Classic Pumpkin Pie Recipe (No Cracks, No Soggy Crust)
A pumpkin pie recipe cracks for one reason more than any other: the pie gets baked until the center looks fully set, the way you'd bake a cake or a batch of brownies. Pumpkin pie filling is a custard, and custards keep cooking from carryover heat even after the oven door opens, so a center that looks firm at the 50 minute mark is already past done by the time it cools on the counter. That's why so many pies crack straight down the middle or turn grainy instead of silky.
If you’re already thinking about what else to bake once the holiday pans come out, my lineup of easy pies, bars, and cheesecakes is worth a scroll for more ideas.
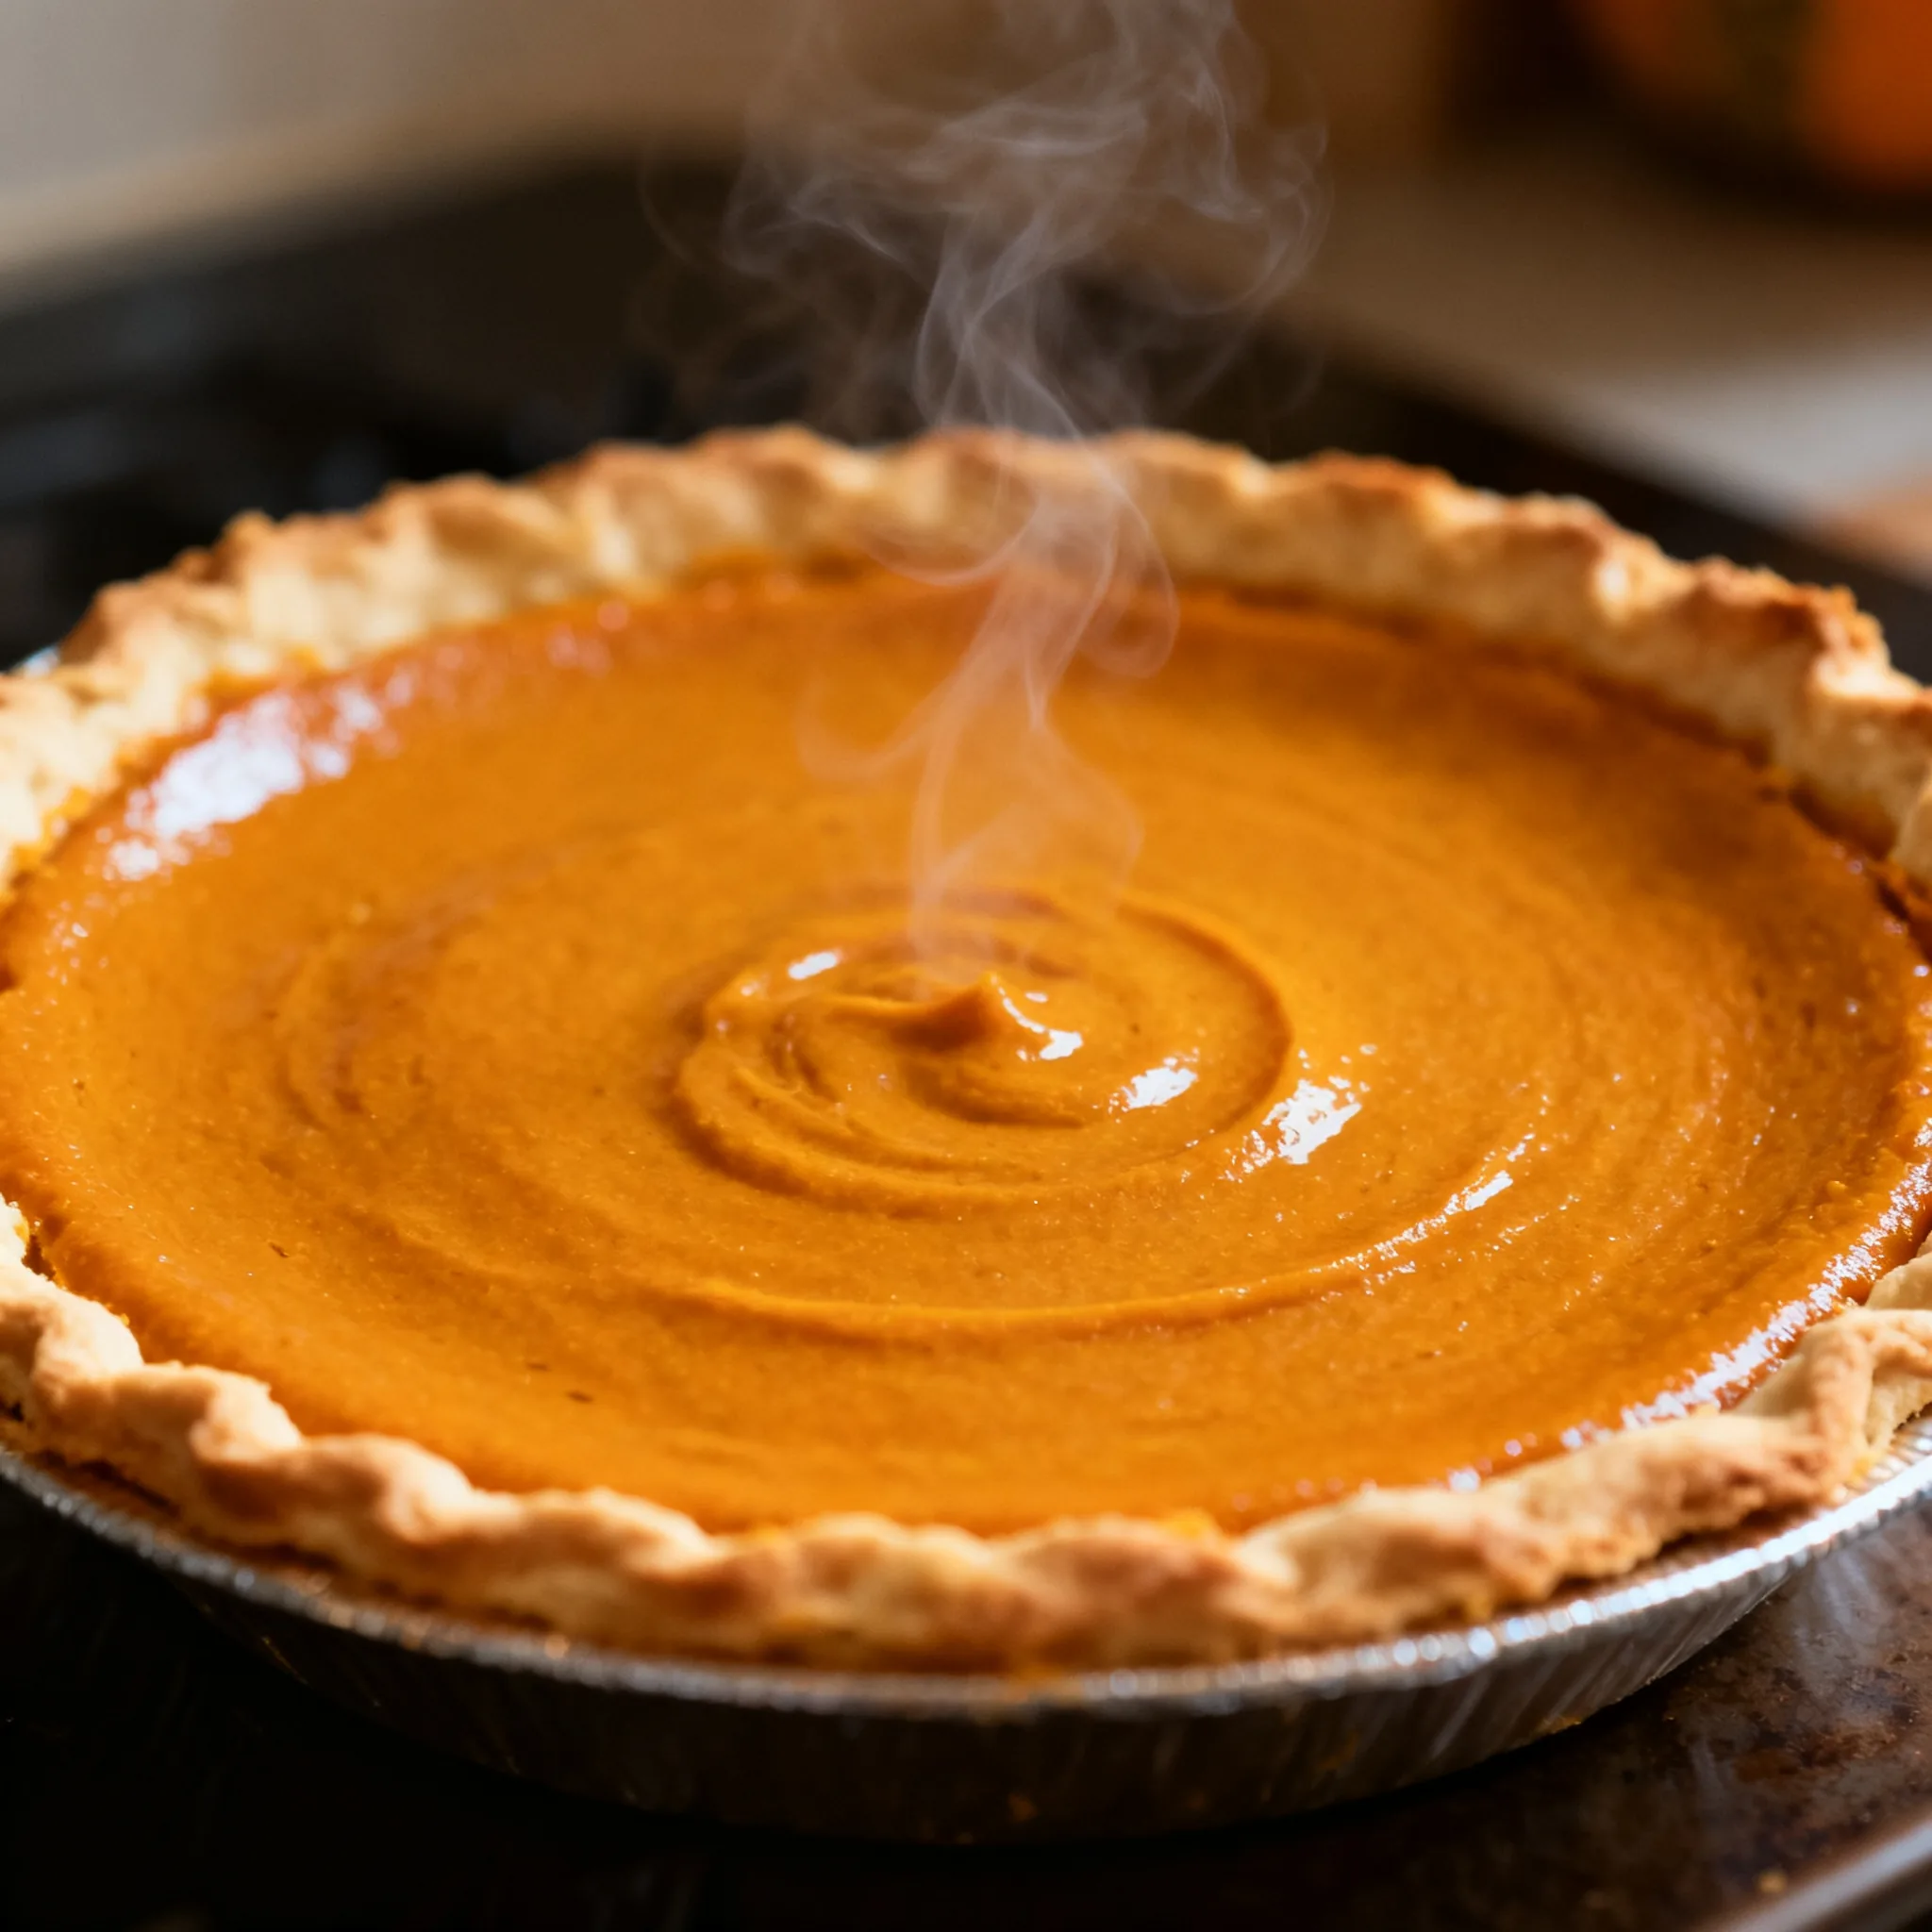
The fix is pulling the pie when the outer edge is set and only a 3-inch circle in the center still moves like loose gelatin, not pancake batter and not solid ground. It looks underdone. It isn't, and I pull mine at that point every time. Residual heat finishes the center over the next 30 minutes while the pie sits on the counter, and that gentler finish is exactly what keeps the custard smooth instead of letting the egg proteins seize into a cracked, spongy mess.
Get that one cue right and the rest of this recipe is forgiving: a simple spiced custard in a blind baked crust, built from a can of pumpkin and pantry staples. Here's exactly how I build it, bake it, and keep the bottom crust from turning soggy underneath all that filling.
PrintClassic Pumpkin Pie Recipe (No Cracks, No Soggy Crust)
A silky spiced pumpkin custard in a crisp blind baked crust, with no cracks and no soggy bottom.
- Prep Time: 20 minutes
- Cook Time: 1 hour 15 minutes
- Total Time: 3 hours 35 minutes
- Yield: 8 1x
- Method: Baked
- Cuisine: American
Ingredients
- 1 unbaked 9-inch pie crust
- 15 oz can pumpkin puree
- 3/4 cup granulated sugar
- 1 tsp ground cinnamon
- 1/2 tsp ground ginger
- 1/4 tsp ground cloves
- 1/4 tsp ground nutmeg
- 1/2 tsp salt
- 2 large eggs
- 12 oz can evaporated milk
Instructions
- Preheat oven to 400°F. Line the pie crust with parchment and fill with pie weights or dried beans; blind bake 15 minutes, then remove the weights and bake 5-8 minutes more until the bottom looks dry and lightly golden.
- Increase oven temperature to 425°F.
- In a large bowl, whisk the eggs until smooth, then whisk in the pumpkin puree, sugar, cinnamon, ginger, cloves, nutmeg, and salt until fully combined.
- Gradually whisk in the evaporated milk until the filling is smooth with no streaks.
- Pour the filling into the warm blind baked crust. Set the pie on a rimmed baking sheet and place on the lowest oven rack.
- Bake at 425°F for 15 minutes, then reduce the oven to 350°F and bake 35-40 minutes more, tenting the crust edges with foil if they brown too fast, until the edges are set and a 3-inch circle in the center still jiggles slightly (internal temperature around 175°F).
- Cool on a wire rack at room temperature for about 2 hours before slicing or refrigerating.
Notes
Use canned pumpkin puree, not pumpkin pie filling, which already has sugar and spices added. If the crust edges brown too quickly during the second bake, shield them with foil strips around the 20 minute mark. Let the pie cool fully at room temperature before refrigerating so steam doesn’t soften the bottom crust.
Why the Jiggle Test Beats the Toothpick Test Here
A pumpkin pie filling is a custard before it’s anything else: eggs, canned pumpkin, sugar, and evaporated milk held together by egg proteins that tighten as they heat. Push those proteins too far and they squeeze out moisture, which is exactly what a crack is, a tear in an overcooked custard trying to release liquid it no longer wants to hold. The toothpick test that works for cakes is the wrong tool here, because by the time a toothpick comes out clean from the center, the custard is usually already overbaked and on its way to cracking.
Instead, nudge the pie plate gently around the 45 minute mark. The outer ring, about three inches in from the crust, should be fully set and not move at all. The center, a circle about 3 inches across, should still wobble like loose gelatin when you nudge the pan. If you want a number instead of a feel, pull the pie at an internal temperature around 175°F in the center on an instant read thermometer. At that point the eggs are already cooked past the safe 160°F mark; the custard simply firms up to sliceable as it cools on the counter.
Blind Baking and Oven Settings That Keep the Bottom Crust Crisp
The second most common failure in a pumpkin pie recipe is a pale, soggy bottom crust, and it comes from pouring a wet filling into a crust that was never fully cooked on its own. Blind bake the crust first: line it with parchment, fill with pie weights or dried beans, and bake at 400°F for about 15 minutes, then pull the weights and bake 5-8 minutes more until the bottom looks dry and just barely tanned, not raw and shiny.
Bake the filled pie in two stages. Start at 425°F for the first 15 minutes, which sets the edges of the custard fast and helps the crust hold its shape, then drop the oven to 350°F for the remaining 35-40 minutes so the center cooks through gently instead of scrambling at the edges while the middle lags behind. Set the pie on a rimmed baking sheet placed on the lowest oven rack, which pushes extra heat up through the bottom crust instead of only baking the top. If the crust edges are browning faster than the filling is cooking, loosely tent them with foil around the 20 minute mark.
Storing and Reheating Pumpkin Pie Without a Soggy Crust
Let the pie cool completely at room temperature, about 2 hours, before you refrigerate it. Moving a warm custard pie straight into the fridge traps steam under the cover, and that moisture migrates right into the crust, which is how you end up with a bottom that’s gone soft overnight. Once it’s fully cool, cover loosely with foil or plastic and refrigerate; it keeps well for 3-4 days.
Skip the microwave for reheating a slice, since it turns the custard rubbery in patches before the middle even warms through. Instead, warm individual slices in a 300°F oven for about 10 minutes, uncovered, just until the filling loses its chill. If you want to freeze the pie, bake and cool it completely, then wrap it tightly and freeze without any topping for up to a month; thaw it overnight in the fridge before serving.
Easy Swaps and Variations on This Pumpkin Pie
Evaporated milk gives this filling its dense, sliceable texture, but heavy cream makes a slightly richer, softer custard if that’s what you prefer. For a dairy-free version, swap in full fat coconut milk for the evaporated milk and use a crust made with a dairy-free fat like shortening or a plant based butter, since a standard butter crust still brings dairy into the slice.
For spice, I build mine from cinnamon, ginger, cloves, and a little nutmeg rather than a pre-mixed pumpkin pie spice, since that lets you push the ginger or cloves up if you like a sharper bite. A tablespoon of bourbon or dark rum stirred into the filling adds depth; not all of the alcohol bakes off, so skip it if you’re serving kids. If you’re short on time, a store-bought refrigerated crust works fine here as long as you still blind bake it first; the custard doesn’t care where the crust came from, only that it’s fully cooked before the filling goes in.
Pumpkin Breakfasts That Use the Same Spices
If pumpkin season has you hooked, try turning the same flavors into breakfast with pumpkin pie overnight oats, or bake a batch of pumpkin spice scones for a cozy weekend brunch.
Frequently Asked Questions
Why did my pumpkin pie crack on top?
A crack almost always means the custard spent too long in the oven and the egg proteins tightened past the point of holding moisture. Pull the pie while the center still jiggles slightly instead of waiting for it to look fully set, and it will finish setting as it cools without splitting.
Can I use fresh pumpkin instead of canned pumpkin puree?
Yes, but fresh roasted pumpkin holds more water than canned, so drain it in a strainer lined with a paper towel for an hour first. Skipping that step gives you a looser, wetter filling that takes longer to set and is more likely to crack.
Why does the bottom crust of my pumpkin pie come out soggy?
Soggy bottoms come from pouring filling into a crust that wasn't baked long enough on its own first. Blind bake the crust until the bottom looks dry and lightly browned, and bake the filled pie on a rimmed sheet on the lowest rack so heat reaches the bottom crust directly.
Can I make pumpkin pie a day ahead?
Yes, and it's actually easier to slice the next day once the custard has fully chilled and set. Bake it the day before, cool it completely, cover, and refrigerate, then let it sit at room temperature for 20-30 minutes before serving if you want it less cold.
What's the difference between pumpkin pie spice and making your own blend?
Store-bought pumpkin pie spice works fine, but a homemade blend of cinnamon, ginger, cloves, and nutmeg lets you push one flavor harder, like extra ginger for more bite. Start with the amounts in the recipe and adjust to taste the next time you make it.
Get our 10 best recipes - free
Join the Receipster newsletter and we’ll send you Dorothy’s 10 most-loved recipes as a free PDF.
Free PDF + new recipes every week. Unsubscribe anytime.