Introduction
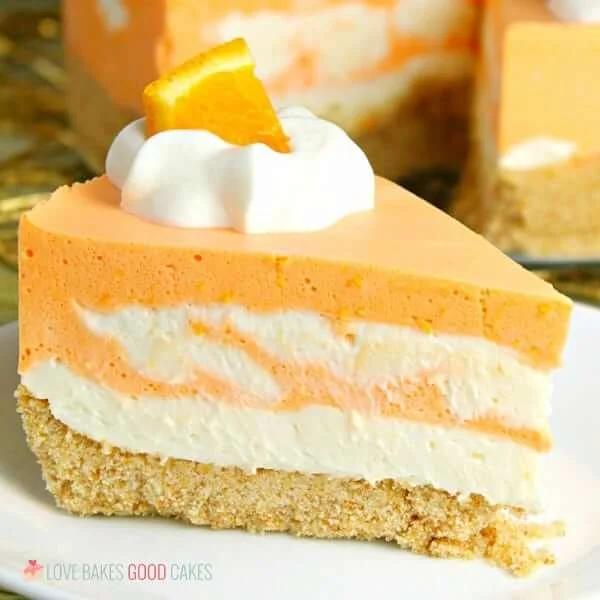
This Easy No-Bake Orange Creamsicle Cheesecake is a dreamy, five-ingredient dessert that captures the nostalgic flavor of a classic frozen treat. It’s incredibly creamy, requires no oven, and comes together in minutes for a perfect make-ahead sweet. For another simple creamsicle dessert, try this Easy No-Bake Orange Creamsicle Pie Ready in 30 Minutes.
Ingredients
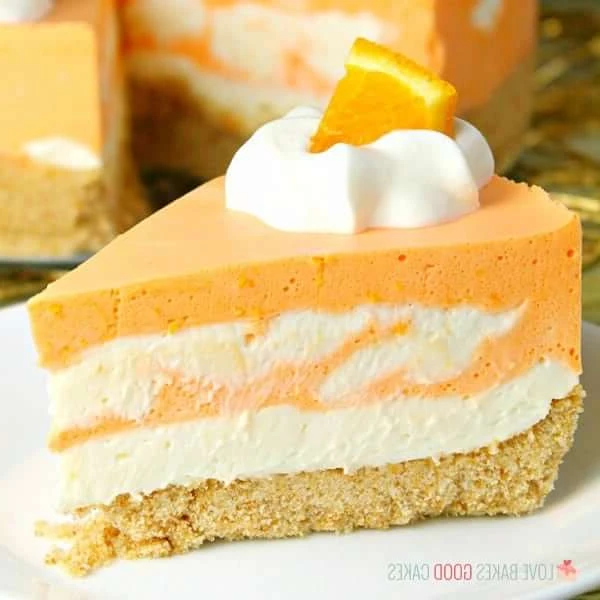
This No-Bake Orange Creamsicle Cheesecake recipe combines a buttery vanilla wafer crust with a dreamy, airy filling that perfectly captures the nostalgic, sunny flavor of a creamsicle.
- 12 ounces vanilla wafers
- 1 1/2 cups granulated sugar (divided)
- 4 tablespoons unsalted butter, melted (1/2 stick)
- 2 packages cream cheese, softened to room temperature (8 oz. each)
- 2 cups heavy cream
- 1 box orange jello (3 oz.)
- 1 cup boiling water
- 1/2 cup powdered sugar
- 1/2 teaspoon vanilla extract
- Zest of one orange
Timing
| Prep Time | 20 minutes |
| Cook Time | 0 minutes |
| Total Time | 4 hours 20 minutes (includes chilling) |
Context: This No-Bake Orange Creamsicle Cheesecake is ready in about 4 hours, which is significantly faster than traditional baked cheesecakes that require cooling and setting overnight.
Step-by-Step Instructions
Step 1 — Prepare the Crust
Combine graham cracker crumbs, melted butter, and a pinch of salt in a medium bowl. Press the mixture firmly and evenly into the bottom of a 9-inch springform pan. Use the bottom of a measuring cup to compact it for a solid base. Chill the crust in the freezer for at least 15 minutes while you make the filling.
Step 2 — Soften the Cream Cheese
Ensure your cream cheese is at full room temperature for a perfectly smooth, lump-free filling. Let it sit out for 1-2 hours, or soften it in the microwave using 15-second bursts at 50% power. The cream cheese should be soft to the touch but not melted or greasy.
Step 3 — Make the Orange Creamsicle Filling
In a large bowl, beat the softened cream cheese with powdered sugar and vanilla extract until completely smooth. Gently fold in the thawed whipped topping until just combined. Divide this mixture evenly into two separate bowls.
Into one bowl, fold the orange zest and orange juice concentrate. For a vibrant color and stronger flavor, you can add a drop or two of orange food coloring. The second bowl remains plain for the vanilla cream layer.
Step 4 — Layer the Cheesecake
Retrieve the chilled crust. Spoon the plain vanilla cream mixture over the crust and spread it into a smooth, even layer. Carefully spoon the orange creamsicle mixture on top, spreading gently to avoid mixing the layers. A small offset spatula works best for this.
Step 5 — Create Swirls (Optional)
For a marbled effect, use a toothpick or knife to gently swirl the top orange layer into the vanilla layer beneath. Make just a few figure-eight motions; over-swirling will muddy the distinct creamsicle flavors.
Step 6 — Chill to Set
Cover the pan with plastic wrap and refrigerate the No-Bake Orange Creamsicle Cheesecake for a minimum of 6 hours, though overnight is ideal for the firmest, cleanest slices. The filling should be completely firm to a gentle touch when properly set.
Step 7 — Garnish and Serve
Once set, run a thin knife around the edge of the pan before releasing the springform collar. Garnish with fresh orange slices, more zest, or a dollop of whipped cream. For clean cuts, dip your knife in hot water and wipe it dry between each slice.
Nutritional Information
| Calories | ~420 kcal |
| Protein | ~5 g |
| Carbohydrates | ~38 g |
| Fat | ~28 g |
| Fiber | ~1 g |
| Sodium | ~220 mg |
Note: These are approximate values for one slice of this No-Bake Orange Creamsicle Cheesecake. Actual nutrition can vary based on specific brands and ingredient measurements used.
Healthier Alternatives
This no-bake orange creamsicle cheesecake is wonderfully adaptable. Here are several ingredient swaps to tailor it to different dietary needs without sacrificing its signature creamy, citrusy flavor.
- Greek Yogurt for Cream Cheese — Swap half the cream cheese for plain Greek yogurt. This adds a protein boost and a pleasant tang, lightening the texture while keeping it creamy.
- Coconut Cream for Dairy — Use full-fat coconut cream in place of heavy cream and a dairy-free cream cheese alternative. This creates a rich, dairy-free version with a subtle tropical note that pairs well with orange.
- Almond or Coconut Flour Crust — Replace graham cracker crumbs with finely ground almond flour or unsweetened coconut flour for a gluten-free, lower-carb base. You may need to slightly increase the melted butter or coconut oil for binding.
- Natural Sweeteners — Substitute granulated sugar with pure maple syrup, honey, or a powdered monk fruit blend. Note that liquid sweeteners may require a slight reduction in other liquids to maintain the proper set.
- Silken Tofu or Vegan Cream Cheese — For a plant-based protein option, blend silken tofu with vegan cream cheese. This creates a surprisingly smooth and firm filling that carries the orange and vanilla flavors well.
- Reduced-Sodium Crust — Opt for low-sodium or homemade graham crackers, or use crushed unsalted pretzels or nuts for the crust to control the salt content.
- Sugar-Free Jello or Citrus Zest — Enhance the orange flavor with extra fresh zest or a small amount of sugar-free orange Jello powder instead of relying solely on sweetened juice concentrate for a lower-sugar option.
- Nut or Seed Butter Filling — For a unique, high-protein twist, blend cashew butter or tahini with the cream cheese and sweetener. This creates a denser, nutrient-rich filling with a deliciously nutty undertone.
Serving Suggestions
- For a classic creamsicle experience, pair a slice with a tall glass of orange soda or a scoop of vanilla bean ice cream.
- Serve as a refreshing, elegant finale to a summer barbecue or a light spring luncheon.
- Brighten up a holiday dessert table by garnishing with fresh mint sprigs and candied orange peel alongside traditional pies.
- Create a fun, interactive dessert bar by offering toppings like whipped cream, white chocolate shavings, and fresh berries for guests to customize their slice.
- For a stunning presentation, plate individual mini cheesecakes on a pool of vibrant raspberry coulis or a drizzle of dark chocolate sauce.
- This no-bake orange creamsicle cheesecake is perfect for potlucks and picnics—simply transport it in its springform pan and slice on-site.
To make slicing clean and easy, dip your knife in hot water and wipe it dry between each cut. The bright, creamy flavor of this no-bake cheesecake pairs wonderfully with a cup of lightly sweetened iced tea or a sparkling prosecco.
Common Mistakes to Avoid
- Mistake: Using room-temperature cream cheese. Fix: Use cold, full-fat cream cheese straight from the fridge for a stable, sliceable filling that whips properly.
- Mistake: Overmixing the filling after adding citrus. Fix: Gently fold in the orange juice and zest last to prevent the dairy from breaking or becoming grainy.
- Mistake: Skimping on chilling time. Fix: Chill the assembled cheesecake for a full 8 hours, or ideally overnight, to ensure it sets firmly enough to slice cleanly.
- Mistake: Using bottled orange juice instead of fresh. Fix: Always use freshly squeezed juice and zest for the brightest, truest Orange Creamsicle flavor without artificial notes.
- Mistake: A soggy or crumbly crust. Fix: Press the graham cracker mixture firmly and evenly into the pan and pre-freeze it for 15 minutes before adding the filling.
- Mistake: Not whipping the heavy cream to stiff peaks first. Fix: Whip the cream separately until it holds its shape, then fold it in to maintain airiness and structure.
- Mistake: Adding liquid orange extract instead of zest. Fix: Use real orange zest for aromatic oils; if using extract, add it sparingly (¼ tsp) to avoid a chemical taste.
- Mistake: Attempting to unmold a springform pan too early. Fix: Run a thin, hot knife around the edge first and gently release the clamp to prevent the crust from cracking.
Storing Tips
- Fridge: Cover the cheesecake tightly with plastic wrap or store in an airtight container. It will keep for up to 5 days in the refrigerator, maintaining its creamy texture and vibrant orange creamsicle flavor.
- Freezer: For longer storage, wrap the whole cheesecake or individual slices tightly in plastic wrap and then in aluminum foil. Place in a freezer-safe container. Your No-Bake Orange Creamsicle Cheesecake can be frozen for up to 2 months. Thaw overnight in the refrigerator before serving.
- Reheat: This dessert is not meant to be reheated. For food safety, always serve it chilled. Keep refrigerated until ready to serve, and do not leave it out at room temperature for more than 2 hours.
For the best texture and to prevent the filling from becoming too soft, store your No-Bake Orange Creamsicle Cheesecake in the coldest part of your fridge, away from the door.
Conclusion
This No-Bake Orange Creamsicle Cheesecake is the perfect, refreshing dessert for any occasion. It’s incredibly easy to make and delivers that classic creamsicle flavor everyone loves. If you enjoy this recipe, be sure to try our Orange Creamsicle Cookies Recipe or Orange Creamsicle Chia Pudding Recipe. We’d love to hear how yours turned out—leave a comment below!
PrintNo-Bake Orange Creamsicle Cheesecake

Ingredients
- 12 ounces vanilla wafers
- 1 1/2 cups granulated sugar (divided)
- 4 tablespoons unsalted butter, melted (1/2 stick)
- 2 packages cream cheese, softened to room temperature (8 oz. each)
- 2 cups heavy cream
- 1 box orange jello (3 oz. )
- 1 cup boiling water
- 1/2 cup powdered sugar
- 1/2 teaspoon vanilla extract
- Zest of one orange
Instructions
- Pulse vanilla wafers in a food processor until it resembles crumbs. Add 1/2 cup granulated sugar and melted butter, pulsing to combine.
- Spray a 9-inch springform pan generously with cooking spray and press mixture into the bottom of the pan and slightly up the sides. Chill in the freezer for at least 30 minutes.
- In a large mixing bowl, beat together cream cheese and 1 cup granulated sugar with a hand-held mixer until smooth and creamy. Set aside.
- In a separate bowl, whisk together orange jello and boiling water until dissolved and set aside.
- In a separate medium bowl, whip heavy cream, vanilla extract, confectioners sugar, and orange zest until stiff peaks form. Combine half of the whipped cream mixture with the orange jello mixture and the other half with the cream cheese mixture.
- Alternate spreading each mixture into the pan, starting with the cream cheese mixture and ending with whipped cream. Chill in the fridge for at least 4 hours or overnight before serving.
FAQs
Can I make this No-Bake Orange Creamsicle Cheesecake ahead of time?
Yes, this is an excellent make-ahead dessert. The No-Bake Orange Creamsicle Cheesecake needs at least 6 hours to set in the refrigerator, so preparing it the day before serving is ideal. The flavors develop even more overnight.
What can I use if I don’t have a springform pan?
You can use a standard pie plate or a deep 9-inch dish. The No-Bake Orange Creamsicle Cheesecake will still set properly. For easier serving, line your dish with parchment paper so you can lift the slices out.
Can I use bottled orange juice instead of fresh?
We recommend fresh orange juice and zest for the brightest flavor. Bottled juice often lacks the vibrant citrus punch needed for an authentic creamsicle taste in this cheesecake. Fresh juice ensures your dessert is not overly sweet.


