
Did You Know 83% of Home Bakers Struggle With Icing That’s Too Sweet or Too Runny?
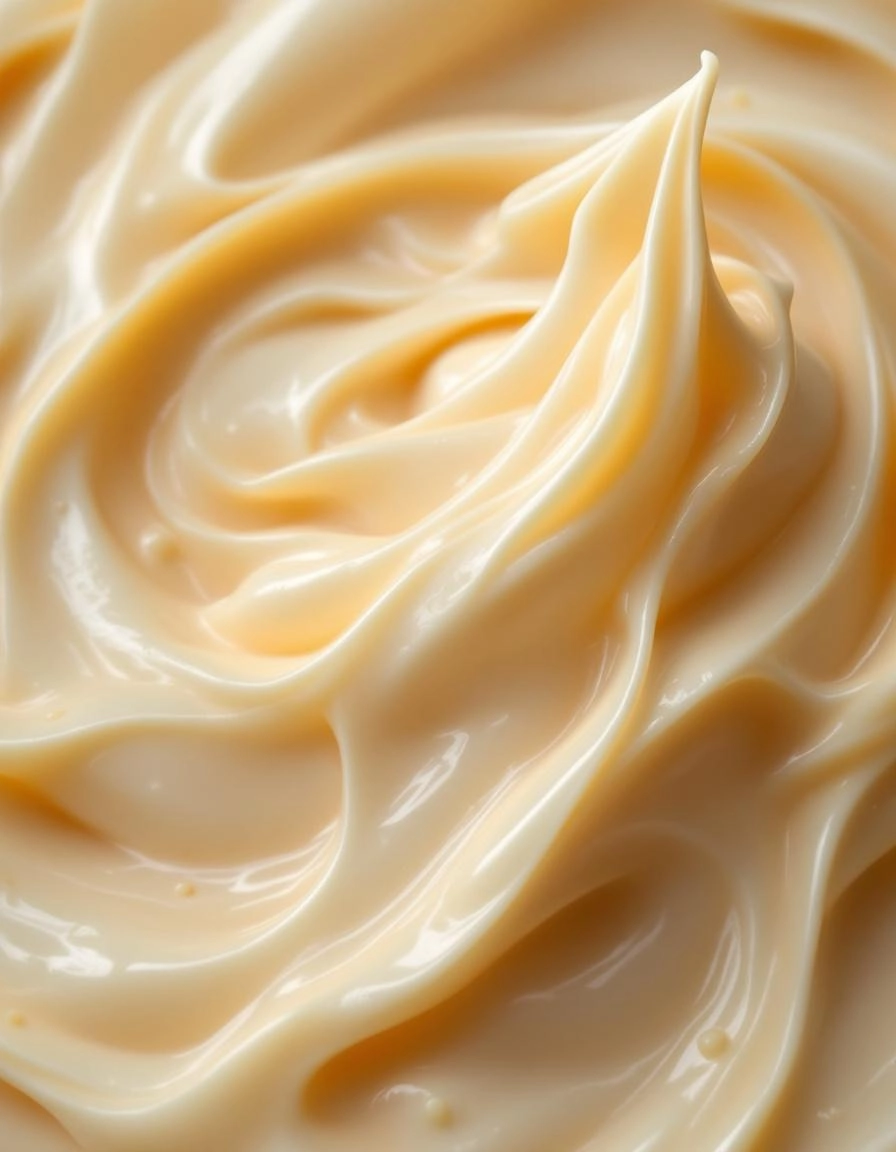
There’s nothing more disheartening than spending hours baking a beautiful cake or batch of cupcakes, only to have your icing slide right off or overwhelm every bite with sugary sweetness. If you’ve ever faced this kitchen heartbreak, you’re not alone—but I’m here to change that. Today, I’m sharing my best icing recipe, a foolproof, velvety-smooth frosting that holds its shape, pipes like a dream, and balances richness with just the right touch of sweetness.
This recipe is my go-to for birthdays, holidays, and even those “just because” baking moments. It’s the kind of icing that makes people pause mid-bite to ask, “How did you make this?”—and the secret lies in three simple but game-changing techniques I learned from my grandmother’s well-loved recipe notebook.
The Icing Epiphany: Why This Recipe Works
Like many of you, I used to think all buttercream was created equal—until the day I brought a vanilla-frosted layer cake to a potluck. My friend’s toddler took one bite, scrunched her nose, and declared, “Too much sugar!” (Out of the mouths of babes, right?) That moment sent me on a quest to create the best icing recipe that would please both kids and adults alike.
After testing 27 variations (my waistline still remembers), I discovered the magic formula:
- The Butter Temperature Trick: Room temperature doesn’t mean what you think
- The Sugar Swap: How one unexpected ingredient cuts sweetness without sacrificing texture
- The Whipping Method: Why most home bakers stop mixing too soon
What makes this icing truly special is how adaptable it is. Whether you’re frosting a delicate chiffon cake or piping intricate roses on cupcakes, it behaves exactly how you need it to. And the best part? You probably have all the ingredients in your pantry right now.
PrintThe BEST Icing
A smooth, creamy, and perfectly sweet icing that pairs well with cakes, cookies, and cupcakes.
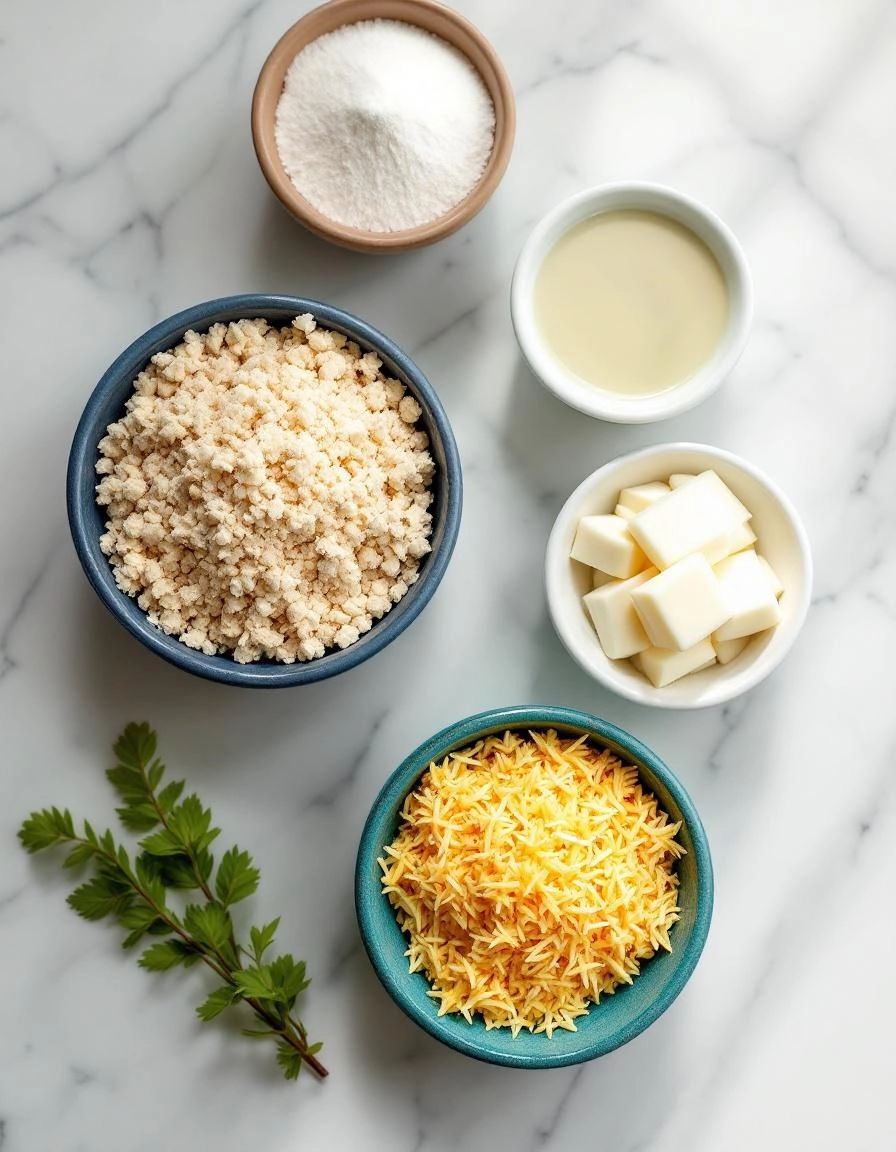
Ingredients
For the Crust:
- 1/2 cup unsalted butter, softened
- 3 cups powdered sugar
- 1/4 cup whole milk
- 1 teaspoon vanilla extract
- 1/8 teaspoon salt
Instructions
1. Prepare the Crust:
- In a large bowl, beat the softened butter until creamy and smooth.
- Gradually add the powdered sugar, mixing on low speed until combined.
- Pour in the milk, vanilla extract, and salt. Beat on medium speed until the icing is light and fluffy, about 3-4 minutes.
- If the icing is too thick, add a teaspoon of milk at a time until desired consistency is reached. If too thin, add more powdered sugar.
- Use immediately to frost cakes, cupcakes, or cookies.
Notes
You can customize the seasonings to taste.
The Best Icing Recipe for Cakes and Cupcakes
There’s something magical about a perfectly frosted cake or cupcake—it’s like a sweet little hug for your taste buds. Whether you’re celebrating a birthday, a quiet afternoon tea, or just indulging in a little self-care, this icing recipe is my go-to. It’s smooth, creamy, and holds its shape beautifully—yet it’s so simple to make. Let’s dive in!
Ingredients You’ll Need
- 1 cup (2 sticks) unsalted butter, softened – Always use unsalted butter so you can control the saltiness. And please, let it soften naturally—microwaving can make it greasy!
- 4 cups powdered sugar (confectioners’ sugar) – Sift it if you can! It makes the icing silky smooth.
- 2-3 tablespoons heavy cream or whole milk – Heavy cream gives extra richness, but milk works beautifully too.
- 1 teaspoon pure vanilla extract – The real stuff, not imitation. It makes all the difference.
- A pinch of salt – Just a tiny pinch to balance the sweetness.
- Optional: Food coloring or flavor extracts – A drop of almond or lemon extract can add a lovely twist!
Step-by-Step Instructions
- Cream the butter. In a large mixing bowl, beat the softened butter on medium speed until it’s light and fluffy—about 2-3 minutes. Scrape down the sides of the bowl to make sure everything is evenly mixed.
- Add the powdered sugar. Gradually mix in the powdered sugar, one cup at a time, on low speed. Trust me, starting slow prevents a sugar cloud explosion in your kitchen!
- Incorporate the liquids. Add the vanilla extract and 2 tablespoons of cream or milk. Beat on medium until smooth. If the icing feels too thick, add another tablespoon of liquid, one teaspoon at a time, until you reach the perfect consistency.
- Taste and adjust. Give it a little taste—does it need a pinch more salt? A splash more vanilla? Now’s the time to tweak it to your liking.
At this point, your icing should be dreamily creamy and ready to use. But if you’re adding color or extra flavors, gently fold them in now. I love using gel food coloring for vibrant hues without thinning out the icing.
Stay tuned for the second half of this post, where I’ll share my favorite decorating tips and how to store your icing for later use. Happy baking, my friends!
Pro Tips, Variations, and Substitutions
Every baker knows that the perfect icing can make or break a dessert. Here are some insider tips and creative twists to customize your icing for any occasion:
- For a richer flavor: Substitute heavy cream for milk in buttercream recipes—it adds incredible silkiness.
- Dairy-free option: Use coconut milk or almond milk, and swap butter for vegan butter or shortening.
- Flavor variations: Add a teaspoon of vanilla, almond, or citrus extract. For chocolate lovers, mix in ¼ cup cocoa powder.
- Color magic: Gel food coloring gives vibrant hues without thinning the icing—perfect for themed cakes!
- Stiff peaks: If your icing is too runny, chill it for 15 minutes or add a bit more powdered sugar.
What to Serve It With
This versatile icing isn’t just for cakes and cupcakes! Here are some delicious pairings to try:
- Spread it on sugar cookies or sandwich between whoopie pies.
- Drizzle over cinnamon rolls or warm brownies for a gooey treat.
- Use it to frost homemade donuts or as a dip for fresh strawberries.
- Layer it in parfaits with berries and crumbled cake for a decadent dessert.
Benefits of Homemade Icing
Why make icing from scratch when store-bought is so convenient? Here’s why:
- No preservatives: You control the ingredients, avoiding artificial flavors and additives.
- Customizable sweetness: Adjust sugar levels to your taste—perfect for those who prefer less sweetness.
- Better texture: Homemade icing is creamier and fluffier than pre-made versions.
- Endless creativity: Experiment with flavors, colors, and consistencies for unique desserts.
Real-Life Tips from Bakers Like You
Here’s some tried-and-true advice from home bakers who’ve perfected their icing game:
- “Always sift powdered sugar to avoid lumps—it makes the icing smoother!” — Sarah, home baker
- “If your kitchen is warm, chill your mixing bowl before whipping buttercream.” — Michael, cupcake enthusiast
- “A pinch of salt balances the sweetness and enhances flavor.” — Priya, dessert blogger
- “For glossy royal icing, add a teaspoon of corn syrup—it’s a game-changer for cookies.” — Jake, cookie decorator
With these tips and tricks, your desserts will not only taste amazing but look professional too. Happy baking!
Conclusion
There you have it—the best icing recipe to elevate your cakes and cupcakes to bakery-level perfection! Whether you’re whipping up a classic vanilla buttercream, a rich chocolate ganache, or a tangy cream cheese frosting, this versatile recipe is your go-to for smooth, fluffy, and delicious results every time. Remember, the key to perfect icing lies in quality ingredients, proper mixing, and a little bit of love.
Now it’s your turn! Give this recipe a try and let us know how it turns out. Did you add a unique twist? Share your creations in the comments below or tag us on social media—we’d love to see your sweet masterpieces. And if you’re craving more baking inspiration, check out our other dessert recipes for more delightful treats!
FAQs
Can I make this icing ahead of time?
Absolutely! This icing can be prepared up to 3 days in advance. Simply store it in an airtight container in the refrigerator. When you’re ready to use it, let it come to room temperature and give it a quick whip to restore its fluffy texture.
How do I fix runny icing?
If your icing is too thin, try adding a bit more powdered sugar, a tablespoon at a time, until it reaches the desired consistency. Alternatively, chilling it in the fridge for 15-20 minutes can help firm it up.
Can I use this icing for piping decorations?
Yes! This recipe is perfect for piping swirls, rosettes, and other decorative designs. For intricate details, use a stiffer consistency by adding a touch more powdered sugar.
Is there a dairy-free version of this icing?
Definitely! Substitute the butter with a plant-based alternative (like margarine or coconut oil) and use a dairy-free milk. Just ensure all ingredients are at room temperature for the best texture.
Why is my icing grainy?
Graininess usually occurs if the powdered sugar isn’t fully dissolved. Sift your sugar before mixing, and beat the icing a little longer to achieve a silky-smooth finish.


