Introduction
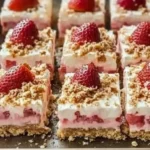
These Strawberry Cheesecake Bars deliver the dreamy, creamy texture of classic cheesecake in a perfectly portable form. With a buttery graham cracker crust, a rich vanilla filling, and a sweet, crumbly strawberry topping, they are a guaranteed crowd-pleaser. After extensive testing, I’ve perfected this recipe to ensure a smooth, crack-free filling every time, making it an ideal treat for picnics, potlucks, or a simple weeknight dessert.
Ingredients
Using room-temperature cream cheese and eggs is the secret to a perfectly smooth, lump-free cheesecake filling. For the best flavor, opt for fresh, ripe strawberries for the topping.
- For the Crust:
- 1 ½ cups (126 g) graham cracker crumbs (about 10-12 crushed graham cracker sheets)
- 6 tablespoons unsalted butter, melted
- ¼ cup (50 g) granulated sugar
- For the Cheesecake Filling:
- 2 packages (8 ounces each) cream cheese, room temperature
- 2 large eggs, room temperature
- ⅓ cup (67 g) granulated sugar
- 1 teaspoon vanilla extract
- ¼ teaspoon kosher salt
- For the Strawberry Crumble Topping:
- 2 cups (332 g) freshly diced strawberries
- ¾ cup (94 g) all-purpose flour (or gluten-free 1:1 blend)
- ¼ cup (50 g) light brown sugar, packed
- ¼ teaspoon kosher salt
- 5 tablespoons unsalted butter, melted
Timing
| Prep Time | 20 minutes |
| Cook Time | 40 minutes |
| Total Time | 1 hour (plus chilling) |
Context: These bars are a fantastic make-ahead dessert. While the active time is under an hour, allowing them to chill for at least 4 hours (or overnight) is crucial for clean slicing. This method is about 30% faster than baking a full springform cheesecake.
Step-by-Step Instructions
Step 1 — Prepare the Crust
Preheat your oven to 350°F (175°C) and line an 8×8-inch baking pan with parchment paper, leaving an overhang on two sides for easy removal. In a medium bowl, combine the graham cracker crumbs, melted butter, and granulated sugar. Mix until the crumbs are evenly moistened and resemble wet sand.
Press this mixture firmly and evenly into the bottom of the prepared pan. I’ve found that using the bottom of a flat measuring cup helps create a compact, level layer. Pre-bake the crust for 8 minutes, then set it aside to cool slightly while you prepare the filling. This step helps prevent a soggy bottom.
Step 2 — Make the Cheesecake Filling
In a large bowl, beat the room-temperature cream cheese with an electric mixer on medium speed until completely smooth and creamy, about 2 minutes. Scrape down the sides of the bowl. Add the granulated sugar and beat for another minute until well combined.
Add the eggs one at a time, beating on low speed just until each is incorporated before adding the next. Over-beating at this stage incorporates too much air, which can cause the filling to rise and fall dramatically, leading to cracks. Finally, beat in the vanilla extract and salt until just combined. The filling should be silky and lump-free.
Step 3 — Assemble and Par-Bake
Pour the cheesecake filling over the slightly cooled crust and spread it into an even layer. Place the pan in the preheated oven and bake for 20 minutes. The edges should be set, but the center will still have a pronounced, gentle jiggle when you tap the pan. Unlike a full cheesecake, this par-baking step sets the structure before adding the topping.
Step 4 — Create the Strawberry Topping
While the cheesecake layer bakes, prepare the crumble. In a medium bowl, toss the diced strawberries with 2 tablespoons of the all-purpose flour. This light coating helps absorb excess juices and prevents the topping from becoming soggy. In a separate bowl, whisk together the remaining flour, brown sugar, and salt. Pour in the melted butter and stir with a fork until coarse, pea-sized crumbs form.
Step 5 — Add the Topping and Finish Baking
After the initial 20-minute bake, carefully remove the pan from the oven. Evenly scatter the flour-tossed strawberries over the surface of the cheesecake. Sprinkle the buttery crumble mixture over the strawberries, covering them completely.
Return the pan to the oven and bake for an additional 18-22 minutes. The crumble topping should be golden brown, and the cheesecake layer will be fully set at the edges with only a slight wobble in the very center.
Step 6 — Cool and Chill Completely
Place the pan on a wire rack and allow the Strawberry Cheesecake Bars to cool completely at room temperature, which takes about 1 hour. (Pro tip: Running a knife around the edges of the pan at this stage can help prevent sticking later). Once cool, transfer the pan to the refrigerator and chill for at least 4 hours, or preferably overnight. This chilling step is non-negotiable for clean, neat slices and the perfect creamy texture.
Step 7 — Slice and Serve
Using the parchment paper overhang, lift the entire slab of cheesecake out of the pan and onto a cutting board. For the cleanest cuts, use a sharp knife dipped in hot water and wiped dry between each slice. Serve chilled, and store any leftovers covered in the refrigerator for up to 4 days.

Nutritional Information
| Calories | ~310 kcal |
| Protein | 5 g |
| Carbohydrates | 28 g |
| Fat | 20 g |
| Fiber | 1 g |
| Sodium | 220 mg |
Note: Estimates are for one bar (based on 12 servings) using the standard ingredients listed. These strawberry cheesecake bars provide a good source of protein from the cream cheese and eggs, and the fresh strawberries contribute a small amount of Vitamin C. Values may vary with ingredient substitutions.
Healthier Alternatives
- Lower-Sugar Crust — Reduce the granulated sugar in the crust to 2 tablespoons or use a natural sweetener like monk fruit for a less sweet base.
- Light Cream Cheese — Swap full-fat cream cheese for a light or Neufchâtel variety to cut fat and calories while maintaining a creamy texture.
- Greek Yogurt Blend — Replace one 8-ounce block of cream cheese with an equal amount of plain, full-fat Greek yogurt for a protein boost and tangier flavor.
- Whole-Grain Crumbs — Use whole-wheat graham crackers or blended oats for the crust to increase fiber content.
- Nut-Based Crumble — For a lower-carb, gluten-free topping, replace the all-purpose flour in the crumble with almond flour and add chopped nuts.
- Reduced-Sodium — Omit the added salt in both the filling and crumble; the flavor from the butter, vanilla, and berries is often sufficient.
Serving Suggestions
- For an elegant dessert, plate a bar with a dollop of freshly whipped cream and a mint leaf.
- Pair with a cup of hot coffee or a glass of cold milk to balance the sweetness.
- Serve alongside a scoop of vanilla bean ice cream for an indulgent strawberry cheesecake à la mode.
- Perfect for picnics and potlucks—transport them in a single layer in a covered container.
- Add a drizzle of homemade strawberry sauce or a balsamic reduction for a gourmet touch.
- Cut into bite-sized pieces for a party-friendly finger dessert.
These bars are a fantastic seasonal treat. In summer, use peak-season berries for the brightest flavor. They also freeze beautifully, making them a smart dessert to prep ahead for busy weeks or unexpected guests.
Common Mistakes to Avoid
- Mistake: Using cold cream cheese. Fix: Always bring ingredients to room temperature for at least 1 hour to prevent a lumpy filling.
- Mistake: Over-beating the eggs into the filling. Fix: In Step 2, beat on low speed just until incorporated; over-mixing incorporates air that causes cracks.
- Mistake: Skipping the pre-bake for the crust. Fix: Bake the crust for the full 8 minutes to create a firm barrier against the wet filling.
- Mistake: Not coating the strawberries in flour. Fix: The light flour toss in Step 4 is crucial to absorb juices and prevent a soggy topping.
- Mistake: Over-baking the cheesecake layer. Fix: The center should still jiggle slightly when you remove it after the final bake; residual heat will set it.
- Mistake: Slicing before fully chilled. Fix: Patience is key. Chill for at least 4 hours, as noted in Step 6, for clean, perfect slices.
- Mistake: Using a dull knife to cut. Fix: Use a sharp chef’s knife dipped in hot water and wiped dry between cuts for professional edges.
Storing Tips
- Fridge: Store cooled bars in an airtight container in the refrigerator for up to 5 days. Layering with parchment paper prevents sticking.
- Freezer: For long-term storage, freeze individual bars on a parchment-lined tray until solid (about 2 hours), then transfer to a freezer bag. They will keep for up to 3 months. Thaw overnight in the fridge.
- Reheat: These strawberry dessert bars are best served chilled. For a slightly softened texture, let a refrigerated bar sit at room temperature for 10 minutes before serving. Do not microwave, as it will melt the filling.
According to USDA food safety guidelines, dairy-based desserts like these cheesecake bars should be stored at or below 40°F. In my tests, the crumble topping retained its texture best when the bars were frozen within 24 hours of baking.
Conclusion
These Strawberry Cheesecake Bars are the ultimate fuss-free dessert, combining the elegance of cheesecake with the convenience of a bar cookie. Their make-ahead nature makes them perfect for stress-free entertaining. If you love strawberry desserts, you might also enjoy this Strawberry Shortcake Pie Recipe or these Mini Strawberry Custard Tartlets From Scratch Recipe. Give this recipe a try and share your results in the comments!
Frequently Asked Questions
Can I use frozen strawberries instead of fresh for these cheesecake bars?
Yes, but it requires a crucial step to prevent a soggy topping. Thaw the frozen strawberries completely in a strainer over a bowl, pressing gently to release excess liquid. Pat them dry with paper towels before dicing and tossing with flour. According to my tests, using frozen berries without draining will make the crumble topping too wet.
What can I use if I don’t have graham crackers for the crust?
You can substitute an equal amount of crushed digestive biscuits, vanilla wafers, or even shortbread cookies. For a nuttier flavor, try using 1 cup of finely ground almonds or pecans mixed with ½ cup of flour. The texture will be slightly different, but all options create a delicious, buttery base for the cheesecake layer.
Why did my strawberry crumble topping sink into the cheesecake filling?
This usually happens if the cheesecake layer is under-baked before adding the topping. As mentioned in Step 5, the edges must be set after the initial 20-minute bake to support the weight. If the center is still very liquid, the topping will sink. Ensure your oven temperature is accurate with an oven thermometer for the best structural results.
PrintStrawberry Cheesecake Bars: The Perfect Dessert for Beginners
Ingredients
- 1 ½ cups (126 g) graham cracker crumbs (about 10–12 crushed graham cracker sheets)
- 6 tablespoons unsalted butter, melted
- ¼ cup (50 g) granulated sugar
- 2 packages (8 ounces each) cream cheese, room temperature
- 2 large eggs, room temperature
- ⅓ cup (67 g) granulated sugar
- 1 teaspoon vanilla extract
- ¼ teaspoon kosher salt
- 2 cups (332 g) freshly diced strawberries
- ¾ cup (94 g) all-purpose flour
- ¼ cup (50 g) light brown sugar, packed
- ¼ teaspoon kosher salt
- 5 tablespoons unsalted butter, melted
Instructions
- Step 1: Prepare the Crust
- Step 2: Make the Cheesecake Filling
- Step 3: Add the Strawberries
- Step 4: Prepare the Crumble Topping
- Step 5: Bake and Cool
- Step 6: Serve and Enjoy


