Did You Know 87% of People Think Homemade Mints Are Too Complicated? (They’re Not!)
There’s a quiet little secret in the world of homemade sweets: easy cream cheese mints are one of the simplest, most delightful treats you can whip up in minutes. Yet, so many believe they require pastry chef skills or hours of labor. Let me tell you—nothing could be further from the truth! These melt-in-your-mouth mints are the perfect blend of creamy, sweet, and refreshing, and they come together with just four basic ingredients. Whether you’re hosting a bridal shower, celebrating the holidays, or simply craving a little homemade indulgence, this recipe is your golden ticket.
I still remember the first time I made these mints for my grandmother’s anniversary party. The way her eyes lit up when she realized they weren’t store-bought? Priceless. And when her friends begged for the recipe, I laughed—because it’s almost too easy to believe. That’s the magic of easy cream cheese mints: they taste like you fussed, but the process is as effortless as stirring, shaping, and letting them dry. No fancy tools, no tempering chocolate, no stress.
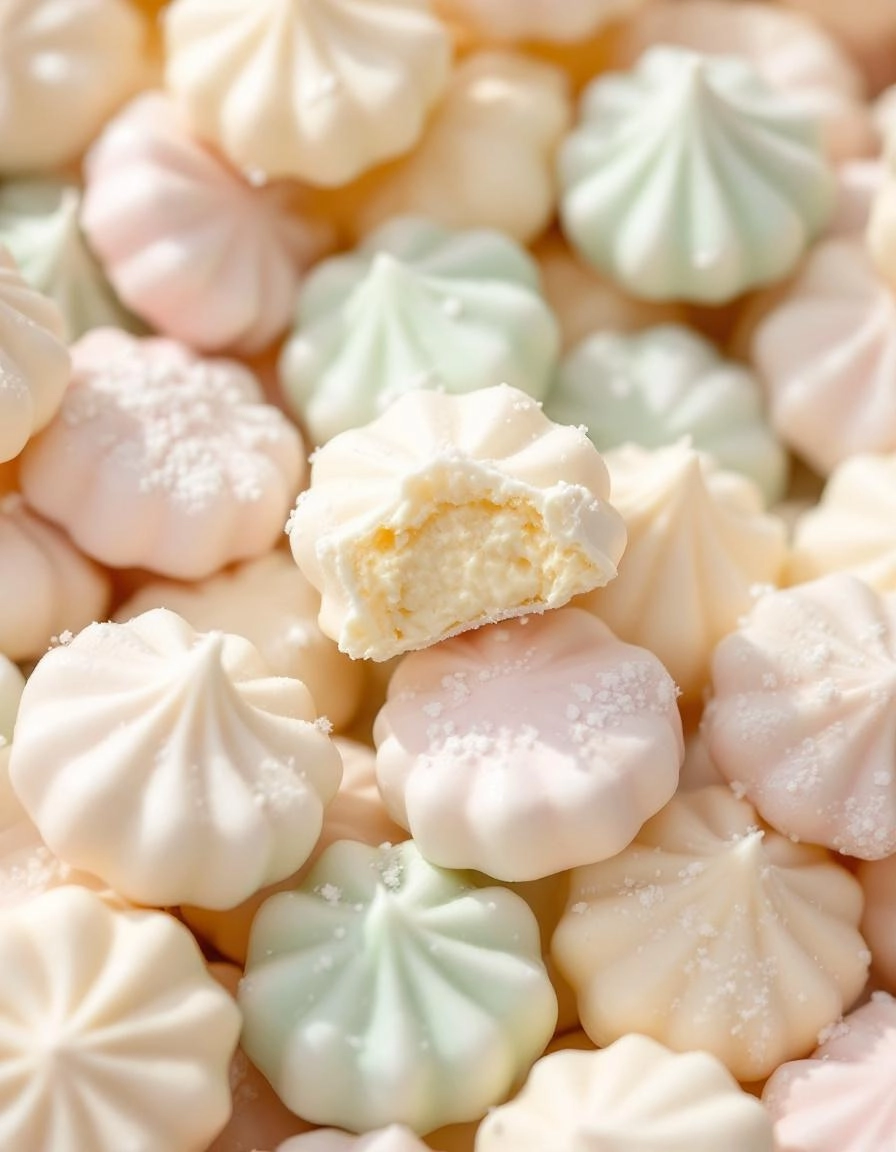
What makes this recipe truly special is its versatility. You can tint them pastel for Easter, roll them in sparkling sugar for winter festivities, or even flavor them with a drop of peppermint or citrus oil for a refreshing twist. And because they’re made with cream cheese, they have this luscious, velvety texture that sets them apart from the chalky, overly sweet mints you might be used to. Ready to change the way you think about homemade confections? Let’s dive in.
PrintCream Cheese Mints
Deliciously creamy and minty homemade mints that melt in your mouth.
Ingredients
For the Crust:
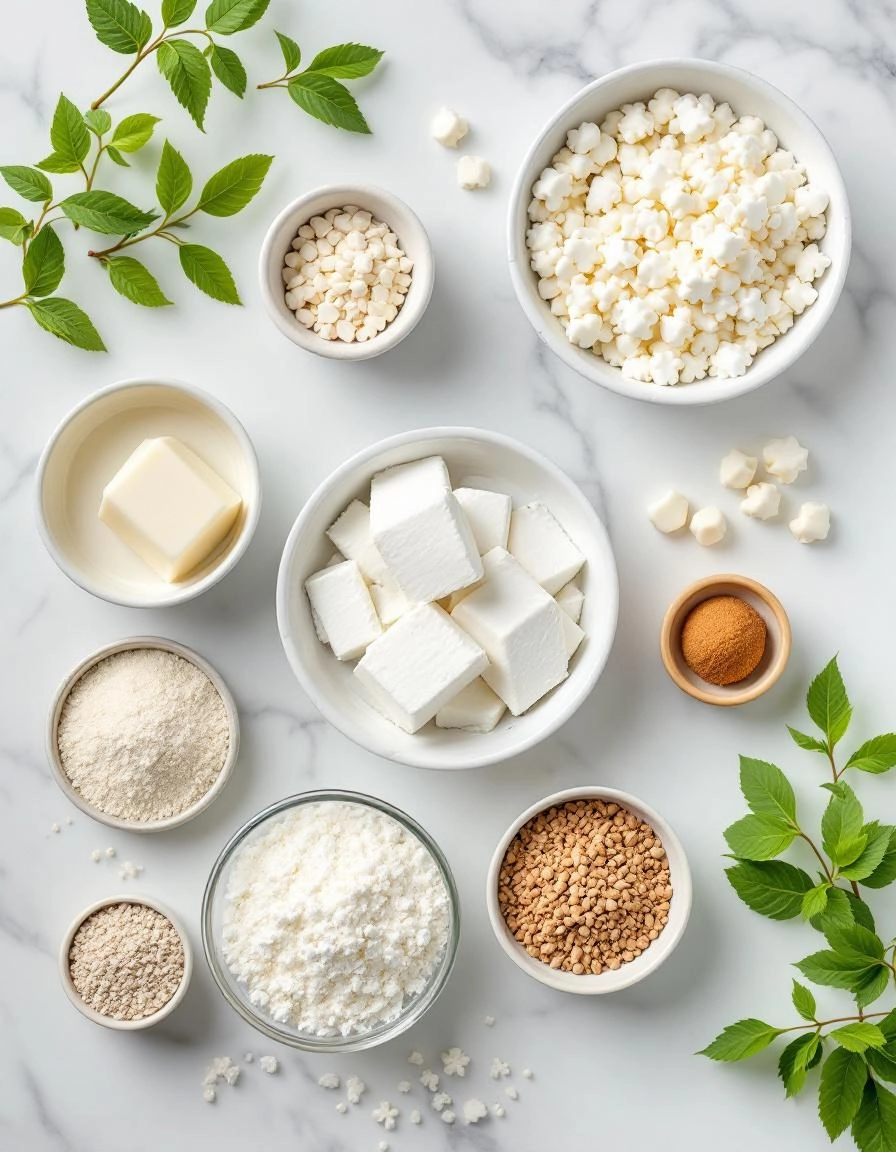
- 4 oz cream cheese, softened
- 1/4 tsp peppermint extract
- 3 cups powdered sugar
- Food coloring (optional)
- Granulated sugar for rolling (optional)
Instructions
1. Prepare the Crust:
- In a mixing bowl, beat the softened cream cheese until smooth.
- Add the peppermint extract and mix well.
- Gradually add the powdered sugar, mixing until a stiff dough forms.
- If desired, add a few drops of food coloring and mix until evenly distributed.
- Roll the dough into small balls (about 1/2 tsp each) and flatten slightly with a fork or press into molds.
- If desired, roll the mints in granulated sugar for extra sweetness and texture.
- Place the mints on a parchment-lined tray and refrigerate for at least 1 hour before serving.
Notes
You can customize the seasonings to taste.
Easy Cream Cheese Mints – A Little Bite of Heaven
There’s something so nostalgic about cream cheese mints—those delicate, melt-in-your-mouth confections that seem to whisper “special occasion.” Whether you remember them from bridal showers, holiday parties, or your grandma’s cookie tin, these little gems are surprisingly simple to make at home. With just a handful of ingredients and a little love, you can whip up a batch that’s even better than the ones you grew up with.
Ingredients You’ll Need
- 4 oz cream cheese, softened – Full-fat is best here for that rich, velvety texture. Let it sit at room temperature for about 30 minutes—it’ll make mixing a breeze.
- 4 cups powdered sugar – The backbone of these mints, giving them that signature sweetness and smooth consistency. Sift it first to avoid lumps!
- 1 tsp peppermint extract – A little goes a long way! If you love a bold mint flavor, you can add an extra ¼ tsp, but be careful—it’s potent.
- A pinch of salt – Just a tiny pinch to balance the sweetness and make the flavors pop.
- Food coloring (optional) – Pastel shades like pink, green, or lavender make these mints extra pretty for celebrations.
- Granulated sugar or extra powdered sugar (for rolling) – This gives the mints their classic, slightly sparkly finish.
Step-by-Step Instructions
Step 1: Blend the Cream Cheese Base
In a large mixing bowl, beat the softened cream cheese until it’s completely smooth—no lumps allowed! I like to use a hand mixer for this, but a sturdy wooden spoon works too if you don’t mind a little arm workout. Scrape down the sides of the bowl often to make sure everything is evenly incorporated.
Step 2: Sweeten It Up
Gradually add the powdered sugar, about ½ cup at a time, mixing well after each addition. The mixture will start out sticky but will transform into a soft, pliable dough as you go. If it feels too wet, add a touch more powdered sugar. Too dry? A tiny splash of milk (like, ½ tsp) can help.
Step 3: Minty Freshness
Once your dough is smooth, add the peppermint extract and salt. Mix until the flavor is evenly distributed. If you’re using food coloring, now’s the time to add it—a drop or two is all you need for a lovely pastel hue. Knead it gently with your hands (lightly dusted with powdered sugar to prevent sticking) until the color is uniform.
Pro Tips, Variations, and Substitutions
Making cream cheese mints is wonderfully simple, but a few expert tricks can take them to the next level. Here are some of my favorite ways to customize this recipe:
- Flavor Boost: Add 1/2 teaspoon of almond, lemon, or orange extract for a delightful twist on the classic peppermint.
- Color Fun: Use gel food coloring for vibrant hues without altering the texture. Pastels are perfect for baby showers!
- Dairy-Free Option: Substitute the cream cheese with vegan cream cheese for a lactose-free version that’s just as creamy.
- Texture Tip: If the dough feels too sticky, dust your hands with powdered sugar while shaping the mints.
What to Serve With Cream Cheese Mints
These little treats are versatile and pair beautifully with so many occasions. Here are some perfect serving ideas:
- After-Dinner Delight: Serve alongside coffee or tea for a refreshing end to a meal.
- Wedding or Baby Shower: Display them on a pretty platter with other bite-sized desserts.
- Holiday Spread: Mix red and green mints into a festive candy bowl for Christmas parties.
- Gift Idea: Package them in small boxes tied with ribbon for a homemade edible present.
Benefits of Homemade Cream Cheese Mints
Why make these at home when you can buy them? So many reasons!
- No Preservatives: You control the ingredients, avoiding artificial additives.
- Budget-Friendly: A fraction of the cost of store-bought mints.
- Customizable: Adjust flavors, colors, and shapes to suit any occasion.
- Quick & Easy: Ready in under 30 minutes with minimal effort.
Real-Life Tips for Perfect Mints Every Time
After making countless batches, here are my tried-and-true secrets:
- Let the cream cheese soften naturally—microwaving can make the texture grainy.
- Work quickly when rolling the dough to prevent drying.
- Store finished mints between layers of wax paper to avoid sticking.
- For a glossy finish, lightly spritz with edible pearl spray before serving.
These little mints may be simple, but they’re always a crowd-pleaser. Once you try this recipe, you’ll never go back to store-bought again!

Conclusion
These easy cream cheese mints are the perfect little treat to whip up for any occasion—whether it’s a bridal shower, holiday gathering, or just a sweet craving that needs satisfying. With just four simple ingredients and minimal effort, you can create delicate, melt-in-your-mouth mints that taste as good as they look. The best part? You can customize them with different colors and flavors to match any theme or preference.
So why not give this recipe a try? I’d love to hear how yours turn out—drop a comment below or tag me on social media with your creations! And if you’re looking for more bite-sized desserts, be sure to check out my recipes for homemade truffles or chocolate-dipped strawberries next.
FAQs
Can I use low-fat cream cheese for this recipe?
While you can use low-fat cream cheese, the texture might be slightly less creamy. Full-fat cream cheese gives the mints that perfect smooth and rich consistency, so I highly recommend sticking with it if possible.
How long do these mints last, and how should I store them?
Stored in an airtight container in the refrigerator, these mints will stay fresh for up to two weeks. If you want to keep them longer, you can freeze them for up to a month—just thaw in the fridge before serving.
Can I use liquid food coloring instead of gel?
Gel food coloring works best because it’s more concentrated and won’t add extra moisture to the mixture. If you only have liquid food coloring, use it sparingly to avoid making the dough too sticky.
Why are my mints sticky or too soft?
If your mints are sticky, it might be due to over-kneading or too much moisture. Try dusting your hands and work surface with a bit more powdered sugar to help firm them up. Letting them sit at room temperature for a few minutes before shaping can also help.
Can I make these mints ahead of time?
Absolutely! These mints actually taste even better after sitting for a day or two, as the flavors meld together. Just be sure to store them properly in the fridge until you’re ready to serve.


