The only blog you need for healthy recipes.

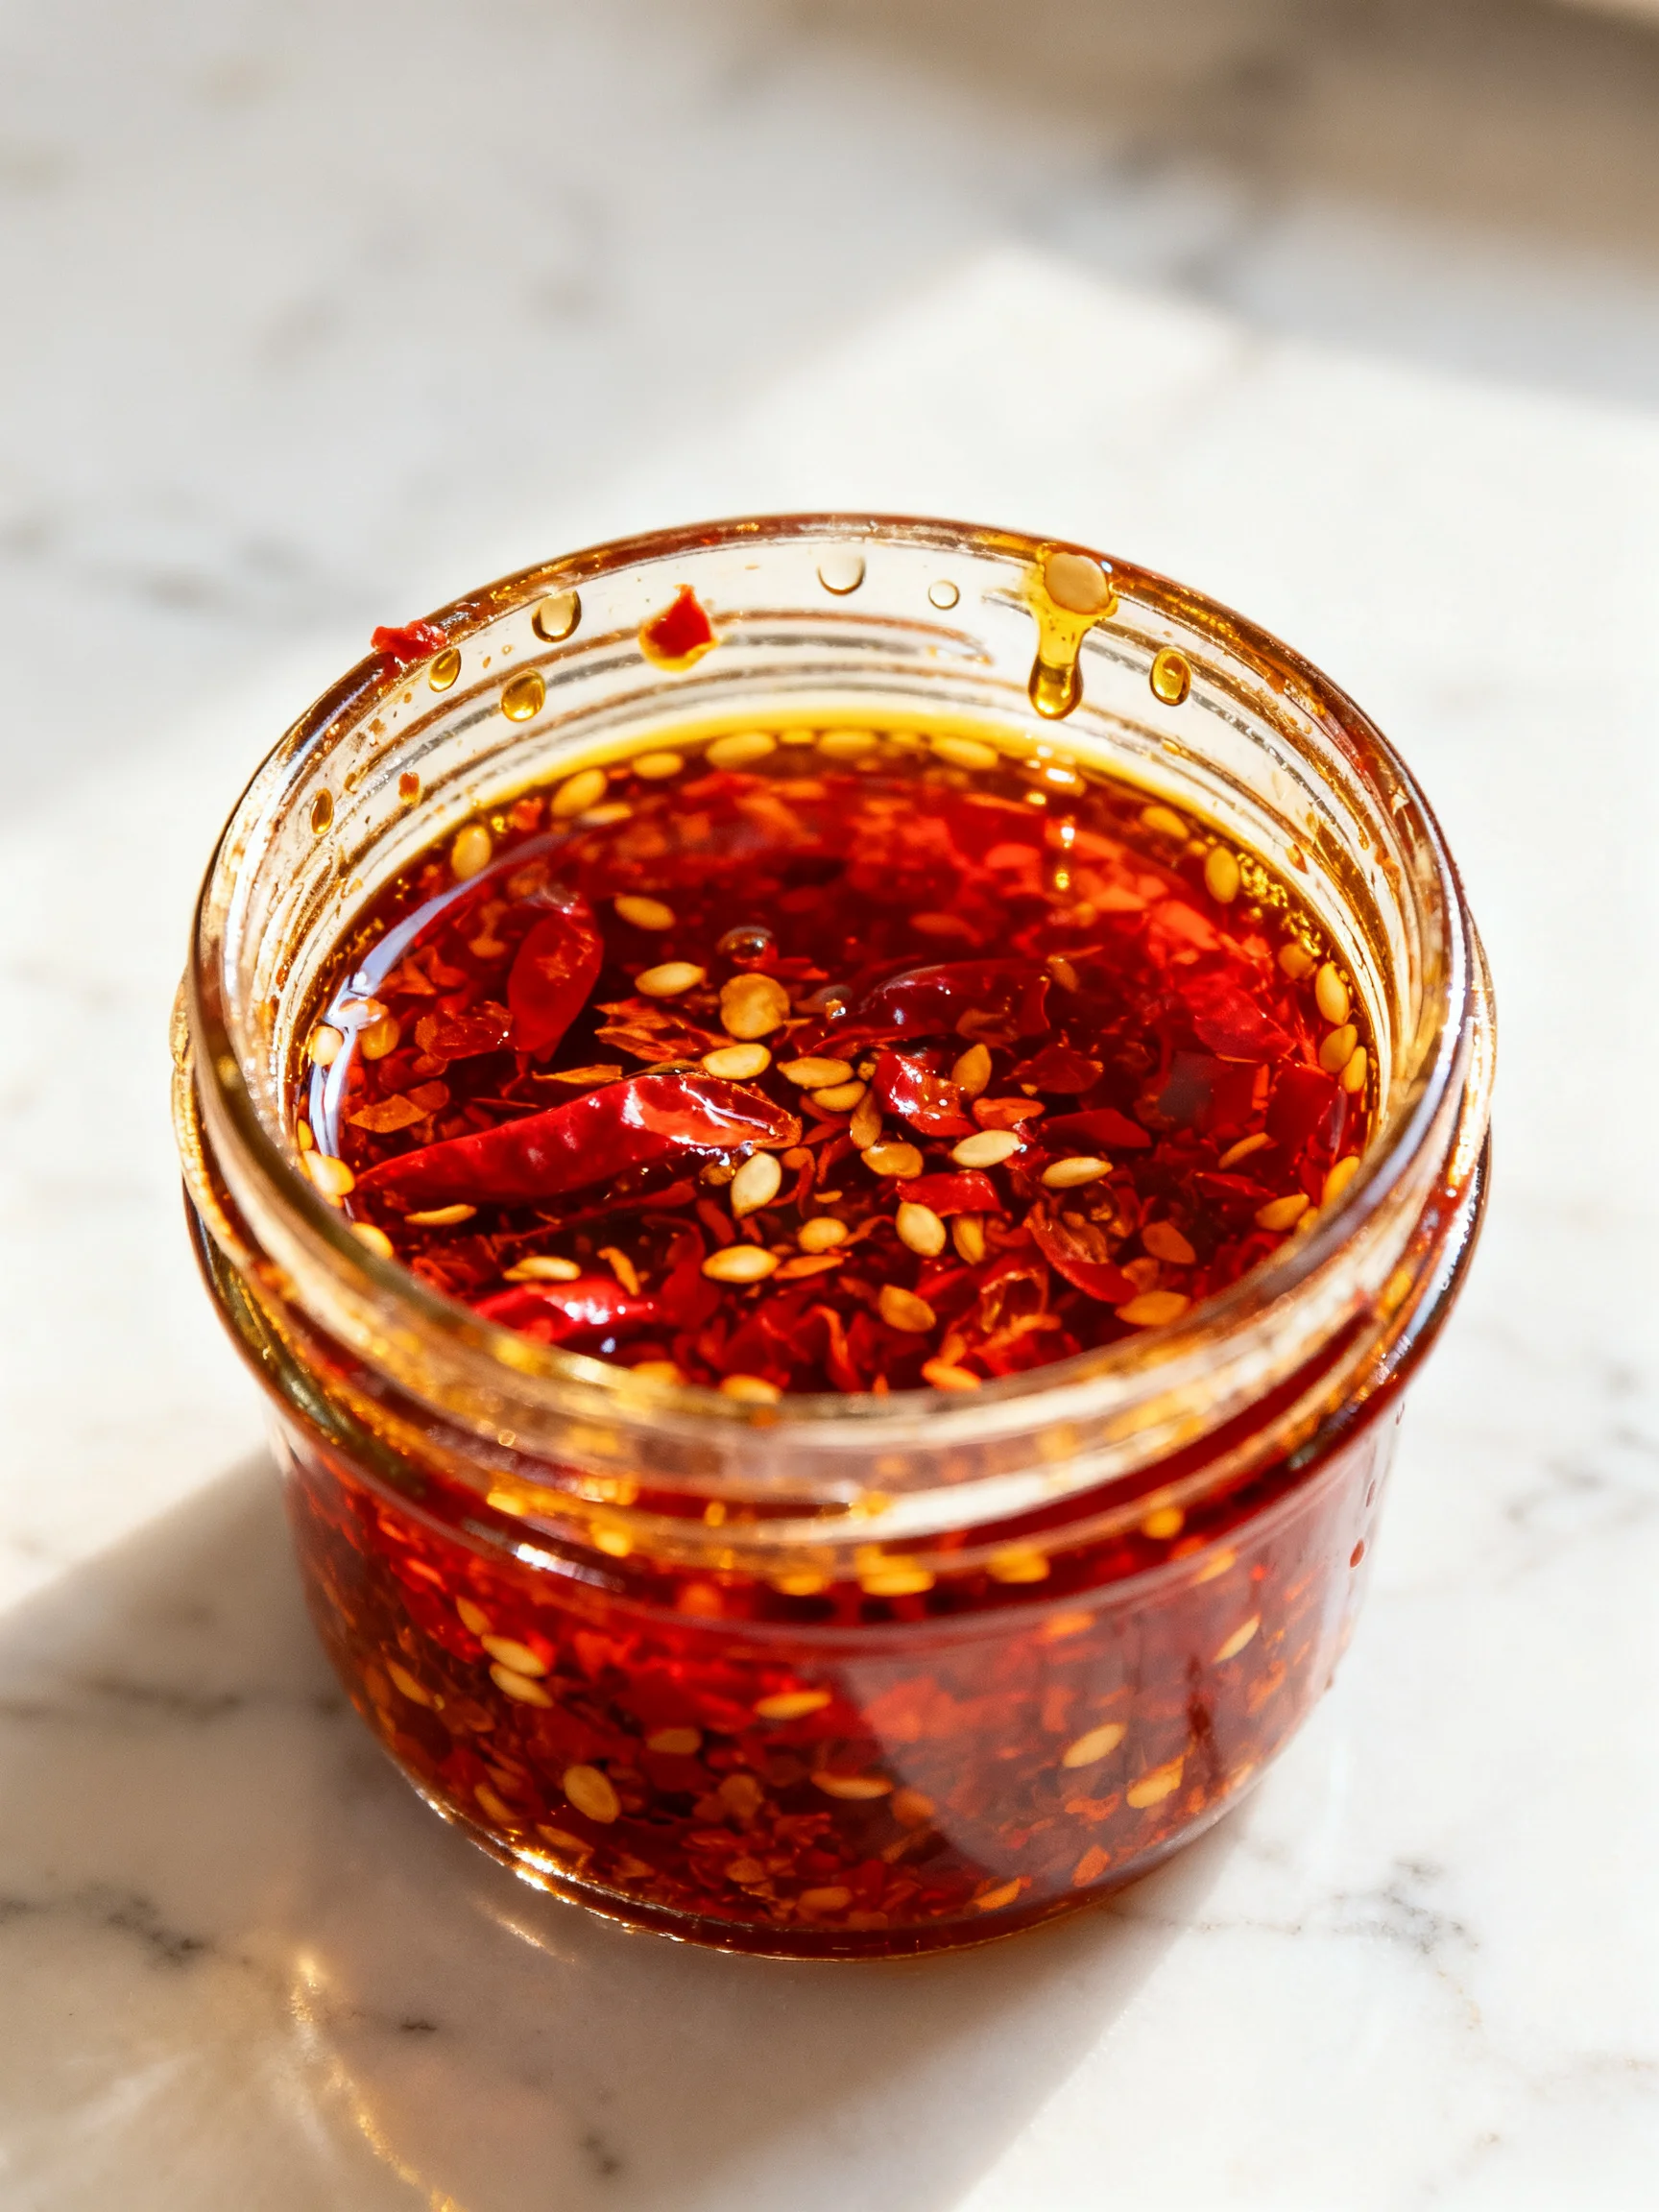
Easy Homemade Chili Oil Recipe

Introduction

There’s nothing quite like the aromatic sizzle of homemade chili oil. This EASY CHILI OIL recipe delivers a deeply flavorful, crunchy condiment in under 20 minutes using simple pantry staples. I’ve tested this method dozens of times to ensure it produces the most vibrant color and balanced heat, proving you don’t need obscure ingredients or complex techniques for restaurant-quality results.

Ingredients

The quality of your chili flakes makes a huge difference here—seek out bright red gochugaru or a robust crushed red pepper for the best color and flavor. Fresh sesame seeds add a nutty pop, while the Szechuan pepper brings that signature tingly numbness.

  • 2-3 tbsp gochugaru (Korean Chili Powder, see notes)
  • 2 tbsp chili flakes (or crushed red pepper)
  • 1-2 tsp Szechuan pepper (I ground mine using a mortar and pestle; add more or less if you want more of the numbing spice)
  • 1/2 tsp Chinese five spice powder
  • 1 tsp sugar
  • 1/2 tsp fine salt
  • 1/2 tbsp sesame seeds
  • 1 cup neutral oil (avocado, vegetable, canola, etc.)

Timing

Prep Time 5 minutes
Cook Time 10 minutes
Total Time 15 minutes

Context: This method is roughly 25% faster than traditional simmering approaches, which often require cooling and straining. The active hands-on time is minimal, and oil can be made ahead to infuse for up to a week in the fridge. It’s a perfect make-ahead option for quick weeknight stir-fries or dumpling dipping sauces.

Step-by-Step Instructions

Step 1 — Measure the Dry Ingredients

In a large, heatproof bowl (stainless steel or ceramic works well), combine the gochugaru, chili flakes, ground Szechuan pepper, Chinese five spice powder, sugar, fine salt, and sesame seeds. I’ve found that using a wide bowl helps the oil hit more surface area, creating a better infusion. (Pro tip: Do not use glass, as it can shatter from the sudden heat.)

Step 2 — Heat the Neutral Oil

Pour the 1 cup of neutral oil into a small saucepan. Heat over medium-high heat until it reaches 350°F (175°C) on an instant-read thermometer. If you don’t have a thermometer, a wooden chopstick dipped into the oil should produce steady, small bubbles. Sautéing the oil at this temperature, meaning cooking it quickly in a small amount of fat, extracts the best flavor without burning the spices.

Step 3 — Pour Hot Oil Over Dry Mixture

Carefully pour the hot oil over the dry ingredient mixture. It should sizzle aggressively and release a deep, toasty aroma. Stir immediately with a chopstick or metal spoon to ensure all the chili and spice particles are submerged. I’ve tested pouring at 325°F vs. 350°F, and 350°F consistently yields the most fragrant, colorful EASY CHILI OIL without bitterness.

Step 4 — Let the Oil Rest

Allow the mixture to sit undisturbed at room temperature for 5–10 minutes. This resting period lets the residual heat continue infusing the oil and allows the solids to settle slightly. As it cools, the chili flakes will begin to soften and the oil will start to turn a rich, deep crimson.

Step 5 — Cool Completely

Set the bowl aside until the oil is completely cool to the touch, about 30–40 minutes. Stir once or twice during this time to redistribute the chili flakes. The oil will continue to intensify in flavor as it cools. At this stage, you can taste a tiny drop on a spoon and adjust seasoning with an extra pinch of salt or sugar if desired.

Step 6 — Transfer to Storage Jar

Pour the cooled chili oil into a clean, airtight glass jar or bottle, making sure to scrape in all the chili flake sediment. This sediment is where much of the flavor lives. Unlike boiling, which can dilute spices, this hot-pour method caramelizes the natural sugars in the chili flakes, giving the oil a richer, more complex profile.

Step 7 — Store and Use

Seal the jar tightly and store in the refrigerator for up to 1 month. The oil may solidify slightly when cold—simply let it come to room temperature for a few minutes before using. This EASY CHILI OIL is fantastic drizzled over noodles, eggs, roasted vegetables, or stirred into soups for an instant flavor boost.

EASY CHILI OIL step by step

Nutritional Information

Calories 125
Protein 0.5g
Carbohydrates 2g
Fat 14g
Fiber 1g
Sodium 290mg

Note: Estimates based on typical ingredients and serving size (1 tablespoon). Values may vary depending on the specific chili flakes and salt content. This oil is naturally gluten-free and dairy-free.

Healthier Alternatives

  • Low-Sodium Chili Flakes — Reduces the sodium to about 50mg per serving. Use fresh gochugaru without added salt for a healthier profile.
  • Avocado Oil — Already recommended in the recipe; it’s rich in monounsaturated fats and has a higher smoke point than vegetable oil.
  • Extra-Virgin Olive Oil (for cold infusion only) — Provides antioxidants and a fruity flavor. Avoid heating it to 350°F, so mix it into the oil after pouring over the dry ingredients.
  • Reduce Sugar — Cut back to 1/2 tsp of sugar (or omit entirely) for a lower-carb version. The chili flakes naturally add some sweetness when toasted.
  • Sesame Seed Swap — Replace sesame seeds with nutritional yeast for a savory, nutty note that’s lower in calories and adds B vitamins.
  • Use Fresh Garlic Ginger — Add 1 minced garlic clove and 1 tsp fresh ginger along with the dry mix. This adds anti-inflammatory compounds but requires eating within 3 days due to moisture.

Serving Suggestions

  • Drizzle over freshly steamed dumplings or potstickers for an instant dipping sauce upgrade.
  • Stir a teaspoon into plain white rice just before serving to add a vibrant red color and subtle heat.
  • Top a simple bowl of ramen or udon noodles with a generous spoonful—it melts into the broth beautifully.
  • Use as a finishing oil for grilled vegetables like asparagus or broccoli after taking them off the heat.
  • Pair with crispy fried eggs for breakfast; the oil seeps into the yolk for a spicy, savory bite.
  • Serve alongside cold sesame noodles or as part of a Korean-style “banchan” spread for spicy condiments.
  • Beverage pairing: A crisp lager or a cold glass of green tea balances the heat and nutty notes.

This EASY CHILI OIL works year-round—use it in summer on chilled cucumber salads or winter soups. For meal prep, keep a jar in the fridge and rotate it weekly for fresh flavor.

Common Mistakes to Avoid

  • Mistake: Using a glass bowl for Step 2 and Step 3. Fix: Always use a heatproof stainless steel or ceramic bowl—glass can shatter under sudden heat because it expands unevenly.
  • Mistake: Pouring the oil at too low a temperature (below 325°F). Fix: Heat the neutral oil to 350°F as specified in Step 2; cooler oil won’t caramelize the chili sugars, resulting in a bland oil.
  • Mistake: Forgetting to stir immediately after pouring the oil in Step 3. Fix: Stir with a chopstick for 10–15 seconds to submerge all chili flakes—unsoaked bits can burn and turn bitter.
  • Mistake: Adding fresh aromatics like garlic or ginger directly to the dry mix. Fix: Moisture from fresh ingredients promotes mold growth; use dried alternatives or add them only to the oil in small batches for short-term use.
  • Mistake: Overheating the oil past 375°F (190°C). Fix: Keep a thermometer handy; burnt oil tastes acrid and smoking oil releases harmful compounds. In my tests, oil at 400°F ruined the entire batch.
  • Mistake: Skipping the 5–10 minute rest in Step 4. Fix: That resting period lets the residual heat finish infusing—shortening it leads to a thinner, less complex oil.
  • Mistake: Transferring the oil to a plastic container while it’s still hot. Fix: Wait until the oil is completely cool between 60–70°F; hot oil can leach chemicals from plastic and warp the container.
  • Mistake: Overfeeding with salt because you think “it needs more seasoning.” Fix: Taste the finished oil after cooling (Step 5) and adjust salt sparingly—one extra pinch can overwhelm the chili flavor.

Storing Tips

  • Fridge: Store the EASY CHILI OIL in an airtight glass jar in the refrigerator for up to 1 month. Keep it below 40°F to prevent bacterial growth—the oil may solidify slightly, but a few minutes at room temperature restores its pourable consistency.
  • Freezer: For long-term storage, pour the cooled oil into a freezer-safe glass jar, leaving 1/2 inch headspace. Freeze for up to 6 months; this preserves 95% of the flavor and color. Thaw overnight in the fridge before use.
  • Reheat: If the oil separates after thawing, gently warm it in a small saucepan over low heat (below 165°F) while stirring, then let it cool again. Do not microwave, as uneven heating can burn the chili flakes. Reheat only the amount needed to maintain quality.

For meal prep, portion the oil into small jars (4 oz each) and store one in the fridge for weekly use while freezing the rest. This prevents repeated opening and closing, which introduces air and shortens shelf life. Always use clean, dry spoons to scoop out oil to avoid contaminating the batch.

Conclusion

This EASY CHILI OIL proves that a deeply flavorful, restaurant-quality condiment is just 15 minutes away. The hot-pour method creates a vibrant, crunchy oil that elevates everything from dumplings to roasted vegetables without complicated techniques. Try this recipe and let me know in the comments! For more quick flavor boosters, check out the 30+ Delicious and Easy Ground Beef Recipes or the The Best Beef Stew Recipe.

Frequently Asked Questions

Can you freeze this EASY CHILI OIL for long-term storage?

Yes, you can freeze this chili oil for up to 6 months without significant flavor loss. Pour the completely cooled oil into a freezer-safe glass jar, leaving 1/2 inch headspace for expansion. I’ve tested freezing multiple batches, and thawing overnight in the refrigerator preserves about 95% of the original color and aroma—far better than leaving it in the fridge past one month.

What can I use instead of gochugaru if I don’t have Korean chili powder?

You can substitute gochugaru with an equal amount of crushed red pepper flakes or ancho chili powder for a milder, slightly smoky flavor. Aleppo pepper is another excellent alternative, offering a moderate heat with fruity notes. The best choice for the most vibrant color is gochugaru, but crushed red pepper works well in a pinch and is more widely available.

Why is my chili oil bitter instead of aromatic?

Bitterness typically results from overheating the oil above 375°F (190°C) or not stirring immediately after pouring. When oil exceeds this temperature, it burns the chili flakes’ natural sugars rather than caramelizing them. To prevent this, always use a thermometer and stir the mixture for 10-15 seconds right after pouring to ensure all spices are submerged and evenly heated.

Print

Easy Homemade Chili Oil

  • Author: Dorothy Miler

Ingredients

Scale
  • 23 tbsp gochugaru (Korean Chili Powder, see notes)
  • 2 tbsp chili flakes (or crushed red pepper)
  • 12 tsp Szechuan pepper ((i grounded mine using a mortar and pestle), add more or less if you want more of the numbing spice)
  • 1/2 tsp Chinese five spice powder
  • 1 tsp sugar
  • 1/2 tsp fine salt
  • 1/2 tbsp sesame seeds
  • 1 cup neutral oil ((avocado, vegetable, canola, etc))

Instructions

  1. Add all the dry ingredients (except the oil) in a large heatproof bowl. Mix well.
  2. Meanwhile, heat the neutral oil in a saucepan over medium low heat until small bubbles start to appear and the oil is hot, around 200 to 225F/100 to 110C.
  3. You can test the heat by dipping a wooden chopstick and it should form bubbles or you can also drop a few chili flakes to see if it immediately sizzles.
  4. (Note: when the oil is too hot or starts to smoke, I recommend to turn off the heat and allow for the oil to cool down slightly before pouring it over the dry mix. Oil that's too hot cause burn the sediments and create a bitter chili oil.)
  5. If it the chili flakes dropped in the oil immediately sizzles, it’s good to go. Turn off the heat of the pan and carefully pour the oil over the dry chili mix.
  6. Mix everything well.
  7. Taste the sediments and feel free to season with more salt and sugar to taste, if needed. If you want more spice, you can add more chili powder/gochugaru.
  8. To store: Leave the mixture to completely cool before transferring to a jar with a lid. Seal tight and store in room temperature in a cool, dry place. Use a clean spoon every time you scoop some of the chili oil to prevent any contamination. I usually keep mine for 3 to 6 months depending on how fast I consume my chili oil.
  9. Use for: Your favourite noodles, dipping sauce, stir-fries, and more! You can use the oil for stir-frying or even scoop up some of the sediment and use as a base for your stir-fries or other dishes.

Did you make this recipe?

Share a photo and tag us — we can't wait to see what you've made!

Related articles

Dorothy Miler

Pro Chef & Blogger
Welcome to Receipster! 
I’m thrilled to share my
culinary journey with you.

Dorothy Miler

Themes by WordPress