
Did You Know That 75% of Home Bakers Avoid White Chocolate Because They Think It’s Too Sweet?
I used to be in that majority, my friend. I’d pass by the elegant white chocolate bars in the baking aisle, convinced they were a one-note sugar bomb, incapable of the sophisticated depth I craved in a dessert. Oh, how wrong I was. It took a serendipitous afternoon, a punnet of perfectly ripe raspberries, and a complete kitchen mishap to change my mind forever. That happy accident led me straight to the path of creating what I now confidently call the absolute Best White Chocolate Raspberry Cake.
This isn’t just a cake; it’s a love story. It’s the tale of rich, creamy white chocolate, finally understood and perfectly balanced by the bright, tangy kiss of ruby-red raspberries. It’s the kind of dessert that makes you pause after the first bite, your eyes widening in surprise. It’s the centerpiece of birthday celebrations, the star of baby showers, and the secret weapon I pull out when I want to impress my most foodie friends. It’s a symphony of flavors and textures, and today, I’m so thrilled to share the first act of this baking journey with you.
A Meeting of Two Souls: White Chocolate & Raspberry
Before we even preheat the oven, we must talk about our two main characters. Their partnership is the very heart of this recipe.
For the white chocolate, quality is non-negotiable. You must seek out a bar labeled with real cocoa butter. Skip the chips, which often contain stabilizers that can seize when melted. We want a bar that melts into a smooth, velvety pool of decadence. This provides the cake with an incredibly moist crumb and a subtle vanilla-cocoa flavor that is the antithesis of cloying sweetness.
And the raspberries? They are the vibrant counterpoint. Whether you use fresh, plump berries in the height of summer or a bag of frozen ones (no thawing needed!), their sharp, fruity acidity cuts through the richness of the white chocolate perfectly. It’s this beautiful push-and-pull in every single bite that makes this cake so impossibly moreish.
Gathering Your Baking Symphony
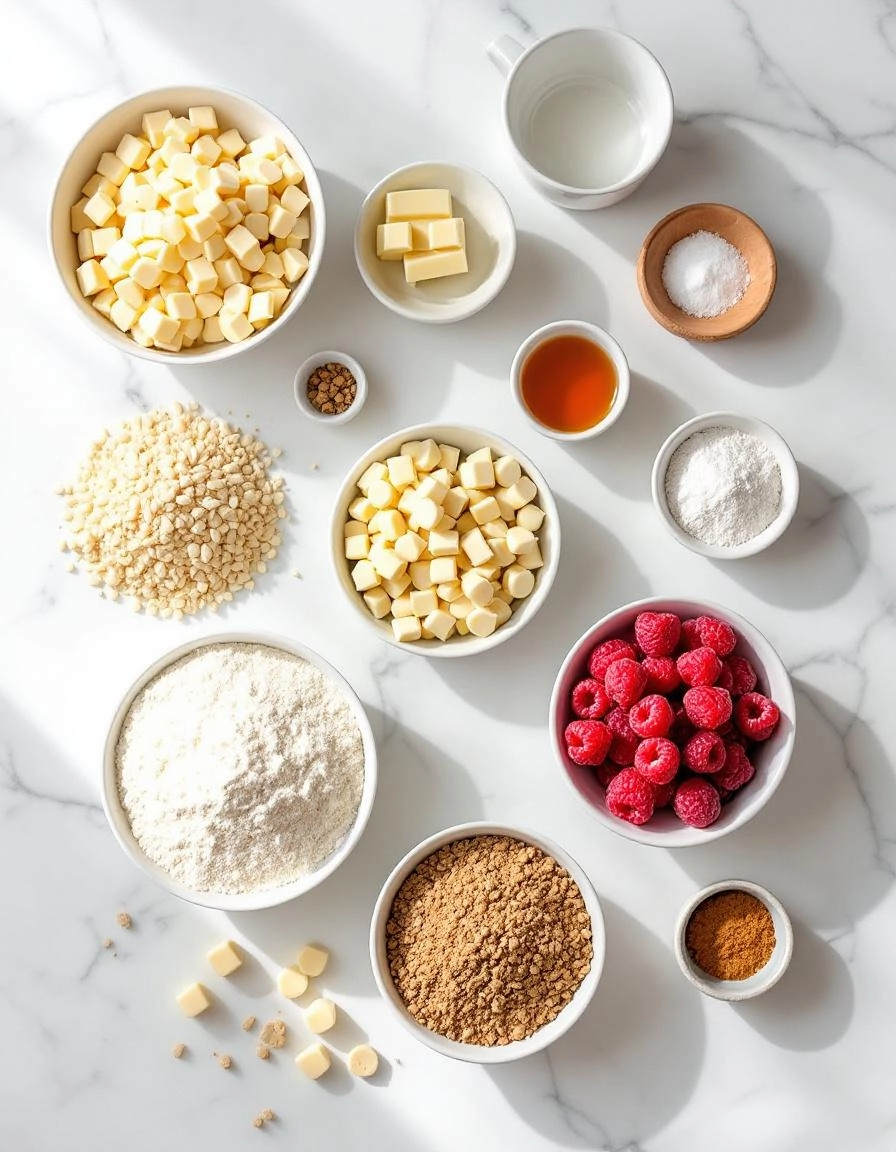
The beauty of this recipe lies not in a long list of obscure ingredients, but in the careful selection of simple, high-quality staples. Here’s what you’ll need to create magic:
- The White Chocolate: One 4-ounce bar of good-quality white chocolate, chopped.
- The Berries: 1 ½ cups of fresh or frozen raspberries (do not thaw if frozen).
- The Dry Goods: All-purpose flour, baking powder, a pinch of salt, and of course, granulated sugar.
- The Wet Cast: Unsalted butter (softened), eggs at room temperature, pure vanilla extract, and whole milk.
Having everything measured and ready to go—your mise en place—is the secret to a stress-free, joyful baking experience. It allows you to simply flow through the steps, which we’ll dive into next time. Trust me, the aroma of white chocolate and vanilla wafting from your oven will be your greatest reward.
PrintWhite Chocolate Raspberry Cake
A moist white chocolate cake layered with fresh raspberry filling and creamy white chocolate frosting.
Ingredients
For the Crust:
- 2 cups all-purpose flour
- 1 1/2 cups granulated sugar
- 3/4 cup unsalted butter, softened
- 4 oz white chocolate, melted
- 3 large eggs
- 1 cup buttermilk
- 2 tsp baking powder
- 1 tsp vanilla extract
- 2 cups fresh raspberries
- 1/4 cup raspberry jam
Instructions
1. Prepare the Crust:
- Preheat oven to 350°F. Grease and flour two 9-inch round cake pans.
- Cream butter and sugar until light. Add eggs one at a time, then mix in melted white chocolate and vanilla.
- Alternately add flour mixture and buttermilk, beginning and ending with flour. Divide batter between pans and bake 25-30 minutes.
- Cool cakes completely. Spread raspberry jam between layers and top with fresh raspberries.
- Frost with white chocolate buttercream and garnish with additional raspberries.
Notes
You can customize the seasonings to taste.
The Ingredients for a Little Slice of Heaven
Before we begin, let’s gather our ingredients. There’s something so comforting about lining everything up on the counter, isn’t there? It feels like a promise of the deliciousness to come. This recipe is broken down into three parts: the cake, the raspberry filling, and the frosting. Trust me, each component is worth the extra little bowl!
For the White Chocolate Cake
- 2 ½ cups all-purpose flour: Spoon and level it, my dear. We want light, fluffy cake, not a dense brick!
- 2 ½ tsp baking powder: Our little leavening helper to give the cake its beautiful rise.
- ½ tsp salt: Just a pinch to balance all the sweetness and make the flavors sing.
- 1 cup unsalted butter, softened: This is key! Leave it out for a good hour. It should yield gently to your touch. This creates the most wonderful crumb.
- 1 ¾ cups granulated sugar: Sweetness to complement the tart raspberries.
- 4 large eggs, room temperature: Another room temp hero! Cold eggs can make the batter curdle. Just pop them in a bowl of warm water for 5 minutes if you forgot.
- 2 tsp vanilla extract: The pure kind, if you have it. It makes all the difference.
- 1 ¼ cups whole milk, room temperature: Seeing a pattern? Room temp ingredients are the secret to a perfectly emulsified, smooth batter.
- 6 oz good quality white chocolate, melted and slightly cooled: Don’t use chips! They have stabilizers. Get a bar of baking white chocolate and chop it finely before melting gently.
For the Raspberry Filling
- 12 oz fresh or frozen raspberries: If using frozen, no need to thaw! They break down beautifully.
- ¼ cup granulated sugar: Adjust to your taste and the tartness of your berries.
- 1 tbsp lemon juice: A bright squeeze to enhance the berry flavor.
- 2 tsp cornstarch mixed with 1 tbsp water: Our magic thickener to turn those juicy berries into a glorious, spreadable filling.
Let’s Bake: A Step-by-Step Cozy Guide
Now, put on your favorite apron, maybe pour yourself a cup of tea, and let’s create some magic together.
Step 1: Preparing the Cake Batter
First, preheat your oven to 350°F (175°C). Grease and line three 8-inch round cake pans with parchment paper. This trio of layers is what makes this cake so spectacular!
In a medium bowl, whisk together your flour, baking powder, and salt. Set this aside. In the bowl of your stand mixer fitted with the paddle attachment, beat the softened butter and sugar together on medium-high speed for a good 3-4 minutes. We want it to become pale and wonderfully fluffy. This step incorporates air, which is the soul of a light cake.
Now, add your eggs one at a time, beating well after each addition. Scrape down the sides of the bowl. Mix in the vanilla. It should smell divine already!
Here’s the trick: reduce the mixer speed to low. Add the flour mixture in three parts, alternating with the milk, beginning and ending with the flour. Mix until just combined. Overmixing is the enemy of tenderness! Finally, gently fold in the melted and slightly cooled white chocolate until no streaks remain.
Step 2: Baking to Golden Perfection
Divide that beautiful, speckled batter evenly among your three prepared pans. I like to use a kitchen scale for perfect layers, but eyeballing it works just fine too!
Slide them into the preheated oven and bake for 25-30 minutes. You’ll know they’re done when the tops are springy to the touch and a toothpick inserted into the center comes out clean.
Now, the hardest part: let the cakes cool in their pans for 10 minutes before turning them out onto a wire rack to cool completely. I know, I know, the aroma is intoxicating and you want to dive right in! But patience here ensures our cakes won’t break apart. While they cool, we can make our filling.
Step 3: The Luscious Raspberry Filling
In a small saucepan, combine the raspberries, sugar, and lemon juice. Cook over medium heat, stirring occasionally, until the berries break down and become juicy, about 5-7 minutes.
Give your cornstarch and water mixture a quick stir (it settles quickly!) and then whisk it into the bubbling raspberries. Continue to cook for another minute or two, until the mixture thickens noticeably and becomes glossy.
Remove it from the heat and pour it into a bowl to cool completely. It will thicken even more as it sits. This sweet-tart jewel-toned filling is going to be the most wonderful surprise in the middle of our cake.
Now that you’ve got the basics of this dreamy white chocolate raspberry cake down, let’s talk about how to make it truly your own. Every baker has their own pantry and preferences, and this recipe is wonderfully forgiving and flexible!
Baker’s Notes: Pro Tips & Tricks
For the absolute best results, keep these little secrets in mind:
- Room Temperature is Key: I can’t stress this enough! Ensure your eggs, milk, and sour cream are all at room temperature. This helps them emulsify with the butter, creating a lighter, fluffier crumb that simply can’t be beaten.
- Don’t Overmix: Once you add the dry ingredients, mix on low speed just until the flour disappears. Overmixing develops the gluten and can lead to a tough, dense cake.
- Fresh vs. Frozen Raspberries: While I adore the burst of fresh berries, frozen raspberries work beautifully and are often more affordable. Do not thaw them—toss them in a tablespoon of flour straight from the freezer to prevent them from sinking to the bottom of the pan.
Delicious Variations & Substitutions
This cake is a fantastic canvas for your creativity. Here are a few ways to mix it up:
- Gluten-Free: Swap the all-purpose flour for a 1:1 gluten-free baking blend. The structure might be slightly more delicate, but it’s just as delicious.
- Dairy-Free: Use your favorite plant-based milk and a dairy-free yogurt in place of the sour cream. For the butter, a high-quality vegan butter works wonders.
- Lemon Zest: Add the zest of one lemon to the cake batter for a bright, zesty twist that complements the raspberries perfectly.
- Different Berries: Not a raspberry fan? This cake is also sublime with blackberries, chopped strawberries, or even a mix of summer berries.
The Perfect Pair: What to Serve It With
While this cake is a star all on its own, a little accompaniment can turn it into a show-stopping dessert.
- A dollop of freshly whipped cream or a scoop of vanilla bean ice cream melts beautifully alongside a warm slice.
- For an extra touch of elegance, drizzle each plate with a simple raspberry coulis or a handful of fresh raspberries macerated in a bit of sugar.
- A cup of freshly brewed coffee or a pot of Earl Grey tea makes for the perfect cozy beverage pairing.
The Sweet Benefits of Baking This Cake
Beyond its incredible taste, this cake is special. Baking it from scratch fills your home with the most wonderful, comforting aroma. It’s a labor of love that shows someone you care. It’s perfect for birthdays, anniversaries, or just because. Sharing a homemade cake creates moments of connection and joy—that’s the real magic of baking.
Real-Life Tips from My Kitchen to Yours
Here’s the real talk from many, many batches of this cake:
- If your white chocolate seizes or gets clumpy when melting, add a teaspoon of vegetable oil and stir vigorously—it can often save the day!
- For super clean slices, dip your knife in hot water and wipe it dry between each cut.
- This cake is actually even more flavorful the next day. The flavors have time to meld, making it a fantastic make-ahead dessert for parties.
I hope you feel inspired and equipped to bake this beautiful cake. It’s a recipe that has brought so much happiness to my table, and I truly hope it does the same for yours. Happy baking!
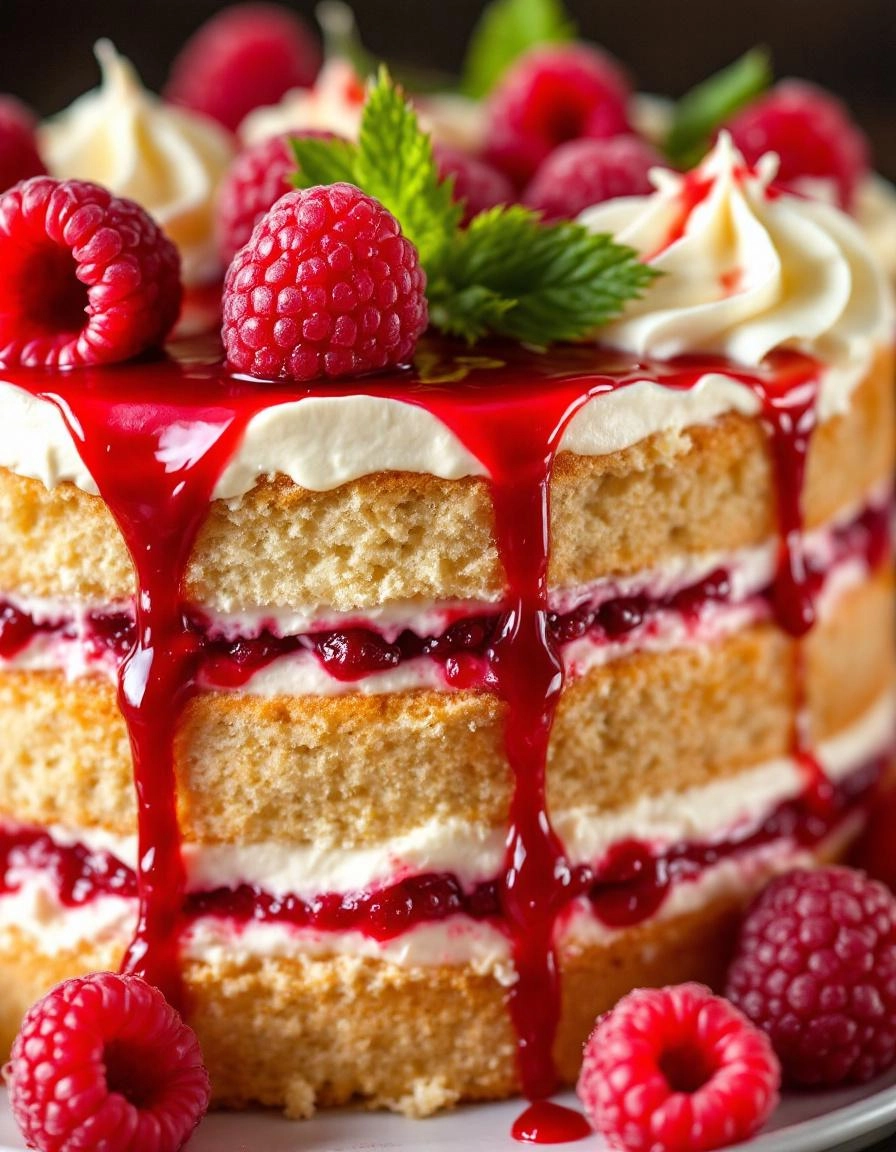
Conclusion
And there you have it—your very own stunning, bakery-worthy White Chocolate Raspberry Cake! This recipe is truly a labor of love, combining the rich, creamy sweetness of white chocolate with the bright, tangy burst of fresh raspberries. From the tender, moist layers to the dreamy buttercream and that gorgeous raspberry filling, every element is designed to create a show-stopping dessert that’s perfect for celebrations or simply making an ordinary day feel special.
I hope this cake brings as much joy to your kitchen as it does to mine. There’s nothing quite like the pride of slicing into a beautiful homemade cake you created yourself.
Now, I’d love to hear from you! Did you add your own twist with a dash of lemon zest or a sprinkle of toasted coconut? How did your family react? Share your baking stories and photos in the comments below—reading them is my favorite part of the day. And if you’re looking for your next baking project, why not try our Luscious Lemon Lavender Loaf or these Decadent Dark Chocolate Brownies next? Happy baking!
FAQs
Can I use frozen raspberries instead of fresh for the filling?
Absolutely! Frozen raspberries work wonderfully. There’s no need to thaw them first—just toss them straight from the freezer into the saucepan with the sugar and cornstarch. You might just need to cook the filling for a minute or two longer until it thickens beautifully.
My buttercream seems too runny. What can I do?
This can happen if your melted white chocolate or butter was a bit too warm when incorporated. Don’t worry! The easiest fix is to pop the entire bowl of buttercream into the refrigerator for 15-20 minutes to firm up, then give it another good whip with your mixer. It should come together perfectly.
How far in advance can I assemble this cake?
This cake is a fantastic make-ahead dessert! You can bake the layers up to two days in advance—just wrap them tightly in plastic wrap once completely cool and store at room temperature. The assembled cake keeps beautifully in the refrigerator for up to two days. Just let it sit at room temperature for about an hour before serving for the best texture and flavor.
I’m not a fan of super sweet frosting. Is this buttercream very sweet?
The white chocolate does add sweetness, but the tang from the raspberry filling and a pinch of salt in the buttercream help balance it out beautifully. If you’re particularly sensitive to sweetness, you can reduce the confectioners’ sugar by 1/4 cup and add a tiny bit more salt to taste.
Can I make this into cupcakes?
Yes, you can! This batter will make about 24-26 cupcakes. Fill the liners 2/3 full and bake for 18-22 minutes, or until a toothpick comes out clean. You can pipe the buttercream on top and add a dollop of raspberry filling or a fresh raspberry for a gorgeous finish.


