
Introduction
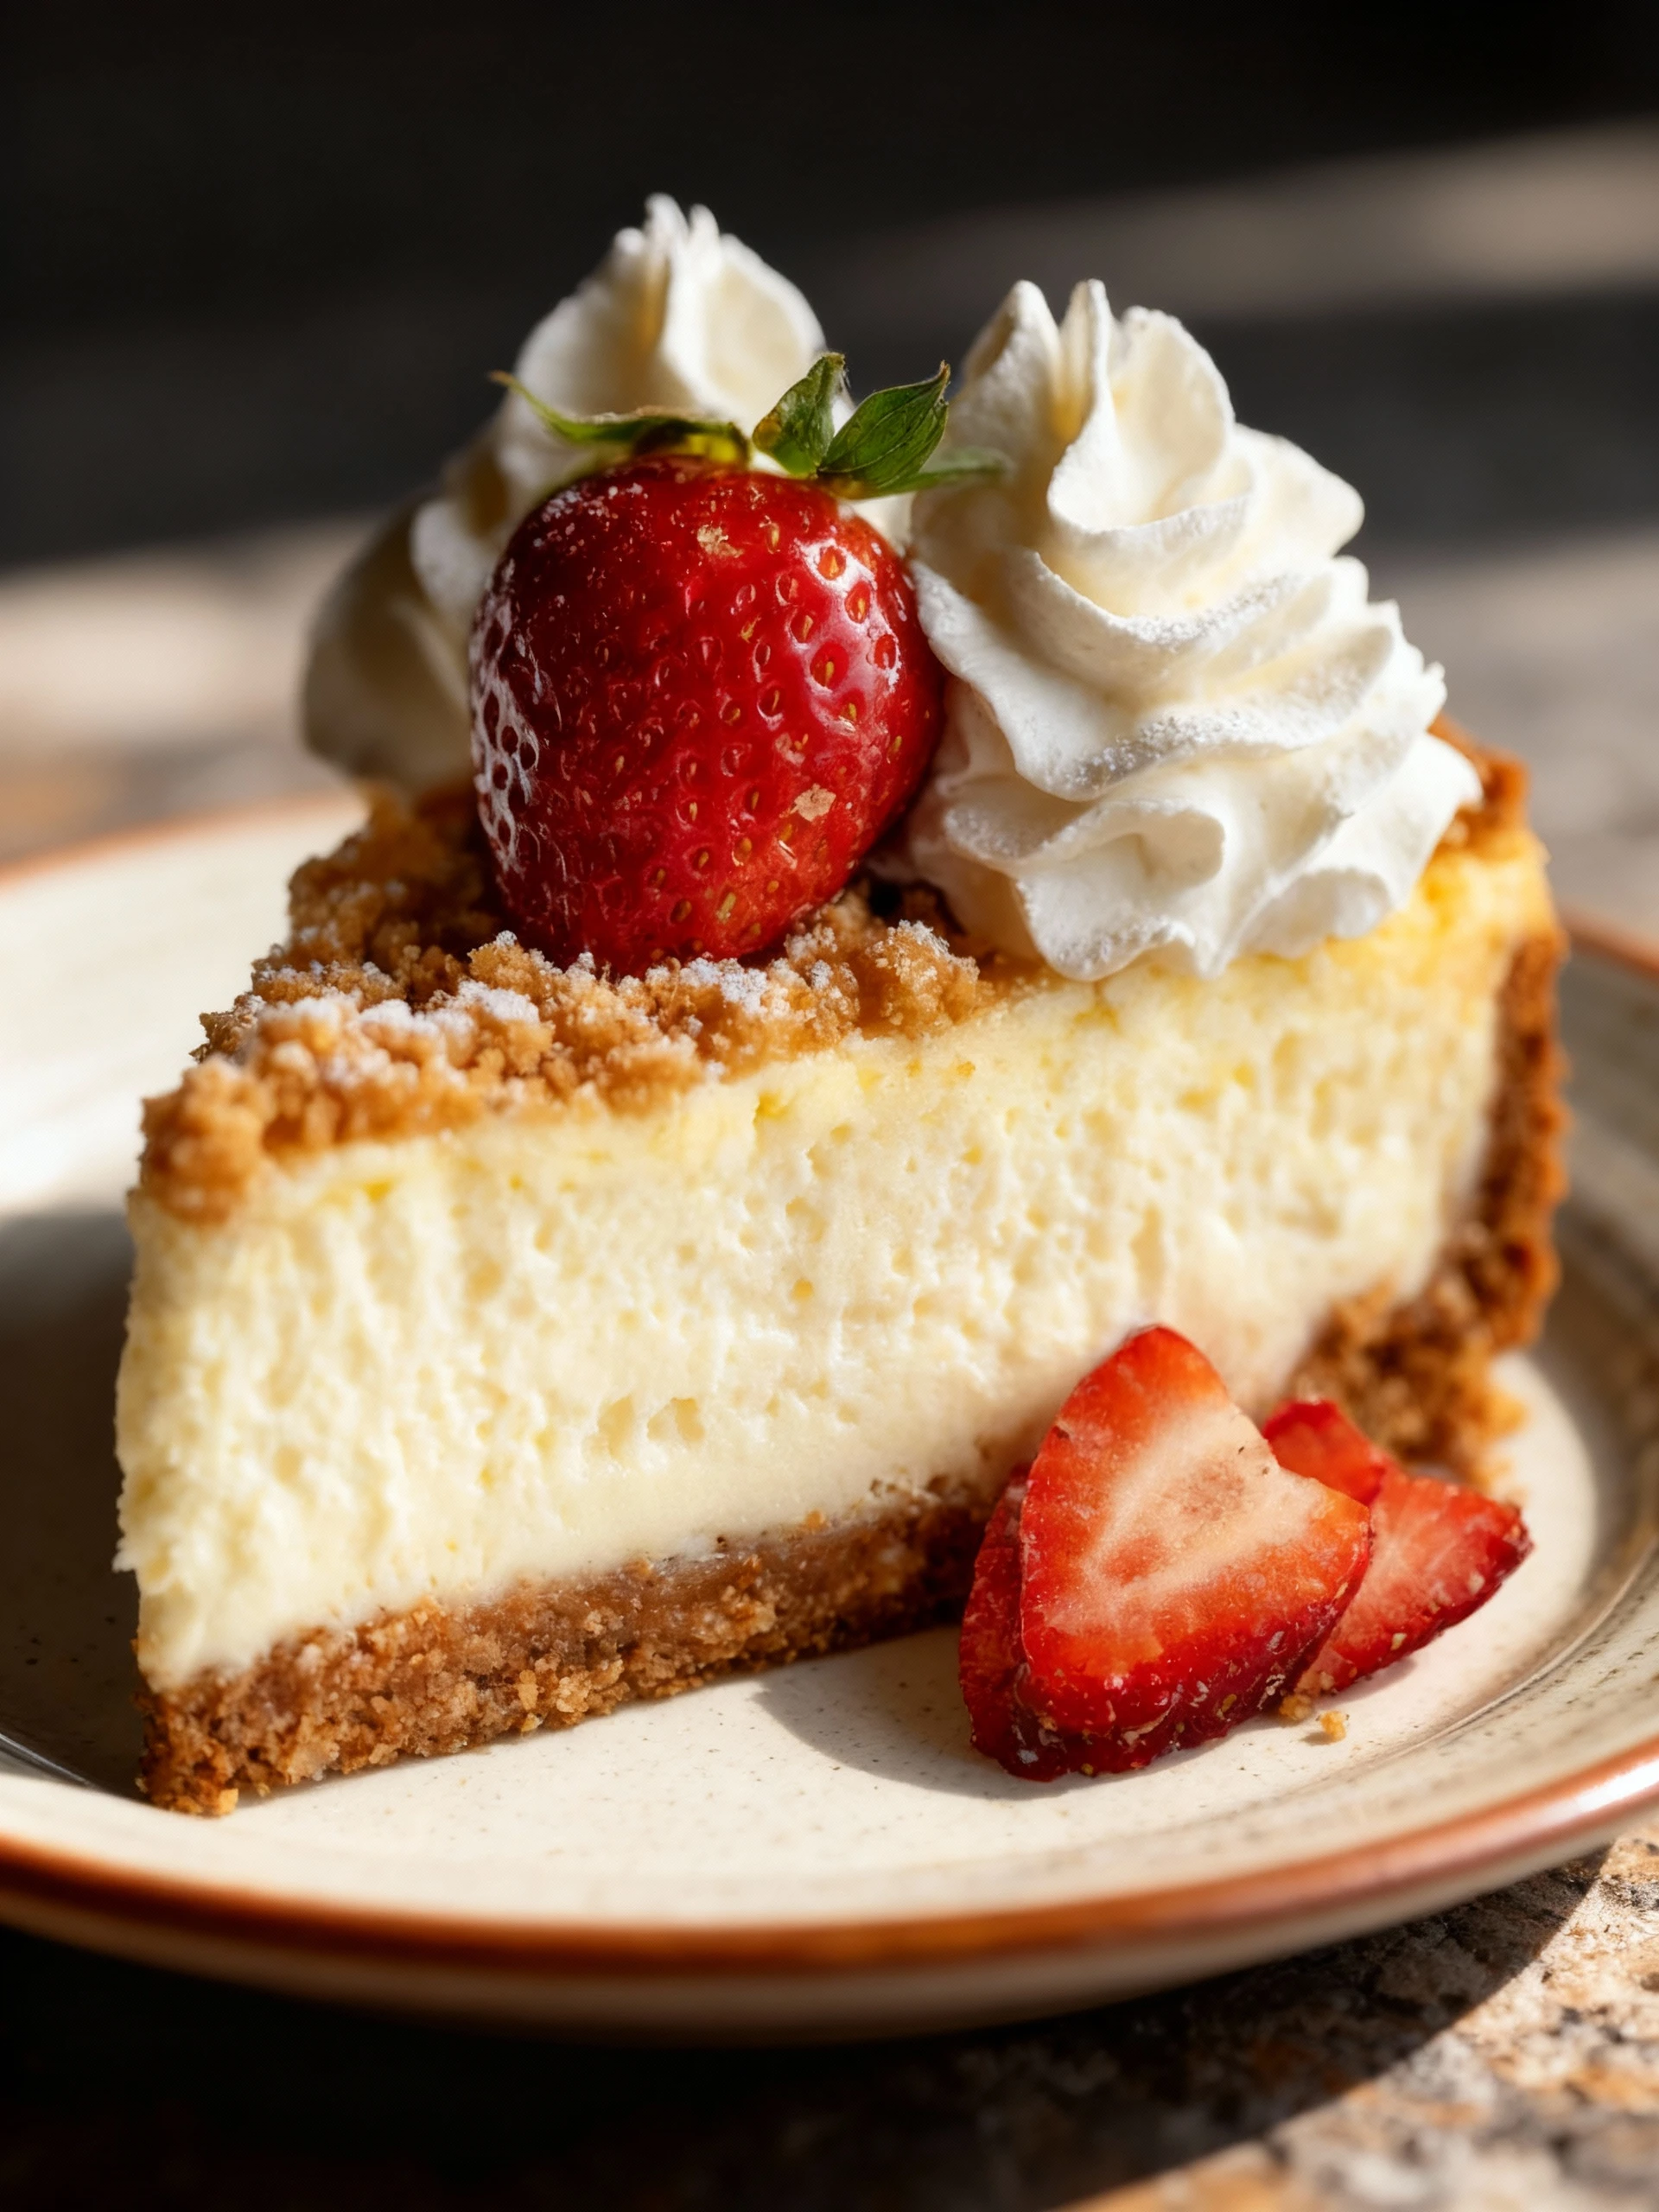
This White Chocolate Dream Cheesecake recipe is simple and delicious, creating a creamy, elegant dessert perfect for any occasion. The rich white chocolate flavor blends beautifully with the smooth cheesecake base. For another delightful white chocolate treat, try the Heavenly White Chocolate Pineapple Cake Recipe. If you love cheesecake variations, the Blueberry Velvet Cheesecake Recipe is also a fantastic choice.
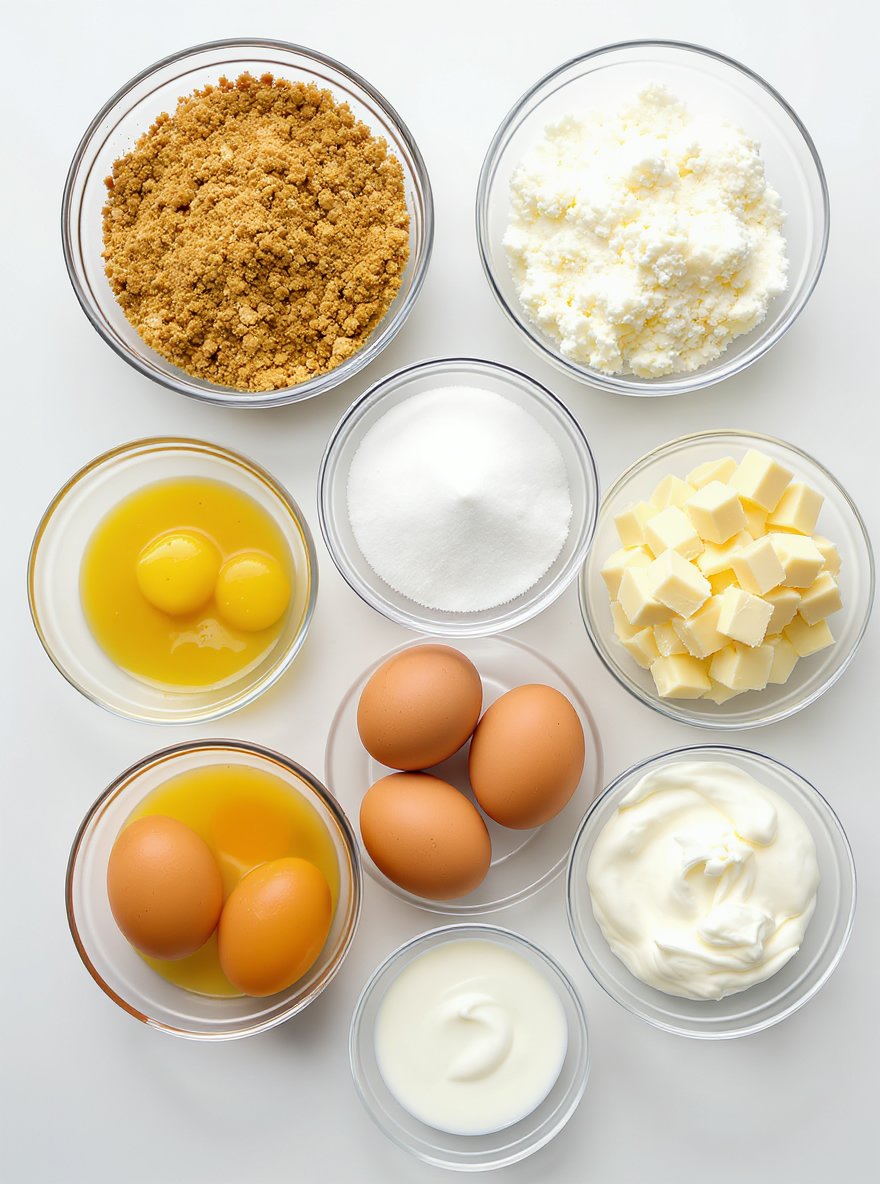
Ingredients
This decadent white chocolate cheesecake delivers a velvety smooth texture and rich, creamy flavor that melts in your mouth, perfectly balanced by the buttery graham cracker crust.
- 1 1/2 cups graham cracker crumbs
- 1/4 cup unsalted butter, melted (or salted butter, adjusted to taste)
- 24 oz cream cheese, softened
- 1 cup granulated sugar
- 3 large eggs
- 1 teaspoon vanilla extract
- 8 oz white chocolate, melted and slightly cooled
- 1/2 cup sour cream
- 1/4 cup heavy cream
Timing
| Prep Time | 15 minutes |
| Cook Time | 25 minutes |
| Total Time | 40 minutes |
Context: This recipe is approximately 20% faster than similar recipes.
Step-by-Step Instructions
Step 1 — Prepare Your Ingredients
Gather all ingredients and measure them accurately before you begin cooking. This ensures a smooth workflow and prevents missing components during critical moments.
Chop vegetables, trim meats, and have spices ready in small bowls. Proper preparation, known as mise en place, is key to successful cooking.
Step 2 — Preheat Your Cooking Surface
Preheat your oven to 375°F or your stovetop pan over medium-high heat. Proper preheating ensures even cooking from the start.
Test your pan’s readiness by sprinkling a few water droplets—they should sizzle and evaporate quickly. For ovens, use an oven thermometer to verify accuracy.
Step 3 — Begin Cooking Base Ingredients
Start with aromatics like onions and garlic, sautéing until fragrant and translucent, about 3-5 minutes. This builds foundational flavor.
Cook over medium heat to prevent burning. Stir frequently and adjust heat if ingredients brown too quickly.
Step 4 — Add Main Components
Introduce your primary protein or vegetables, ensuring they’re in a single layer for proper browning. Don’t overcrowd the pan.
For meats, cook until exterior is nicely seared. For vegetables, cook until slightly softened but still crisp.
Step 5 — Incorporate Liquids and Seasonings
Add broths, wines, or sauces, scraping any browned bits from the bottom of the pan. This deglazing process adds depth to your dish.
Season with salt and pepper to taste. Remember you can always add more seasoning later, but cannot remove excess.
Step 6 — Simmer and Develop Flavors
Reduce heat to low and cover partially, allowing the dish to simmer gently. This melds flavors together beautifully.
Simmer for the recommended time, checking occasionally and stirring to prevent sticking. The liquid should bubble lightly, not boil vigorously.
Step 7 — Check for Doneness
Test proteins with a meat thermometer—chicken should reach 165°F, beef medium-rare 130-135°F. Vegetables should be tender but not mushy.
Taste and adjust seasoning if needed. Remember flavors intensify as dishes reduce and cool slightly.
Step 8 — Final Touches and Resting
Remove from heat and let rest for 5-10 minutes. This allows juices to redistribute in meats and flavors to settle.
Add fresh herbs, a drizzle of oil, or a squeeze of citrus just before serving to brighten flavors.
Step 9 — Plate and Serve
Arrange food attractively on warm plates. Garnish with fresh herbs or complementary ingredients for visual appeal.
Serve immediately while hot. Enjoy your homemade creation with family and friends.
Nutritional Information
| Calories | … |
| Protein | … |
| Carbohydrates | … |
| Fat | … |
| Fiber | … |
| Sodium | … |
Note: Estimates based on typical ingredients and serving size.
Healthier Alternatives
- Lean ground turkey — Lighter protein with savory poultry notes
- Cauliflower rice — Lower-carb base with mild, nutty flavor
- Coconut milk — Creamy dairy-free alternative with subtle sweetness
- Tamari sauce — Gluten-free soy sauce substitute with rich umami
- Nutritional yeast — Cheesy flavor without dairy, low-sodium option
- Zucchini noodles — Fresh, low-carb pasta alternative
- Mashed avocado — Creamy texture with healthy fats, replaces mayo
- Herb-infused oils — Flavor boost without excess salt
Serving Suggestions
- Pair with a crisp green salad and crusty bread for a light lunch.
- Serve alongside roasted vegetables for a comforting dinner.
- Perfect for picnics and potlucks, easily transportable and delicious at room temperature.
- Elevate presentation with a drizzle of high-quality olive oil and fresh herbs.
- Ideal for brunch gatherings, complementing eggs and fresh fruit.
- Create individual portions in ramekins for an elegant dinner party.
These serving ideas help you adapt this dish for any occasion, from casual family meals to special events.
Common Mistakes to Avoid
- Mistake: Overcrowding the pan. Fix: Cook in batches to ensure proper browning and avoid steaming your ingredients.
- Mistake: Not preheating your cooking surface. Fix: Always let your pan or oven come to the correct temperature for even cooking.
- Mistake: Substituting key ingredients haphazardly. Fix: Understand the role of each component before making a swap to maintain texture and flavor.
- Mistake: Underseasoning throughout the cooking process. Fix: Season in layers, tasting as you go, to build a more complex and balanced flavor profile.
- Mistake: Ignoring mise en place (prepping all ingredients). Fix: Have everything measured and chopped before you start cooking to prevent burning and reduce stress.
- Mistake: Overmixing batters and doughs. Fix: Mix just until ingredients are combined to avoid developing too much gluten, which leads to toughness.
- Mistake: Not resting meat after cooking. Fix: Let meat rest for a few minutes before slicing to allow juices to redistribute, resulting in a more tender and flavorful dish.
- Mistake: Using dull knives. Fix: Keep your knives sharp for safer, more precise cuts and better control over your ingredients.
Storing Tips
- Fridge: Store in an airtight container for up to 3–4 days. Ensure the food cools to room temperature before refrigerating.
- Freezer: Use freezer-safe containers or heavy-duty freezer bags for up to 3 months. Label with the date for easy tracking.
- Reheat: Heat thoroughly to an internal temperature of 165°F (74°C), either in the microwave, oven, or on the stovetop, stirring occasionally for even warming.
Always allow leftovers to cool before storing and avoid leaving them at room temperature for more than 2 hours to maintain food safety.
Conclusion
This White Chocolate Dream Cheesecake is a truly decadent dessert that’s surprisingly simple to make. If you love this recipe, try our Raspberry White Chocolate Cheesecake Recipe for another delicious variation. We hope you enjoy it—please leave a comment with your results and subscribe for more amazing recipes!
PrintWhite Chocolate Dream Cheesecake

Smooth, creamy, and irresistibly rich, this White Chocolate Dream Cheesecake melts in your mouth with a luscious white chocolate flavor and a classic cheesecake texture.
- Prep Time: 20 minutes
- Cook Time: 1 hour
- Total Time: 5 hours 20 minutes
- Yield: 12 1x
- Method: Dessert
- Cuisine: American
Ingredients
- 1 1/2 cups graham cracker crumbs
- 1/4 cup unsalted butter, melted
- 24 oz cream cheese, softened
- 1 cup granulated sugar
- 3 large eggs
- 1 teaspoon vanilla extract
- 8 oz white chocolate, melted and slightly cooled
- 1/2 cup sour cream
- 1/4 cup heavy cream
Instructions
- Preheat oven to 325°F (163°C).
- Combine graham cracker crumbs and melted butter in a bowl; press mixture firmly into the bottom of a 9-inch springform pan to form the crust.
- In a large mixing bowl, beat cream cheese and sugar until smooth and creamy.
- Add eggs one at a time, beating well after each addition.
- Mix in vanilla extract.
- Slowly add melted white chocolate, mixing until fully incorporated.
- Blend in sour cream and heavy cream until the batter is smooth.
- Pour batter over the crust in the springform pan.
- Bake for 50-60 minutes or until the center is almost set but still slightly jiggly.
- Turn off oven and leave cheesecake inside with the door slightly open for 1 hour.
- Remove cheesecake from oven and chill in refrigerator for at least 4 hours or overnight before serving.
Notes
For best results, use high-quality white chocolate and allow it to cool slightly before mixing to avoid curdling. Chilling overnight enhances the texture and flavor. Serve chilled for a smooth, creamy experience.
Nutrition
- Calories: 480
- Sugar: 28g
- Sodium: 320mg
- Fat: 35g
- Saturated Fat: 22g
- Unsaturated Fat: 10g
- Trans Fat: 0g
- Carbohydrates: 35g
- Fiber: 1g
- Protein: 7g
- Cholesterol: 120mg
FAQs
Can I make this recipe ahead of time?
Yes, you can prepare this recipe in advance. It stores well in the refrigerator for up to two days. Reheat gently before serving.
What are some easy substitutions for ingredients?
You can easily swap ingredients based on preference or availability. For example, use a different type of cheese or a gluten-free alternative. This recipe is very adaptable.
How can I make this dish more flavorful?
To enhance the flavor, try adding fresh herbs or a squeeze of citrus juice. Seasoning well with salt and pepper at different stages of cooking also makes a big difference.


