Introduction
Is there anything more comforting than the smell of fresh bread baking in your oven? That incredible aroma of garlic and herbs is pure happiness, promising a warm, buttery, and utterly delicious treat. Today, I am so excited to share my recipe for Rosemary Garlic Pull Apart Bread | Sally’s Baking Addiction. This recipe is a true showstopper, yet it’s surprisingly simple to make, even for beginner bakers. It’s the perfect centerpiece for any dinner table and guarantees everyone will be reaching for more.
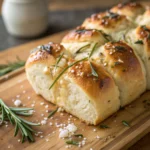
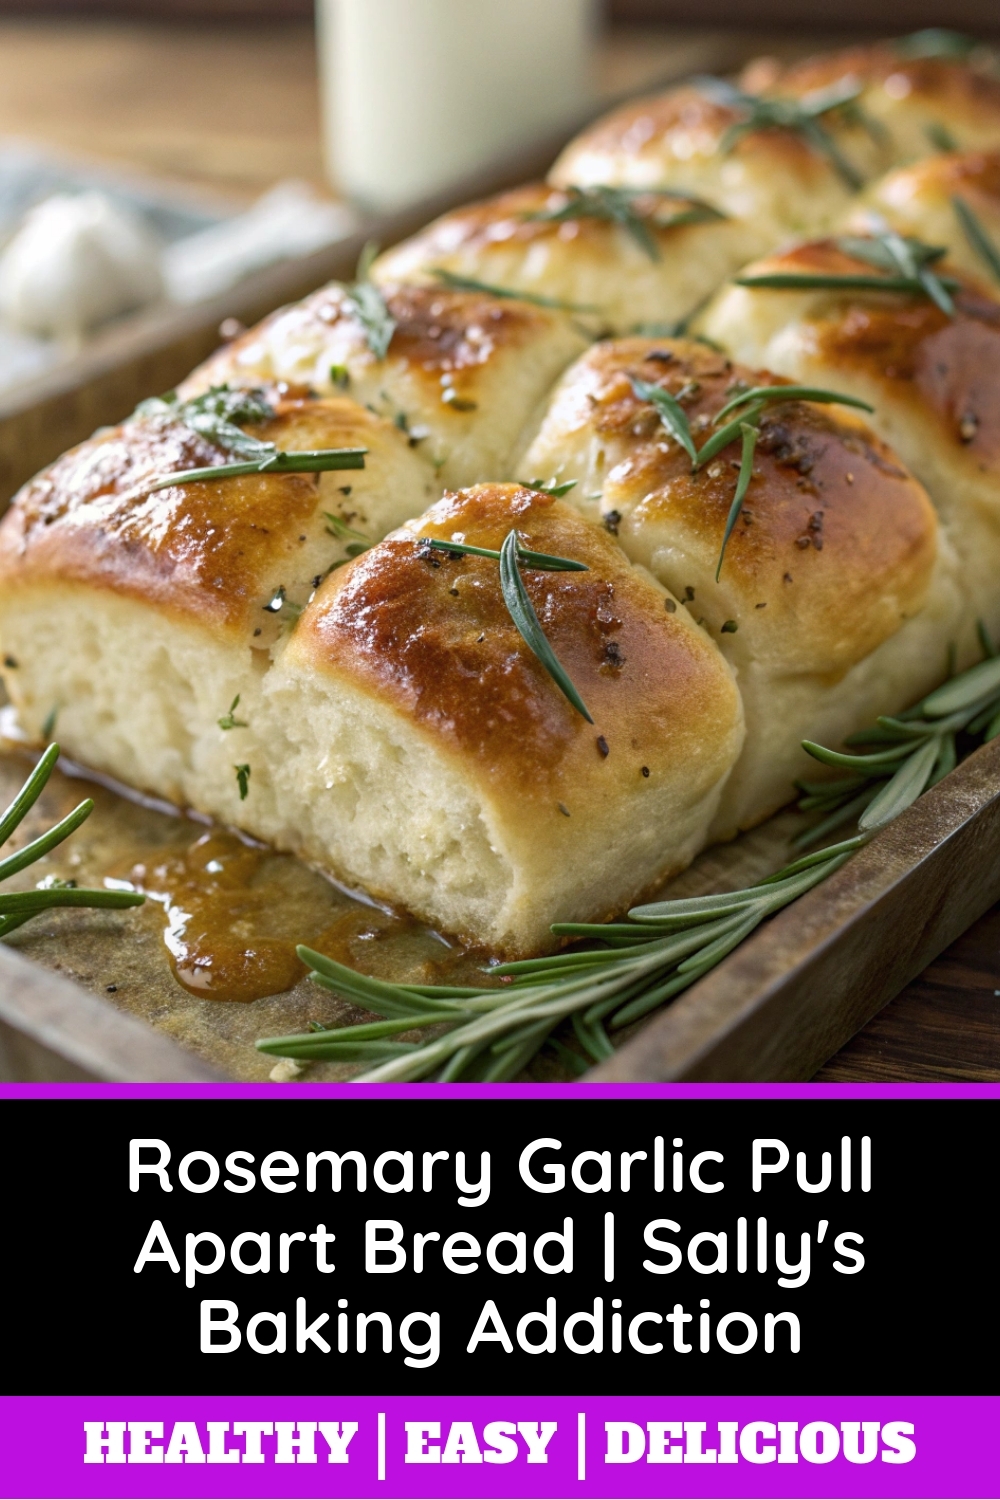
This Rosemary Garlic Pull Apart Bread | Sally’s Baking Addiction is a soft, fluffy yeast bread that bakes in a loaf pan. The magic happens because you stack little pieces of dough that you coat in a fragrant mixture of melted butter, fresh rosemary, and minced garlic. As it bakes, the pieces fuse together but remain easy to pull apart into individual, savory servings. Its uniqueness comes from that incredible flavor in every single bite and its incredibly fun, interactive nature. This recipe perfectly aligns with my blog’s mission to provide reliable, tested recipes that build baking confidence. If you’re new to working with yeast, my guide on working with yeast will give you all the confidence you need. For another fantastic savory baking project, you must try my popular Cheesy Garlic Breadsticks next.
Why I Love This Recipe
I absolutely love this recipe because it turns a simple baking project into a truly special occasion. The process of assembling the loaf is so therapeutic, and the final result never fails to impress my family and friends. There is something incredibly rewarding about pulling a golden, aromatic loaf from the oven and hearing the immediate “oohs” and “aahs” around the table. It’s the ultimate shareable food that creates a moment of pure joy and connection, which is exactly why I love to bake.
Health and Nutrition
Why it’s good for your body
Rosemary Garlic Pull Apart Bread | Sally’s Baking Addiction offers more than just incredible flavor. This savory bread provides tangible health benefits because of its thoughtfully chosen ingredients. Fresh rosemary, for instance, is a powerful herb packed with antioxidants. These compounds actively fight inflammation in your body while also supporting your immune system.
Garlic, another star ingredient, is a true nutritional powerhouse. It contains allicin, a compound known for its heart-healthy properties. So, enjoying this bread contributes to cardiovascular wellness even though it feels like a delicious treat. Furthermore, olive oil delivers healthy monounsaturated fats. These fats are excellent for your heart and help your body absorb the fat-soluble vitamins from other foods.
The base of Rosemary Garlic Pull Apart Bread | Sally’s Baking Addiction provides essential carbohydrates. Your body converts these carbs into usable energy for your daily activities. Although it is an indulgent bake, it contains beneficial components. Therefore, you can feel good about savoring every garlicky, herb-infused bite.
How it fits in a healthy lifestyle
Rosemary Garlic Pull Apart Bread | Sally’s Baking Addiction fits beautifully into a balanced diet when enjoyed mindfully. Think of it as a celebratory side dish rather than an everyday staple. Pair a single serving with a large, protein-rich salad or a bowl of vegetable soup for a complete and satisfying meal. This approach allows you to enjoy its incredible flavor while still prioritizing nutrient-dense foods.
For those with specific dietary goals, this recipe is wonderfully adaptable. You can easily experiment with a whole-wheat flour blend to increase the fiber content. If you are managing a gluten sensitivity, try a reliable gluten-free flour blend to create a version you can enjoy. While not a low-carb food, it perfectly illustrates the principle of balance. You can absolutely include comforting carbs like this bread while still reaching your wellness objectives, especially when paired with a lean protein source. Ultimately, healthy eating includes foods that nourish both your body and your soul.
PrintRosemary Garlic Pull Apart Bread
Make a flavorful pull apart bread using this delicious rosemary-infused yeasted dough. You can use your favorite cheese in the filling. I love and usually use shredded parmesan.
- Prep Time: 3 hrs
- Cook Time: 50 mins
- Total Time: 4 hrs
- Yield: 1 loaf 1x
- Method: Bread
- Cuisine: American
Ingredients
- 2 teaspoons Platinum Yeast from Red Star*
- 1 Tablespoon granulated sugar
- 3/4 cup (180ml) whole milk
- 3 Tablespoons (43g) unsalted butter, softened to room temperature
- 1 large egg
- 2 and 1/3 cups (291g) all-purpose flour (spooned & leveled), plus more as needed*
- 1 teaspoon salt
- 1 teaspoon garlic powder
- 1 Tablespoon finely chopped fresh rosemary (or 2 teaspoons dried)
- 5 Tablespoons (71g) unsalted butter, extra soft (see note)
- 1 Tablespoon finely chopped fresh rosemary (or 2 teaspoons dried)
- 1 Tablespoon finely chopped fresh parsley (or 2 teaspoons dried)
- 2 garlic cloves, minced or 1/2 teaspoon garlic powder
- 1/4 teaspoon salt
- 3/4 cup (95g) shredded parmesan, mozzarella, or white cheddar cheese (or your favorite shredded cheese)
- 1 Tablespoon (14g) unsalted butter, melted
- coarse or flaky sea salt for sprinkling
Instructions
- Place the yeast and sugar in the bowl of a stand mixer fitted with a dough hook or paddle attachment. Or, if you do not own a stand mixer, a regular large mixing bowl. Heat the milk on the stove or in the microwave until warm to touch, about 110°F (43°C). Pour warm milk on top of yeast/sugar. Whisk gently to combine, then loosely cover with a clean kitchen towel and allow to sit for 5-10 minutes. The mixture will be frothy after 5-10 minutes.
- Add the butter, egg, flour, salt, garlic powder, and rosemary. Beat on low speed until the dough comes together and pulls away from the sides of the bowl, about 3 minutes. If the dough isn't pulling away from the sides of the bowl, add a little more flour, a Tablespoon at a time. Dough will be soft.
- Keep the dough in the mixer (and switch to the dough hook if using the paddle) and beat for an additional 5 full minutes, or knead by hand on a lightly floured surface for 5 full minutes. (If you're new to bread-baking, my How to Knead Dough video tutorial can help here.) If the dough becomes too sticky during the kneading process, sprinkle 1 Tablespoon of flour at a time on the dough or on the work surface/in the bowl to make a soft, slightly tacky dough. Do not add more flour than you need because you do not want a dry dough. After kneading, the dough should still feel a little soft. Poke it with your finger—if it slowly bounces back, your dough is ready to rise. You can also do a "windowpane test" to see if your dough has been kneaded long enough: tear off a small (roughly golfball-size) piece of dough and gently stretch it out until it's thin enough for light to pass through it. Hold it up to a window or light. Does light pass through the stretched dough without the dough tearing first? If so, your dough has been kneaded long enough and is ready to rise. If not, keep kneading until it passes the windowpane test.
- Shape the kneaded dough into a ball. Place the dough in a greased bowl (I use nonstick spray to grease) and cover with plastic wrap or aluminum foil. Place in a slightly warm environment to rise until doubled in size, around 60-90 minutes. (If desired, use my warm oven trick for rising. See my answer to Where Should Dough Rise? in my Baking with Yeast Guide.)
- As the dough rises, prepare the filling in the next step and grease a 9×5-inch loaf pan.
- In a medium bowl, mix the soft butter, rosemary, parsley, garlic, and salt together. If the butter is soft enough, you can just mix it all together with a spoon or fork. You can use an electric mixer if that's easier too. Cover tightly and set aside until ready to use. (Don't refrigerate unless making well in advance. It's easiest to spread on the dough when at room temperature. If refrigerated, let it come to room temperature before spreading on dough pieces.)
- Punch down the dough to release the air. Place dough on a lightly floured work surface. Divide it into 12 equal pieces, each about 1/4 cup of dough and a little larger than a golf ball. Using lightly floured hands, flatten each into a circle that's about 4 inches in diameter. The circle doesn't have to be perfectly round. I do not use a rolling pan to flatten, but you certainly can if you want. Spread 1-2 teaspoons of filling mixture onto each. Sprinkle each with 1 Tablespoon of cheese. Fold circles in half and line in prepared baking pan, round side up. See photos above for a visual.
- Cover with plastic wrap or aluminum foil and allow to rise once again in a slightly warm environment until puffy, about 45 minutes.
- Adjust the oven rack to the lower third position then preheat oven to 350°F (177°C).
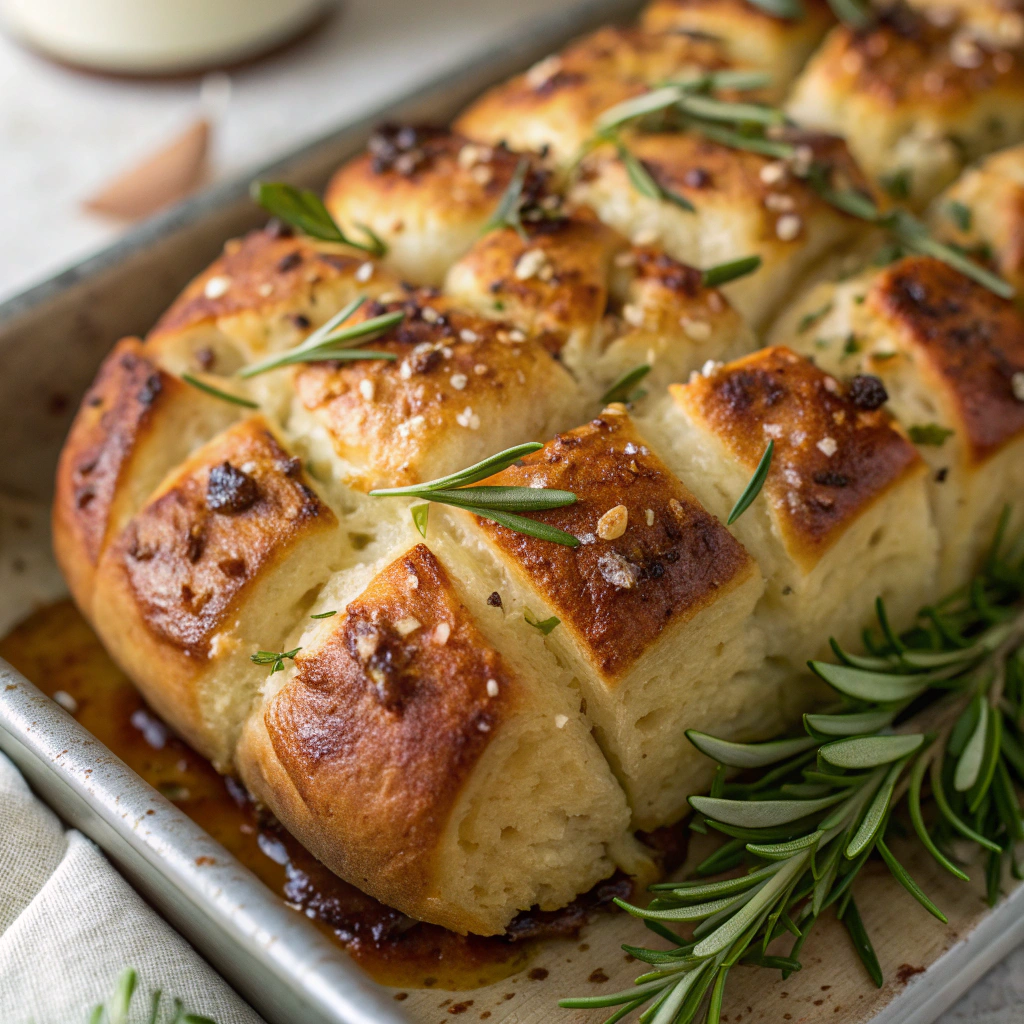
- Bake until golden brown, about 50 minutes. If you find the top of the loaf is browning too quickly, tent with aluminum foil. (Don't be alarmed if there's melted butter around the sides of the bread as it bakes, it will seep into the bread before it finishes.) Remove from the oven and place the pan on a wire rack. If desired, brush with melted butter for topping and sprinkle with sea salt.
- Cool for 10 minutes in the pan, then remove from the pan and serve warm.
- Cover and store leftovers at room temperature for up to 2 days or in the refrigerator for up to 1 week. Since the bread is extra crispy on the exterior, it will become a little hard after day 1. Reheat in a 300°F (149°C) oven for 10-15 minutes until interior is soft again or warm in the microwave.
Notes
For best results, use extra soft butter for the filling to make spreading easier. The bread is best served warm and fresh, but can be reheated to restore softness. Feel free to experiment with different cheese varieties like mozzarella or white cheddar for variation.
Nutrition
- Calories: 220
- Sugar: 2
- Sodium: 280
- Fat: 13
- Saturated Fat: 8
- Unsaturated Fat: 4
- Trans Fat: 0
- Carbohydrates: 20
- Fiber: 1
- Protein: 6
- Cholesterol: 45
How to Prepare This Dish
Steps and time-saving tips
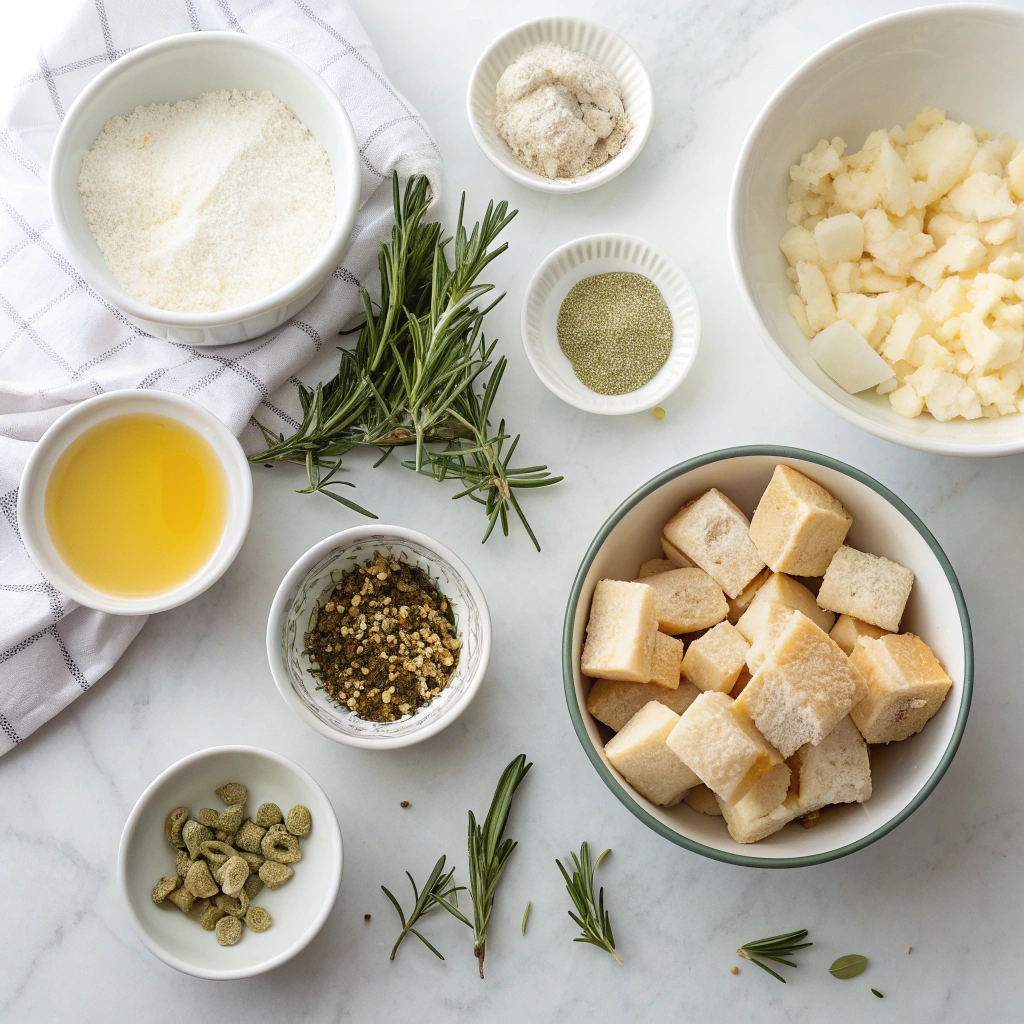
First, gather all your ingredients to make the process smooth. Next, gently warm the milk and melt the butter; however, ensure the mixture is only lukewarm to protect the yeast. Then, whisk the yeast into the milk mixture and let it sit for just five minutes until it becomes frothy. Meanwhile, combine the flour and salt in your large mixing bowl. After that, pour the yeast mixture into the dry ingredients and stir everything until a shaggy dough forms. Turn the dough onto a floured surface and knead it for about five minutes until it feels smooth and elastic. For a time-saving tip, use your stand mixer with a dough hook to handle the kneading for you. Subsequently, place the dough in a greased bowl, cover it, and let it rise in a warm spot until it doubles in size, which typically takes about an hour. Meanwhile, prepare the flavorful filling by mixing soft butter with minced garlic, fresh rosemary, and a pinch of salt. Once the dough has risen, roll it out into a rectangle and evenly spread the garlic-herb butter all over the surface. Then, cut the dough into small squares, stack them into a loaf pan, and let it rise again. Finally, bake your beautiful Rosemary Garlic Pull Apart Bread | Sally’s Baking Addiction until it turns golden brown and your kitchen smells incredible.
Mistakes I’ve made and learned from
I have definitely made my share of mistakes with this recipe! Initially, I often used yeast that was too old, which resulted in a dense loaf that barely rose. Now, I always test my yeast in the warm liquid first to ensure it’s active and bubbly. Another common error was rushing the second rise; impatience led to less fluffy layers. I learned that giving the stacked dough ample time to puff up in the pan is non-negotiable for that perfect pull-apart texture. Furthermore, I once overhandled the dough squares, which made them tough. A lighter touch makes all the difference. For more guidance on working with yeast, check out my tips on successful yeast baking. Also, if you love this flavor profile, you must try my easy garlic rosemary focaccia for another herby, garlicky bread option.
Cultural Connection and Variations
Where this recipe comes from
While pull-apart bread feels like a modern party snack, its heart beats with the ancient rhythm of communal baking. The concept of sharing a loaf and tearing it with your hands is a tradition found across countless cultures. In Italy, bakers make focaccia, dimpling it and drenching it in olive oil and herbs. Meanwhile, in Morocco, families prepare msemen, a flaky, layered flatbread perfect for scooping up meals. This style of eating fosters connection, so it turns a simple meal into a shared experience. The specific magic of Rosemary Garlic Pull Apart Bread | Sally’s Baking Addiction taps directly into that universal desire for warmth and togetherness.
Many families have their own version, often passing it down through generations. A grandmother might use a simple biscuit dough, while another cook may swear by a rich, egg-enriched brioche as the base. The constants are the fragrant, savory toppings and the joyous act of pulling off a steaming piece. Sally’s version celebrates this homestyle tradition because it focuses on accessible, reliable baking. The recipe for Rosemary Garlic Pull Apart Bread | Sally’s Baking Addiction honors that global history of breaking bread, while it gives home bakers a foolproof path to creating their own delicious memories.
How it fits in today’s cooking
This bread secures its place in modern cooking because it is incredibly versatile. It stars at holiday gatherings and seasonal feasts, sitting proudly next to a roast, but it is also simple enough for a weeknight pasta dinner. Home cooks love it for its interactive, fun nature, especially when they want to impress guests without complicated techniques. Furthermore, its make-ahead potential fits perfectly with today’s busy schedules, as you can prepare the dough the night before.
Modern adaptations are endless, so you can easily customize it to your taste. Some cooks reimagine it with everything bagel seasoning or a spicy jalapeño and cheddar twist for a different kick. For a richer, cheesier experience, you might even use it as a delicious companion to a creamy tomato soup. Others might fold in cooked, crumbled bacon or swap the rosemary for fresh dill. It remains a beloved classic, yet it also serves as a fantastic blank canvas for culinary creativity, especially when paired with other comfort foods like our ultimate mac and cheese.
Taste and Texture
What makes it delicious
This Rosemary Garlic Pull Apart Bread | Sally’s Baking Addiction delivers an incredible sensory experience from the very first moment it leaves the oven. You are immediately greeted by the warm, woodsy aroma of fresh rosemary, which beautifully mingles with the pungent, savory scent of roasted garlic. Each tender, fluffy square is soft and airy on the inside, while the exterior edges bake up with a satisfying, golden crispness. When you pull a piece apart, the rich, melted butter creates a slightly chewy texture on the outside of each morsel. The flavor is a perfect harmony because the earthy, pine-like rosemary cuts through the richness, while the garlic provides a deep, mellow savoriness without being overpowering. Every bite of this Rosemary Garlic Pull Apart Bread | Sally’s Baking Addiction is a masterclass in comforting flavors and contrasting textures, so it becomes utterly irresistible and impossible to stop eating.
Boosting the flavor
You can easily boost the flavor of this incredible bread with a few simple tweaks. Consider adding a half cup of finely grated parmesan cheese to the butter mixture for a salty, umami kick that melts beautifully between the layers. For a bit of heat, a pinch of red pepper flakes or a sprinkle of everything bagel seasoning on top before baking adds a wonderful new dimension. Although the bread is fantastic on its own, serving it with a side of warm marinara sauce for dipping transforms it into a truly shareable appetizer. If you have extra fresh herbs, folding some chopped thyme or a little parsley into the butter blend will enhance its garden-fresh fragrance. This bread also pairs wonderfully with a cozy soup, so consider serving it alongside a bowl of creamy tomato basil soup for the ultimate comfort food experience.

Tips for Success
Best practices for results
Always use fresh rosemary and garlic for the most vibrant flavor in your Rosemary Garlic Pull Apart Bread | Sally’s Baking Addiction. Furthermore, ensure your milk and eggs are at room temperature because this allows the yeast to activate properly and creates a more uniform, tender crumb. You must also generously butter the bundt pan, so the baked bread releases cleanly and easily for a beautiful presentation. Although the dough is rich, do not skip the step of brushing the melted garlic butter between the layers as this is essential for the signature pull-apart texture and flavor infusion.
Mistakes to avoid
A common error is using yeast that is too old or hot liquid which can kill the yeast, so always proof it in warm liquid to ensure it’s active and foamy before proceeding with your Rosemary Garlic Pull Apart Bread | Sally’s Baking Addiction. Another frequent mistake is not allowing the dough to rise in a warm, draft-free spot, even though this patience is crucial for a light and airy final product. If you find your dough isn’t doubling in size, our guide on troubleshooting yeast dough offers excellent solutions. Finally, avoid overbaking the bread, as this will dry it out; instead, rely on a visual golden-brown color and a hollow sound when tapped, much like the perfect crust you achieve with our classic dinner rolls.
Serving and Pairing Suggestions
How to serve this dish
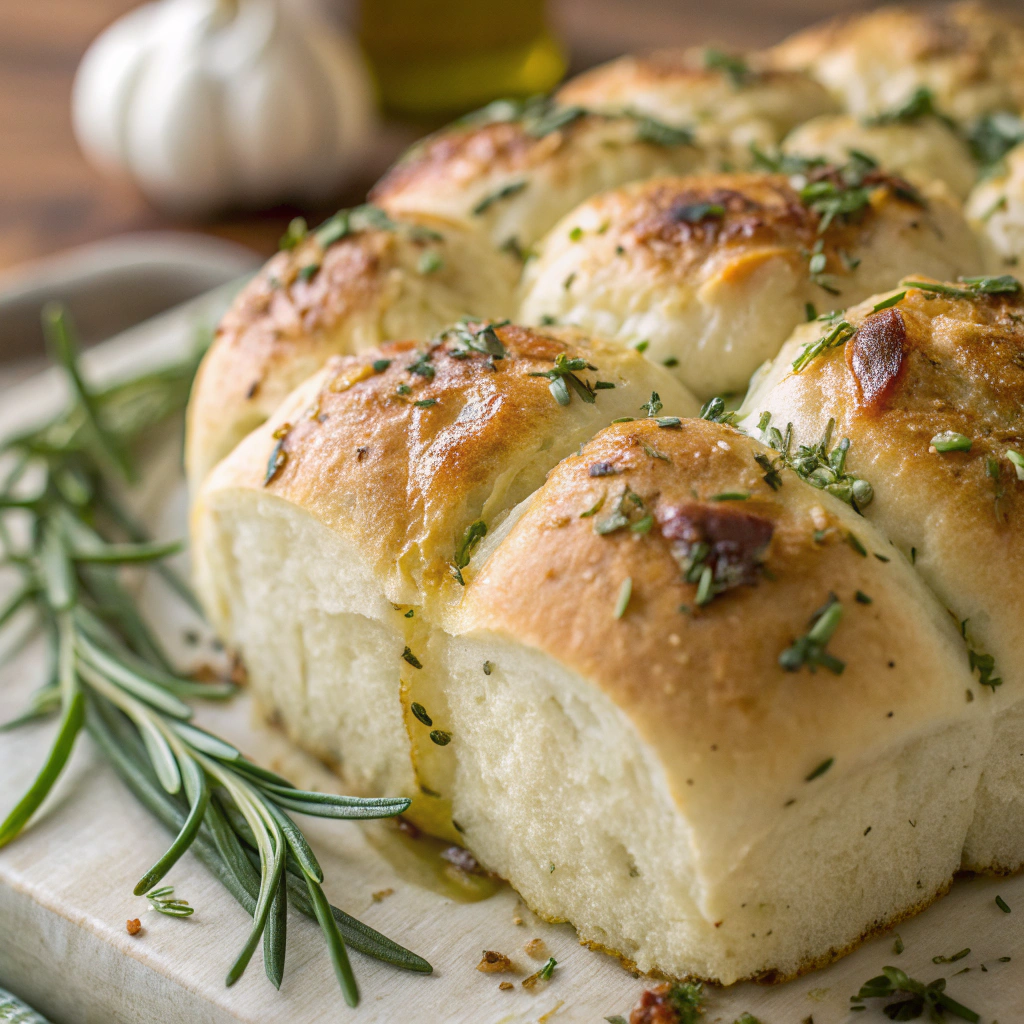
For a truly show-stopping presentation, serve your Rosemary Garlic Pull Apart Bread | Sally’s Baking Addiction right in the skillet it was baked in. Consequently, this rustic approach keeps the bread wonderfully warm and creates a beautiful, communal centerpiece for your table. Furthermore, place a small bowl of high-quality olive oil or a ramekin of flaky sea salt on the side for an extra touch of gourmet dipping.
This aromatic bread is incredibly versatile for any gathering. For instance, it’s perfect for holiday feasts, weekend brunches, or even a casual family dinner. Ultimately, tear off a steaming piece and watch everyone gather around. You can also garnish the top with a few fresh rosemary sprigs for a vibrant, fragrant, and visually appealing finish.
What goes well with it
A rich, creamy soup makes an ideal partner for this savory bread. Specifically, the soft, garlicky layers are perfect for dipping into a warm bowl of our creamy roasted tomato soup. This combination creates a comforting and utterly satisfying meal, especially on a cool evening.
For a heartier dinner option, pair this bread with a robust main course. In fact, it soaks up sauces and juices beautifully, making it the ultimate side for our classic herb-roasted chicken. The herbal notes in both dishes complement each other magnificently, elevating the entire dining experience.
Finally, don’t forget about beverages. A crisp, chilled glass of Sauvignon Blanc or a light pale ale cuts through the rich garlic butter notes perfectly. Alternatively, a sparkling water with lemon makes a refreshing non-alcoholic option that cleanses the palate between each delicious, buttery bite.
You make pull apart bread from scratch by preparing a simple yeast dough, rolling it into small balls, and layering those balls in a pan with a flavorful filling between each piece. For this specific recipe, you coat each dough ball in a rich mixture of melted butter, fresh rosemary, and minced garlic before baking it into the delicious Rosemary Garlic Pull Apart Bread | Sally’s Baking Addiction.
The best way to reheat pull apart bread is in a preheated 350°F (177°C) oven for about 10 minutes, or until it’s warm throughout. This method helps restore its crispy exterior and soft, fluffy interior without making it tough or chewy, which can happen in the microwave.
Yes, you can use dried rosemary instead of fresh. However, because dried herbs are more potent, use only one-third of the amount called for fresh. For the best flavor in your Rosemary Garlic Pull Apart Bread | Sally’s Baking Addiction, crushing the dried rosemary with your fingers before adding it will help release its oils.
Your pull apart bread might be doughy if it was underbaked or if the dough balls were packed too tightly in the pan, preventing heat from circulating properly. Always use a toothpick or instant-read thermometer to ensure the center is fully cooked and golden brown before removing it from the oven.


