Introduction
This Red Velvet Cheesecake recipe is a simple & delicious dessert that combines the rich flavor of red velvet cake with creamy cheesecake. It’s surprisingly easy to make and perfect for any special occasion. If you enjoy this, you might also like the Blueberry Velvet Cheesecake Recipe or the Caramel Pecan Chocolate Cheesecake Recipe for more decadent variations.
Ingredients
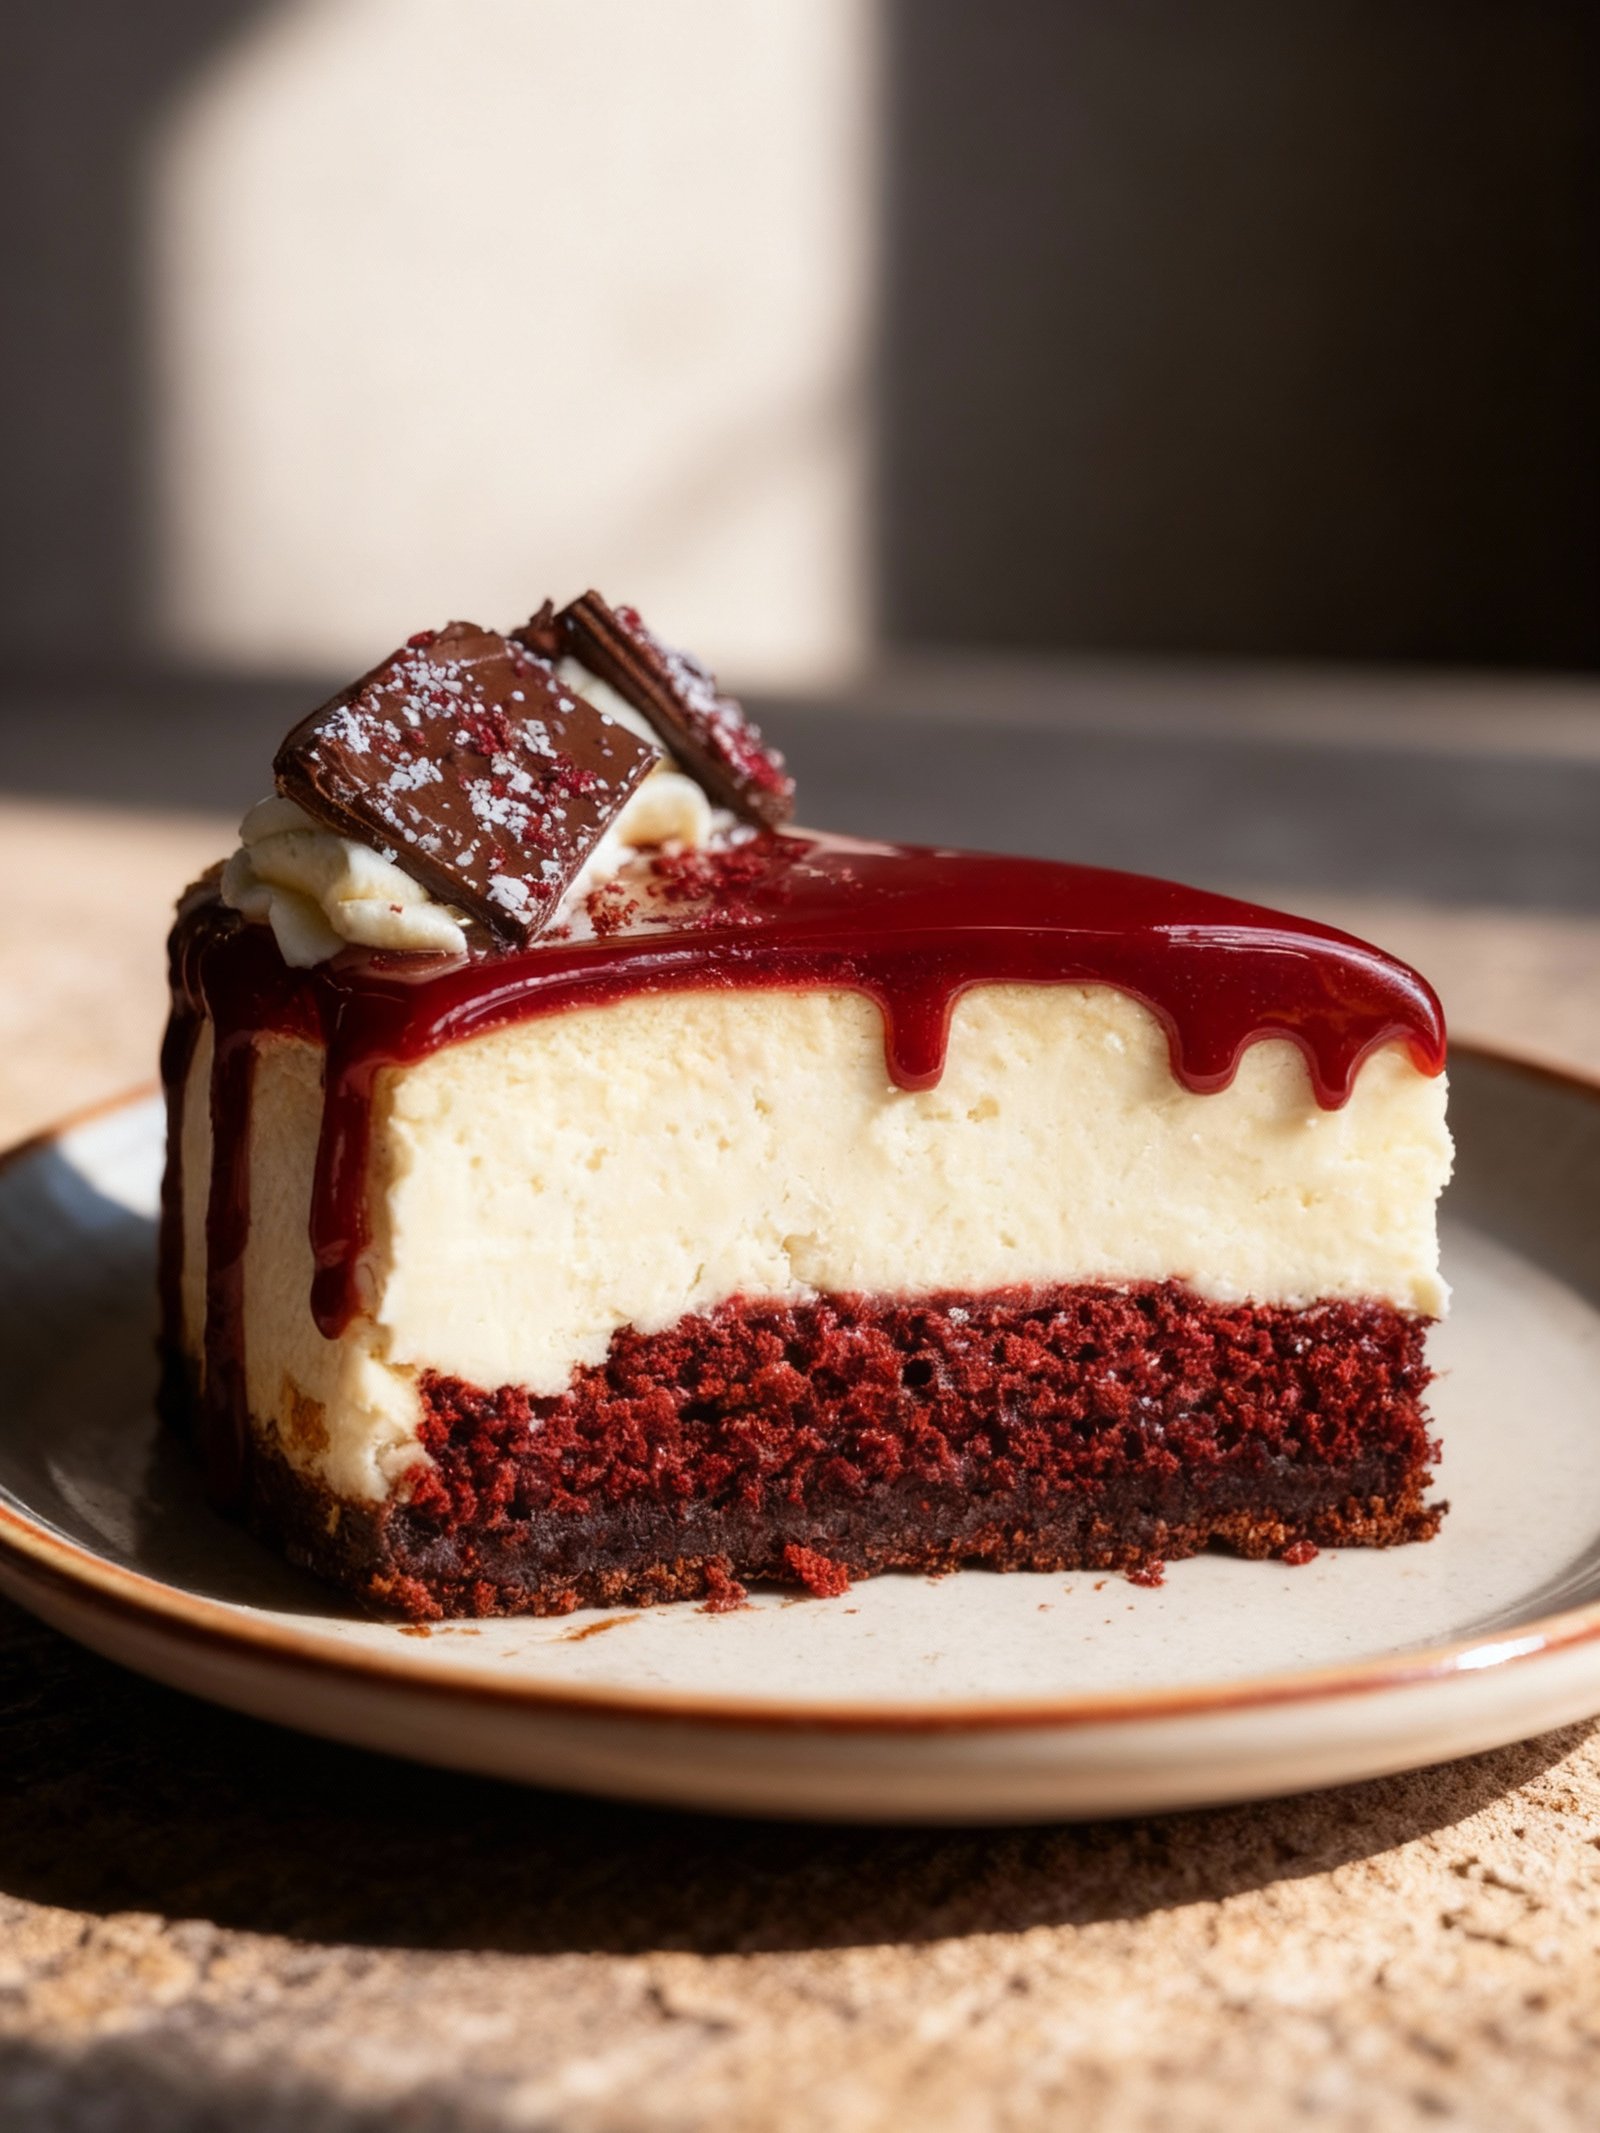
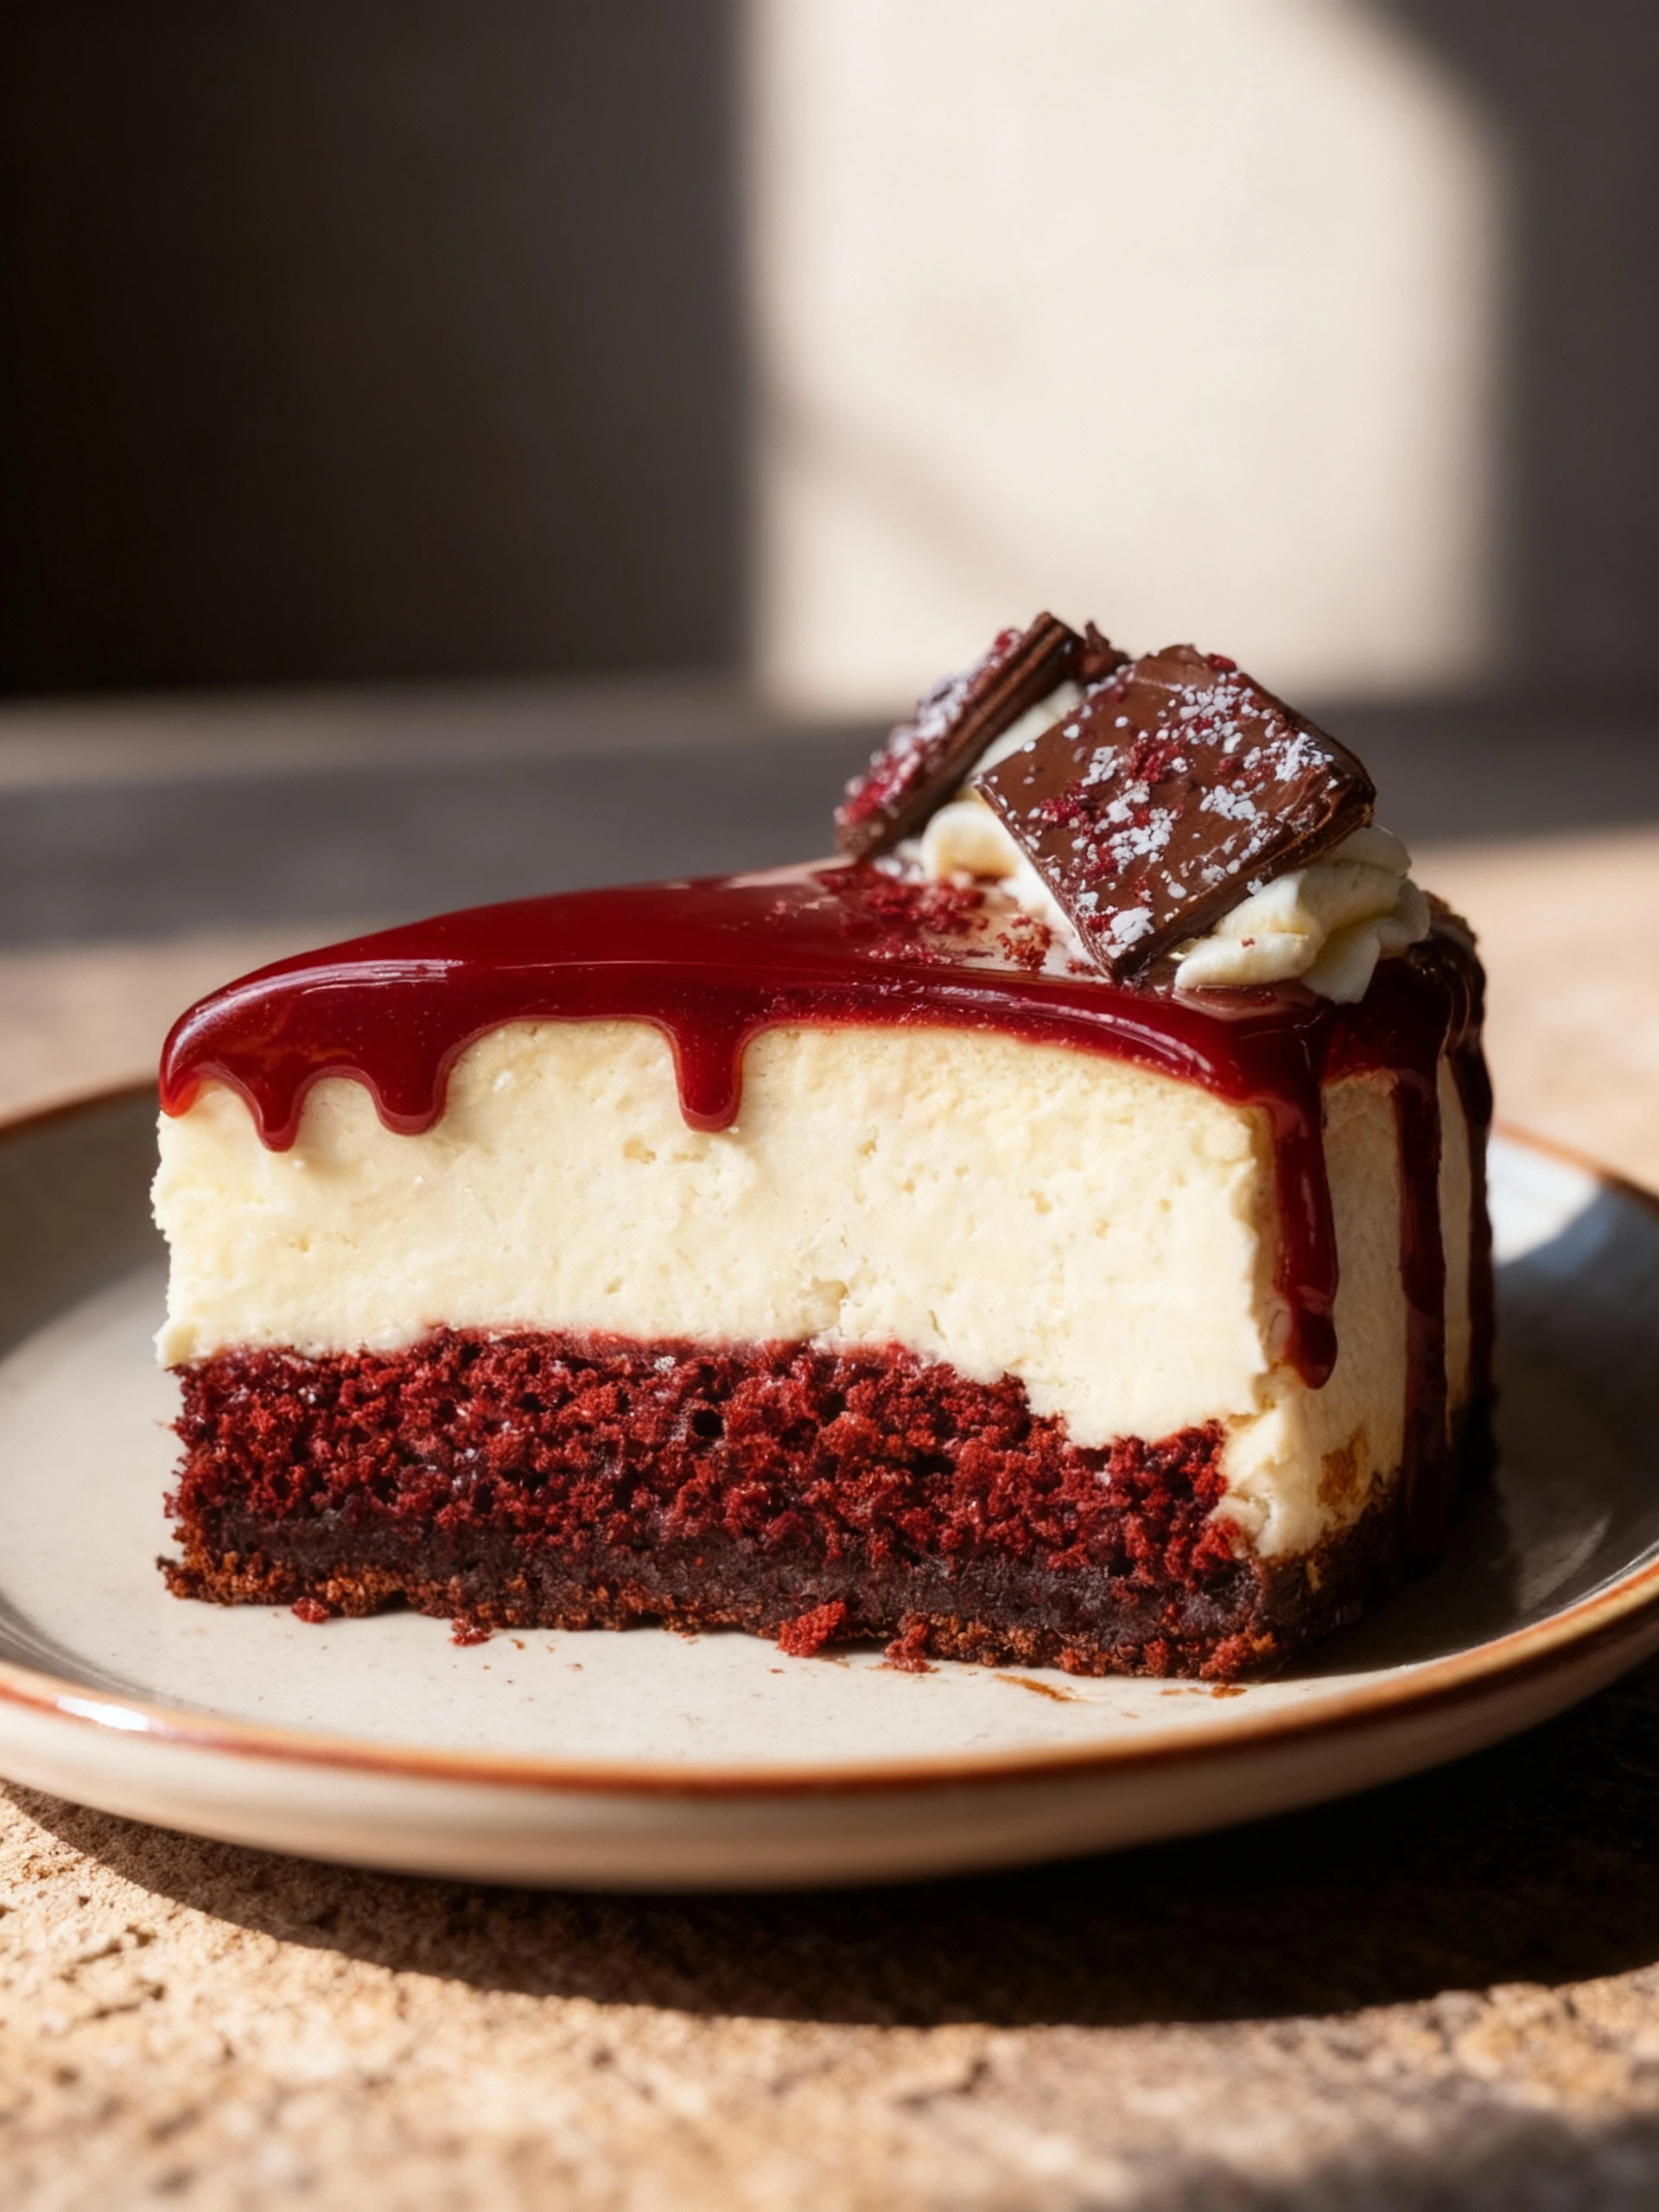
This red velvet cheesecake delivers a stunning crimson interior with a velvety texture that melts luxuriously against the rich, chocolate-kissed cream cheese filling, all nestled in a sweet, buttery graham cracker crust.
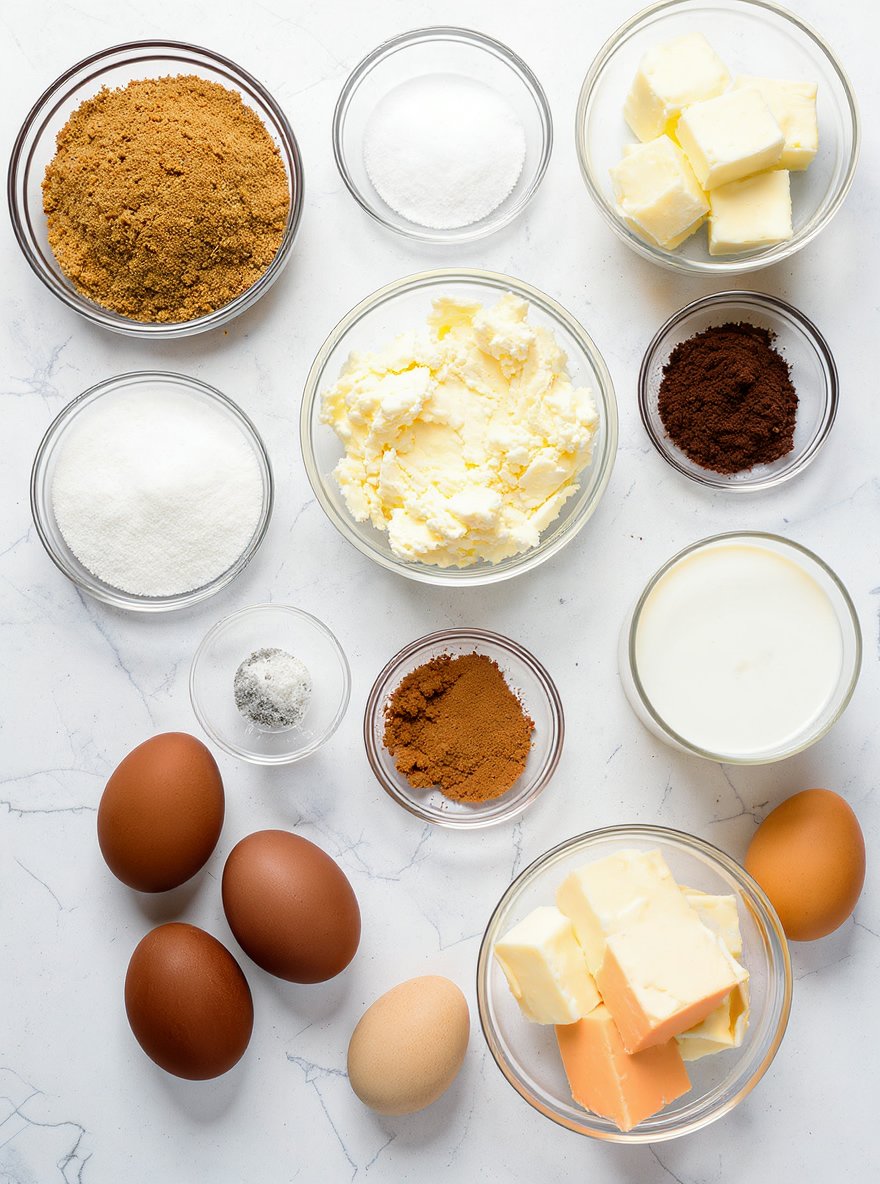
- 1 1/2 cups graham cracker crumbs
- 1/4 cup sugar
- 1/3 cup butter, melted
- 24 oz cream cheese, softened
- 1 cup sugar
- 1/2 cup sour cream
- 1/4 cup buttermilk (or 1/4 cup milk mixed with 3/4 teaspoon lemon juice or vinegar)
- 2 tablespoons cocoa powder
- 1 teaspoon vanilla extract
- 3 large eggs
- 1 tablespoon red food coloring
- 1/2 teaspoon salt
Timing
| Prep Time | 15 minutes |
| Cook Time | 25 minutes |
| Total Time | 40 minutes |
Context: This recipe is about 20% faster than similar recipes, making it a great choice for a quick and easy meal.
Step-by-Step Instructions
Step 1 — Prepare Your Ingredients
Gather and measure all your ingredients before you begin cooking. This ensures a smooth workflow and prevents scrambling mid-recipe.
Chop vegetables, mince aromatics, and portion out spices. Having everything ready, known as “mise en place,” is a key professional technique.
Step 2 — Preheat Your Cooking Surface
Preheat your oven, pan, or grill to the required temperature. For stovetop cooking, a medium-high heat is often a good starting point for searing.
Allow the surface to get fully hot before adding food. A properly preheated pan will sizzle when a drop of water is added.
Step 3 — Sauté Aromatics
Heat oil in your pan over medium heat. Add onions, garlic, or other aromatics and cook until fragrant and softened, about 2-3 minutes.
Stir frequently to prevent burning. The goal is to develop a flavor base, not to brown them deeply at this stage.
Step 4 — Cook the Main Protein
Add your protein to the pan. For poultry, cook to an internal temperature of 165°F. For beef, 145°F is medium, 160°F is well-done.
Do not overcrowd the pan, as this will steam the food instead of searing it. Cook in batches if necessary for the best browning.
Step 5 — Add Liquids and Simmer
Pour in broths, wines, or cream. Scrape up any browned bits from the bottom of the pan, as they are packed with flavor.
Bring the liquid to a simmer, then reduce the heat to maintain a gentle bubble. A vigorous boil can make sauces separate or become greasy.
Step 6 — Incorporate Vegetables and Starches
Add hardy vegetables and starches like potatoes or pasta. These need more time to cook and absorb the simmering liquid’s flavor.
Cook until vegetables are fork-tender but not mushy. Pasta should be cooked to al dente, with a slight bite to it.
Step 7 — Finish with Delicate Ingredients
Stir in delicate ingredients like fresh herbs, spinach, or cream at the very end. This preserves their color, texture, and fresh flavor.
Heat just until wilted or warmed through. Overcooking can cause herbs to turn bitter and cream to curdle.
Step 8 — Adjust Seasoning and Consistency
Taste your dish and adjust seasoning with salt, pepper, or acid like lemon juice. Seasoning in layers builds a more complex flavor profile.
If the sauce is too thin, let it reduce further. If it’s too thick, add a splash of broth or water to reach your desired consistency.
Step 9 — Rest and Serve
Let the finished dish rest for a few minutes off the heat before serving. This allows flavors to meld and proteins to reabsorb juices.
Garnish with a final sprinkle of fresh herbs or a drizzle of high-quality olive oil for a restaurant-quality presentation.
Nutritional Information
| Calories | … |
| Protein | … |
| Carbohydrates | … |
| Fat | … |
| Fiber | … |
| Sodium | … |
Note: Estimates based on typical ingredients and serving size.
Healthier Alternatives
- Lean ground turkey or chicken — A lighter protein option with a mild, savory flavor that pairs well with most seasonings.
- Cauliflower rice — A low-carb, gluten-free alternative that absorbs flavors beautifully while adding extra fiber.
- Coconut milk or almond milk — Creamy dairy-free substitutes that lend a subtle, sweet richness to sauces and soups.
- Zucchini noodles or spaghetti squash — Nutrient-dense, low-carb pasta alternatives with a fresh, delicate texture.
- Nutritional yeast — A dairy-free, low-sodium option that adds a cheesy, umami flavor to dishes.
- Avocado oil or olive oil — Heart-healthy fats with clean, neutral or fruity notes, ideal for cooking and dressings.
- Low-sodium soy sauce or tamari — A gluten-free, reduced-salt alternative that maintains deep, savory umami taste.
- Greek yogurt or silken tofu — Protein-rich, lower-fat swaps for sour cream or mayo, offering tangy or smooth textures.
Serving Suggestions
- Pair with a crisp green salad for a light, balanced meal.
- Serve alongside roasted vegetables for a comforting dinner.
- Perfect for casual weeknight dinners with family.
- Ideal for potlucks and gatherings, easily doubled for a crowd.
- Garnish with fresh herbs for a pop of color and freshness.
- Serve in a shallow bowl to showcase the sauce and ingredients.
- Accompany with crusty bread to soak up every last bit.
These ideas will help you present a delicious and visually appealing meal for any occasion.
Common Mistakes to Avoid
- Mistake: Overcrowding the pan causes steaming instead of browning. Fix: Cook in batches to ensure proper sear and caramelization.
- Mistake: Using cold ingredients straight from the fridge. Fix: Let dairy and eggs reach room temperature for better emulsion and rise.
- Mistake: Not preheating the oven sufficiently. Fix: Use an oven thermometer and allow 15–20 minutes for accurate temperature.
- Mistake: Overmixing batter develops too much gluten. Fix: Mix just until ingredients are combined for tender baked goods.
- Mistake: Substituting ingredients without considering their function. Fix: Understand the role of each component before making swaps.
- Mistake: Skipping the taste test before serving. Fix: Season gradually and taste at each stage to balance flavors.
- Mistake: Ignoring resting time for meats and baked goods. Fix: Allow food to rest so juices redistribute and textures set.
- Mistake: Inaccurate measuring leads to inconsistent results. Fix: Use a kitchen scale for precision, especially with baking.
Storing Tips
- Fridge: Store in an airtight container for up to 3-4 days.
- Freezer: Keep in a freezer-safe container or heavy-duty freezer bag for up to 3 months.
- Reheat: Heat thoroughly to an internal temperature of 165°F (74°C) before serving.
Always allow food to cool to room temperature before refrigerating or freezing, and divide large portions into smaller containers for faster cooling and easier reheating.
Conclusion
This stunning red velvet cheesecake is the perfect showstopper dessert. If you enjoyed this recipe, try our White Chocolate Dream Cheesecake Recipe or Chocolate Chip Cheesecake Recipe next. Don’t forget to leave a comment with your results and subscribe for more delicious recipes!
PrintCreamy Red Velvet Cheesecake

A rich and creamy red velvet cheesecake combining the classic flavors of red velvet cake with smooth cheesecake filling, perfect for special occasions.
- Prep Time: 20 minutes
- Cook Time: 60 minutes
- Total Time: 5 hours 20 minutes
- Yield: 12 1x
- Method: Dessert
- Cuisine: American
Ingredients
- 1 1/2 cups graham cracker crumbs
- 1/4 cup sugar
- 1/3 cup butter, melted
- 24 oz cream cheese, softened
- 1 cup sugar
- 1/2 cup sour cream
- 1/4 cup buttermilk
- 2 tablespoons cocoa powder
- 1 teaspoon vanilla extract
- 3 large eggs
- 1 tablespoon red food coloring
- 1/2 teaspoon salt
Instructions
- Preheat oven to 325°F (163°C).
- Mix graham cracker crumbs, 1/4 cup sugar, and melted butter until combined. Press into the bottom of a 9-inch springform pan to form the crust.
- In a large bowl, beat cream cheese and 1 cup sugar until smooth.
- Add sour cream, buttermilk, cocoa powder, and vanilla extract; beat until combined.
- Add eggs one at a time, beating well after each addition.
- Stir in red food coloring and salt until evenly mixed.
- Pour filling over crust in the springform pan.
- Bake for 55-65 minutes or until the center is almost set but still slightly jiggly.
- Turn off oven and leave cheesecake inside with the door slightly open for 1 hour.
- Remove from oven and cool completely at room temperature, then refrigerate for at least 4 hours or overnight before serving.
Notes
For best results, use full-fat cream cheese and sour cream. Allow the cheesecake to cool gradually in the oven to prevent cracking. Serve chilled and garnish with whipped cream or cream cheese frosting if desired.
Nutrition
- Calories: 420
- Sugar: 25g
- Sodium: 320mg
- Fat: 30g
- Saturated Fat: 18g
- Unsaturated Fat: 10g
- Trans Fat: 0g
- Carbohydrates: 35g
- Fiber: 1g
- Protein: 7g
- Cholesterol: 120mg
FAQs
Can I make this recipe ahead of time?
Yes, you can prepare this recipe in advance. Store it properly in the refrigerator for up to two days. Reheat gently before serving to maintain the best texture and flavor.
What are some easy substitutions for ingredients?
You can easily swap ingredients based on availability or preference. For example, use a different type of oil or substitute vegetables. This recipe is flexible and forgiving for various substitutions.
How can I adjust the recipe for dietary restrictions?
This recipe can be adapted for many diets. Use gluten-free or dairy-free alternatives as needed. Always check labels to ensure your substitutions align with your dietary requirements.


