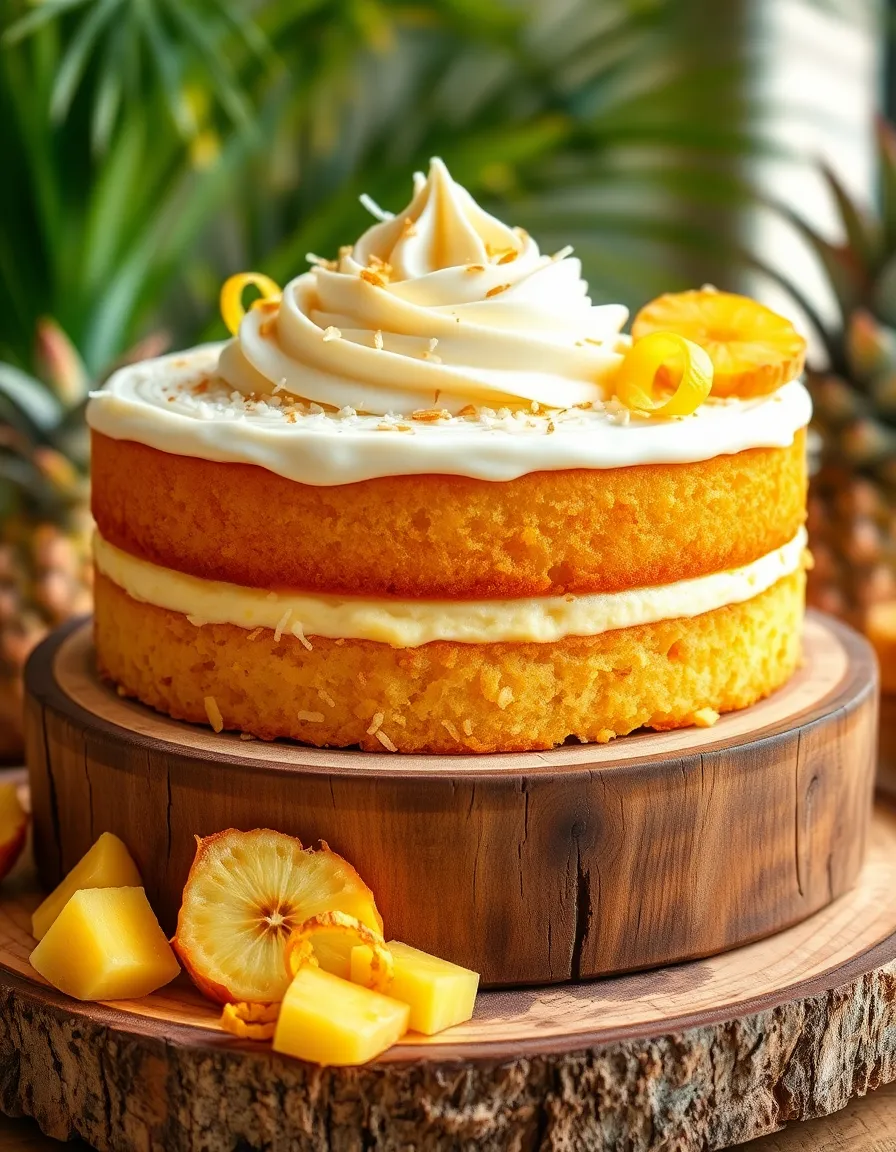
There’s something about the golden sweetness of pineapple that feels like a sunbeam in cake form. I first fell in love with this Pineapple Heaven Cake at a potluck years ago—one bite transported me to a tropical getaway, right there at a folding table in my neighbor’s backyard. Now, it’s my go-to dessert when I want to wrap friends in a little edible sunshine. The tender crumb, the caramelized pineapple topping… pure bliss.
Ingredients You’ll Need
- 1 fresh pineapple (or 2 cups canned in juice, drained)—because that bright, tangy flavor is the star!
- 1 ½ cups all-purpose flour—spooned and leveled for the perfect lightness
- ¾ cup granulated sugar—just enough to let the pineapple shine
- ½ cup unsalted butter, melted (plus extra for greasing)—richness with a golden touch
- 2 large eggs—room temperature for that dreamy, airy texture
- ½ cup whole milk—the secret to a moist crumb (buttermilk works too!)
- 1 tsp vanilla extract—a warm hug for all the flavors
- 1 ½ tsp baking powder + ¼ tsp salt—the unsung heroes of lift and balance
Let’s Bake Some Sunshine
- Prep your pineapple: If using fresh, peel, core, and slice into thin rings (about ¼-inch thick). Pat dry—this helps prevent a soggy cake. For canned, simply drain well.
- Butter up: Generously grease a 9-inch round cake pan. Arrange pineapple slices in a single layer at the bottom—get creative with a floral pattern!
- Whisk the dry goods: In a bowl, sift together flour, baking powder, and salt. Sifting = lighter cake, I promise.
- Mix the wet ingredients: In another bowl, whisk melted butter and sugar until glossy. Add eggs one at a time, then vanilla. Alternate adding dry ingredients and milk, mixing just until combined—overmixing is the enemy of fluffiness.
- Bake with love: Pour batter over pineapple slices. Bake at 350°F for 35-40 minutes, until a toothpick comes out clean. Let cool 10 minutes before inverting onto a plate—that caramelized pineapple top will take your breath away!
Tip: Run a knife around the edges before flipping to ensure your cake releases cleanly. And don’t skip the cooling step—patience rewards you with intact pineapple perfection!
Pro Tips, Variations, and Substitutions
Making Pineapple Heaven Cake is a breeze, but a few pro tips can take it to the next level:
- Use fresh pineapple for the best flavor, but canned pineapple (drained well) works in a pinch.
- Toast the coconut flakes lightly before sprinkling for an extra layer of nutty sweetness.
- Swap the whipped cream for a stabilized version (with a bit of gelatin or cream cheese) if you need the cake to hold up longer.
- Add a splash of rum to the pineapple mixture for a tropical twist—just a teaspoon or two will do!
What to Serve With Pineapple Heaven Cake
This cake is a showstopper on its own, but pairing it with the right accompaniments makes it even more heavenly:
- A scoop of vanilla bean ice cream melts beautifully into the warm cake.
- Fresh berries or mango slices add a bright contrast to the rich flavors.
- A drizzle of caramel sauce or a dusting of powdered sugar makes it extra indulgent.
- A cup of hot tea or coffee balances the sweetness perfectly.
Storage and Reheating Tips
Pineapple Heaven Cake is best enjoyed fresh, but here’s how to keep it tasting great:
- Store leftovers in an airtight container in the fridge for up to 3 days.
- Freeze individual slices wrapped tightly in plastic wrap for up to a month. Thaw in the fridge before serving.
- Reheat gently in the microwave for 10–15 seconds to bring back that just-baked warmth.
Frequently Asked Questions
Can I make this cake gluten-free?
Absolutely! Substitute the all-purpose flour with a gluten-free baking blend (1:1 ratio) for a delicious gluten-free version.
Can I use frozen pineapple?
Yes, but thaw and drain it thoroughly to avoid excess moisture in the cake.
How do I prevent the cake from getting soggy?
Make sure your pineapple is well-drained, and avoid overmixing the batter. A light hand keeps the texture perfect.
Can I make this cake ahead of time?
You can bake the cake a day in advance, but wait to add the whipped cream topping until just before serving for the best texture.
A Sweet Final Thought
There’s something magical about the combination of pineapple, coconut, and fluffy cake that makes every bite feel like a tropical getaway. Whether you’re serving it at a summer gathering or just treating yourself to a little slice of sunshine, Pineapple Heaven Cake is sure to bring smiles. So preheat that oven, gather your ingredients, and get ready to bake a little piece of paradise. Happy baking!
PrintPineapple Heaven Cake
A light and fluffy cake with layers of pineapple and whipped cream, perfect for any occasion.
Ingredients
For the Crust:
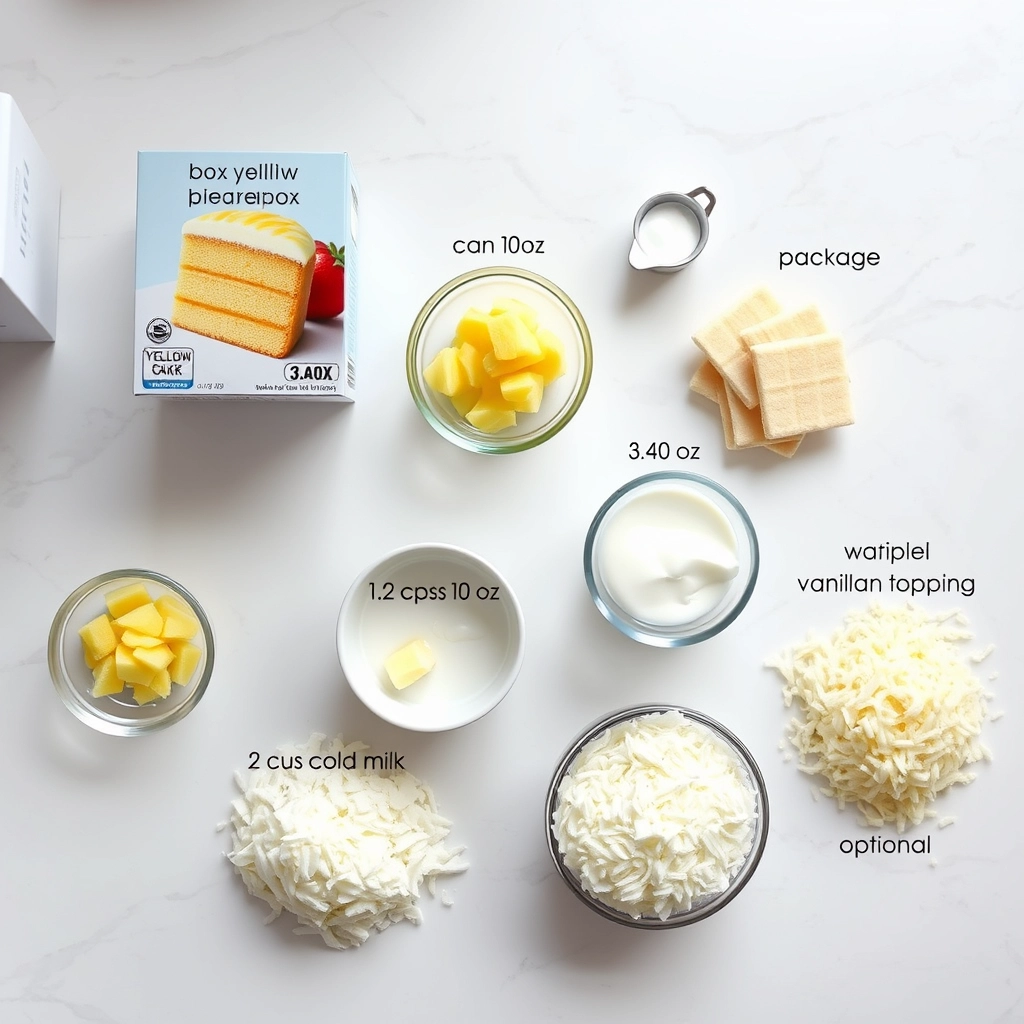
- 1 box yellow cake mix
- 1 can (20 oz) crushed pineapple, undrained
- 1 package (3.4 oz) instant vanilla pudding mix
- 2 cups cold milk
- 1 container (8 oz) whipped topping
- 1 cup shredded coconut (optional)
Instructions
1. Prepare the Crust:
- Prepare the yellow cake mix according to package instructions and bake in a 9×13-inch pan. Let cool completely.
- In a bowl, whisk together the vanilla pudding mix and cold milk until thickened. Fold in the whipped topping.
- Poke holes all over the cooled cake with a fork. Pour the undrained crushed pineapple evenly over the cake.
- Spread the pudding and whipped topping mixture over the pineapple layer. Sprinkle with shredded coconut if desired.
- Refrigerate for at least 2 hours before serving to allow flavors to meld.
Notes
You can customize the seasonings to taste.


