Introduction
Skip the oven and still enjoy all the cozy flavors of fall. This No Bake Pumpkin Cheesecake is sweet, creamy, and completely irresistible. It’s the perfect effortless dessert for autumn gatherings. If you love pumpkin spice, you might also enjoy this Pumpkin Spice Gooey Cake with Cream Cheese Frosting Recipe for another seasonal treat.
Ingredients
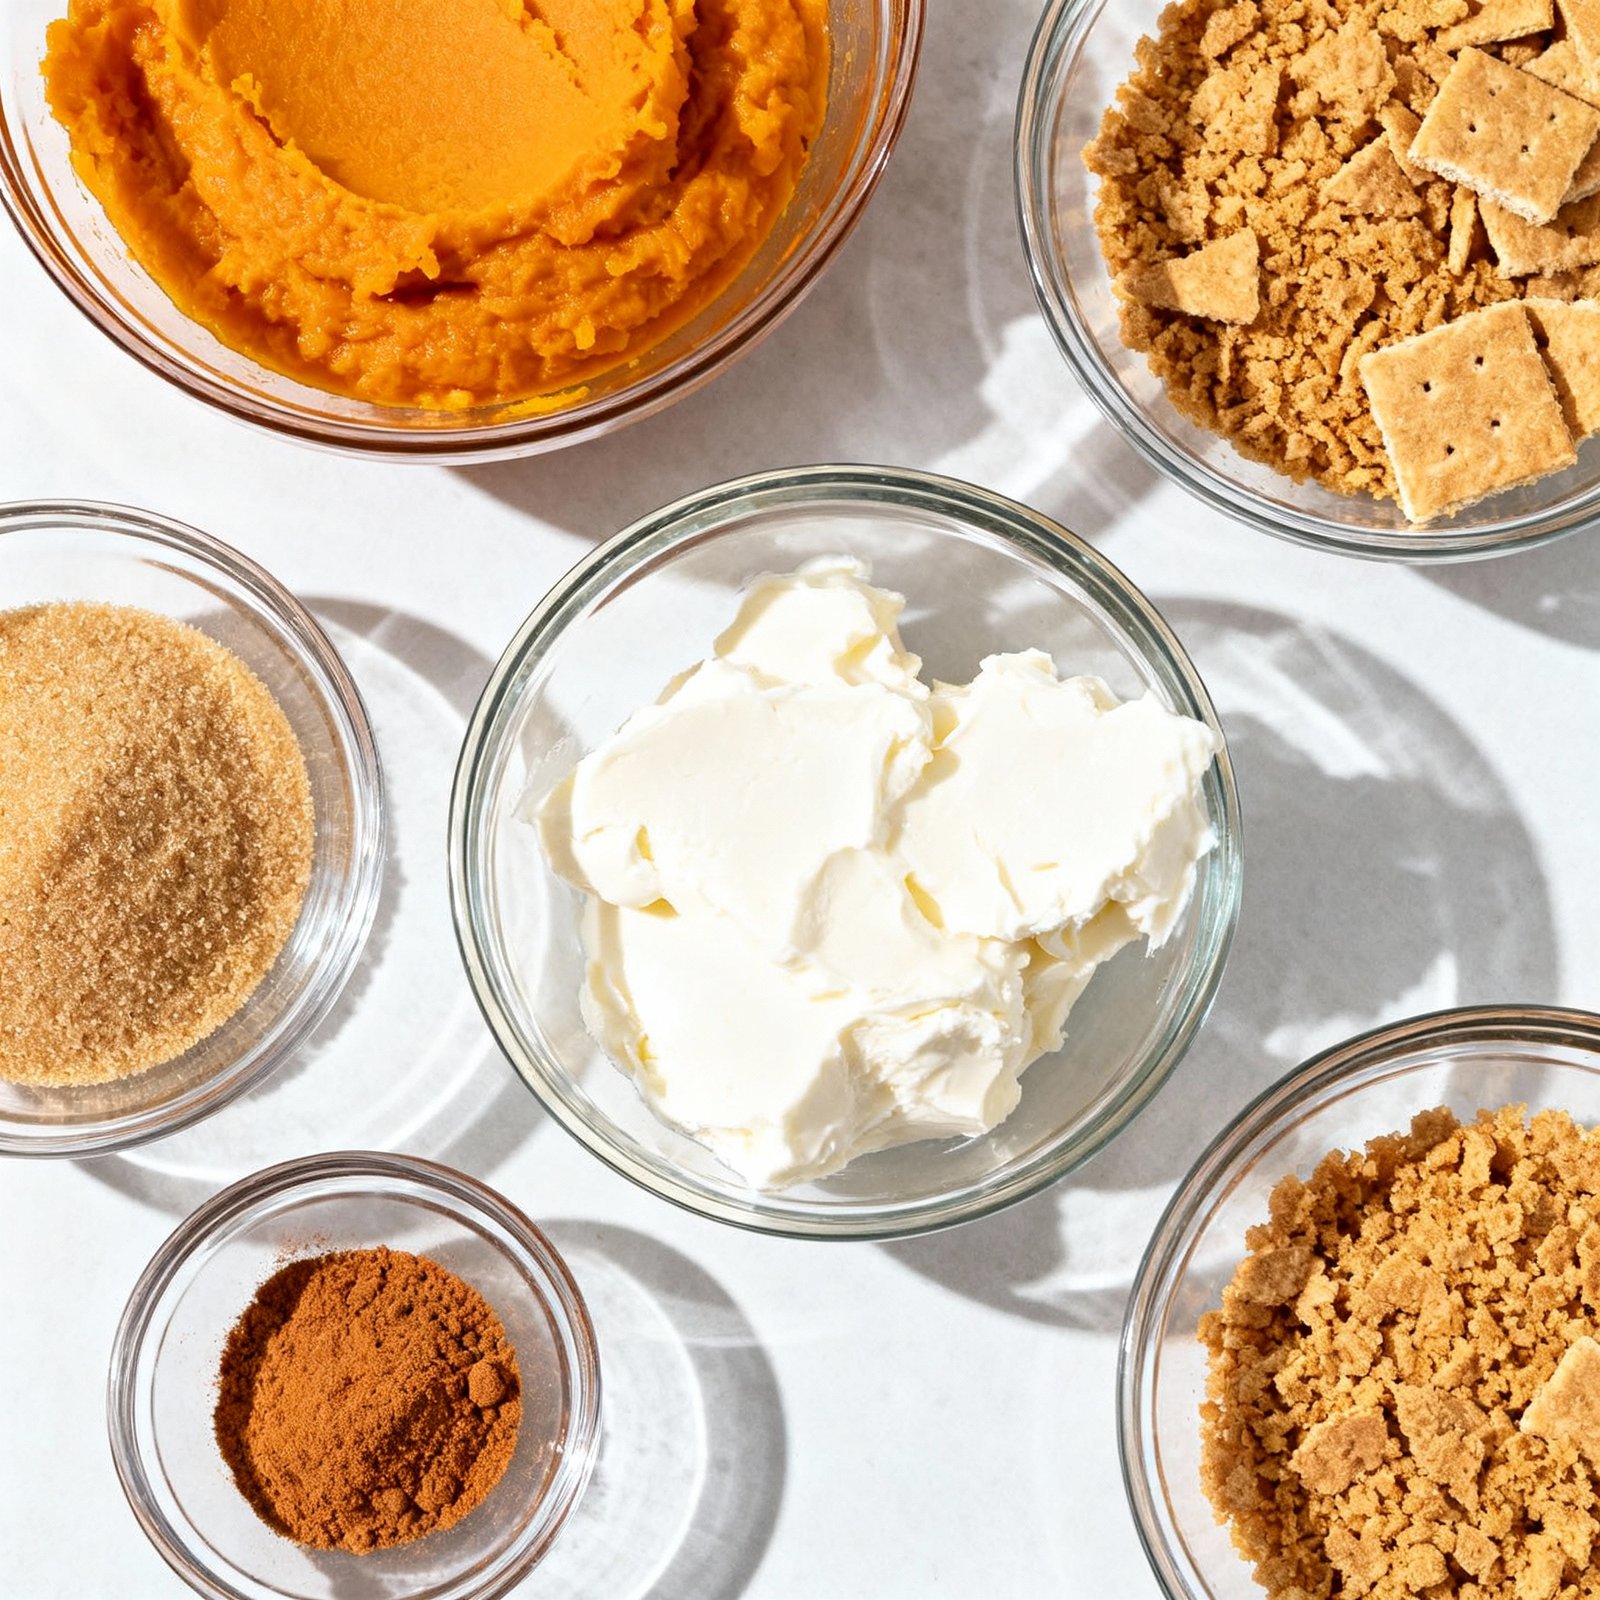
This no-bake pumpkin cheesecake comes together with a simple, cozy list of ingredients that deliver that classic sweet and creamy flavor without ever turning on the oven.
- 1 1/2 cups gingersnap cookie crumbs
- 6 tablespoons unsalted butter, melted
- 16 ounces cream cheese, softened
- 1 cup canned pumpkin puree
- 3/4 cup powdered sugar
- 1/4 cup brown sugar
- 1 teaspoon pumpkin pie spice
- 1/2 teaspoon ground cinnamon
- 1/2 teaspoon vanilla extract
- 1/4 teaspoon salt
- 1 cup heavy whipping cream
Timing
| Prep Time | 20 minutes |
| Cook Time | 0 minutes |
| Total Time | 4 hours 20 minutes (includes chilling) |
Context: This no-bake method is significantly faster than traditional baked pumpkin cheesecake recipes, which typically require over an hour of active baking and cooling time.
Step-by-Step Instructions
Step 1 — Prepare the Crust
Combine graham cracker crumbs, melted butter, and a pinch of sugar in a medium bowl. Mix until the crumbs are evenly moistened and the texture resembles wet sand.
Firmly press the mixture into the bottom and slightly up the sides of a 9-inch springform pan. Use the flat bottom of a measuring cup to create a compact, even layer. Chill the crust in the refrigerator for at least 15 minutes to set while you prepare the filling.
Step 2 — Soften the Cream Cheese
Take the cream cheese out of the refrigerator and let it sit at room temperature for about 30-45 minutes. It should be soft to the touch but still cool.
Using a block-style, full-fat cream cheese is key for the best texture. Softened cream cheese will blend smoothly without lumps, ensuring your no-bake pumpkin cheesecake is perfectly creamy.
Step 3 — Make the Filling Base
In a large mixing bowl, beat the softened cream cheese with an electric mixer on medium speed until it is completely smooth and fluffy. This should take about 2 minutes. Scrape down the sides of the bowl to ensure everything is incorporated.
Gradually add the powdered sugar and pumpkin pie spice, beating on low speed until just combined. Avoid overmixing at this stage to keep the filling light.
Step 4 — Incorporate the Pumpkin
Add the canned pumpkin puree and vanilla extract to the cream cheese mixture. Beat on low speed until the ingredients are fully combined and the color is uniform.
For the best flavor, use 100% pure pumpkin puree, not pumpkin pie filling. The filling should be thick and hold its shape when you lift the beaters.
Step 5 — Fold in the Whipped Topping
Gently fold the thawed whipped topping into the pumpkin mixture using a spatula. Use a folding motion to incorporate it without deflating the mixture, which keeps the cheesecake airy.
Ensure the whipped topping is fully thawed but still cold for the best results. The filling will be light and fluffy when properly combined.
Step 6 — Assemble the Cheesecake
Retrieve the chilled crust from the refrigerator. Pour the pumpkin cheesecake filling into the crust and spread it into an even layer with an offset spatula or the back of a spoon.
Tap the pan gently on the counter a few times to release any large air bubbles. This helps create a smooth top surface for your no-bake dessert.
Step 7 — Chill to Set
Cover the springform pan with plastic wrap or aluminum foil. Place the cheesecake in the refrigerator to chill and set for a minimum of 6 hours, though overnight is ideal for the best texture.
The cheesecake is properly set when the center is firm to a gentle touch and does not jiggle loosely. This slow chilling process is what allows you to skip the oven entirely.
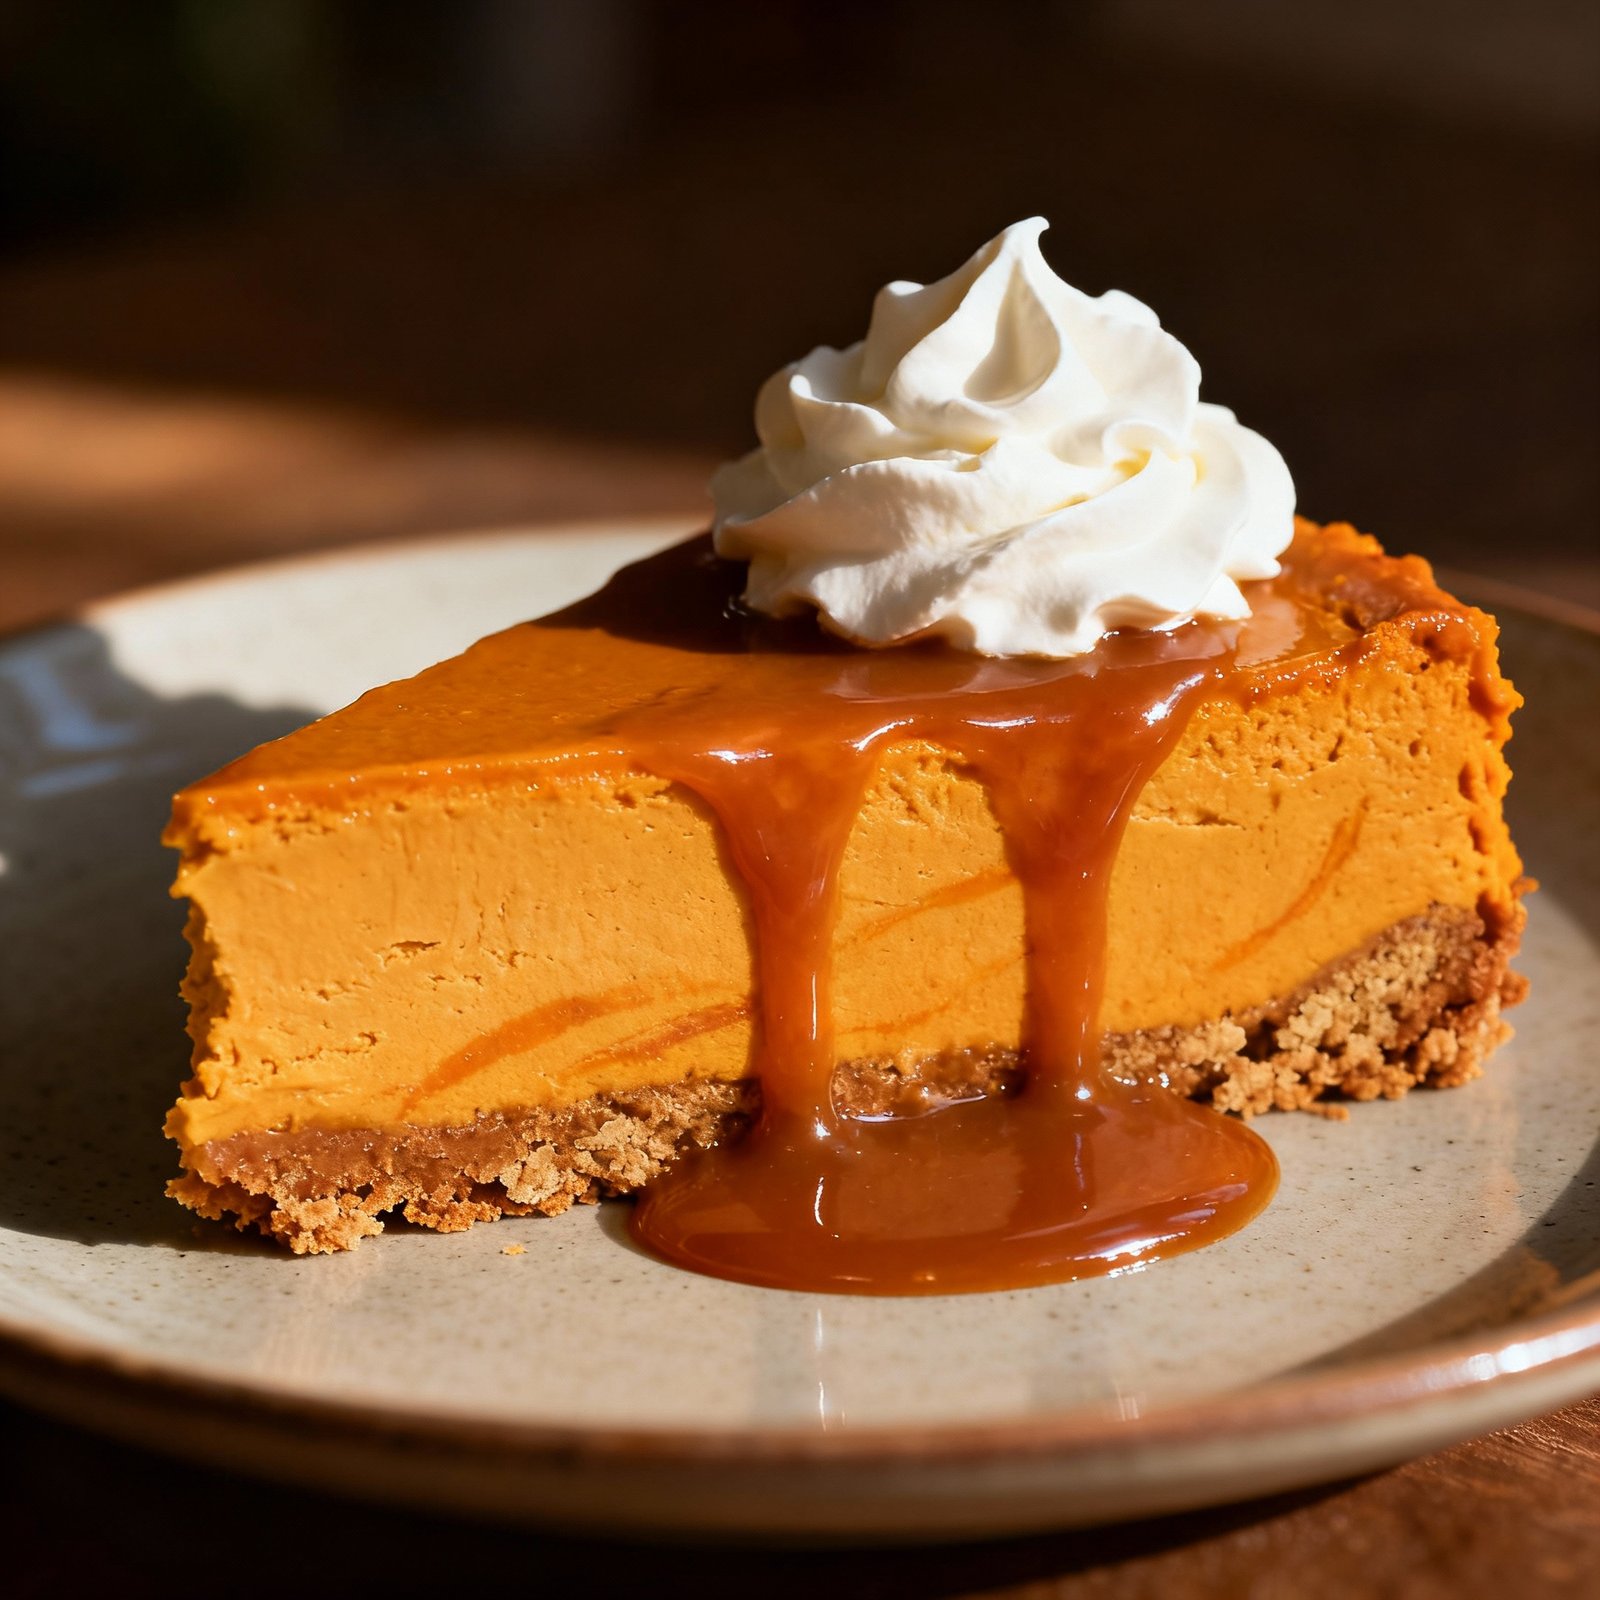
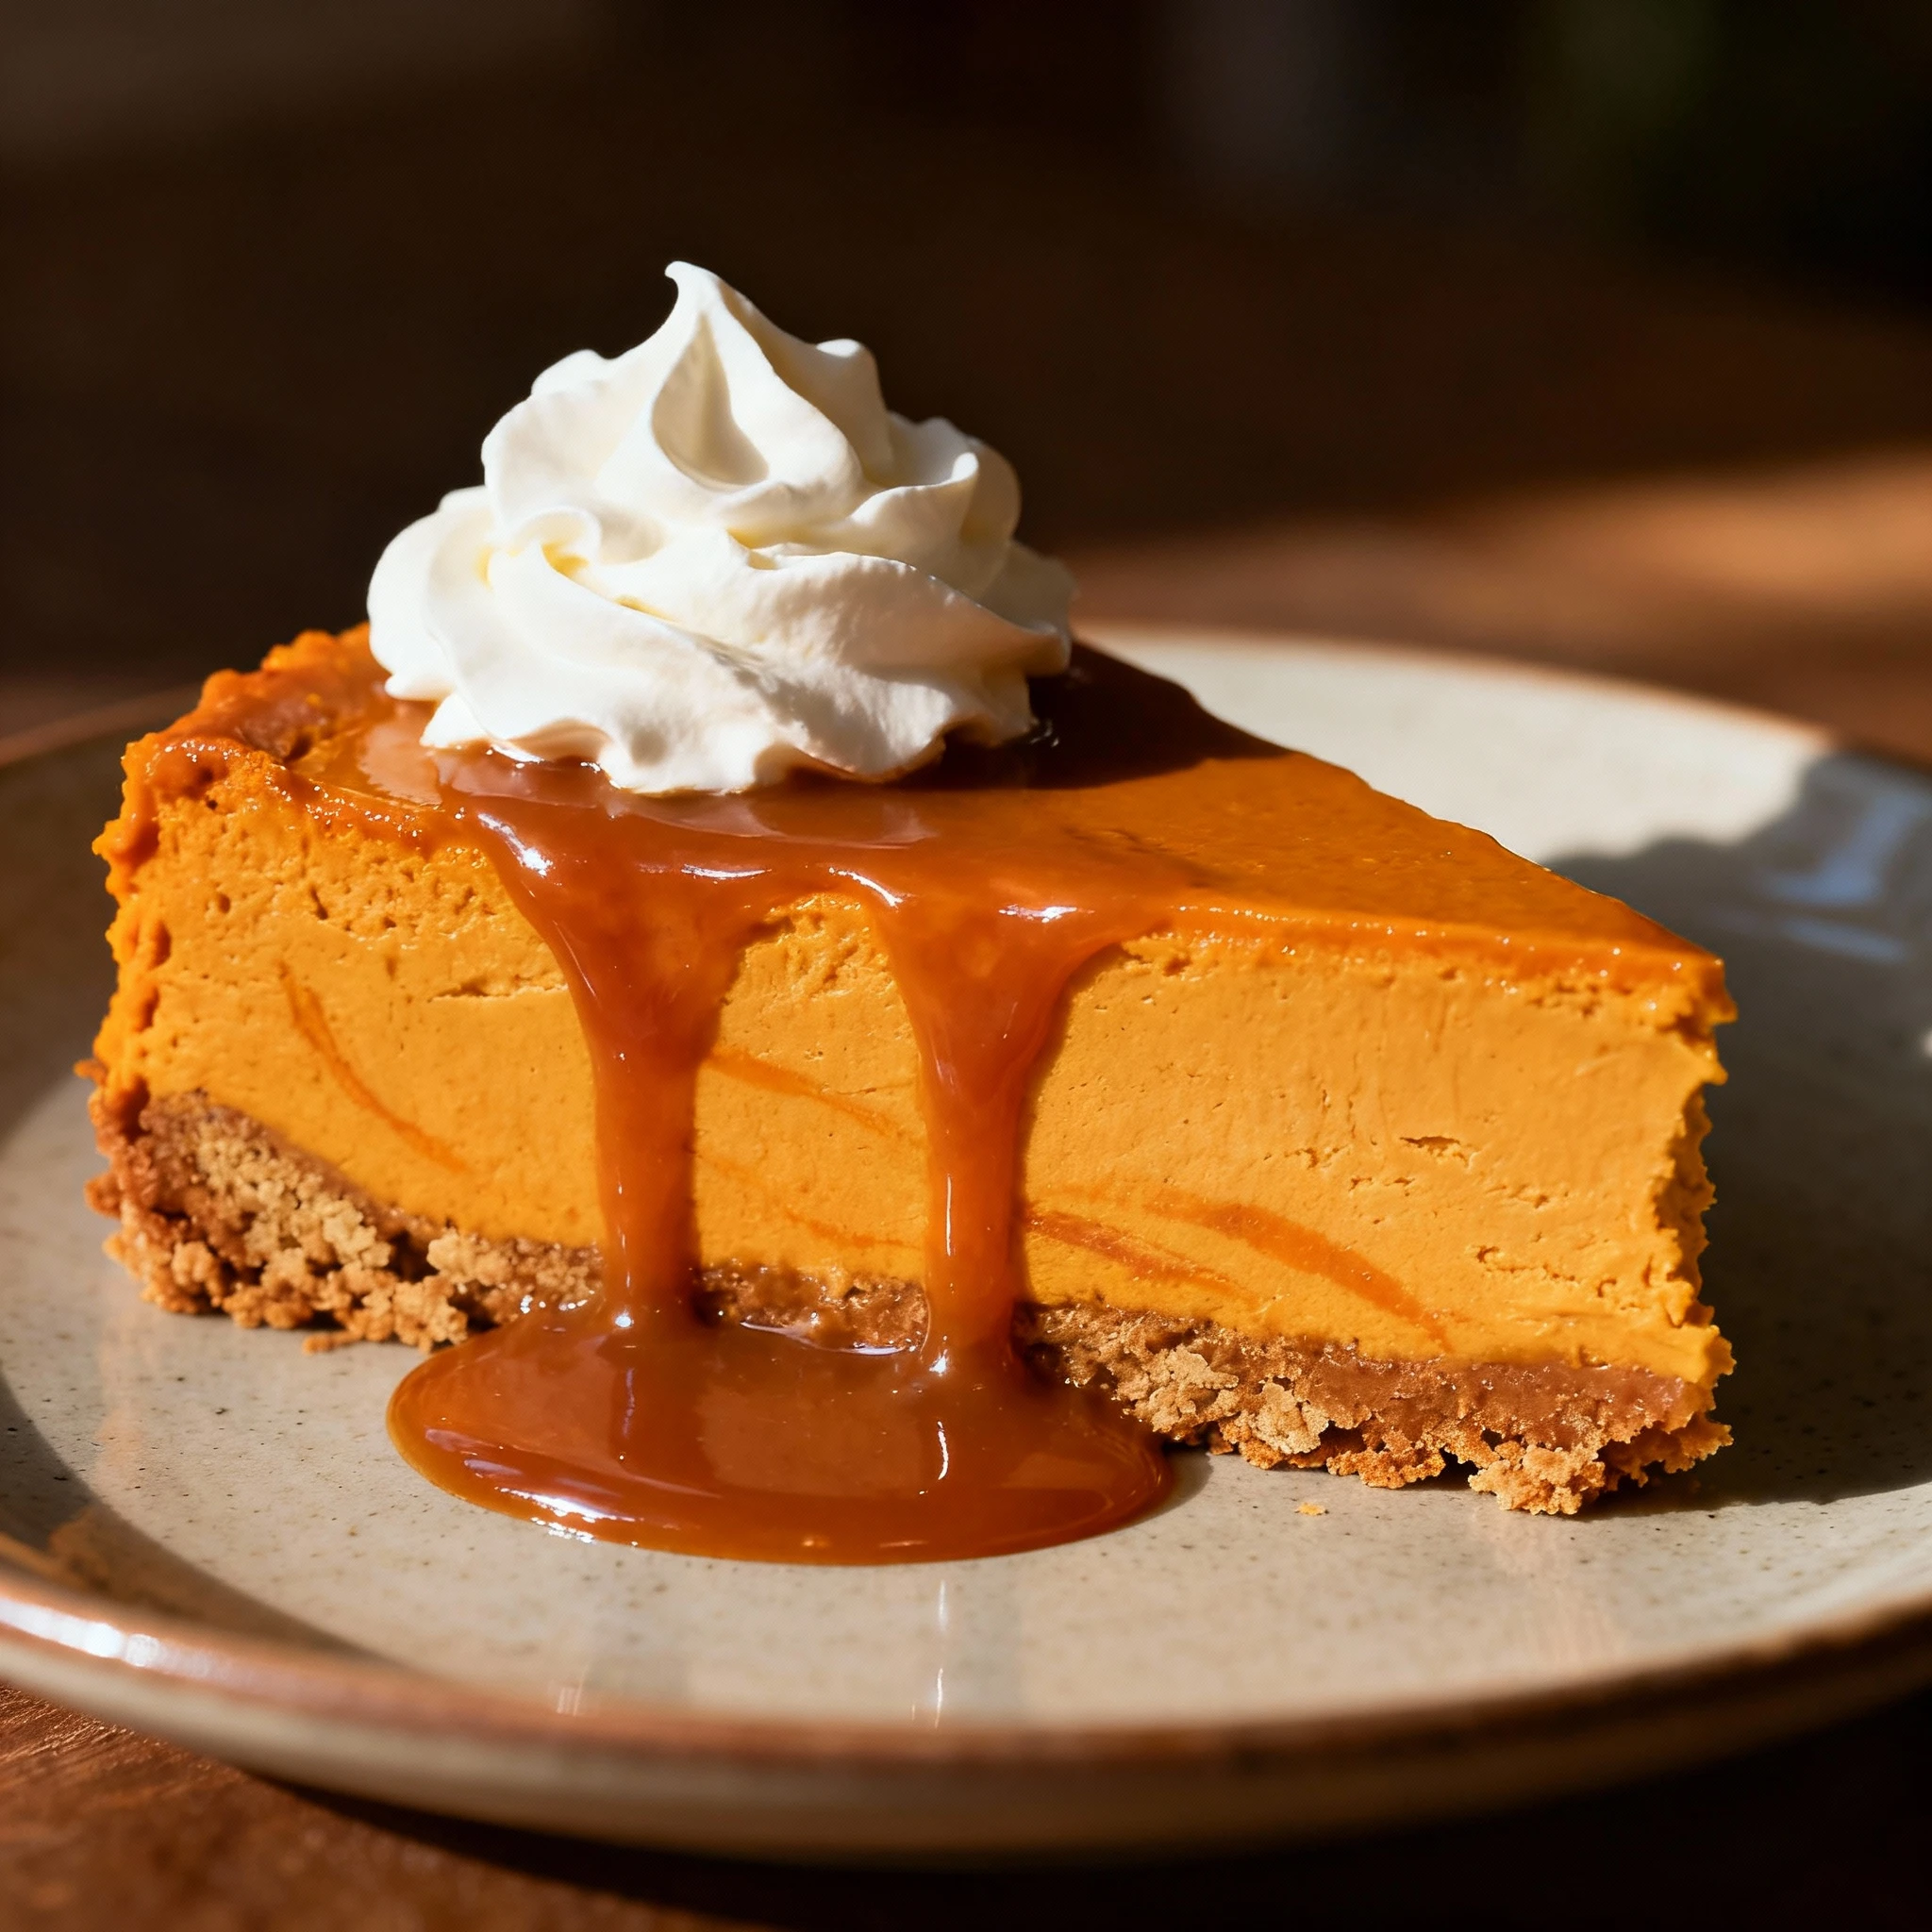
Step 8 — Serve and Garnish
Once set, carefully run a thin knife around the inner edge of the springform pan before releasing the clasp. This ensures a clean release without cracking the edges.
Slice with a sharp knife dipped in hot water for neat pieces. Garnish with additional whipped cream and a sprinkle of cinnamon or nutmeg just before serving to highlight the cozy fall flavors.
Nutritional Information
| Calories | 385 |
| Protein | 5g |
| Carbohydrates | 32g |
| Fat | 28g |
| Fiber | 2g |
| Sodium | 220mg |
Note: Estimates based on typical ingredients and serving size.
Healthier Alternatives
Skip the oven and still enjoy all the cozy flavors of fall with these simple, healthier swaps for your No Bake Pumpkin Cheesecake.
- Greek Yogurt for Cream Cheese — Use plain Greek yogurt for a protein boost and a tangy flavor that complements the pumpkin spice.
- Almond Flour Crust — Swap graham crackers for almond flour to create a gluten-free, lower-carb base with a nutty taste.
- Coconut Cream for Dairy — Opt for full-fat coconut cream to make a rich, dairy-free version that’s just as creamy.
- Natural Sweeteners — Replace refined sugar with pure maple syrup or monk fruit sweetener for a lower-glycemic option.
- Pumpkin Puree Boost — Increase the amount of pumpkin puree slightly for more fiber and a deeper fall flavor.
- Nut Topping — Top with chopped pecans or walnuts instead of whipped cream for added crunch and healthy fats.
- Spice It Up — Enhance the warm spices like cinnamon and nutmeg to add flavor without sugar or sodium.
Serving Suggestions
- Pair a slice with a warm cup of chai tea or a freshly brewed coffee to enhance the cozy, spiced flavors.
- Serve as the grand finale for a Thanksgiving feast or a casual Friendsgiving gathering.
- Top individual slices with a dollop of freshly whipped cream and a sprinkle of cinnamon or crushed gingersnap cookies.
- For an elegant presentation, use a piping bag to create whipped cream rosettes on each slice before serving.
- Drizzle with a simple caramel or salted caramel sauce for an extra layer of decadent sweetness.
- This no-bake pumpkin cheesecake is perfect for potlucks and holiday parties since it travels well without needing refrigeration until serving.
To make each slice look its best, dip a sharp knife in hot water and wipe it dry before each cut for beautifully clean edges.
Common Mistakes to Avoid
- Mistake: Using canned pumpkin pie filling instead of pure pumpkin puree. Fix: Always check the label for 100% pure pumpkin to avoid an overly sweet, spiced dessert.
- Mistake: Not chilling the mixing bowl and beaters before whipping the cream. Fix: A cold bowl helps the cream whip up faster and hold its structure for a lighter, fluffier cheesecake.
- Mistake: Overmixing the filling once the cream cheese is incorporated. Fix: Mix just until smooth to prevent incorporating too much air, which can cause cracks as it sets.
- Mistake: Skipping the step of pressing the crust firmly into the pan. Fix: Use the bottom of a measuring cup to compact the crumbs for a sliceable base that won’t crumble.
- Mistake: Rushing the chilling time and slicing too soon. Fix: Allow a full 4-6 hours, or preferably overnight, for the cheesecake to set completely for clean cuts.
- Mistake: Using brick cream cheese straight from the refrigerator. Fix: Let the cream cheese soften at room temperature for 30-60 minutes to ensure a lump-free, silky smooth filling.
- Mistake: Adding liquid sweeteners like maple syrup without adjusting other wet ingredients. Fix: If using liquid sweeteners, consider slightly reducing another liquid component to maintain the proper setting consistency.
- Mistake: Not tasting the filling before pouring it into the crust. Fix: Give the filling a quick taste to adjust spices or sweetness to your personal preference.
Storing Tips
- Fridge: Store the cheesecake in an airtight container in the refrigerator for up to 5 days. Ensure it is covered to prevent it from absorbing other flavors.
- Freezer: For longer storage, wrap the cheesecake or individual slices tightly in plastic wrap and then aluminum foil before placing them in a freezer-safe container. It will keep well for up to 2 months. Thaw overnight in the refrigerator before serving.
- Reheat: This no-bake dessert is best served chilled. Reheating is not recommended as it can cause the creamy filling to soften and lose its texture. Always serve it directly from the refrigerator for the best consistency and food safety.
For optimal food safety, keep the cheesecake refrigerated at or below 40°F (4°C) until you are ready to serve it.
Conclusion
This No Bake Pumpkin Cheesecake is the ultimate fuss-free dessert for capturing the cozy flavors of fall. For another no-bake pumpkin treat, try this scrumptious No Bake Pumpkin Pie. Give this recipe a try and share your thoughts in the comments below!
PrintNo Bake Pumpkin Cheesecake
A sweet, creamy, and completely irresistible no-bake pumpkin cheesecake with cozy fall flavors, featuring a spiced pumpkin cream cheese filling in a crunchy gingersnap cookie crust. Perfect for a make-ahead fall dessert without using the oven.
- Prep Time: 20 minutes
- Cook Time: 0 minutes
- Total Time: 8 hours 20 minutes
- Yield: 12 1x
- Method: Dessert
- Cuisine: American
Ingredients
- 1 1/2 cups gingersnap cookie crumbs
- 6 tablespoons unsalted butter, melted
- 16 ounces cream cheese, softened
- 1 cup canned pumpkin puree
- 3/4 cup powdered sugar
- 1/4 cup brown sugar
- 1 teaspoon pumpkin pie spice
- 1/2 teaspoon ground cinnamon
- 1/2 teaspoon vanilla extract
- 1/4 teaspoon salt
- 1 cup heavy whipping cream
Instructions
- Combine gingersnap cookie crumbs and melted butter in a bowl; press mixture firmly into the bottom of a 9-inch springform pan to form the crust.
- In a large bowl, beat the softened cream cheese until smooth.
- Add pumpkin puree, powdered sugar, brown sugar, pumpkin pie spice, cinnamon, vanilla extract, and salt to the cream cheese; mix until well combined.
- In a separate bowl, whip the heavy cream to stiff peaks.
- Gently fold the whipped cream into the pumpkin cream cheese mixture until fully incorporated, being careful not to deflate the whipped cream.
- Spread the filling evenly over the prepared crust.
- Cover and refrigerate for at least 8 hours or overnight to set before serving.
Notes
Whipping the heavy cream to stiff peaks is crucial for a thick, mousse-like texture. This cheesecake can be made up to two days in advance and kept refrigerated. For best flavor, use homemade pumpkin pie spice or a good quality blend.
Nutrition
- Calories: 350
- Sugar: 20g
- Sodium: 250mg
- Fat: 25g
- Saturated Fat: 15g
- Unsaturated Fat: 10g
- Trans Fat: 0g
- Carbohydrates: 30g
- Fiber: 2g
- Protein: 5g
- Cholesterol: 80mg
FAQs
How long does this no-bake pumpkin cheesecake need to set in the refrigerator?
For the best results, let the cheesecake chill for at least 6 hours, or ideally overnight. This allows it to become perfectly firm and creamy, so you can skip the oven and still enjoy all the cozy flavors of fall.
Can I use fresh pumpkin instead of canned pumpkin puree?
You can use homemade pumpkin puree, but ensure it is very thick and has no excess moisture. Using canned puree is recommended for consistent texture and to guarantee your no-bake pumpkin cheesecake sets properly without becoming watery.
What is the best way to store leftovers?
Keep any leftover cheesecake covered in the refrigerator for up to 5 days. For longer storage, you can freeze individual slices tightly wrapped in plastic for up to 3 months.


