Introduction
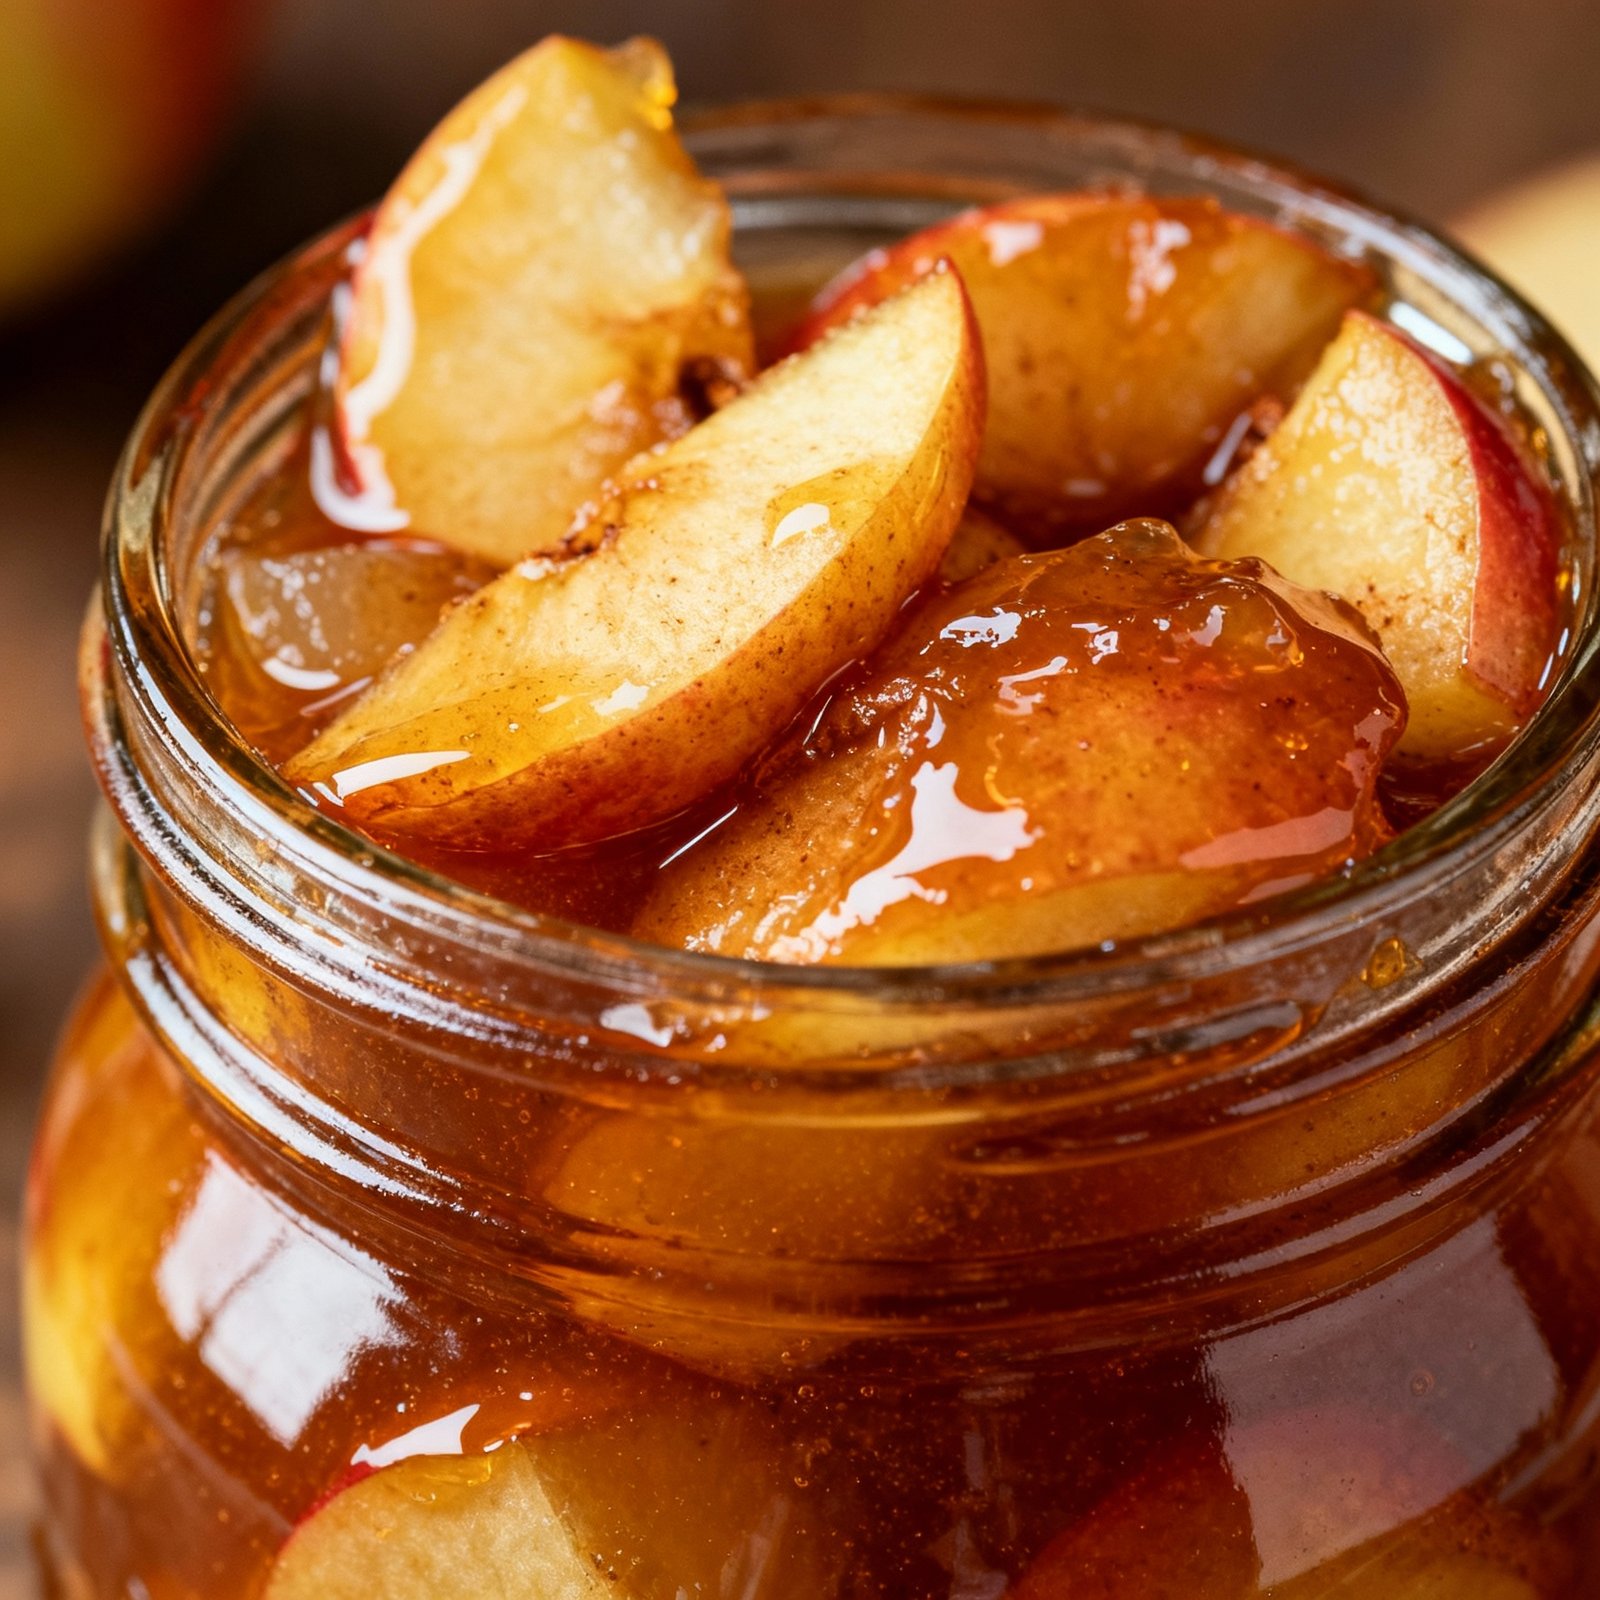
What if you could have the taste of fresh-baked apple pie any day of the year, without the hours of peeling and slicing? While many believe that freezer pies result in a soggy crust, the secret is in the preparation of the filling itself. This Make Ahead Apple Pie Filling Freezer Recipe – Saving this method is a game-changer, locking in flavor and texture for up to a year.
By pre-mixing your apples with the perfect balance of sugar, spices, and a touch of thickener, you create a ready-to-bake component that defies expectations. This technique not only saves precious time during busy holidays but also helps reduce food waste by preserving a seasonal bounty. Having this filling on hand means a delicious, comforting dessert is never more than a frozen pie crust away.
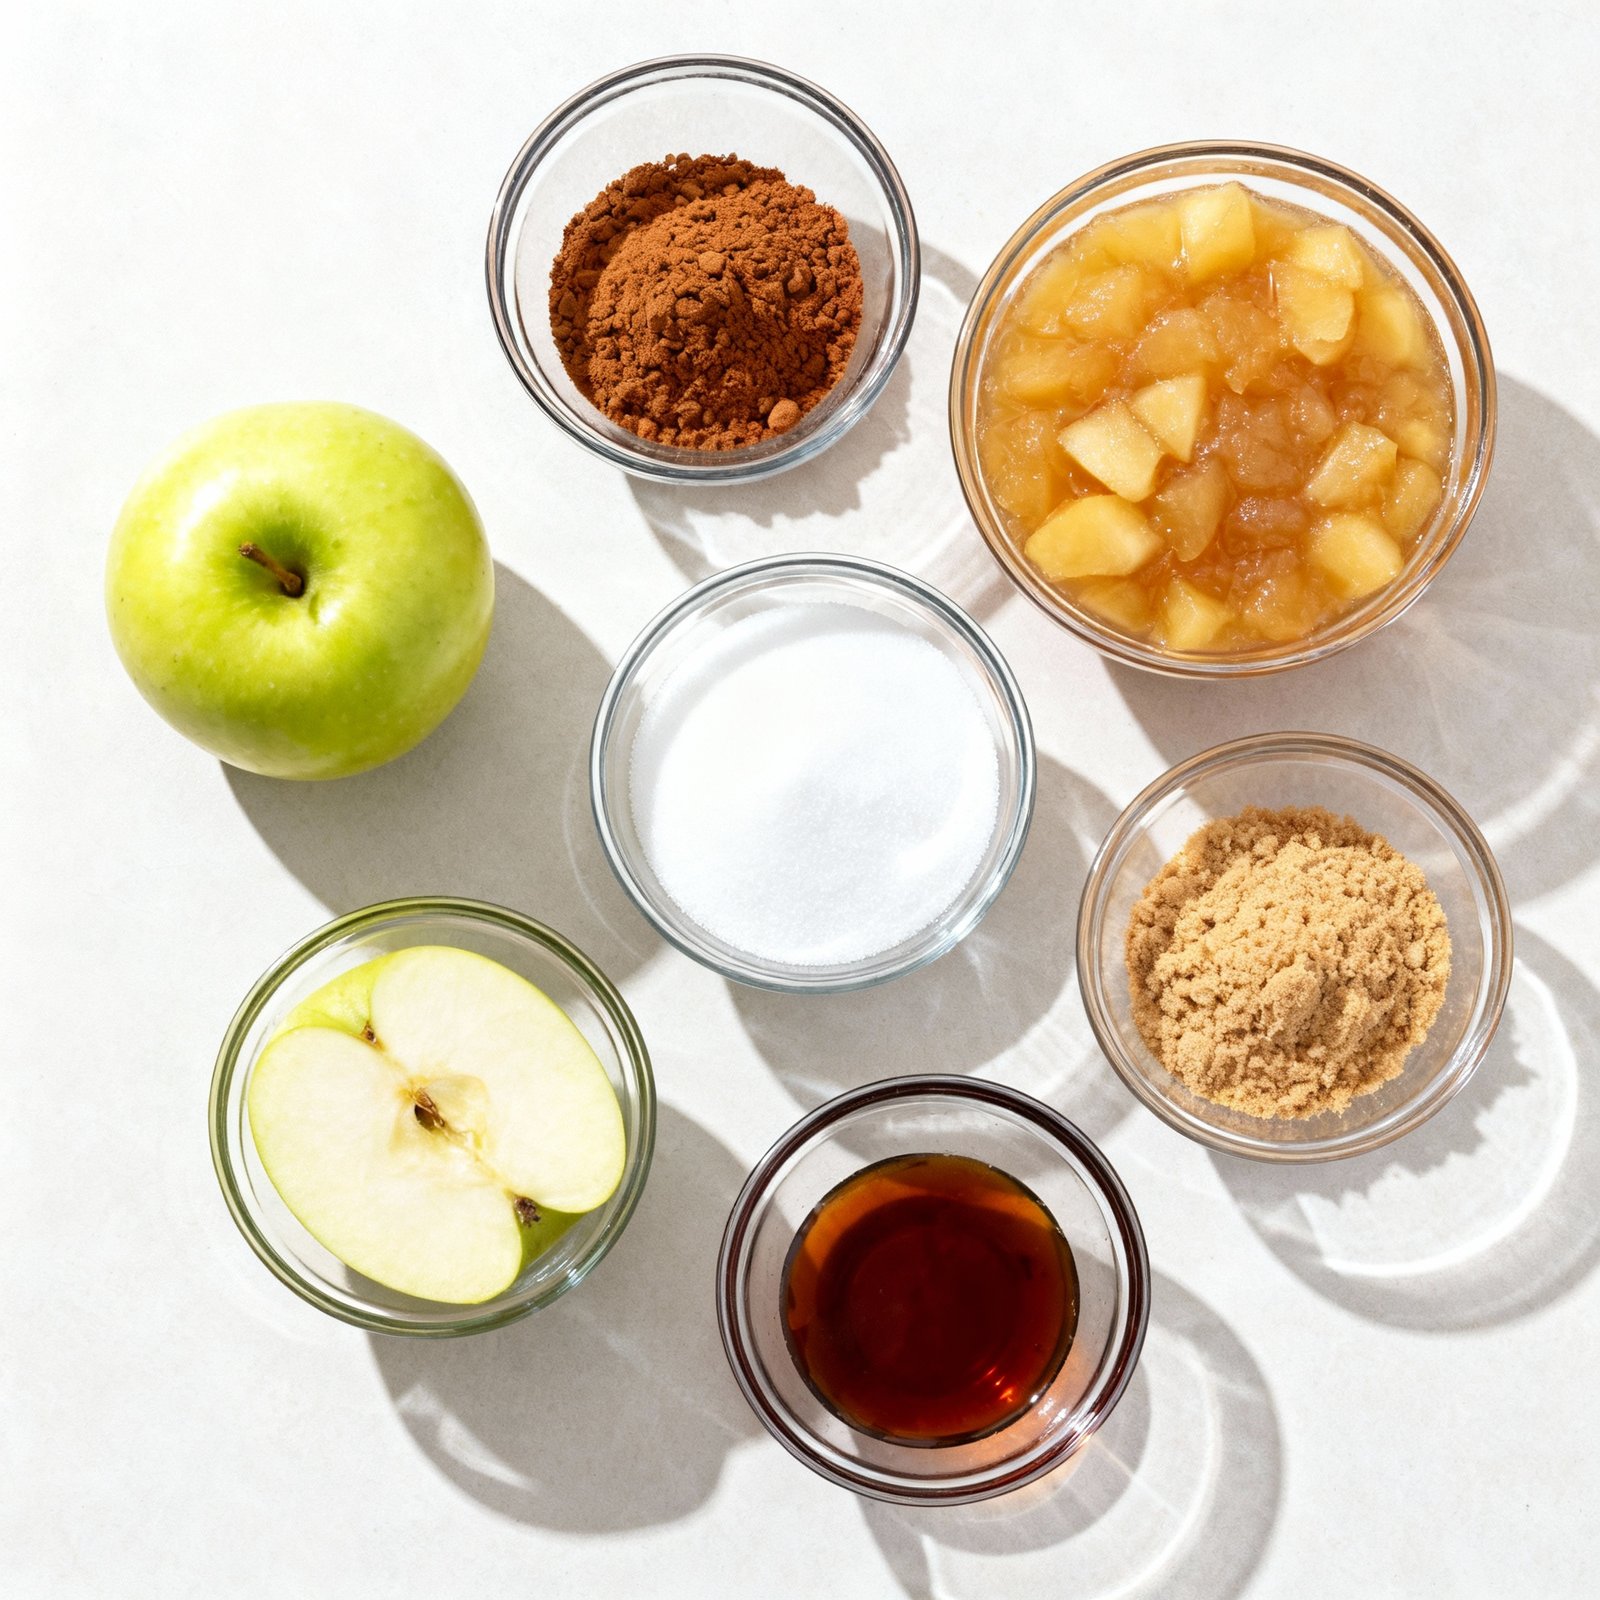
Ingredients
This make ahead apple pie filling freezer recipe combines the sweet aroma of cinnamon and nutmeg with tart, crisp apples for a filling that tastes like autumn in every bite.
- 7 pounds apples (about 22-24 cups), peeled and sliced
- 1 lemon (zested and juiced)
- 1 cup granulated sugar
- 1 cup brown sugar
- 1 cup cornstarch
- 1 tablespoon cinnamon
- 1/2 teaspoon salt
- 1/4 teaspoon ground nutmeg
- 6 cups water
Timing
| Prep Time | 20 minutes |
| Cook Time | 15 minutes |
| Total Time | 35 minutes |
Context: This make-ahead apple pie filling freezer recipe is about 30% faster than preparing a traditional pie from scratch.
Step-by-Step Instructions
Step 1 — Prepare Your Apples
Start by peeling, coring, and slicing your apples. Aim for uniform slices, about 1/4 to 1/2-inch thick, to ensure even cooking later.
To prevent browning, you can toss the apple slices in a mixture of lemon juice and water as you work.
Step 2 — Create the Flavorful Syrup
In a large pot, combine granulated sugar, brown sugar, cornstarch, and a pinch of salt. Whisk these dry ingredients together to prevent lumps.
Gradually stir in water and apple juice or cider until the mixture is smooth. This forms the base of your pie filling.
Step 3 — Cook the Filling Base
Place the pot over medium heat and bring the mixture to a simmer, stirring frequently. Cook until the liquid thickens and becomes translucent, which usually takes about 3-5 minutes.
This step is crucial for activating the cornstarch and creating the perfect pie filling consistency.
Step 4 — Add Spices and Apples
Remove the thickened syrup from the heat and stir in your ground cinnamon, nutmeg, and a splash of vanilla extract for warmth and depth of flavor.
Carefully fold the prepared apple slices into the warm syrup until they are evenly coated. The residual heat will begin to soften the apples slightly.
Step 5 — Cool Completely
Spread the apple pie filling out in a thin layer on a large baking sheet or in a shallow dish to speed up the cooling process. This step is essential for food safety before freezing.
Allow the filling to cool to room temperature, which prevents ice crystals from forming and ensures the best texture when thawed.
Step 6 — Portion and Package for Freezing
Once completely cool, divide the Make Ahead Apple Pie Filling into portions suitable for one pie. Use heavy-duty freezer bags or airtight, freezer-safe containers.
Press out as much air as possible from bags before sealing to prevent freezer burn. Label each package with the contents and date.
Step 7 — Freeze for Future Baking
Lay the sealed bags flat on a baking sheet to freeze. This creates a stackable, space-saving brick that freezes quickly and evenly.
Your Make Ahead Apple Pie Filling Freezer Recipe will keep well for up to 6 months. Thaw in the refrigerator overnight before using.
Nutritional Information
| Calories | 215 |
| Protein | 0.5g |
| Carbohydrates | 56g |
| Fat | 0.2g |
| Fiber | 4g |
| Sodium | 75mg |
Note: Estimates based on typical ingredients and serving size.
Healthier Alternatives
This versatile Make Ahead Apple Pie Filling Freezer Recipe is easy to adapt for various dietary needs. Here are some simple ingredient swaps to try.
- Lower-Sugar Alternative — Replace granulated sugar with a monk fruit sweetener blend to cut carbs and calories without sacrificing sweetness.
- Gluten-Free Thickener — Swap all-purpose flour for an equal amount of cornstarch or arrowroot powder to create a gluten-free apple pie filling.
- Dairy-Free Option — Use your favorite plant-based butter or coconut oil instead of regular butter for a rich, dairy-free version.
- Low-Sodium Version — Simply omit the salt from the spice mix to significantly reduce the sodium content while the cinnamon and other spices provide plenty of flavor.
- Whole-Grain Boost — For a fiber-rich alternative, use whole wheat flour or oat flour as the thickener instead of refined white flour.
- Natural Sweetener — Use pure maple syrup or honey in place of sugar, adjusting the amount to taste and noting that the filling’s freezing properties may change slightly.
- Spice Variations — Add a pinch of cardamom, nutmeg, or allspice to the cinnamon for a more complex, warming flavor profile.
Serving Suggestions
- Create a classic double-crust pie by thawing your Make Ahead Apple Pie Filling Freezer Recipe and pouring it into a prepared pie crust. Top with a second crust, vent, and bake until golden and bubbly.
- For a quick dessert, spoon the thawed filling over vanilla ice cream or warm oatmeal for a delicious and easy treat.
- Transform the filling into individual hand pies or turnovers. Simply encase small portions in puff pastry or pie dough and bake until flaky.
- Use the apple pie filling as a sweet topping for pancakes, waffles, or French toast on a cozy weekend morning.
- Layer the filling with granola and yogurt in a parfait glass for an elegant and simple dessert or breakfast.
- Bake the filling inside a cored apple for a beautiful and individual baked apple dessert.
- Serve the warm filling alongside a sharp cheddar cheese or a scoop of creamy custard for a sophisticated flavor pairing.
Having this versatile filling on hand means a delicious homemade dessert is never far away, perfect for unexpected guests or a simple family treat.
Common Mistakes to Avoid
- Mistake: Using the wrong apple variety, leading to a mushy filling. Fix: Stick with firm, crisp apples like Granny Smith or Honeycrisp that hold their shape during freezing and baking.
- Mistake: Skipping the acidulant, which causes the apples to turn an unappetizing brown. Fix: Always toss sliced apples with lemon juice or a fruit fresher to preserve their color and freshness.
- Mistake: Overfilling the freezer bag, making it difficult to seal and stack properly. Fix: Leave at least an inch of headspace in the bag to allow for expansion and ensure an airtight seal.
- Mistake: Not labeling the bags with the date and contents, leading to freezer mystery meals. Fix: Use a permanent marker to label each bag clearly so you can track freshness and contents at a glance.
- Mistake: Adding thickener before freezing, which can break down and create a watery filling. Fix: Mix in the thickener (like cornstarch or flour) only when you are ready to assemble and bake the pie.
- Mistake: Freezing the filling in one large, solid block that takes forever to thaw. Fix: Spread the apple mixture in a single layer on a baking sheet to freeze individually before transferring to a bag for faster, more even thawing.
- Mistake: Using a flimsy storage bag that can tear or allow freezer burn. Fix: Invest in high-quality, heavy-duty freezer bags and remove as much air as possible before sealing.
- Mistake: Storing the filling for too long, resulting in a loss of flavor and texture. Fix: For best quality, use your make ahead apple pie filling freezer recipe within 3-4 months of freezing.
Storing Tips
- Fridge: Store your Make Ahead Apple Pie Filling in an airtight container in the refrigerator for up to 5 days.
- Freezer: For long-term storage, freeze the apple pie filling in freezer-safe bags or containers for up to 6 months. Leave about an inch of headspace to allow for expansion.
- Reheat: Thaw the filling overnight in the refrigerator. Reheat gently in a saucepan over medium heat, stirring occasionally, until it reaches an internal temperature of 165°F (74°C) for food safety.
Following these simple steps for your Make Ahead Apple Pie Filling Freezer Recipe ensures you always have a delicious, ready-to-use filling on hand for a quick and easy dessert.
Conclusion
This Make Ahead Apple Pie Filling Freezer Recipe is your secret weapon for effortless fall baking. I hope you love having a stash of delicious filling ready to go! Please leave a comment with your results, and be sure to try our other seasonal favorites like Creamy Pumpkin Soup with a Twist – Fall Favorite.
PrintFreezer Apple Pie Filling

A make-ahead apple pie filling recipe perfect for freezing and using later, featuring a blend of apples, spices, and a thickened syrup to simplify pie preparation.
- Prep Time: 30 minutes
- Cook Time: 15 minutes
- Total Time: 45 minutes
- Yield: 4-5 pies 1x
- Method: Dessert
- Cuisine: American
Ingredients
- 7 pounds apples (about 22–24 cups), peeled and sliced
- 1 lemon (zested and juiced)
- 1 cup granulated sugar
- 1 cup brown sugar
- 1 cup cornstarch
- 1 tablespoon cinnamon
- 1/2 teaspoon salt
- 1/4 teaspoon ground nutmeg
- 6 cups water
Instructions
- Zest and juice the lemon; set aside.
- Peel and slice apples fairly thick (about 8 slices per apple). Toss apple slices with lemon juice and zest; set aside.
- In a large pot, combine granulated sugar, brown sugar, cornstarch, cinnamon, salt, nutmeg, and water. Bring to a boil over medium-high heat while whisking; boil for 2 minutes until thick and bubbly.
- Stir in apple slices and cover the pot.
- Reduce heat to low and simmer for 10 minutes or until apples begin to soften but are not mushy.
- Remove from heat and keep covered; let cool about 30-40 minutes, checking periodically.
- Ladle equal amounts into 4-5 freezer bags (approximately 2 ½ cups per bag).
- Let cool completely on the counter, then freeze for up to one year.
Notes
Partially cooking the apples before freezing helps prevent them from becoming mushy and ensures they bake evenly with the crust. This filling can be thawed overnight in the refrigerator before using in your favorite pie recipe.
Nutrition
- Calories: 180
- Sugar: 35
- Sodium: 150
- Fat: 0
- Saturated Fat: 0
- Unsaturated Fat: 0
- Trans Fat: 0
- Carbohydrates: 45
- Fiber: 4
- Protein: 0
- Cholesterol: 0
FAQs
How long can I store this Make Ahead Apple Pie Filling Freezer Recipe?
You can safely store this Make Ahead Apple Pie Filling Freezer Recipe for up to 12 months. For the best quality and flavor, we recommend using it within 6 to 8 months. Always use airtight, freezer-safe containers or heavy-duty freezer bags to prevent freezer burn.
Do I need to thaw the filling before baking a pie?
It is best to thaw the Make Ahead Apple Pie Filling Freezer Recipe overnight in the refrigerator before using it. This ensures even baking and prevents a soggy bottom crust. If you are in a hurry, you can bake from frozen, but you will need to increase the baking time significantly.
What are the best apples to use for this freezer recipe?
Firm, tart apples like Granny Smith or Honeycrisp work best for this Make Ahead Apple Pie Filling Freezer Recipe. These varieties hold their shape well during freezing and baking, providing a perfect texture. Avoid using apples that become mushy, like Red Delicious, for the best results.


