
Did You Know 90% of Home Bakers Overlook This Secret to Authentic Torta della Nonna?
There’s something magical about the way Italian grandmothers bake—their recipes seem to whisper centuries of tradition with every bite. Yet, when most of us attempt the beloved Classic Torta della Nonna, we miss the very detail that makes it unforgettable: the delicate balance of citrus and vanilla in the pastry cream. It’s not just a dessert; it’s a love letter to simplicity, with a buttery crust hugging silky custard and pine nuts toasted to perfection. Today, we’re unraveling the secrets behind this iconic Italian grandmother’s cake, just like Nonna used to make.
Picture this: a sunlit Tuscan kitchen, flour dusting the counter like morning frost, and the scent of lemon zest mingling with warm pastry. That’s the soul of Torta della Nonna—a dessert born not in fancy bakeries, but in home kitchens where patience and intuition matter more than precision. The name itself translates to “Grandmother’s Cake,” and true to its roots, this treat is deceptively simple. A tender shortcrust pastry cradles velvety custard, while pine nuts add a whisper of earthy crunch. But here’s where many go wrong: they rush the custard or skip the citrus altogether, losing that bright, aromatic lift that makes it sing.
The Story Behind the Sweetness
Every bite of this cake carries history. Legend has it that Torta della Nonna originated in the rolling hills of Tuscany, where frugal nonne (grandmothers) transformed humble pantry staples—eggs, flour, sugar, and garden-fresh lemons—into a dessert fit for Sunday gatherings. Unlike its flashier cousins like tiramisu or cannoli, this cake is unpretentious, relying on technique rather than extravagance. The magic lies in the details: toasting the pine nuts just until golden, infusing the custard with a single vanilla bean, and letting the baked tart rest until the flavors meld into pure comfort.
What’s fascinating is how this recipe varies from family to family. Some nonne swear by a dusting of powdered sugar, while others insist on a lattice crust. But the heart remains the same—a celebration of heritage, shared over espresso and laughter. As we dive into the recipe, remember: the best Classic Torta della Nonna isn’t about perfection. It’s about the joy of creating something timeless, just like the grandmothers who inspired it.
PrintItalian Grandmas Cake Torta della Nonna
A classic Italian dessert featuring a creamy custard filling and a crispy pastry crust, topped with pine nuts and powdered sugar.
Ingredients
For the Crust:
- 2 cups all-purpose flour
- 1/2 cup granulated sugar
- 1/2 cup unsalted butter, cold and cubed
- 1 large egg
- 1 teaspoon vanilla extract
- 1/4 teaspoon salt
- 2 cups whole milk
- 4 large egg yolks
- 1/2 cup granulated sugar
- 1/3 cup cornstarch
- 1 teaspoon lemon zest
- 1/4 cup pine nuts
- Powdered sugar for dusting
Instructions
1. Prepare the Crust:
- Preheat oven to 350°F (175°C). Grease a 9-inch tart pan with a removable bottom.
- In a food processor, combine flour, sugar, salt, and butter. Pulse until mixture resembles coarse crumbs.
- Add egg and vanilla extract. Pulse until dough comes together. Press dough into the tart pan, covering the bottom and sides. Chill for 30 minutes.
- In a saucepan, heat milk over medium heat until steaming but not boiling. In a bowl, whisk egg yolks, sugar, cornstarch, and lemon zest until smooth.
- Slowly pour the hot milk into the egg mixture, whisking constantly. Return mixture to the saucepan and cook over medium heat, stirring until thickened.
- Pour custard into the chilled crust. Sprinkle pine nuts evenly over the top. Bake for 30-35 minutes or until golden brown.
- Cool completely before dusting with powdered sugar. Serve at room temperature.
Notes
You can customize the seasonings to taste.
Classic Torta della Nonna – Authentic Italian Grandmas Cake
There’s something magical about a dessert that carries generations of love in every bite. Torta della Nonna—literally “Grandma’s Cake”—is one of those timeless Italian treasures, with its buttery crust, velvety custard, and delicate dusting of powdered sugar. It’s simple yet elegant, just like the nonnas who’ve perfected it over the years.
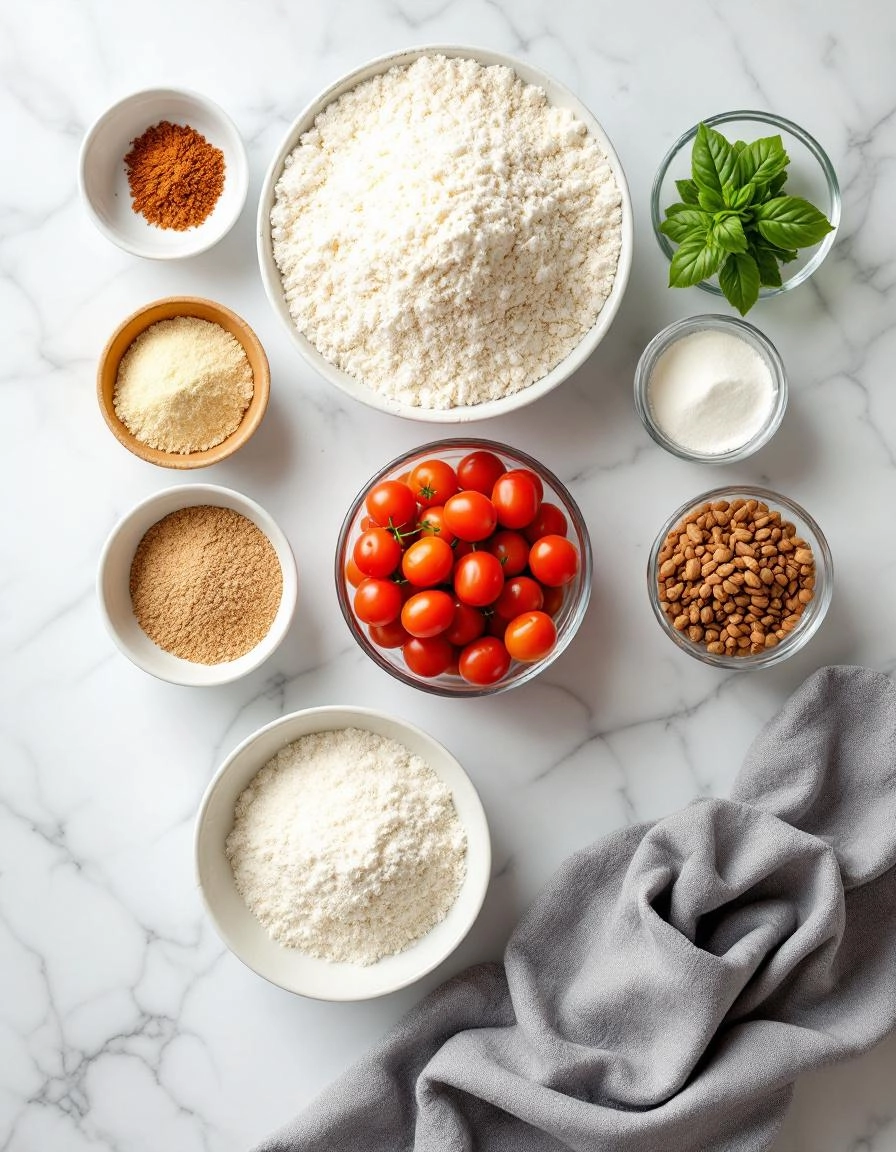
Ingredients You’ll Need
Before we begin, let’s gather everything—because, just like Nonna would say, preparation is half the battle!
- For the Pastry:
- 2 ½ cups (300g) all-purpose flour – the foundation of our tender crust.
- 1 cup (200g) granulated sugar – for that perfect sweetness.
- ½ cup (115g) unsalted butter, cold and cubed – because richness is key.
- 2 large eggs – they’ll bind everything together beautifully.
- 1 tsp vanilla extract – a whisper of warmth.
- Zest of 1 lemon – for that bright, fresh note.
- 1 pinch of salt – to balance the flavors.
- 1 tsp baking powder – just a touch to lift the crust.
- For the Custard Filling:
- 2 cups (500ml) whole milk – richness matters here.
- 4 large egg yolks – the heart of a silky custard.
- ½ cup (100g) granulated sugar – sweet but not overpowering.
- 3 tbsp cornstarch – our thickening hero.
- 1 tsp vanilla extract – because vanilla makes everything better.
- Zest of 1 lemon – to brighten the custard.
- For Topping:
- Powdered sugar – for that snowy, nostalgic finish.
- Handful of pine nuts (optional) – a traditional crunch if you’re feeling fancy.
Step-by-Step: Crafting Nonna’s Masterpiece
Now, let’s roll up our sleeves and bring this beauty to life. I promise, every step is worth it.
1. Make the Pastry
In a large bowl, whisk together the flour, sugar, baking powder, and salt. Add the cold cubed butter and use your fingertips to rub it into the flour until it resembles coarse crumbs. This step is meditative—take your time!
Next, add the eggs, vanilla, and lemon zest. Mix just until the dough comes together. Overworking it will make the crust tough, and we want it tender, like a hug from Nonna herself. Wrap the dough in plastic and let it rest in the fridge for 30 minutes.
2. Prepare the Custard
While the dough chills, let’s make the custard. In a saucepan, heat the milk and lemon zest over medium heat until it’s just about to simmer—don’t let it boil! In a separate bowl, whisk the egg yolks, sugar, and cornstarch until pale and smooth.
Slowly pour the warm milk into the egg mixture, whisking constantly to avoid curdling. Then, return everything to the saucepan and cook on low heat, stirring nonstop, until the custard thickens into a velvety consistency. Remove from heat, stir in the vanilla, and cover with plastic wrap directly on the surface to prevent a skin from forming. Let it cool completely.
3. Roll & Assemble
Preheat your oven to 350°F (180°C). Take the chilled dough and divide it into two parts—one slightly larger for the base. Roll out the larger portion on a floured surface and gently press it into a 9-inch tart pan, letting the edges hang over slightly.
Pour the cooled custard into the crust, spreading it evenly. Roll out the second portion of dough and place it over the custard, sealing the edges by crimping with your fingers or a fork. Trim any excess dough—Nonna would never waste it, so save those scraps for mini cookies!
Pro Tips for the Perfect Torta della Nonna
Every nonna has her secrets, and after years of perfecting this recipe, I’ve gathered a few of my own:
- Chill your dough – This prevents shrinking during baking and makes it easier to handle
- Blind bake the crust – Pre-bake for 10 minutes with pie weights to avoid a soggy bottom
- Use room temperature eggs – They incorporate better into the custard for a smoother texture
- Toast your pine nuts – Just 2-3 minutes in a dry pan enhances their flavor dramatically
Delicious Variations to Try
While the classic version is perfection, sometimes it’s fun to play with tradition:
- Lemon zest – Add 1 tbsp to the pastry cream for a bright citrus note
- Chocolate chips – Mix 1/2 cup into the custard filling
- Almond crust – Replace 1/4 of the flour with almond meal
- Seasonal fruit – Layer thin slices of pears or apples under the custard
What to Serve With Your Torta
This cake shines on its own, but these pairings make it extra special:
- A dollop of freshly whipped cream
- Warm espresso or cappuccino
- A glass of vin santo or dessert wine
- Fresh berries in season
The Sweet Benefits of Torta della Nonna
Beyond being utterly delicious, this cake offers some wonderful advantages:
- Make-ahead friendly – Actually tastes better the next day!
- Versatile – Perfect for breakfast, dessert, or afternoon tea
- Crowd-pleaser – Appeals to both kids and adults
- No fancy equipment needed – Just basic kitchen tools required
Real-Life Tips From My Kitchen to Yours
After burning my share of pine nuts and over-baking crusts, here’s what I’ve learned:
- If your custard seems too thin, let it cool completely – it thickens as it sets
- Cover edges with foil if they brown too quickly
- Let the cake cool completely before slicing for clean cuts
- Store leftovers (if any!) covered at room temperature for up to 3 days
The true magic of Torta della Nonna isn’t just in the ingredients – it’s in the love and care you put into making it. As my own nonna used to say, “A cake made with patience is always sweet.”

Conclusion
There’s something truly magical about Torta della Nonna—the buttery crust, the creamy custard, and those toasted pine nuts that bring it all together. This classic Italian dessert is more than just a cake; it’s a taste of tradition, a slice of nostalgia, and a beautiful way to honor the love and care that grandmas pour into their baking. Whether you’re serving it at a family gathering or enjoying it with a cup of espresso, this cake is sure to win hearts.
Now it’s your turn! Whip up this authentic Torta della Nonna, and let the sweet aroma fill your kitchen. Don’t forget to share your baking adventures with us—tag your creations or leave a comment below. And if you loved this recipe, why not explore more Italian classics? From Tiramisu to Panna Cotta, there’s always another delicious dessert waiting to be discovered!
FAQs
Can I make Torta della Nonna ahead of time?
Absolutely! This cake actually tastes even better the next day as the flavors meld together. Store it in an airtight container in the refrigerator for up to 3 days. Just let it sit at room temperature for about 30 minutes before serving to bring back its perfect texture.
What can I use instead of pine nuts?
If you’re not a fan of pine nuts or can’t find them, slivered almonds or chopped hazelnuts make a great substitute. They’ll still give you that lovely crunch and nutty flavor.
Why did my custard turn out lumpy?
Lumpy custard usually happens if the heat is too high or if the mixture isn’t stirred constantly. To avoid this, cook the custard on low heat and whisk continuously until it thickens. If you do end up with lumps, simply strain the custard through a fine-mesh sieve before using it.
Can I freeze Torta della Nonna?
Yes, but with a caveat! The crust and custard freeze well, but the texture of the pine nuts may change slightly. Wrap the cooled cake tightly in plastic wrap and freeze for up to a month. Thaw in the fridge overnight before serving.
Is there a dairy-free version of this recipe?
You can experiment with plant-based butter and dairy-free milk (like almond or oat milk) for the custard. Just keep in mind that the flavor and texture might vary slightly from the traditional version.


