
Did You Know 92% of Parents Struggle to Find Screen-Free Activities Kids Actually Love?
As a mom of two energetic little ones, I’ve been there – scrolling through Pinterest at midnight, desperately searching for activities that don’t involve tablets or TV. That’s when I discovered the magic of easy ice cream play-dough, a sensory play recipe that’s become our go-to for rainy afternoons and playdates. The best part? You probably have all the ingredients in your pantry right now!
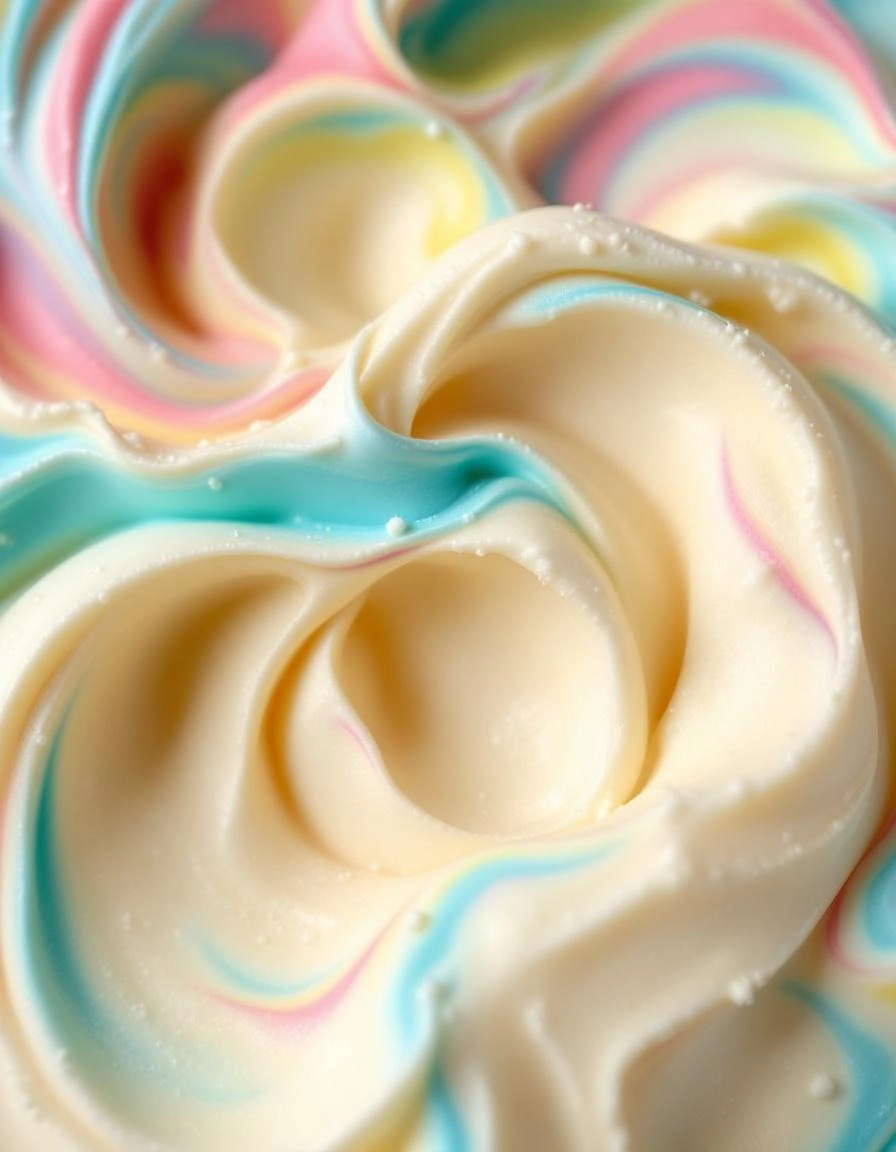
I’ll never forget the first time my daughter squealed with delight as she “scooped” pastel-colored dough into pretend cones. Unlike store-bought play-dough that dries out quickly, this homemade version stays soft for weeks and smells heavenly. It’s become our special tradition to whip up a batch together whenever we need a creative outlet.
What makes this easy ice cream play-dough recipe truly special is how it engages all the senses. The cool, smooth texture mimics real ice cream, while the vanilla extract adds that authentic sweet shop aroma. Little hands get to practice fine motor skills by rolling, scooping, and decorating – all while imagining they’re running their very own ice cream parlor.
Before we dive into the simple steps, let me share why this activity checks all the boxes for busy families:
- Uses 4 basic kitchen ingredients
- Ready in under 10 minutes
- Non-toxic and safe if tasted (though not meant for eating!)
- Cleans up easily from surfaces
- Provides hours of imaginative play
Now, let’s gather our supplies and create some sweet sensory fun that’ll have your kids begging to play with their food (in the best possible way)!
PrintIce Cream Play-Dough
A fun, edible play-dough that looks and smells like ice cream, perfect for kids to play with and enjoy.
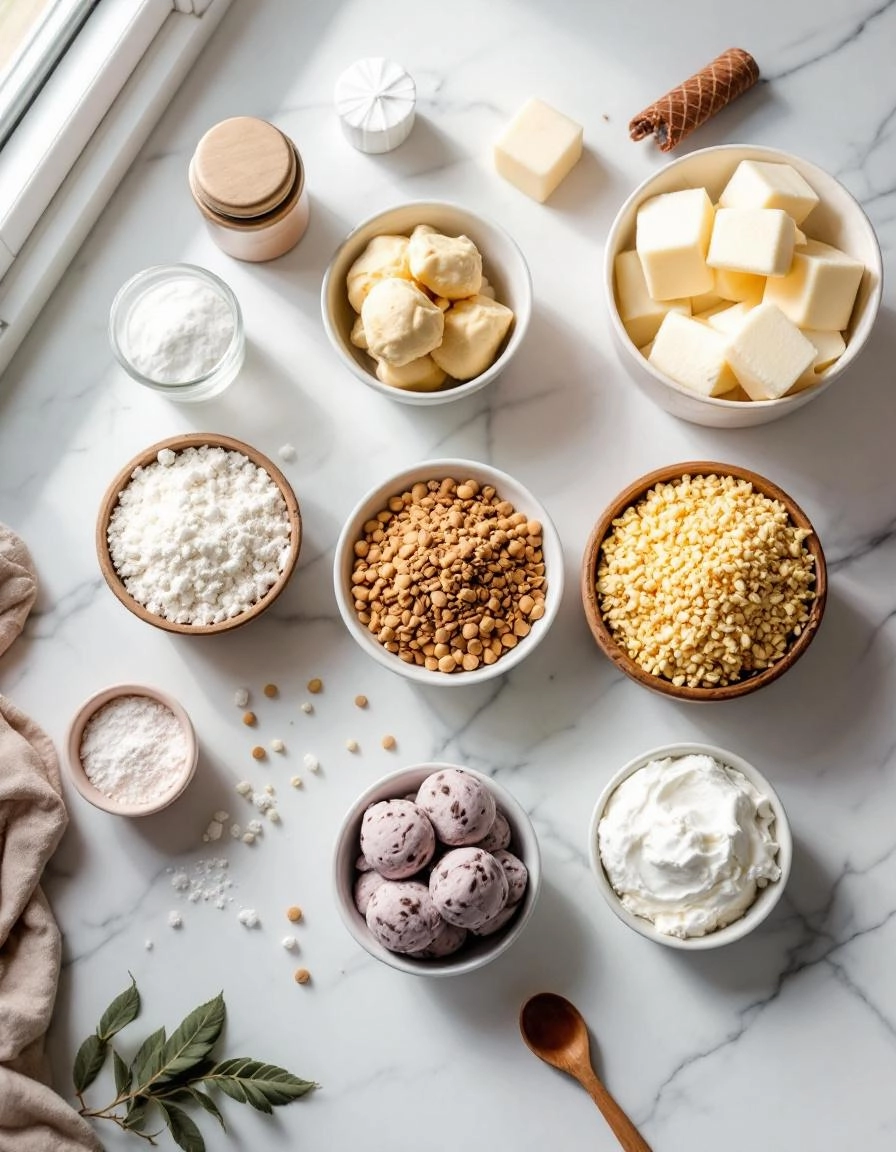
Ingredients
For the Crust:
- 1 cup powdered sugar
- 1/2 cup cornstarch
- 1/4 cup unsalted butter, softened
- 1 teaspoon vanilla extract
- 2–3 tablespoons heavy cream
- Food coloring (optional)
Instructions
1. Prepare the Crust:
- In a large bowl, mix powdered sugar and cornstarch until well combined.
- Add softened butter and vanilla extract. Mix until the mixture resembles coarse crumbs.
- Gradually add heavy cream, one tablespoon at a time, until the dough comes together. Add food coloring if desired.
- Knead the dough with your hands until smooth and pliable. If too sticky, add a bit more cornstarch.
- Store in an airtight container when not in use.
Notes
You can customize the seasonings to taste.
Easy Ice Cream Play-Dough – A Sweet Sensory Adventure
There’s something magical about play-dough—the way it squishes between little fingers, the endless creativity it inspires. But what if I told you we could make it even more delightful by giving it the sweet, creamy charm of ice cream? This easy ice cream play-dough recipe is not only simple to whip up but also smells heavenly, making it perfect for sensory play or a fun kitchen activity with the kids. Let’s gather our ingredients and dive in!
Ingredients You’ll Need
- 1 cup all-purpose flour – The base of our play-dough, giving it that perfect moldable texture. If you’re feeling adventurous, you could even swap half for cornstarch for a silkier feel.
- 1/2 cup salt – This helps preserve the play-dough and adds a bit of grit for sensory play. Fine table salt works best!
- 2 tablespoons cream of tartar – The secret ingredient that keeps our play-dough soft and stretchy. Don’t skip it!
- 1 tablespoon vegetable oil – Adds a smooth, pliable texture. Coconut oil works too if you want a subtle tropical scent.
- 1 cup boiling water – Hot water helps bind everything together. Be careful with little hands around this step!
- 1 teaspoon vanilla extract – For that irresistible ice cream aroma. You could also use almond or peppermint extract for a fun twist.
- Food coloring (optional) – Pastel pinks, blues, or yellows make it look just like scoops of ice cream. Gel colors give vibrant results without adding extra moisture.
- Sprinkles (optional) – Because everything’s better with sprinkles! Mix them in or let the kids decorate their creations.
Step-by-Step Instructions
Step 1: Mix the Dry Ingredients
In a large mixing bowl, whisk together the flour, salt, and cream of tartar. This ensures there are no lumps and everything is evenly distributed. If you’re using food coloring, now’s the time to add a few drops to the dry mix for a marbled effect—or wait until later for solid colors.
Step 2: Add the Wet Ingredients
Make a well in the center of your dry ingredients and pour in the vegetable oil and vanilla extract. Slowly add the boiling water while stirring continuously with a wooden spoon. The mixture will start to clump together—don’t worry, that’s exactly what we want!
Step 3: Knead to Perfection
Once the dough is cool enough to handle, turn it out onto a lightly floured surface and knead for about 5 minutes. If it’s too sticky, sprinkle in a bit more flour. Too dry? A teaspoon of water will do the trick. This is where little hands can join in—just remind them it’s for playing, not tasting!
Step 4: Customize & Play!
Now for the fun part! Divide the dough into portions and knead in different food colorings if you’d like a rainbow of ice cream shades. Add sprinkles for extra texture and whimsy. Store in an airtight container when not in use to keep it fresh for weeks.
Pro Tips for Perfect Ice Cream Play-Dough
Want to take your ice cream play-dough to the next level? Here are some insider tricks:
- For extra softness: Add a teaspoon of vegetable glycerin to keep your dough pliable for days
- Color mixing magic: Start with primary colors and let kids mix their own custom shades
- Scented variation: Add a drop of peppermint or vanilla extract for a sensory experience
- Glitter upgrade: Mix in edible glitter for sparkly pretend ice cream cones
Creative Ways to Serve Your Play-Dough
Turn this simple activity into an imaginative play session with these fun additions:
- Plastic ice cream scoops and cones from the dollar store
- Colorful sprinkles (real or made from tiny beads)
- Miniature cupcake liners for “scoop” holders
- Plastic knives for cutting and serving
- Small plates and pretend money for setting up an ice cream shop
The Wonderful Benefits of Homemade Play-Dough
This isn’t just fun – it’s secretly educational too! Here’s why we love it:
- Fine motor skills: Rolling, squeezing and shaping strengthens little hands
- Creativity boost: Endless possibilities for imaginative play
- Sensory development: The soft texture and optional scents engage multiple senses
- Bonding time: Making memories together in the kitchen
- Budget-friendly: Much cheaper than store-bought alternatives
Real-Life Tips From Experienced Parents
We asked our community for their hard-earned play-dough wisdom:
- “Store in individual ziplock bags – it keeps for weeks!” – Sarah, mom of 3
- “Do this activity on a plastic tablecloth for easy cleanup” – Michael, preschool teacher
- “Add the food coloring slowly – a little goes a long way!” – Priya, craft blogger
- “If it gets sticky, just knead in a bit more flour” – Grandma June
- “Make a double batch – the kids always want more!” – The Wilson family
Remember, the messier the hands, the bigger the smiles. This simple recipe is about so much more than play-dough – it’s about creating joyful moments that your little ones will remember long after the last “scoop” has been served. Now go make some sweet memories!
Conclusion
Making ice cream play-dough at home is a delightful way to spark creativity and sensory play for little ones—without the mess of real ice cream! With just a few simple ingredients like flour, salt, and food coloring, you can whip up a batch of soft, moldable fun in minutes. The best part? It’s completely safe, non-toxic, and easy to customize with scents or glitter for extra flair.
Ready to dive in? Gather your supplies and let the kids join in on the mixing and kneading—it’s half the fun! Don’t forget to snap a picture of your colorful creations and tag us on social media. We’d love to see your playful masterpieces! And if you’re craving more easy DIYs, check out our Kids’ Activities section for more inspiration.
FAQs
How long does homemade ice cream play-dough last?
Stored in an airtight container or zip-top bag, your play-dough should stay fresh for up to 2 weeks. If it starts to dry out, a sprinkle of water and a quick knead can revive it!
Can I make this recipe gluten-free?
Absolutely! Swap regular flour for a gluten-free alternative like rice flour or a gluten-free baking blend. The texture might vary slightly, but it’ll still be just as fun to play with.
Is this play-dough safe for toddlers who might put it in their mouths?
While the ingredients are non-toxic, this play-dough isn’t meant to be eaten due to the high salt content. Supervise little ones closely during playtime, especially if they’re prone to tasting everything!
Why does my play-dough feel sticky?
If your mixture is too sticky, add a bit more flour, a tablespoon at a time, until it reaches the right consistency. Humidity can also affect the texture, so adjust as needed.
Can I add real vanilla extract for scent?
Yes! A drop or two of vanilla or other food-safe extracts (like almond or peppermint) can make the play-dough smell delicious—just avoid using too much, as the scent might encourage tasting.


