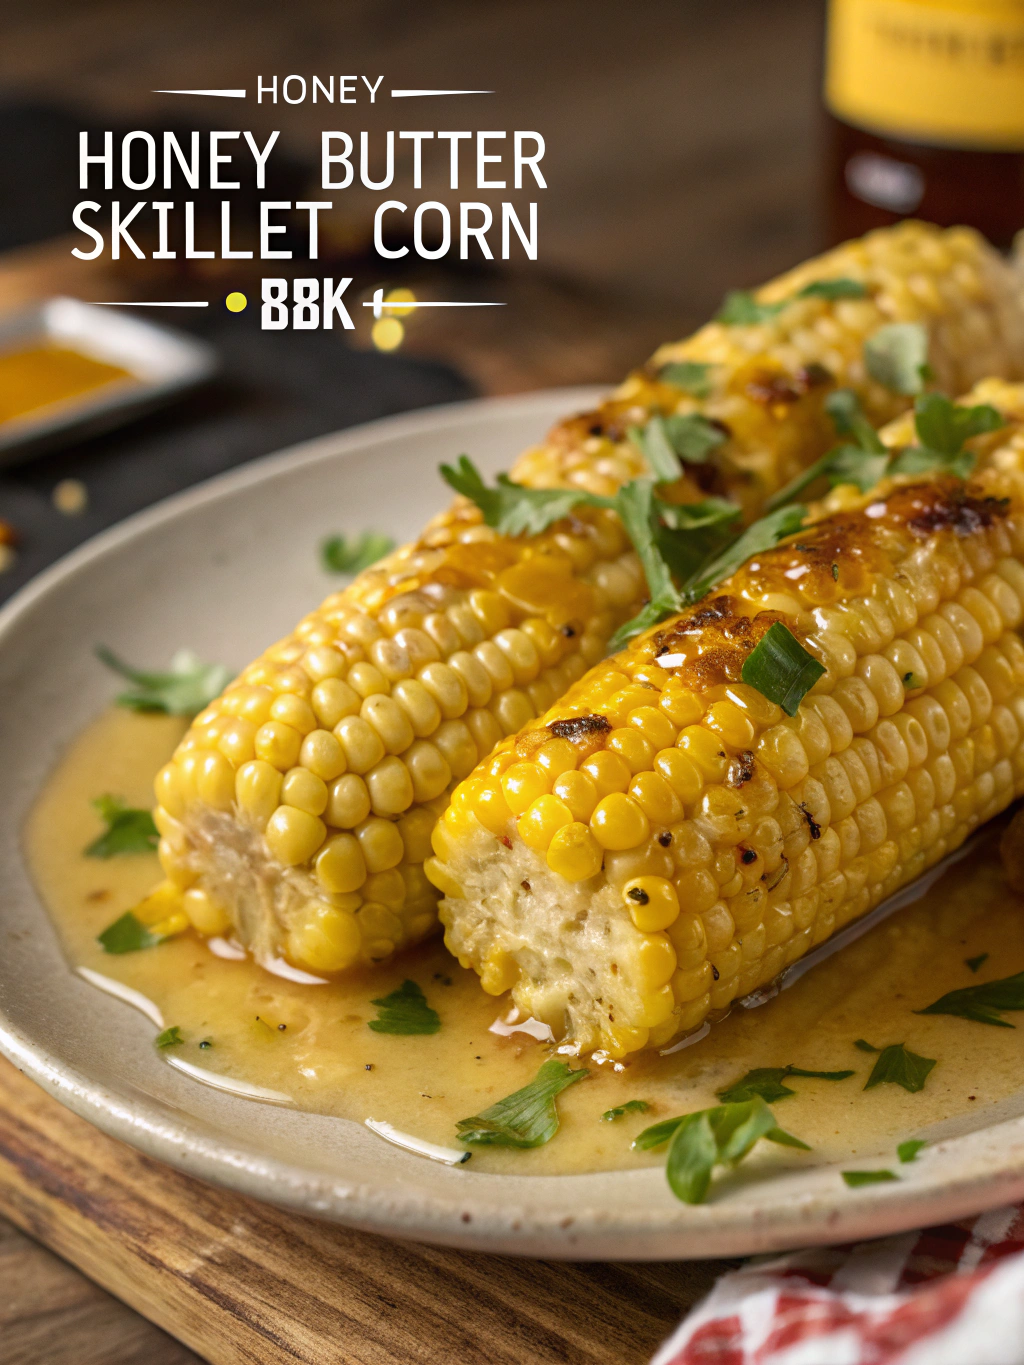
There’s something about the golden glow of summer corn that makes me want to slow down and savor every bite. Maybe it’s the way the kernels glisten under the sun at the farmers’ market, or the sound of husks rustling as I peel them back to reveal rows of sweet perfection. Whatever the reason, this Honey Butter Skillet Corn is my love letter to those simple, sunlit moments—a dish that’s as comforting as a porch swing at dusk and as vibrant as a midsummer evening.
Ingredients You’ll Need
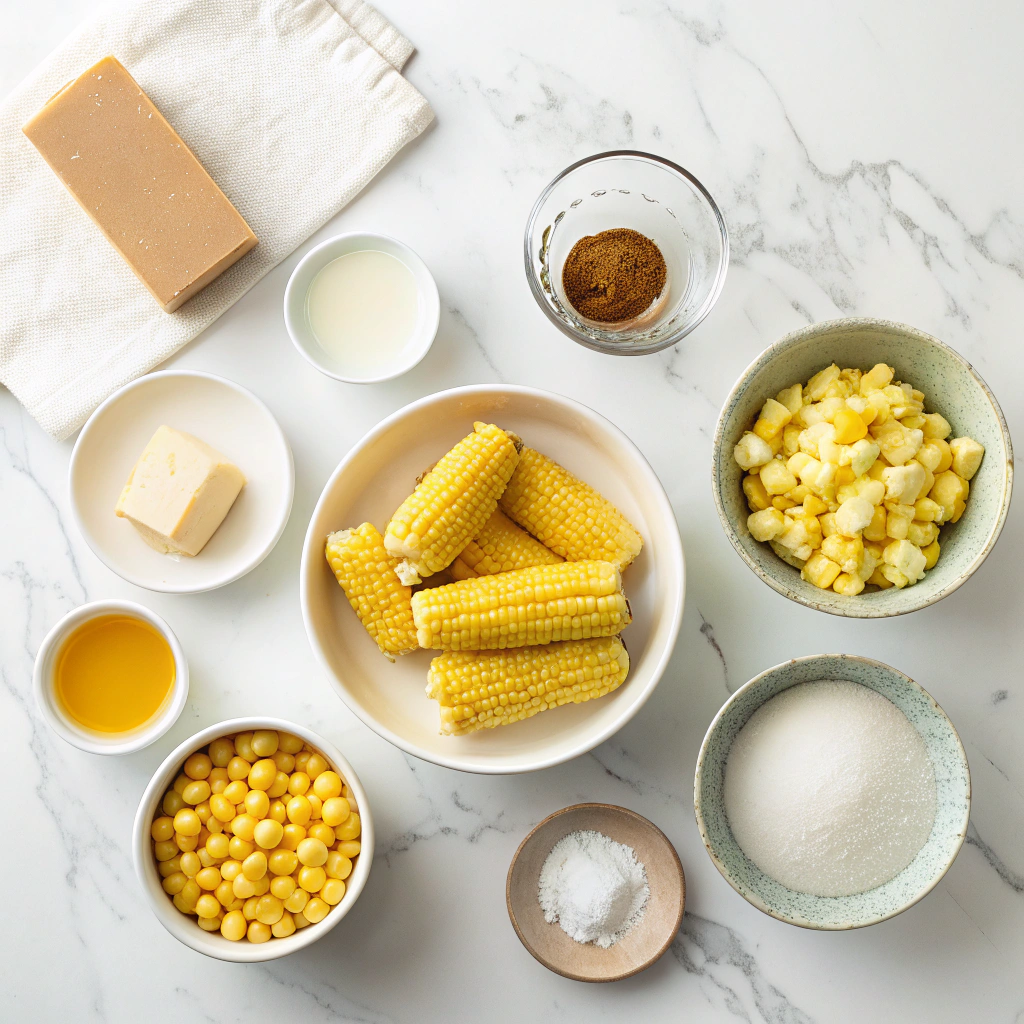
Gather these simple ingredients, and let’s turn humble corn into something extraordinary:
- 4 ears of fresh corn – Look for plump, bright yellow kernels with snug husks. If fresh isn’t available, frozen corn (about 2 cups) works in a pinch.
- 3 tablespoons unsalted butter – The richer, the better. I always reach for European-style butter when I want that velvety texture.
- 2 tablespoons honey – A local wildflower honey adds a lovely floral note, but any variety will do.
- 1/2 teaspoon smoked paprika – Just a whisper for warmth—it’s the secret handshake in this recipe.
- 1/4 teaspoon sea salt – Flaky Maldon salt is my favorite for finishing, but any fine salt will work.
- Freshly cracked black pepper – A few generous twists to balance the sweetness.
- 1 tablespoon chopped fresh chives or parsley – For that final pop of color and freshness.
How to Make Honey Butter Skillet Corn
This recipe comes together in minutes, but the flavors will linger in your memory like a perfect summer day. Here’s how to make it:
- Prep the corn: Shuck the ears and slice off the kernels. (Pro tip: Place the ear upright in a bowl and run your knife downward—the bowl catches all the runaway kernels!)
- Melt the butter: Heat a cast-iron skillet over medium heat and add the butter. Let it foam slightly, swirling the pan until it smells nutty and golden.
- Toast the corn: Add the corn kernels to the skillet and stir to coat them in butter. Let them sizzle undisturbed for 2 minutes to develop a light char, then stir and repeat.
- Sweeten the deal: Drizzle in the honey and sprinkle the smoked paprika, salt, and pepper. Toss everything together until the corn is glossy and caramelized, about 3–4 more minutes.
- Finish with love: Transfer to a serving dish and scatter fresh herbs on top. Serve immediately while it’s still warm and dreamy.
As you stir that honeyed butter into the corn, you’ll notice the way the kitchen fills with a scent that’s equal parts cozy and celebratory—a little like summer itself, bottled up in a skillet.
Pro Tips, Variations, and Substitutions
This honey butter skillet corn is wonderfully forgiving, so feel free to make it your own! Here are a few ideas to customize it:
- Spice it up: Add a pinch of cayenne pepper or smoked paprika for a subtle kick.
- Herb it up: Fresh thyme, rosemary, or chives add a lovely earthy note.
- Cheesy twist: Stir in a handful of grated Parmesan or crumbled feta at the end.
- Dairy-free option: Swap butter for olive oil or vegan butter, and use maple syrup instead of honey.
- Fresh vs. frozen: Fresh sweet corn is ideal, but frozen kernels work in a pinch—just thaw and pat dry first.
What to Serve With Honey Butter Skillet Corn
This dish is the perfect sidekick to so many meals! Try pairing it with:
- Grilled chicken, steak, or barbecue ribs
- Juicy burgers or hot dogs for a summer cookout
- Roasted pork tenderloin or baked ham
- A simple green salad for a light, veggie-packed meal
Storage and Reheating Tips
Leftovers? No problem! Store any extra corn in an airtight container in the fridge for up to 3 days. To reheat:
- Stovetop: Warm it in a skillet over medium heat with a splash of water or broth to keep it moist.
- Microwave: Cover and heat in 30-second intervals, stirring in between.
Note: The corn may soften a bit upon reheating, but the flavor will still be delicious!
Frequently Asked Questions
Can I use canned corn instead?
Yes! Drain and rinse canned corn well before using. Just note that the texture will be softer than fresh or frozen.
Is there a way to make this ahead of time?
You can prep the ingredients ahead, but for the best texture, cook it just before serving. If needed, reheat gently as directed above.
Can I double the recipe?
Absolutely! Use a larger skillet to ensure the corn cooks evenly without overcrowding.
What if I don’t have honey?
Maple syrup, brown sugar, or even a dash of agave nectar will work beautifully as a substitute.
Final Thoughts
There’s something so comforting about a skillet full of golden, buttery corn—especially when it’s kissed with honey and a hint of warmth. Whether you’re serving it at a backyard barbecue or as a cozy weeknight side, this dish is sure to bring smiles to the table. It’s simple, versatile, and packed with flavor, making it a recipe you’ll turn to again and again. Happy cooking!
PrintHoney Butter Skillet Corn
Sweet and savory skillet corn with a rich honey butter glaze, perfect as a side dish.
Ingredients
For the Crust:
- 4 cups fresh or frozen corn kernels
- 4 tablespoons unsalted butter
- 2 tablespoons honey
- 1/2 teaspoon salt
- 1/4 teaspoon black pepper
- 1/4 teaspoon smoked paprika
- 1 tablespoon chopped fresh parsley
Instructions
1. Prepare the Crust:
- Melt butter in a large skillet over medium heat.
- Add corn kernels and cook for 5-7 minutes, stirring occasionally, until tender.
- Stir in honey, salt, black pepper, and smoked paprika. Cook for another 2-3 minutes.
- Remove from heat and sprinkle with chopped parsley before serving.
Notes
You can customize the seasonings to taste.


