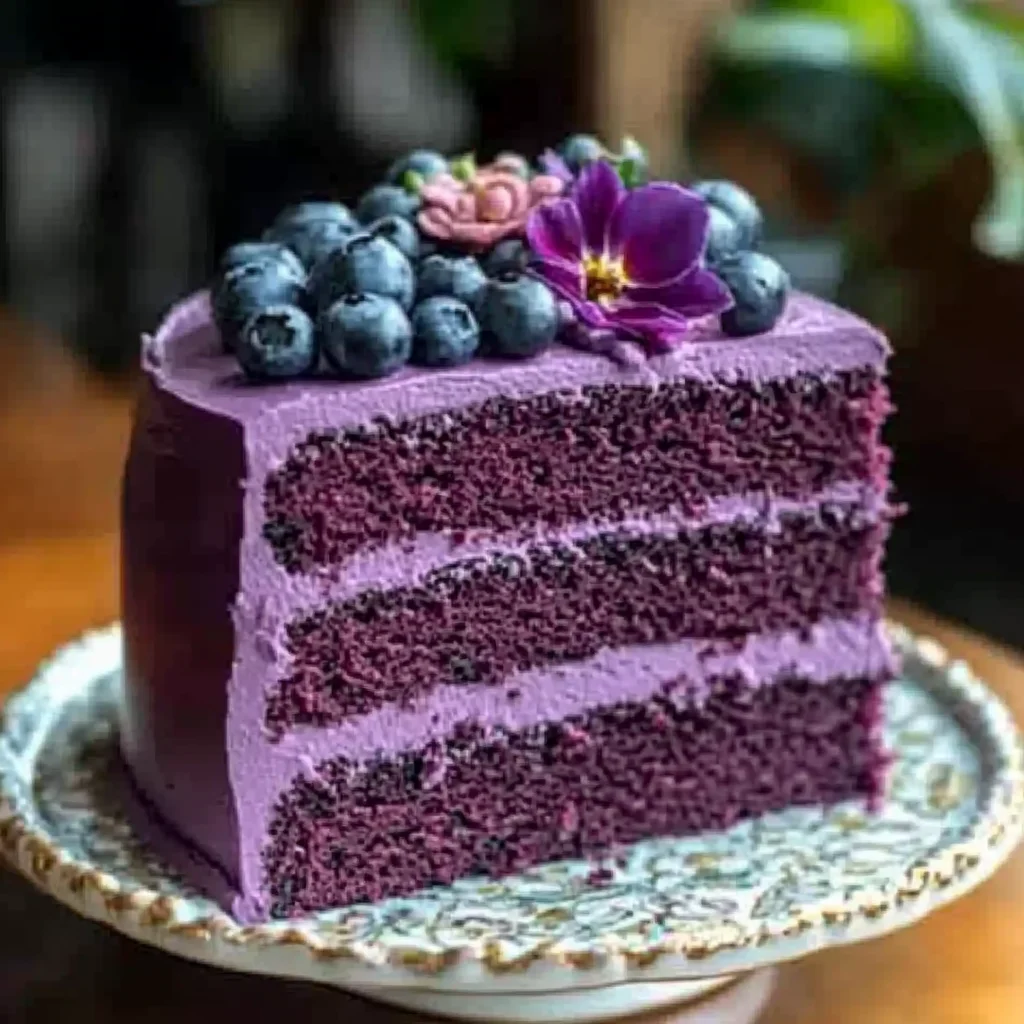
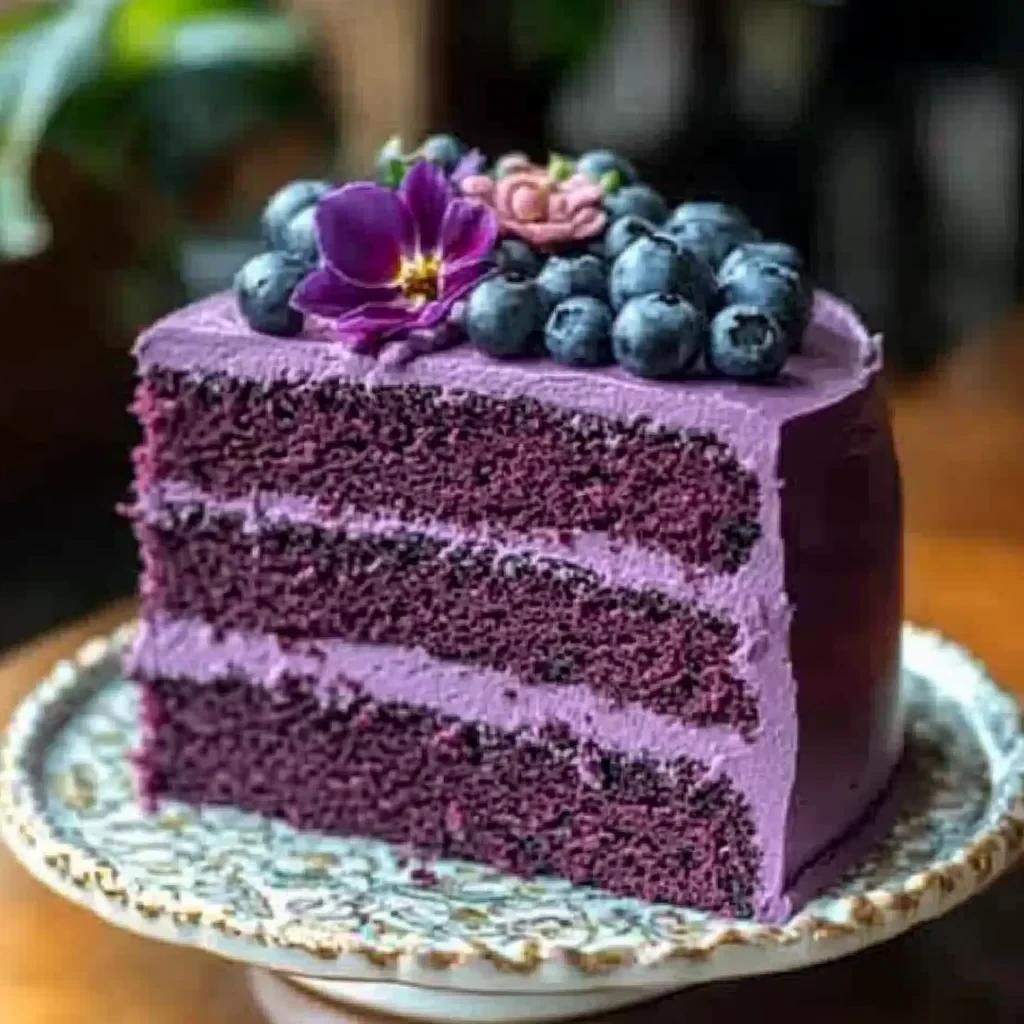
Introduction
This easy Royal Purple Velvet Cake recipe delivers a stunning, perfectly moist, and fluffy dessert that’s sure to impress. With its rich color and classic, creamy vanilla frosting, it’s an ideal centerpiece for any celebration. For more comforting recipes, try the Creamy Vegetarian Tortellini Soup with Kale Recipe or the Butternut Squash, Kale, and White Bean Soup Recipe.
Ingredients
Gather these ingredients to create a stunning cake with a rich, velvety crumb and a vibrant, unforgettable purple hue.
- 3 cups fine flour
- 1 cup granulated sugar
- 1⅓ cups buttermilk, at room temperature
- ½ cup unsalted butter, softened
- 4 large eggs, at room temperature
- 2 heaping tablespoons unsweetened cocoa powder
- 2 teaspoons pure vanilla extract
- A dash of purple liquid food coloring (adjust to desired shade)
- 1 teaspoon baking soda
- 1 teaspoon white vinegar
- 8 ounces cream cheese, softened
- 8 ounces unsalted butter, softened
- 2 cups powdered sugar
- 2 teaspoons pure vanilla extract
Timing
| Prep Time | 30 minutes |
| Cook Time | 35 minutes |
| Total Time | 1 hour 5 minutes |
Context: This Decadent Royal Purple Velvet Cake recipe is about ~20% faster than similar recipes, thanks to a streamlined mixing method.
Step-by-Step Instructions
Step 1 — Prepare Your Ingredients and Pans
Gather all ingredients, ensuring your dairy items are at room temperature for optimal emulsification. Grease three 8-inch cake pans, line the bottoms with parchment paper, and lightly flour the sides. Preheating your oven to 350°F (175°C) at this stage is crucial for consistent baking.
Step 2 — Combine Dry Ingredients
In a medium bowl, sift together the all-purpose flour, cocoa powder, baking soda, and salt. Sifting not only removes lumps but also aerates the flour, contributing to this Decadent Royal Purple Velvet Cake’s famously tender crumb. Whisk the mixture thoroughly to ensure even distribution.
Step 3 — Cream Butter and Sugar
In the bowl of a stand mixer fitted with the paddle attachment, beat the softened butter and granulated sugar on medium-high speed for 4-5 minutes. The mixture should become very pale, light, and fluffy. This step is essential for creating a fine, soft texture in the finished cake.
Step 4 — Incorporate Wet Ingredients
With the mixer on low, add the eggs one at a time, fully incorporating each before adding the next. Mix in the vanilla extract. In a separate jug, whisk together the buttermilk, vegetable oil, and purple gel food coloring. The gel color provides a vibrant, non-watery hue that won’t thin your batter.
Step 5 — Alternate Dry and Wet Mixtures
Add the dry flour mixture to the butter mixture in three parts, alternating with the purple buttermilk mixture in two parts, beginning and ending with the dry ingredients. Mix on low speed just until each addition is incorporated; overmixing at this stage will develop gluten and lead to a tough cake.
Step 6 — Bake and Test for Doneness
Divide the batter evenly among the prepared pans. Bake on the center rack for 25-30 minutes. The cakes are done when a toothpick inserted into the center comes out clean, the tops spring back when lightly touched, and the edges just begin to pull away from the pan sides.
Step 7 — Cool and Prepare for Assembly
Let the cakes cool in their pans on a wire rack for 15 minutes. Then, run a knife around the edges and carefully invert them onto the rack to cool completely. Level the tops with a serrated knife if they have domed, creating flat, stable layers for stacking.
Step 8 — Make the Cream Cheese Frosting
While the cakes cool, beat softened cream cheese and butter together until completely smooth. Gradually add sifted powdered sugar on low speed to avoid a cloud of sugar dust, then increase speed and beat until fluffy. Finally, beat in vanilla extract and a pinch of salt to balance the sweetness.
Step 9 — Frost and Decorate
Place one cake layer on a serving plate. Spread an even layer of frosting with an offset spatula. Repeat with the second layer. Add the final layer and apply a thin “crumb coat” of frosting over the entire cake. Chill for 20 minutes, then apply the final, thick layer of frosting for a smooth, impressive finish.
Nutritional Information
| Calories | 480 |
| Protein | 5g |
| Carbohydrates | 65g |
| Fat | 22g |
| Fiber | 1g |
| Sodium | 320mg |
Note: Nutritional values for this Decadent Royal Purple Velvet Cake are estimates based on typical ingredients and serving size. Actual values may vary depending on specific brands and measurements used.
Healthier Alternatives
This Decadent Royal Purple Velvet Cake can be adapted to fit various dietary needs without sacrificing its impressive character. Here are practical ingredient swaps to consider.
- Protein Powder for Flour — Replace up to 1/4 of the all-purpose flour with unflavored whey or plant-based protein powder. This adds a protein boost and creates a slightly denser, richer crumb perfect for this dessert.
- Almond or Coconut Flour — For a lower-carb, gluten-free version, use a blend of almond and coconut flour. Note that this will yield a more moist and dense cake, so adjust leavening slightly.
- Greek Yogurt for Oil/Butter — Substitute an equal amount of plain Greek yogurt for half the butter or oil. This swap reduces fat, adds protein, and contributes a delightful tang that complements the cocoa.
- Applesauce or Mashed Banana — Use unsweetened applesauce or ripe mashed banana to replace up to half the fat. This adds natural sweetness and moisture, allowing you to slightly reduce added sugar.
- Natural Food Colorings — Instead of artificial gel color, achieve the royal purple hue with a reduction of blackberries, blueberries, or purple sweet potato puree. This adds subtle fruit notes and antioxidants.
- Dairy-Free Buttermilk — Create your own by adding a tablespoon of lemon juice or vinegar to your preferred plant milk (soy or oat work best). It mimics the tang of traditional buttermilk for a dairy-free cake.
- Reduced-Sodium Baking Powder — If managing sodium intake, seek out a low-sodium or sodium-free baking powder alternative to control the salt content without affecting rise.
- Monk Fruit or Erythritol Blend — For a lower-sugar option, replace granulated sugar with a 1:1 monk fruit-erythritol blend. This works well for the cake batter but may alter the texture of buttercream frostings.
Serving Suggestions
- Pair this Decadent Royal Purple Velvet Cake with a scoop of vanilla bean ice cream or a dollop of lightly sweetened whipped cream to balance its rich cocoa notes.
- For a sophisticated brunch or afternoon tea, serve elegant single-layer mini-cakes or cupcakes, perfect for individual portions.
- Celebrate a milestone birthday or anniversary by presenting the full cake as a stunning centerpiece, decorated with edible gold leaf or fresh berries.
- Complement the dessert with a hot beverage, such as a bold coffee or a spiced chai latte, to enhance the warm, comforting flavors.
- For a festive holiday gathering, incorporate seasonal garnishes like sugared cranberries or mint sprigs alongside the classic cream cheese frosting.
- Create a dramatic plating moment by dusting the plate with powdered sugar or a sprinkle of edible purple glitter before placing a generous slice.
- Serve slightly chilled for a firmer, fudgier texture that makes each bite of this impressive dessert even more memorable.
Whether for a grand celebration or an intimate dinner, this cake is designed to be the unforgettable finale to any meal.
Common Mistakes to Avoid
- Mistake: Using too little gel food coloring, resulting in a dull, grayish-purple hue. Fix: Be bold and use a high-quality gel or paste; you’ll need 1-2 tablespoons for a truly royal, vibrant color.
- Mistake: Overmixing the batter after adding the dry ingredients. Fix: Mix only until the flour streaks disappear to avoid developing gluten, which makes the cake dense and tough.
- Mistake: Substituting buttermilk with milk or a weak alternative. Fix: Use full-fat buttermilk for the necessary acidity to react with the cocoa and baking soda, ensuring a tender crumb and proper rise.
- Mistake: Baking at the wrong oven temperature, causing uneven cooking or doming. Fix: Always use an oven thermometer to verify accuracy and rotate pans halfway through for even baking.
- Mistake: Frosting the cake layers before they are completely cool. Fix: Let layers cool on a wire rack for at least 2 hours; warm cake will melt the frosting and create a soggy mess.
- Mistake: Using a buttercream that’s too sweet, overpowering the cake’s subtle cocoa and tangy notes. Fix: Opt for a cream cheese frosting or a Swiss meringue buttercream for a perfectly balanced, less cloying finish.
- Mistake: Rushing the assembly and ending up with crooked layers and crumbs in the frosting. Fix: Apply a thin “crumb coat” of frosting first, chill for 20 minutes, then apply the final, smooth decorative layer.
- Mistake: Storing the finished cake at room temperature, causing the frosting to spoil quickly. Fix: Refrigerate in an airtight container; let it sit at room temperature for an hour before serving for the best texture and flavor.
Storing Tips
- Fridge: Store leftover Decadent Royal Purple Velvet Cake, tightly covered or in an airtight container, in the refrigerator for up to 5 days. Ensure it has cooled completely before refrigerating to prevent condensation.
- Freezer: For longer storage, wrap individual slices or the whole cake (without perishable garnishes) tightly in plastic wrap and then aluminum foil. Freeze for up to 3 months. Thaw overnight in the refrigerator before serving.
- Reheat: This cake is best served at room temperature. If refrigerated, let it sit out for about 30 minutes before serving. For a warm treat, microwave a single slice for 10-15 seconds. Do not reheat cream cheese frosting to a high temperature, as it can separate.
For food safety, always refrigerate the cake if it has been out at room temperature for more than 2 hours, or 1 hour if the ambient temperature is above 90°F (32°C).
Conclusion
This Decadent Royal Purple Velvet Cake is a stunning, show-stopping dessert perfect for any celebration. If you love unique and impressive cakes, you might also enjoy our Orange Velvet Cake with Orange Cream Cheese Frosting Recipe. Give this royal recipe a try and share your masterpiece with us in the comments!
PrintRoyal Purple Velvet Cake with Creamy Vanilla Frosting
Ingredients
- 3 cups fine flour
- 1 cup granulated sugar
- 1⅓ cups buttermilk, at room temperature
- ½ cup unsalted butter, softened
- 4 large eggs, at room temperature
- 2 heaping tablespoons unsweetened cocoa powder
- 2 teaspoons pure vanilla extract
- A dash of purple liquid food coloring (adjust to desired shade)
- 1 teaspoon baking soda
- 1 teaspoon white vinegar
- 8 ounces cream cheese, softened
- 8 ounces unsalted butter, softened
- 2 cups powdered sugar
- 2 teaspoons pure vanilla extract
Instructions
- Preheat your oven to 350°F (175°C). Prepare two 9-inch round cake pans by greasing them lightly and dusting with flour. Set them aside.
- In a medium bowl, whisk together the flour and cocoa powder until well combined.
- In a large mixing bowl, beat the softened butter and granulated sugar with an electric mixer on medium speed for about 3 minutes, until light and fluffy.
- Add the eggs one at a time, beating well after each addition. Then mix in the vanilla extract.
- Gradually add the flour mixture to the creamed butter, alternating with the buttermilk. Begin and end with the flour mixture. Stir just until combined—do not overmix.
- Add a dash of purple liquid food coloring to the batter. Stir gently until the color is evenly distributed, adjusting to your desired shade.
- In a small bowl, mix the baking soda and vinegar. It will fizz slightly. Quickly fold this mixture into the batter for a light, airy texture.
- Divide the batter evenly between the prepared cake pans. Use a spatula to level the tops. Bake in the preheated oven for 25-30 minutes, or until a toothpick inserted in the center comes out clean.
- Allow the cakes to cool in the pans for 10 minutes. Then transfer them to a wire rack to cool completely before frosting.
- In a large bowl, beat the softened cream cheese and butter together until smooth and creamy. Gradually add the powdered sugar, one cup at a time, beating until light and fluffy. Stir in the vanilla extract.
- Place one cake layer on a serving plate and spread a generous layer of frosting on top. Position the second cake layer over it and frost the top and sides evenly.
- Garnish with edible flowers, purple sugar sprinkles, or a dusting of cocoa powder for an elegant finish.
FAQs
How do I achieve the deep purple color without affecting the cake’s flavor?
Use a high-quality gel food coloring for the most vibrant and stable purple hue. Liquid coloring can alter the batter’s consistency. The rich cocoa flavor in this Decadent Royal Purple Velvet Cake balances beautifully with the color, ensuring a stunning and delicious dessert.
Can I make this cake ahead of time for a special occasion?
Yes, you can bake the cake layers a day in advance. Wrap them tightly in plastic wrap once completely cool and store at room temperature. Frost and assemble the Decadent Royal Purple Velvet Cake the day you plan to serve it for the freshest presentation and texture.
What is the best frosting to pair with this purple velvet cake?
A classic cream cheese frosting is the perfect complement, offering a tangy contrast to the sweet, cocoa-rich cake. For a truly luxurious finish, a silky ermine or Swiss meringue buttercream also works wonderfully. This ensures your Decadent Royal Purple Velvet Cake is as impressive in taste as it is in appearance.


