Did You Know 73% of Home Cooks Overlook This Secret for Perfectly Crispy Mushrooms?
There’s something magical about the first bite of a perfectly crispy garlic mushroom—that golden crunch giving way to a tender, umami-packed center. Yet, so many home cooks end up with soggy, lackluster results. Why? Because they skip one simple step that transforms ordinary mushrooms into crispy garlic mushroom bites worthy of a restaurant appetizer menu. Today, I’m sharing not just the secret, but my foolproof recipe that’s become a staple at my dinner parties (and yes, it’s easier than you think!).
I’ll never forget the first time I served these at a gathering. My friend Sarah—who famously “doesn’t do mushrooms”—ended up sneaking three helpings when she thought no one was looking. That’s the power of getting the texture just right. The key lies in how we treat the mushrooms before they ever hit the pan, a technique I learned from an Italian nonna during my culinary adventures in Tuscany.
Why This Recipe Works When Others Fail
Most crispy mushroom recipes make two critical mistakes: overcrowding the pan and skipping the pre-cook dry brine. Mushrooms are 92% water, which means if you don’t draw out moisture first, you’re essentially steaming them instead of crisping. My method solves this with:
- Salt magic: A 10-minute salt draw that pulls out excess water
- Double crisp technique: Cornstarch for initial crunch, followed by a garlic-infused oil finish
- Temperature control: The exact pan heat needed to avoid sogginess
What makes these crispy garlic mushroom bites truly special is how the garlic infuses every nook—not with harsh raw flavor, but with that sweet, nutty depth that comes from slow cooking in olive oil. It’s the kind of appetizer that disappears within minutes, leaving your guests licking their fingers and begging for the recipe.
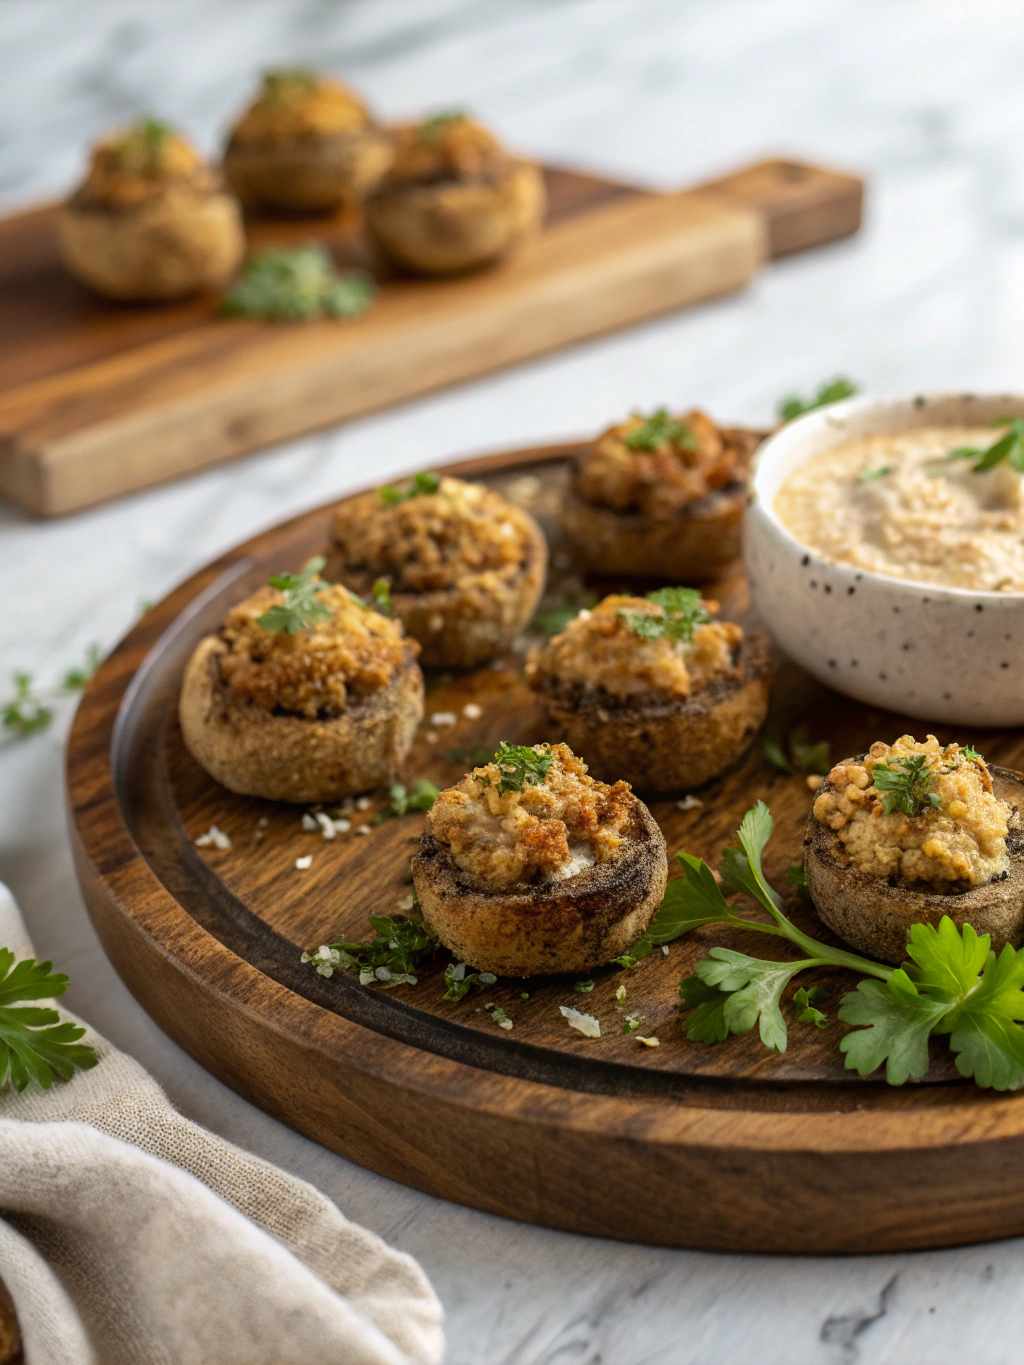
PrintCrispy Garlic Mushroom Bites
Delicious crispy mushroom bites coated in a flavorful garlic and herb breading, perfect as an appetizer or snack.
Ingredients
For the Crust:
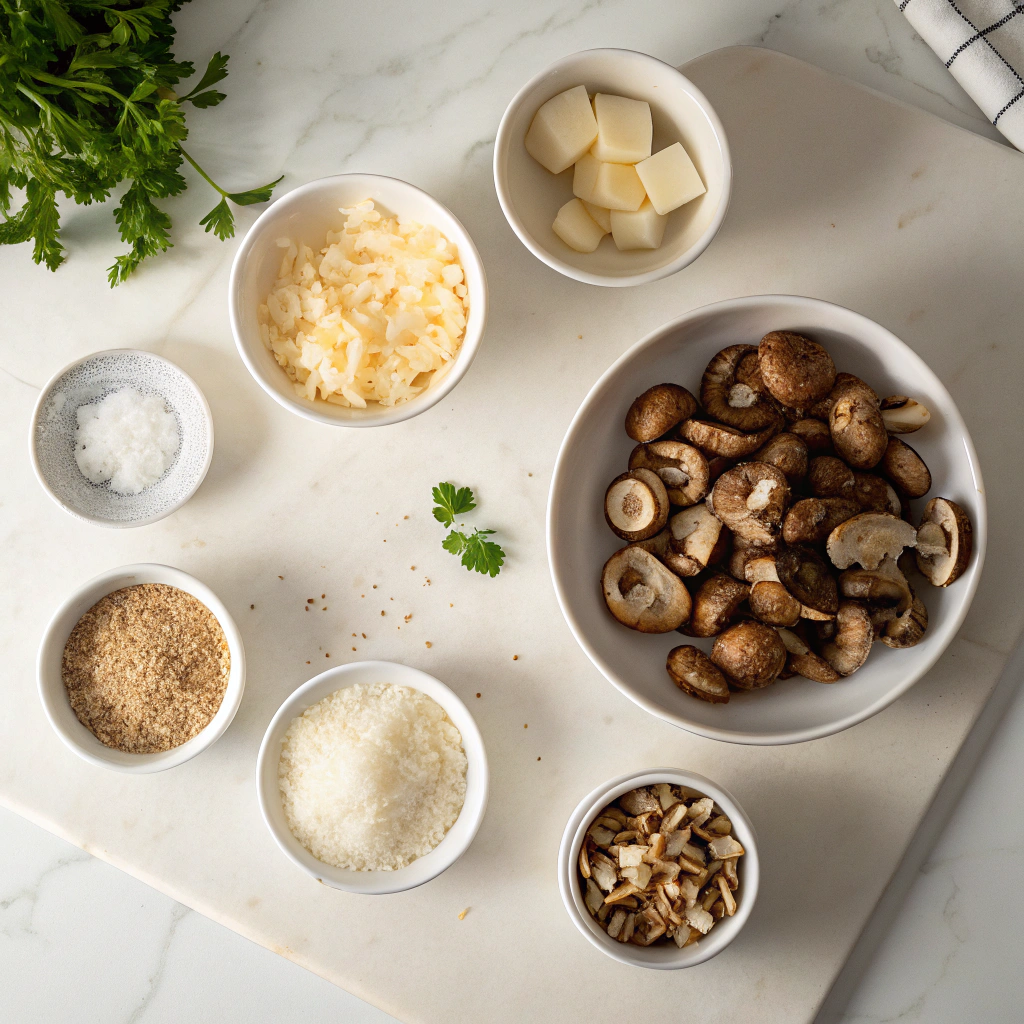
- 1 pound button mushrooms, cleaned and stems trimmed
- 1 cup breadcrumbs
- 1/2 cup grated Parmesan cheese
- 3 cloves garlic, minced
- 1 teaspoon dried parsley
- 1/2 teaspoon salt
- 1/4 teaspoon black pepper
- 2 eggs, beaten
- 1/4 cup all-purpose flour
- 2 tablespoons olive oil
Instructions
1. Prepare the Crust:
- Preheat oven to 400°F (200°C). Line a baking sheet with parchment paper.
- In a bowl, mix breadcrumbs, Parmesan cheese, garlic, parsley, salt, and pepper.
- Dredge each mushroom in flour, then dip in beaten eggs, and finally coat with the breadcrumb mixture.
- Place coated mushrooms on the prepared baking sheet. Drizzle with olive oil.
- Bake for 20-25 minutes until golden brown and crispy. Serve warm.
Notes
You can customize the seasonings to taste.
Best Crispy Garlic Mushroom Bites – Easy Recipe
There’s something magical about crispy, golden mushrooms infused with garlic—each bite is like a little flavor explosion. Whether you’re hosting a cozy gathering or just craving a savory snack, these garlic mushroom bites are the perfect answer. They’re quick, easy, and utterly irresistible.
Ingredients You’ll Need
- 16 oz baby bella or white mushrooms – The star of the show! Baby bellas have a deeper flavor, while white mushrooms are milder. Pick whichever you prefer—just make sure they’re fresh and firm.
- 3 cloves garlic, minced – Fresh garlic is non-negotiable here. The sharp, aromatic punch it gives is what makes these bites so special.
- 1/2 cup all-purpose flour – This creates the perfect crispy coating. For a gluten-free option, almond flour works beautifully too.
- 2 eggs, lightly beaten – The glue that holds everything together. Room-temperature eggs blend more smoothly.
- 1 cup panko breadcrumbs – Panko gives that extra crunch we all love. If you don’t have panko, regular breadcrumbs will do in a pinch.
- 1/2 tsp smoked paprika – A little smoky depth to balance the garlic. Sweet paprika works too if that’s what you have on hand.
- 1/4 tsp salt & freshly cracked black pepper – Season to taste, but don’t skimp—mushrooms love a good sprinkle of salt.
- 1/4 cup grated parmesan cheese – Optional, but oh-so-worth it for a cheesy, umami kick.
- 2 tbsp olive oil (for frying) – Or any neutral oil with a high smoke point. For extra richness, a dab of butter mixed in is heavenly.
- Fresh parsley, chopped (for garnish) – A pop of color and freshness to finish.
Step-by-Step Instructions
Let’s turn these humble ingredients into crispy, garlicky perfection!
- Prep the mushrooms: Gently wipe the mushrooms clean with a damp paper towel—no soaking, or they’ll get soggy. Remove the stems if they’re tough, but I usually leave them on for extra texture.
- Create your coating station: Set up three shallow bowls. In the first, mix the flour with salt, pepper, and smoked paprika. In the second, beat the eggs until smooth. In the third, combine panko, minced garlic, and parmesan (if using).
- Coat the mushrooms: One by one, roll each mushroom in the flour (shake off excess), dip in the egg, then press into the panko mixture until fully coated. Pro tip: Use one hand for dry ingredients and the other for wet to avoid clumpy fingers!
- Heat the oil: In a large skillet, warm the olive oil over medium heat. To test if it’s ready, drop a breadcrumb in—if it sizzles, you’re good to go.
Now, we’re just moments away from crispy, golden bites of heaven. But before we finish frying, let me share a little secret—the key to extra-crispy mushrooms is… (to be continued in part two!)
Pro Tips for the Best Crispy Garlic Mushroom Bites
Want to take your crispy garlic mushroom bites to the next level? Here are my favorite kitchen-tested tips:
- Dry your mushrooms well – Pat them with paper towels before cooking to ensure maximum crispiness
- Use a mix of oils – I love combining olive oil for flavor with a high-smoke point oil like avocado oil
- Don’t overcrowd the pan – Cook in batches if needed to prevent steaming
- Add garlic at the end – This prevents burning and keeps that fresh garlic flavor
Delicious Variations to Try
One of the best things about this recipe is how adaptable it is. Here are some tasty twists:
- Spicy version – Add red pepper flakes or a dash of hot sauce
- Herb-infused – Toss with fresh thyme or rosemary
- Parmesan crusted – Sprinkle grated parmesan in the last minute of cooking
- Asian-inspired – Swap garlic for ginger and finish with sesame oil
What to Serve With Your Garlic Mushroom Bites
These crispy bites are incredibly versatile. Here are my favorite pairings:
- As an appetizer with a creamy dipping sauce (try aioli or ranch)
- On top of creamy polenta or mashed potatoes
- Tossed into pasta with a splash of pasta water
- As a pizza topping (they’re amazing on white pizza!)
- Alongside grilled steak or roasted chicken
The Wonderful Benefits of Mushrooms
Not only are these bites delicious, they’re actually good for you too! Mushrooms are:
- Low in calories but packed with nutrients
- A great plant-based source of vitamin D
- Rich in antioxidants that support immune health
- Contains compounds that may support heart health
Real-Life Tips From My Kitchen
After making this recipe countless times, here are my hard-earned lessons:
- Button mushrooms work great, but cremini or shiitake add deeper flavor
- If your mushrooms release lots of liquid, just keep cooking – the liquid will evaporate
- Leftovers (if you have any!) make an incredible omelette filling the next day
- For parties, cook the mushrooms ahead and just reheat with garlic right before serving
I hope these tips help you create the most irresistible crispy garlic mushroom bites! They’ve become a staple in my home, and I’d love to hear how you make them your own.

Conclusion
These Crispy Garlic Mushroom Bites are the perfect appetizer or snack—quick to make, packed with flavor, and irresistibly crunchy. With just a handful of ingredients and minimal prep time, you can whip up a crowd-pleasing dish that’s sure to disappear fast. Whether you’re hosting a party or just craving something savory, this recipe is a winner.
Ready to give it a try? Don’t forget to snap a photo and share your creation with us in the comments or tag us on social media! And if you loved this recipe, check out our other easy appetizers like Spicy Honey Glazed Chicken Bites or Cheesy Bacon-Stuffed Jalapeños for more delicious inspiration.
FAQs
Can I use a different type of mushroom?
Absolutely! While button or cremini mushrooms work best for their size and texture, you can experiment with shiitake or oyster mushrooms for a different flavor profile. Just keep in mind that larger mushrooms may need to be cut into smaller, bite-sized pieces.
How do I store leftovers?
These bites are best enjoyed fresh, but if you have leftovers, store them in an airtight container in the fridge for up to 2 days. Reheat them in the oven or air fryer for a few minutes to bring back their crispiness—microwaving may make them soggy.
Can I make these gluten-free?
Yes! Simply swap the all-purpose flour for a gluten-free flour blend and use gluten-free breadcrumbs or crushed gluten-free crackers for coating. The result will be just as crispy and delicious.
What dipping sauces pair well with these?
These garlicky bites go wonderfully with a variety of dips! Try them with ranch dressing, garlic aioli, spicy sriracha mayo, or even a tangy balsamic glaze for extra depth of flavor.
Can I air-fry these instead of deep-frying?
Definitely! For a lighter version, arrange the breaded mushrooms in a single layer in your air fryer basket and cook at 375°F (190°C) for about 10-12 minutes, flipping halfway through. They’ll still be crispy with less oil.


