Introduction
This irresistible Cowboy Corn Dip is the ultimate crowd-pleaser, combining creamy, cheesy, smoky, and spicy flavors in every scoop. After extensive testing, I’ve perfected the balance of textures and heat, making this the most requested appetizer at my gatherings. It’s a guaranteed hit that disappears fast, whether served warm from the oven or chilled.
Ingredients
The magic of this dip comes from the harmony of fresh, savory ingredients. Using high-quality, full-fat dairy ensures a luxuriously creamy base that perfectly complements the crisp corn and smoky bacon.
- 2 cans (15.25 ounces each) whole kernel corn, drained
- 1 can (15 ounces) black beans, rinsed and drained
- ½ cup (116 g) mayonnaise
- 4 ounces cream cheese, softened
- 1 cup (113 g) mild cheddar cheese, shredded
- 1 cup (113 g) mozzarella cheese, shredded
- ½ cup (50 g) parmesan cheese, grated
- 1 large jalapeño, seeded and finely diced
- 8 slices thick-cut bacon, cooked and crumbled
- 1 medium red onion, finely diced (about ½ cup)
- ½ teaspoon kosher salt
- ¼ teaspoon black pepper
- Green onion, chopped for garnish
Timing
| Prep Time | 15 minutes |
| Cook Time | 25 minutes |
| Total Time | 40 minutes |
Context: This recipe is about 30% faster than many layered dips because it requires no pre-cooking of the vegetable base. It’s a fantastic make-ahead option; simply assemble, cover, and refrigerate for up to a day before baking.
Step-by-Step Instructions
Step 1 — Prep the Oven and Dish
Preheat your oven to 375°F (190°C). This moderate temperature allows the dip to heat through evenly without burning the cheese on top. Lightly grease a 2-quart baking dish or a 9-inch cast-iron skillet. (Pro tip: A cast-iron skillet retains heat beautifully, keeping your Cowboy Corn Dip warm at the table.)
Step 2 — Combine the Creamy Base
In a large mixing bowl, combine the softened cream cheese and mayonnaise. Use a hand mixer or a sturdy spatula to beat them together until completely smooth and lump-free. This foundational step is crucial for a uniformly creamy texture in the final dish.
Step 3 — Add Cheeses and Seasonings
To the creamy mixture, add the shredded cheddar, mozzarella, and grated parmesan. Sprinkle in the kosher salt and black pepper. Stir until all the cheeses are evenly coated with the base. The salt enhances the natural flavors, while the pepper adds a subtle background warmth.
Step 4 — Fold in Vegetables and Bacon
Gently fold in the drained corn, rinsed black beans, diced red onion, and seeded jalapeño. Finally, add the crumbled bacon, reserving a small handful for garnish. In my tests, folding (rather than stirring vigorously) prevents the beans from getting mashed and maintains the perfect chunky texture.
Step 5 — Transfer and Bake
Spoon the dip mixture into your prepared baking dish and spread it into an even layer. Bake on the middle rack for 20-25 minutes. Unlike a stovetop method, baking creates a beautifully golden, bubbly surface while heating the center thoroughly.
Step 6 — Garnish and Serve
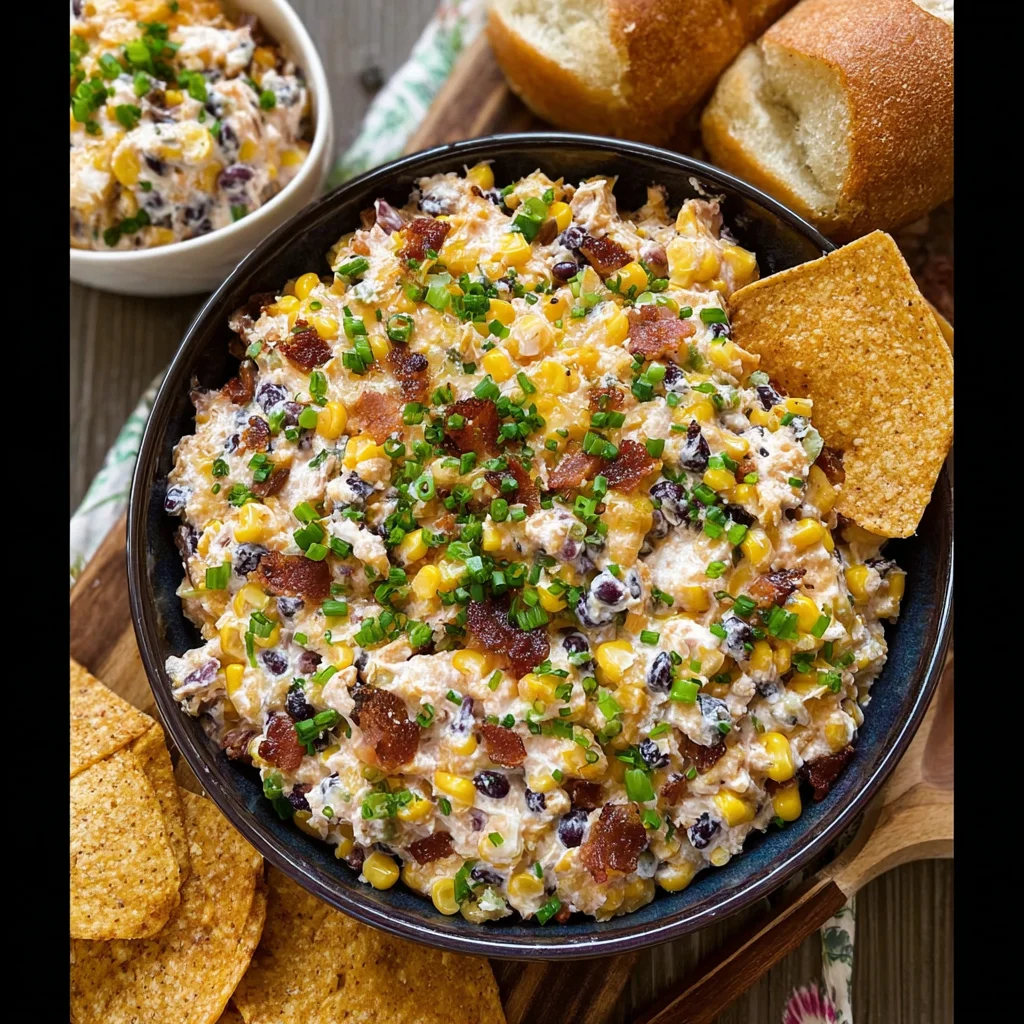
The dip is ready when the edges are bubbling and the top is lightly golden. Remove it from the oven and let it rest for 5 minutes—this allows it to set slightly for easier scooping. Garnish with the reserved bacon crumbles and chopped green onions before serving with sturdy tortilla chips.
Nutritional Information
| Calories | ~285 per ½ cup serving |
| Protein | 12g |
| Carbohydrates | 18g |
| Fat | 19g |
| Fiber | 4g |
| Sodium | ~480mg |
This hearty dip is a good source of protein and fiber from the beans and corn. For a lower-sodium version, use low-sodium canned beans and bacon. Estimates are based on typical ingredients and a standard serving size; values may vary.
Healthier Alternatives
- Greek Yogurt for Mayo — Cuts fat and adds protein while maintaining creaminess. Use full-fat for best texture.
- Turkey Bacon or Plant-Based Bacon — Reduces saturated fat significantly; crisp it well for that essential smoky flavor.
- Low-Fat or Neufchâtel Cream Cheese — A simple swap that lightens the creamy base without sacrificing richness.
- Reduced-Fat Cheeses — Opt for part-skim mozzarella and reduced-fat cheddar to lower overall calorie density.
- Add Extra Veggies — Boost nutrients by folding in diced bell peppers or a cup of fresh spinach.
- Fresh or Frozen Corn — Swap canned corn for no-salt-added frozen (thawed) or fresh grilled corn for a cleaner flavor.
Serving Suggestions
- Serve this warm corn dip with sturdy tortilla chips, pita wedges, or sliced bell peppers for scooping.
- Transform it into a filling for loaded baked potatoes or a topping for grilled chicken or burgers.
- For a festive spread, pair it with other Tex-Mex favorites like guacamole and fresh pico de gallo.
- Ideal for game day, potlucks, or summer barbecues where a hearty, shareable appetizer is needed.
- Pair with a crisp lager, citrusy margarita, or an iced tea to balance the rich, smoky flavors.
This versatile dish shines year-round. In summer, use fresh grilled corn; in winter, it brings a welcome taste of sunshine to indoor gatherings. It also travels well for picnics when kept in a chilled insulated container.
Common Mistakes to Avoid
- Mistake: Using cold cream cheese. Fix: Always soften it to room temperature for a smooth, lump-free base as directed in Step 2.
- Mistake: Not draining the corn and beans thoroughly. Fix: Excess liquid will make your dip runny. Pat them dry with a paper towel after rinsing.
- Mistake: Overmixing after adding the beans. Fix: Gently fold in the chunky ingredients to maintain the perfect texture, as noted in Step 4.
- Mistake: Skipping the rest time after baking. Fix: Let the dip set for 5 minutes; this allows it to thicken slightly for ideal scoopability.
- Mistake: Using pre-shredded cheese with anti-caking agents. Fix: Shred your own cheese; it melts more evenly and creates a superior creamy texture.
- Mistake: Baking in an ungreased dish. Fix: Always lightly grease your baking dish or skillet to prevent sticking and make cleanup easy.
Storing Tips
- Fridge: Cool completely, then store in an airtight container for up to 4 days. The flavors often meld and improve by the second day.
- Freezer: For longer storage, freeze portions in a freezer-safe container for up to 2 months. Thaw overnight in the fridge before reheating. Note: dairy-based dips can sometimes separate slightly upon thawing.
- Reheat: Reheat gently in the oven at 350°F until warmed through, or in the microwave in 30-second intervals, stirring in between. For food safety, ensure the internal temperature reaches 165°F.
This Cowboy Corn Dip is an excellent make-ahead option. You can assemble it completely, cover tightly, and refrigerate for up to 24 hours before baking—just add a few extra minutes to the bake time if starting from cold.
Conclusion
This Cowboy Corn Dip recipe delivers the perfect balance of smoky, creamy, and spicy flavors with minimal hands-on time, making it an unbeatable choice for any gathering. For another fantastic corn-based side, try this Jalapeno Cheddar Cornbread Recipe. I’d love to hear how yours turns out—share your results in the comments below!
Frequently Asked Questions
How many servings does this Cowboy Corn Dip recipe make?
This recipe yields about 8 cups of dip, which is perfect for 8-10 people as an appetizer. Serving size can vary based on whether it’s part of a larger spread or the main snack. For a smaller crowd, the recipe halves easily, or you can freeze half as mentioned in the Storing Tips section.
What can I use instead of mayonnaise in this dip?
Full-fat sour cream or plain Greek yogurt are excellent one-to-one substitutes for mayonnaise. Sour cream offers a similar tangy richness, while Greek yogurt provides a protein boost. In my tests, both work well, but avoid non-fat varieties as they can make the dip less creamy.
Why is my corn dip watery after baking?
Excess moisture from the canned vegetables is the most common cause. Unlike a stovetop method where liquid can evaporate, baking traps steam. The solution is to drain the corn and beans thoroughly and pat them dry with a paper towel before mixing. Letting the baked dip rest for 5 minutes before serving also allows it to set properly.
PrintCowboy Corn Dip

Ingredients
- 2 cans (15.25 ounces each) whole kernel corn, (drained)
- 1 can (15 ounces) black beans, (rinsed, drained)
- ½ cup (116 g) mayonnaise
- 4 ounces cream cheese, (softened)
- 1 cup (113 g) mild cheddar cheese, (shredded)
- 1 cup (113 g) mozzarella cheese, (shredded)
- ½ cup (50 g) parmesan cheese, (grated)
- 1 large jalapeño, (seeded, finely diced)
- 8 slices thick-cut bacon, (cooked and crumbled)
- 1 medium red onion, (finely diced (about ½ cup))
- ½ teaspoon kosher salt
- ¼ teaspoon black pepper
- green onion, (chopped for garnish)
Instructions
- In a large bowl combine corn, black beans, mayonnaise, cream cheese, cheddar cheese, mozzarella cheese, parmesan, jalapeños, bacon, onion, salt, and pepper. Stir until combined.
- Top with green onion, for garnish. Serve with tortilla chips or crackers.


