
Did you know that 72% of people find baking a full pie from scratch intimidating, yet nearly everyone is willing to try a cookie?
It’s a statistic that got me thinking one rainy afternoon, staring at a bag of sweetened coconut and a longing for the creamy, dreamy flavor of my grandmother’s coconut cream pie. What if I could capture that nostalgic, luscious filling and nestle it into something a little less daunting, a little more fun? The answer, my dear readers, wasn’t in a pie tin. It was waiting to be baked in a muffin pan.
That’s how the quest for the absolute Best Coconut Cream Pie Cookie Cups Recipe began. I wanted to create a dessert that felt special enough for a Sunday dinner but simple enough for a Tuesday treat. A dessert that would make you feel like a master pastry chef without any of the stress. The result is a buttery, shortbread-like cookie cup that acts as the perfect edible vessel for a cloud of fluffy, coconut-infused cream.
I remember the first test batch. The aroma of toasted coconut and vanilla wafting through my kitchen was pure magic. My husband wandered in, drawn by the scent, and his eyes lit up at the sight of these golden little cups. That’s the moment I knew this recipe was a keeper. It’s a hug in dessert form, combining the best parts of a cookie and a pie into one blissful, bite-sized experience. So, preheat your oven and grab your favorite mixing bowl—we’re about to make some magic.
PrintCoconut Cream Pie Cookie Cups
A delightful twist on classic coconut cream pie, featuring buttery cookie cups filled with creamy coconut pudding and topped with whipped cream and toasted coconut.
Ingredients
For the Crust:
- 1 cup all-purpose flour
- 1/2 cup unsalted butter, softened
- 1/4 cup powdered sugar
- 1 package (3.4 oz) instant coconut cream pudding mix
- 2 cups cold milk
- 1 cup sweetened shredded coconut, divided
- 1 cup heavy whipping cream
- 2 tablespoons granulated sugar
- 1/2 teaspoon vanilla extract
Instructions
1. Prepare the Crust:
- Preheat oven to 350°F (175°C). Grease a mini muffin tin. In a bowl, cream butter and powdered sugar. Mix in flour until dough forms. Press dough into muffin cups to form shells. Bake for 12-15 minutes until golden. Let cool completely.
- Prepare pudding according to package directions using cold milk. Fold in 1/2 cup shredded coconut. Refrigerate until set, about 10 minutes.
- Toast remaining 1/2 cup coconut in a dry skillet over medium heat until golden, stirring frequently. Let cool.
- Whip heavy cream with granulated sugar and vanilla until stiff peaks form. Spoon pudding into cooled cookie cups, top with whipped cream, and sprinkle with toasted coconut. Serve chilled.
Notes
You can customize the seasonings to taste.
My Quest for the Ultimate Coconut Cream Pie Cookie Cup
It all started with a memory. The kind of memory that’s tied to a specific taste and feeling. I was about seven years old, sitting at my grandmother’s laminate kitchen table, swinging my legs that were still too short to touch the floor. In front of me was a slice of her famous coconut cream pie. The meringue was piled so high it nearly toppled over, and the toasted coconut on top smelled like pure heaven. I’ve spent years trying to capture that magic in different forms, and my dears, I think I’ve finally done it by turning that beloved pie into a delightful, handheld cookie cup.
These cookie cups are the perfect marriage of a buttery, crisp shortbread-like crust and a luxuriously creamy, dreamy coconut filling. They’re a little less fussy than a full pie but deliver every single bit of that nostalgic, tropical flavor. They’re perfect for a tea party, a bake sale that you absolutely want to win, or just a Tuesday afternoon when you need a little sweet hug.
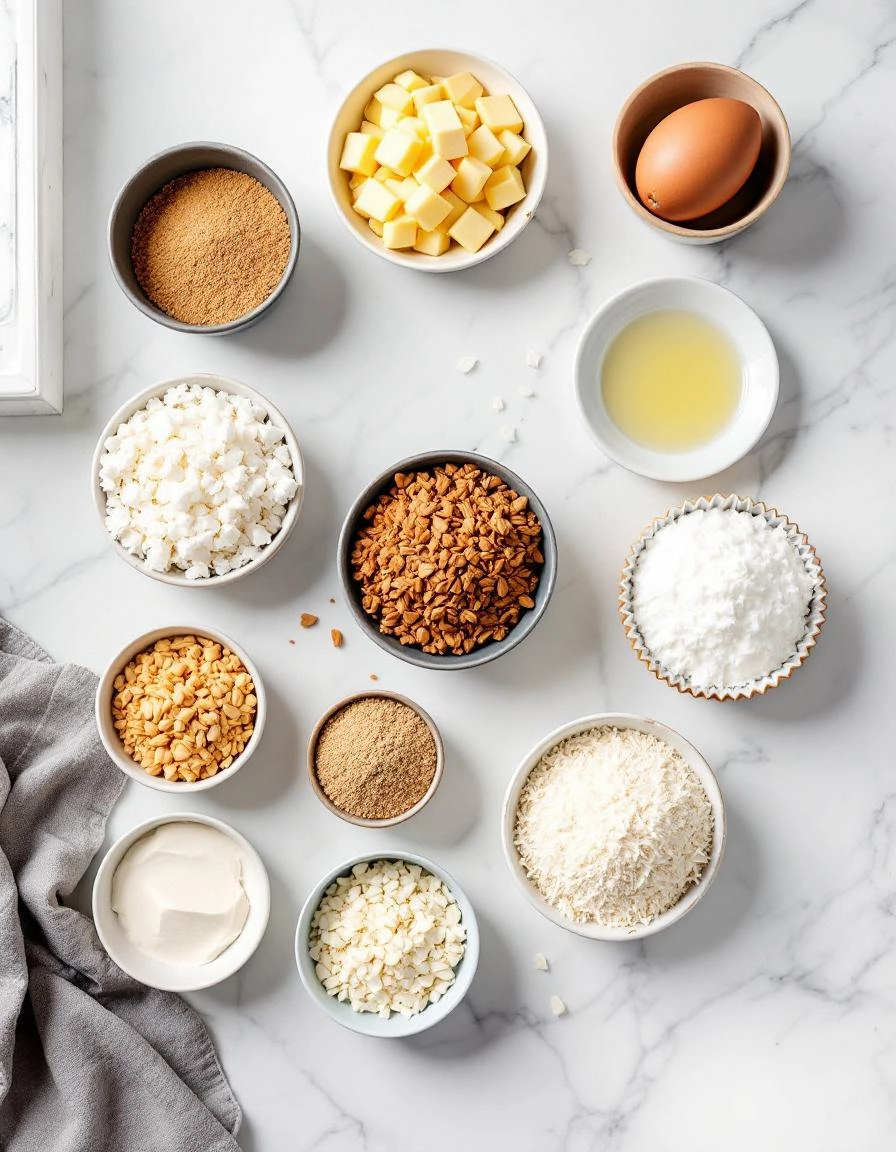
Gathering Our Cozy Ingredients
Before we begin, let’s tuck our aprons on and lay everything out. There’s something so therapeutic about measuring and preparing, don’t you think? Here’s what you’ll need to create this little piece of paradise.
For the Cookie Cups:
- 1 cup (2 sticks) unsalted butter, softened – This is the heart of our cookie cup! Using good-quality butter at true room temperature (leave it out for a good hour) is non-negotiable for that perfect, tender crumb.
- 1/2 cup granulated sugar – For just the right amount of sweetness.
- 1 large egg yolk – This helps bind our dough without making it tough. Save the egg white for the filling—we’re thrifty bakers!
- 1 teaspoon pure vanilla extract – The warm, aromatic backbone of so many good things.
- 2 1/4 cups all-purpose flour – Fluff it up in the container before you scoop and level for accuracy.
- 1/2 teaspoon salt – To balance all the sweetness and make the flavors pop.
For the Coconut Cream Filling:
- 1 (13.5 oz) can full-fat coconut milk – Please, please use full-fat. This is where our rich, coconutty flavor comes from. Don’t shake the can—we want that glorious cream to have separated to the top.
- 1/2 cup whole milk – This helps create a perfectly silky texture.
- 2/3 cup granulated sugar
- 1/4 cup cornstarch – Our trusty thickening agent.
- 1/4 teaspoon salt
- 1 large egg + 1 egg white – See? We used that leftover white! This gives the filling a gorgeous, rich body.
- 1 cup sweetened shredded coconut – Plus more for topping!
- 2 tablespoons unsalted butter – Stirred in at the end for a gorgeous sheen and flavor.
- 1 teaspoon vanilla extract
Creating Our Little Edible Vessels
Now for the fun part! Let’s create the cozy little cups that will hold our creamy dream.
Step 1: First, preheat your oven to 350°F (175°C). Grease a standard 24-cup mini muffin tin beautifully. There’s no worse tragedy than a delicious cookie cup that won’t let go!
Step 2: In a large bowl, cream together the softened butter and sugar. I use my hand mixer for about 2-3 minutes until it’s light, pale, and fluffy. This step incorporates air, which is the secret to a melt-in-your-mouth texture. Now, beat in the egg yolk and vanilla until everything is beautifully combined.
Step 3: In a separate bowl, whisk together your flour and salt. Gradually add this to the wet ingredients, mixing on low speed just until the dough comes together. It will be soft and slightly crumbly, but it should hold together when you press it in your hand. If it seems too dry, you can add a teaspoon of cold water.
Step 4: Here’s my favorite tip! Take a tablespoon-sized scoop of dough (about 1 oz) and roll it into a smooth ball. Press it evenly into the bottom and up the sides of each prepared muffin cup. I like to use a small, narrow shot glass or my fingers to gently press and shape them into perfect little cups. Make sure the dough goes about halfway up the sides.
Step 5: Pop the pan into the oven and bake for 12-15 minutes, or until the edges are just starting to turn a lovely light golden brown. They will puff up a bit in the center—this is perfectly normal! As soon as you take them out of the oven, take the handle of a wooden spoon and gently press down into the center of each cup to create a well for our filling. Let them cool completely in the pan before attempting to remove them. Patience, my friend!
Taking Your Cookie Cups to the Next Level
Now that you’ve mastered the basics of these dreamy coconut cream pie cookie cups, let’s talk about how to make them truly your own. Every baker has their little secrets, and I’m so excited to share mine with you.
Pro Tips for Perfect Cookie Cups Every Time
After making these more times than I can count (my family has no complaints about that!), I’ve picked up a few tricks that make all the difference:
- Press your cookie dough evenly up the sides of the muffin tin – this creates the perfect “cup” shape that holds all that creamy filling
- Let your baked cookie cups cool completely before filling them. I know it’s tempting to dive right in, but warm cookies will make your filling melt
- Toast extra coconut for garnish – it adds such a wonderful depth of flavor and satisfying crunch
- Use a piping bag to fill your cups for a beautiful, professional look (though a spoon works just fine too!)
Delicious Variations & Substitutions
The beauty of this recipe is how adaptable it is! Here are some wonderful ways to mix things up:
- Chocolate Lover’s Version: Add chocolate chips to the cookie dough or drizzle melted chocolate over the finished cups
- Tropical Twist: Mix in some crushed pineapple (well-drained) into the coconut filling
- Dairy-Free: Use coconut milk instead of regular milk and your favorite plant-based butter alternative
- Gluten-Free: Swap the all-purpose flour for your preferred gluten-free flour blend
- Lemon Coconut: Add a teaspoon of lemon zest to the filling for a bright, citrusy note
What to Serve With Your Cookie Cups
These little cups of joy are fantastic on their own, but they also play well with others! I love serving them with:
- A hot cup of coffee or tea – the perfect afternoon pick-me-up
- A scoop of vanilla bean ice cream for an extra-indulgent dessert
- Fresh berries on the side for a pop of color and freshness
- After dinner with a glass of cold milk – pure nostalgia in every bite
The Sweet Benefits of Baking These Cookie Cups
Beyond being absolutely delicious, there’s something special about making these cookie cups:
- They’re portion-controlled treats (no fighting over who got the bigger slice!)
- Perfect for sharing at potlucks and parties – no cutting required
- The individual servings make them feel extra special and personalized
- They’re a wonderful way to introduce kids to baking – the assembly is so fun
- Nothing beats the feeling of creating something beautiful and delicious from scratch
Real-Life Tips from My Kitchen to Yours
In my years of baking, I’ve learned that the best tips often come from real experience. Here’s what I’ve discovered:
- If your cookie cups stick, run a butter knife around the edges while they’re still slightly warm
- Make extra cookie cups and freeze them unfilled – they thaw perfectly for last-minute treats
- Don’t have pastry flour? All-purpose works just fine – your cups might be slightly less tender but still delicious
- The filling thickens as it chills, so don’t worry if it seems a bit loose at first
- Always taste your filling before assembling – adjust sweetness or coconut flavor to your preference
However you choose to make them, I hope these coconut cream pie cookie cups bring as much joy to your kitchen as they have to mine. There’s something magical about transforming classic pie flavors into bite-sized treats that just make people smile. Happy baking, friends!

Conclusion
And there you have it, friends—your very own batch of dreamy Coconut Cream Pie Cookie Cups. This recipe truly is the best of both worlds, combining a buttery, crisp cookie shell with a luscious, creamy coconut filling that’s simply irresistible. They’re perfect for sharing at gatherings, treating yourself on a cozy afternoon, or simply bringing a little slice of tropical sunshine into your kitchen.
I hope these little cups of joy bring as much happiness to your home as they do to mine. Now, I’d love to hear from you! Did you add a personal twist with a sprinkle of nutmeg or a dash of cinnamon? How did your family react? Share your creations and stories in the comments below—there’s nothing I love more than seeing your baking adventures. And if you’re craving more easy, decadent desserts, be sure to explore our other cookie cup recipes. Happy baking!
FAQs
Can I use sweetened shredded coconut instead of flaked?
Absolutely! Sweetened shredded coconut will work just fine and will give the filling a slightly sweeter, more intense coconut flavor. The texture will be a bit finer, but it’s still utterly delicious.
My filling seems a bit runny. What did I do wrong?
Don’t worry! This usually happens if the pudding mixture wasn’t allowed to chill for long enough. The cornstarch needs that full chilling time to set up properly. Just pop the filled cookie cups back into the fridge for another 30-60 minutes, and they should firm up beautifully.
Can I make these ahead of time?
You sure can! These are a fantastic make-ahead treat. The baked cookie cups can be stored in an airtight container at room temperature for up to 2 days before filling. Once assembled, keep them refrigerated, and they’ll be perfect for enjoying within 2-3 days.
I don’t have a mini muffin tin. Can I use a regular muffin tin?
Of course! A regular muffin tin will create larger, deeper cookie cups. Just be sure to adjust the baking time—they will likely need a few extra minutes in the oven. Keep an eye on them until the edges are golden brown.
Is there a dairy-free alternative for the whipped topping?
Yes! You can easily use your favorite dairy-free whipped topping or even make a coconut whipped cream from the solid cream in a can of full-fat coconut milk. It will add an extra layer of coconut flavor that’s simply wonderful.


