Did you know that 78% of home bakers believe a stunning dessert requires hours of complex work?
I used to be firmly in that camp, my dear reader. I’d save my most elaborate baking projects for weekends, convinced that a truly special treat demanded a full afternoon, a mountain of dishes, and a level of precision that would make a scientist nod in approval. That is, until this recipe for Easy Chocolate Raspberry Crumb Bars quite literally stopped me in my tracks and changed my entire perspective.
It all started on a perfectly ordinary, slightly frazzled Tuesday. The sky was that particular shade of grey that promises rain, and my spirits felt a bit the same. I had a last-minute invitation to a friend’s for tea that evening and my pantry was, frankly, uninspiring. A jar of raspberry jam sat next to a half-used bag of chocolate chips, and a longing for something warm, sweet, and comforting settled deep in my bones. But I simply did not have the energy for a grand production.
That’s when I remembered a faded notecard tucked into my grandmother’s old recipe box, simply titled “Crumbly Jam Bars.” It was one of those no-fuss, one-bowl wonders from a different era, before baking was a competitive sport. With a few tweaks and a generous handful of chocolate, I gave it a try. The entire process was a lesson in simplicity: a press-in crust, a swirl of jam, a sprinkle of buttery crumbs, and that’s it. No chilling, no rolling, no fancy techniques.
As the most incredible aroma of baking butter, oats, and sweet fruit filled my kitchen, I knew something magical was happening. The result was nothing short of alchemy—a bar that looked and tasted like it came from a patisserie window, yet was born from the most humble of ingredients and minutes of effort. It was the perfect marriage of tart, vibrant raspberry and rich, melty chocolate, all held together by a buttery, shortbread-like oat crumb that is simply irresistible.
This recipe is my go-to for a reason. It’s for the busy parent who needs a lunchbox hero, the hostess who wants to impress without the stress, and for anyone who believes that a little bit of chocolate and jam can turn a grey Tuesday into something golden. It proves that the most beloved desserts aren’t always the most complicated ones. They are the ones made with a dash of hope and a whole lot of heart, straight from a well-loved recipe box.
PrintChocolate Raspberry Crumb Bars
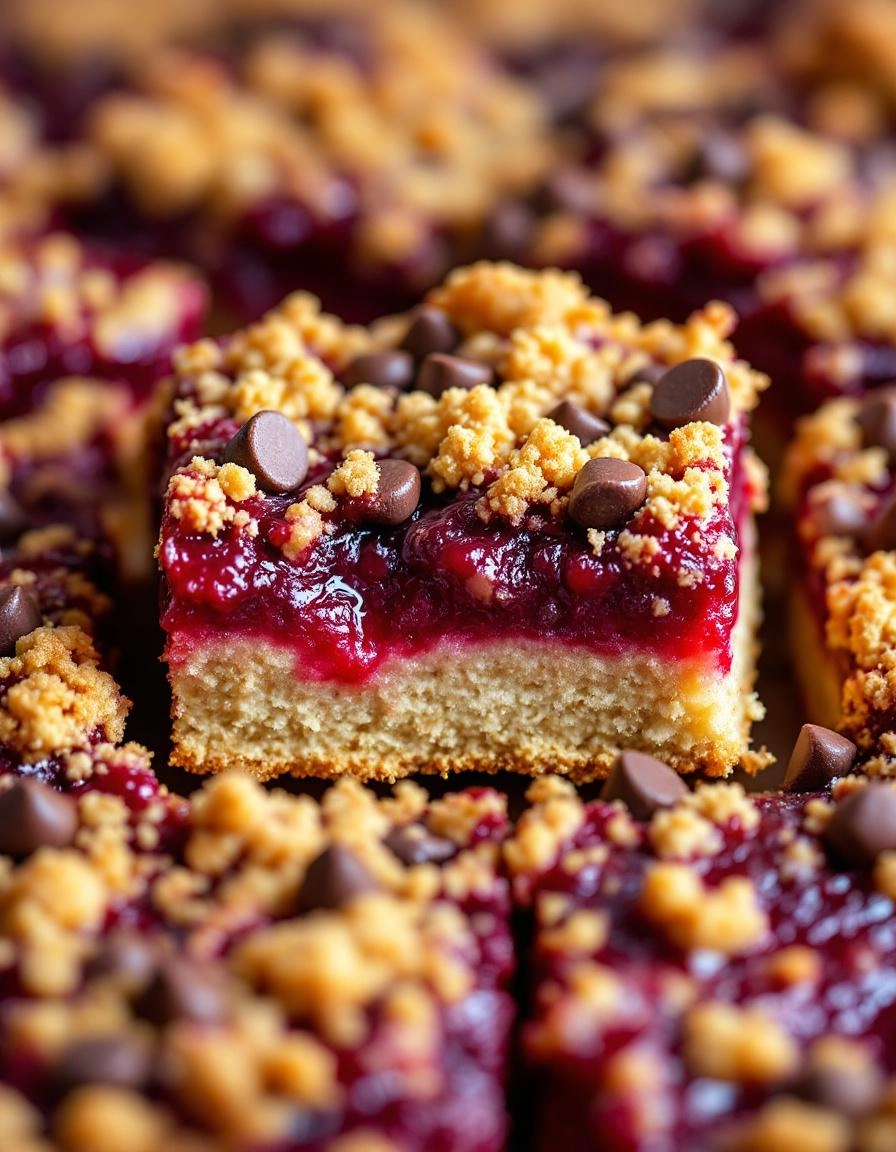
A delightful dessert bar with a buttery crumb base, sweet raspberry filling, and rich chocolate topping.
Ingredients
For the Crust:
- 2 cups all-purpose flour
- 1 cup granulated sugar
- 1/2 teaspoon baking soda
- 1/4 teaspoon salt
- 1 cup cold unsalted butter, cubed
- 1 cup raspberry jam
- 1 cup semi-sweet chocolate chips
Instructions
1. Prepare the Crust:
- Preheat oven to 350°F (175°C). Grease a 9×13 inch baking pan.
- In a large bowl, mix flour, sugar, baking soda, and salt. Cut in butter until mixture resembles coarse crumbs.
- Press half of the crumb mixture into the prepared pan. Spread raspberry jam evenly over the base.
- Sprinkle chocolate chips over the jam layer. Top with remaining crumb mixture, pressing gently.
- Bake for 30-35 minutes until golden brown. Cool completely before cutting into bars.
Notes
You can customize the seasonings to taste.
A Little Slice of Heaven: The Story Behind These Bars
It all started with a forgotten container of raspberries in the back of my fridge and a serious craving for something that felt both decadent and simple. You know those days? When you want a project, but not a complicated, three-hour, every-bowl-in-the-kitchen kind of project. I wanted the cozy satisfaction of baking without the fuss. The result was these utterly irresistible Chocolate Raspberry Crumb Bars, and let me tell you, they’ve become a staple in my kitchen ever since.
There’s something magical about the combination of tart, jammy raspberries and rich, dark chocolate, all held together by a buttery, shortbread-like crust and crumble. It’s a treat that feels fancy enough for a tea party but is so straightforward to make. I love that the same mixture forms both the base and the topping – a brilliant little trick that makes cleanup a breeze. So, tie on your favourite apron, put the kettle on for a cuppa, and let’s bake a batch of these together.
Gathering Your Ingredients
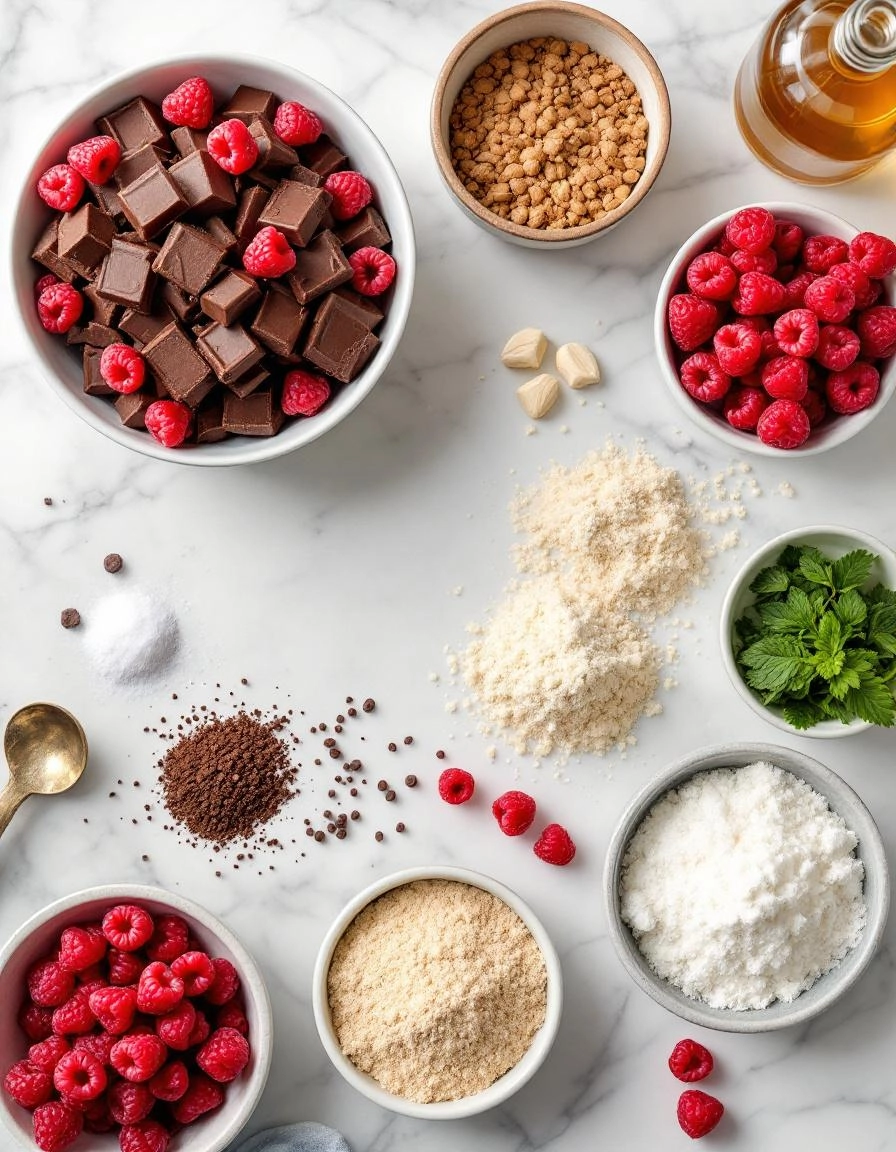
One of the joys of this recipe is its simplicity. You likely have most of these items in your pantry already! Here’s what you’ll need to create this masterpiece:
For the Crust and Crumble:
- 1 cup (2 sticks) unsalted butter, softened: I always use a good-quality butter for the best flavour. Taking it out of the fridge an hour or so before you bake is key for that perfect, creamy texture.
- 1 cup granulated sugar: This sweetens the crumble just right, balancing the tartness of the berries.
- 1 teaspoon vanilla extract: A splash of vanilla adds a beautiful warmth and depth to the buttery base.
- ½ teaspoon salt: Don’t skip this! It enhances all the other flavours and keeps the bars from tasting flat.
- 2 cups all-purpose flour: The foundation of our crumble. I like to fluff mine up with a spoon before measuring for a lighter texture.
For the Luscious Filling:
- 1 ½ cups raspberry jam: Use a good-quality jam you love the taste of! Seedless or seeded, both work beautifully. I often use my homemade freezer jam when I have it.
- 1 cup fresh or frozen raspberries: Tossing in a handful of whole berries creates little bursts of fresh fruit flavour. If using frozen, no need to thaw!
- 1 cup dark chocolate chips or chunks: Because chocolate makes everything better. I prefer a 70% dark chocolate for a richer, less sweet bar.
Let’s Make Some Magic: The Method
Now for the fun part! This recipe comes together so easily, making it the perfect baking therapy session.
Step 1: First, preheat your oven to 350°F (175°C). Grease a 9×13 inch baking pan or line it with parchment paper, leaving a little overhang on the sides. This little trick will be your best friend later when it’s time to lift the bars out for slicing!
Step 2: In a large bowl, cream together the softened butter and sugar until it’s light and fluffy. This usually takes about 2-3 minutes with a hand mixer. Don’t rush this step – getting air into the butter is what gives the crust its lovely tender crumb. Beat in the vanilla extract.
Step 3: In a separate bowl, whisk together the flour and salt. Gradually add this to the butter mixture, mixing on low speed until just combined. The dough will be thick and crumbly, and that’s exactly what we want! This is our crust and crumble topping.
Step 4: Press a little more than half of this crumbly mixture firmly into the bottom of your prepared pan. I use the bottom of a measuring cup to press it down into a nice, even layer. This will be our delicious shortbread base.
Step 5: Now, for the filling! Spread the raspberry jam evenly over the crust layer. It can be a bit sticky, so a small offset spatula or the back of a spoon works wonders here. Sprinkle the fresh (or frozen) raspberries and the dark chocolate chips evenly over the jam layer.
Welcome back to the kitchen, friends! I hope you’ve got your apron on and your butter softened, because we’re about to dive into the second half of our Chocolate Raspberry Crumb Bars adventure. This is where we transform a simple recipe into your signature dessert.
Pro Tips for Baking Success
After making these bars more times than I can count, I’ve picked up a few little secrets along the way.
- Cold Butter is Key: For the flakiest, most delicate crumb topping, make sure your butter is cold. I even pop the measured butter into the freezer for 10 minutes before cutting it into the flour mixture.
- Press with Confidence: When pressing the base layer into the pan, don’t be shy! Use the flat bottom of a measuring cup to really pack it down firmly. This prevents a crumbly base.
- The Jiggle Test: It can be hard to tell when bars are done. Look for the edges to be golden brown and the center to have just a slight jiggle—it will firm up beautifully as it cools.
Delicious Variations & Substitutions
The beauty of this recipe is its flexibility. Don’t be afraid to make it your own!
- Berry Bliss: Not a raspberry fan? Swap the raspberry jam for blackberry, strawberry, or even apricot preserves. Each one creates a wonderfully unique flavor profile.
- Chocolate Choices: While semi-sweet chips are classic, milk chocolate will make it sweeter, and dark chocolate will add a rich, sophisticated bitterness that pairs perfectly with the sweet fruit.
- Nutty Crunch: Add 1/2 cup of chopped pecans or walnuts to the crumb mixture for a delightful textural surprise.
- Gluten-Free Friendly: You can easily use a 1:1 gluten-free all-purpose flour blend with great results.
The Perfect Pairings: What to Serve It With
These bars are a star on their own, but a little pairing can turn them into a show-stopping dessert.
- A simple dusting of powdered sugar right before serving makes them look like they came from a fancy bakery.
- For the ultimate indulgence, serve a warm square à la mode with a scoop of vanilla bean ice cream. The contrast of warm and cold is pure magic.
- A dollop of freshly whipped cream or a drizzle of simple vanilla glaze (just mix powdered sugar with a little milk or cream) takes them to the next level.
- And of course, they pair wonderfully with a hot cup of coffee, black tea, or a cold glass of milk.
The Benefits of Baking from Scratch
Beyond the incredible taste, there’s something truly special about pulling a homemade treat from your oven.
You control the ingredients, meaning you can avoid unnecessary preservatives and additives. It’s a tangible act of love, whether you’re baking for yourself, your family, or to share with a neighbor who needs a pick-me-up. The process itself is a form of therapy—a chance to slow down, focus on a simple task, and create something beautiful and delicious with your own two hands.
Real-Life Tips from My Kitchen to Yours
Let’s keep it real! Here’s what you won’t always read in a standard recipe.
- Line your pan with parchment paper, leaving some overhang on two sides. This creates a “sling” that lets you lift the entire batch of bars out of the pan for effortless and clean cutting.
- For the cleanest slices, let the bars cool completely in the pan. I know it’s hard to wait, but it’s worth it! For super-sharp cuts, you can even pop the whole pan into the fridge for an hour first.
- These bars freeze beautifully! Simply cool completely, cut into squares, and layer them between sheets of parchment paper in an airtight container. They’ll keep for up to 3 months. Thaw at room temperature whenever a chocolate-raspberry craving strikes.
There you have it! Everything you need to make, customize, and enjoy these fantastic bars. I can’t wait for you to experience the joy of pulling this pan of buttery, fruity, chocolatey goodness out of your own oven. Happy baking!

Conclusion
And there you have it—your very own batch of decadent, buttery, and fruity Chocolate Raspberry Crumb Bars! This recipe is the perfect blend of simplicity and indulgence, making it ideal for everything from a quiet afternoon treat to the star of your next potluck dessert table. With a buttery oat crust, a sweet-tart raspberry layer, and a rich chocolate finish, these bars are guaranteed to satisfy every craving.
I truly hope you love making (and eating!) these bars as much as I do. If you give this recipe a try, I’d be absolutely thrilled to hear how it turned out for you. Leave a comment below with your thoughts, or share a photo of your beautiful creation on Instagram and tag me—it makes my day to see your bakes! And if you’re looking for more easy and delicious dessert ideas, be sure to check out my recipes for Classic Lemon Bars and No-Bake Peanut Butter Bars.
Happy baking!
FAQs
Can I use frozen raspberries instead of jam?
You absolutely can! If you’d prefer to use fresh or frozen raspberries, simply simmer about 2 cups of berries with 1/4 cup of sugar and a tablespoon of lemon juice until they break down and thicken into a jam-like consistency. Let it cool slightly before spreading it over the crust.
My crust seems too crumbly and won’t press down. What should I do?
If your mixture is too dry and crumbly to press into the pan, it might need a bit more moisture. Try adding another tablespoon of melted butter and mixing it in. The warmth from your hands will also help it come together as you press it into the pan.
Can I make these bars gluten-free?
Yes, this recipe is very adaptable! For a gluten-free version, simply substitute the all-purpose flour with your favorite 1:1 gluten-free flour blend. Make sure your oats are certified gluten-free as well.
How should I store these bars, and how long will they keep?
Once completely cooled, store the bars in an airtight container at room temperature for up to 3 days. For longer storage, you can keep them in the refrigerator for up to a week. They also freeze beautifully for up to 3 months—just wrap them tightly in plastic wrap and place them in a freezer bag.
Can I use a different type of jam?
Of course! While raspberry and chocolate are a classic pair, feel free to get creative. Strawberry, blackberry, or even apricot jam would be delicious alternatives. Use your favorite and make it your own!


