Introduction
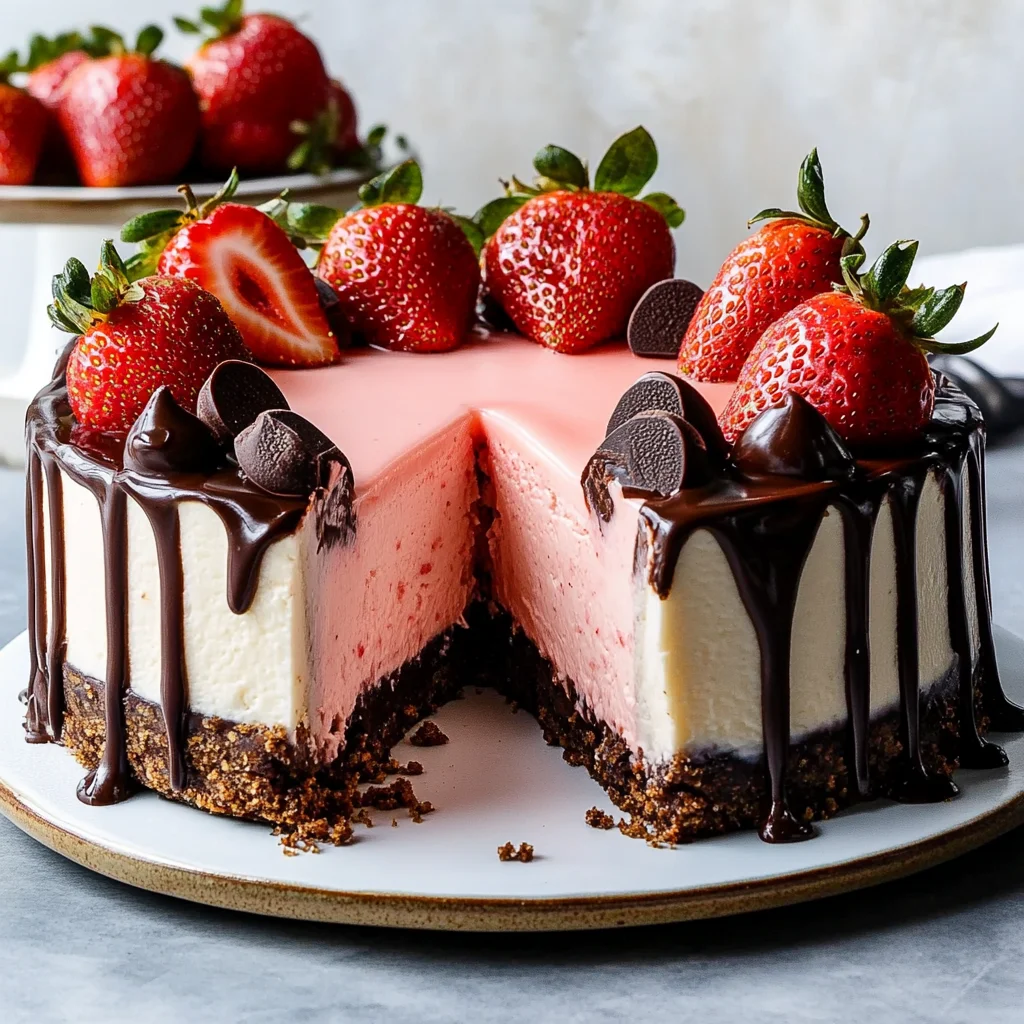
This decadent Chocolate Covered Strawberry Cheesecake Recipe combines the classic romance of chocolate-dipped berries with the rich, creamy indulgence of New York-style cheesecake. After extensive testing, I’ve perfected a method that yields a velvety, crack-free filling every time, nestled on a buttery crust and crowned with glossy ganache and fresh strawberries. It’s the ultimate showstopping dessert for any special occasion.
Ingredients
Using high-quality, full-fat ingredients is the secret to the luxurious texture and flavor of this cheesecake. Be sure your cream cheese is fully softened to room temperature for a perfectly smooth, lump-free filling.
- For the crust:
- 1 1/2 cups graham cracker crumbs (or chocolate wafer cookies, for extra chocolate flavor)
- 1/4 cup granulated sugar
- 1/2 cup unsalted butter, melted
- For the cheesecake filling:
- 3 (8 oz) packages cream cheese, softened
- 1 cup granulated sugar
- 1 tsp vanilla extract
- 3 large eggs
- 1/2 cup sour cream
- 1/4 cup heavy cream
- For the chocolate ganache:
- 1 cup heavy cream
- 1 cup semi-sweet chocolate chips
- For the strawberry topping:
- 1 lb fresh strawberries, hulled and sliced
- 1/4 cup strawberry jam or preserves (optional, for extra shine)
Timing
| Prep Time | 30 minutes |
| Cook Time | 1 hour 10 minutes (plus cooling) |
| Total Time | 1 hour 40 minutes (plus 6+ hours to chill) |
Context: While the active time is under two hours, this is a fantastic make-ahead dessert. The extended chilling period—crucial for a firm, sliceable texture—means you can prepare it a full day in advance, making it perfect for stress-free entertaining.
Step-by-Step Instructions
Step 1 — Prepare the Crust
Preheat your oven to 325°F (163°C). In a medium bowl, combine the graham cracker crumbs and sugar. Pour the melted butter over the mixture and stir until all the crumbs are evenly moistened and resemble wet sand. Press this mixture firmly and evenly into the bottom of a 9-inch springform pan. (Pro tip: Use the bottom of a flat glass or measuring cup to compact it for a solid base that won’t crumble when sliced.) Bake for 10 minutes, then set aside to cool slightly while you make the filling.
Step 2 — Make the Cheesecake Filling
In the bowl of a stand mixer fitted with the paddle attachment (or using a hand mixer), beat the softened cream cheese on medium speed until completely smooth and creamy, about 2-3 minutes. This initial creaming is vital for a lump-free batter. Scrape down the bowl and beater. With the mixer on low, gradually add the sugar, then the vanilla extract, mixing until just combined.
Step 3 — Incorporate Eggs and Dairy
Add the eggs one at a time, beating on low speed after each addition until just incorporated. Over-beating at this stage incorporates too much air, which can cause the cheesecake to rise and crack during baking. Finally, mix in the sour cream and heavy cream until the batter is homogenous and silky. Scrape the bowl once more to ensure no pockets of unmixed cream cheese remain.
Step 4 — Bake the Cheesecake
Pour the filling over the pre-baked crust in the springform pan. Smooth the top with a spatula. Place the pan on a baking sheet and bake in the preheated oven for 55-70 minutes. The cheesecake is done when the edges are set but the center still has a slight, gentle jiggle—about the size of a quarter—when the pan is tapped. Unlike a cake, a cheesecake should not be fully firm in the center when removed from the oven, as it will continue to set as it cools.
Step 5 — Cool and Chill
Turn off the oven, crack the door open slightly, and let the cheesecake cool inside for 1 hour. This gradual temperature change helps prevent dramatic sinking and surface cracks. After the hour, remove it from the oven and run a thin knife around the inner edge of the pan to release it from the sides—this prevents it from sticking and cracking as it contracts. Let it cool completely at room temperature, then cover and refrigerate for at least 6 hours, or preferably overnight.
Step 6 — Prepare the Ganache and Topping
Step 7 — Assemble and Serve
Once the cheesecake is fully chilled, prepare the ganache. Heat the heavy cream in a small saucepan over medium heat until it just begins to simmer. Pour the hot cream over the chocolate chips in a heatproof bowl. Let it sit for 3 minutes, then whisk slowly from the center outward until a smooth, glossy ganache forms. Let it cool for 5-10 minutes until slightly thickened but still pourable.
Arrange the sliced strawberries over the top of the chilled cheesecake. If using, gently warm the strawberry jam with a teaspoon of water to create a simple glaze and brush it lightly over the berries for extra shine. Carefully pour the slightly cooled ganache over the strawberry layer, allowing it to drip down the sides decoratively. Return the assembled Chocolate Covered Strawberry Cheesecake to the fridge for 30 minutes to set the ganache before releasing the springform pan, slicing, and serving.
Nutritional Information
| Calories | ~520 |
| Protein | 8g |
| Carbohydrates | 45g |
| Fat | 35g |
| Fiber | 2g |
| Sodium | ~280mg |
Note: Estimates are per serving (1/12th of the cheesecake) based on typical ingredients. This dessert is a good source of calcium and Vitamin C from the cream cheese and fresh strawberries. Values may vary with specific brands or ingredient swaps.
Healthier Alternatives
- Greek Yogurt for Sour Cream — Use an equal amount of plain, full-fat Greek yogurt to boost protein while maintaining the tangy flavor and creamy texture in the filling.
- Almond Flour Crust — Replace the graham cracker crumbs with 1 1/2 cups of finely ground almond flour and 2 tablespoons of a low-carb sweetener for a gluten-free, lower-carb base.
- Reduced-Sugar Ganache — Opt for sugar-free dark chocolate chips and use the same heavy cream ratio for a rich topping with significantly less sugar.
- Neufchâtel or Light Cream Cheese — These contain about 1/3 less fat than regular cream cheese. In my tests, the texture remains excellent if you avoid over-mixing.
- Natural Sweeteners — Substitute the granulated sugar in the filling with pure maple syrup or monk fruit sweetener, using a 3/4 cup measurement to account for increased sweetness.
- Dairy-Free Version — Use plant-based cream cheese, coconut cream instead of heavy cream, and a vegan butter for the crust to create a delicious dairy-free strawberry cheesecake.
Serving Suggestions
- For an elegant presentation, garnish each slice with a single whole chocolate-dipped strawberry placed on the rim of the plate.
- Pair with a glass of late-harvest Riesling, a sweet sparkling rosé, or a cup of freshly brewed coffee to complement the rich chocolate and berry flavors.
- Serve slightly chilled, but let it sit at room temperature for 15 minutes before slicing for the cleanest cuts and creamiest mouthfeel.
- Transform leftovers into mini desserts by crumbling the cheesecake and layering it with fresh berries in small glasses for a deconstructed parfait.
- This is the perfect dessert for Valentine’s Day, Mother’s Day, or anniversary dinners, offering a restaurant-quality finish at home.
This Chocolate Covered Strawberry Cheesecake Recipe shines as a make-ahead centerpiece. You can prepare the base cheesecake up to two days in advance, then add the fresh strawberry and ganache topping the day of serving for peak freshness.
Common Mistakes to Avoid
- Mistake: Using cold cream cheese. Fix: Let all dairy ingredients sit at room temperature for at least 2 hours. Cold cream cheese will never blend smoothly, leading to a lumpy batter.
- Mistake: Over-beating the eggs into the filling. Fix: In Step 3, add eggs one at a time and mix on low speed until just combined. Over-beating incorporates excess air, which is a primary cause of cracks.
- Mistake: Baking until the center is completely firm. Fix: The cheesecake is done when the edges are puffed and the center has a slight jiggle (like Jell-O). It will set fully during the slow cooling process.
- Mistake: Skipping the water bath or the gradual cool-down. Fix: While not always mandatory, placing the springform pan in a larger pan of hot water during baking and letting it cool in the turned-off oven with the door ajar creates the ideal humid environment for a crack-free top.
- Mistake: Pouring hot ganache directly onto the cold cheesecake. Fix: Let the ganache cool for 5-10 minutes until slightly thickened. Pouring it hot can cause it to run off the strawberries and pool at the base.
- Mistake: Not releasing the cheesecake from the pan sides before chilling. Fix: Always run a thin knife around the edge after the initial cool-down to prevent the filling from sticking and tearing as it contracts in the fridge.
Storing Tips
- Fridge: Store the fully assembled cheesecake, covered with plastic wrap or in an airtight container, in the refrigerator. It will maintain optimal texture and flavor for up to 5 days. The strawberries may soften slightly after day 2.
- Freezer: For longer storage, freeze slices or the whole cheesecake (without fresh strawberry topping) for up to 2 months. Wrap tightly in plastic wrap, then aluminum foil. Thaw overnight in the refrigerator and add fresh berries and ganache before serving.
- Reheat: Cheesecake is best served cold. Do not microwave, as this will compromise the delicate structure. If you prefer a less-chilled slice, simply let it sit at room temperature for 15-20 minutes before serving.
According to USDA guidelines, dairy-based desserts should be stored at or below 40°F. For meal prep, bake and chill the plain cheesecake base up to 3 days ahead. Add the strawberry and chocolate ganache topping the day you plan to serve it for the freshest presentation and taste.
Conclusion
This Chocolate Covered Strawberry Cheesecake Recipe delivers a stunning, professional-looking dessert with a surprisingly straightforward method. Its make-ahead nature makes it a stress-free choice for entertaining. For another elegant berry dessert, try this Dark Chocolate Strawberry Tart Recipe. I hope you love creating this showstopper—please share your results in the comments!
Frequently Asked Questions
Can I make this cheesecake without a springform pan?
Yes, you can use a 9-inch deep-dish pie plate. The main challenge is serving neat slices. To serve, follow the same baking instructions but cool completely, then chill for at least 8 hours. Use a sharp, thin-bladed knife dipped in hot water to cut slices directly from the plate.
What’s the best substitute for fresh strawberries in the topping?
High-quality frozen strawberries, thawed and thoroughly patted dry, work well. For a cooked topping, simmer 2 cups of frozen berries with 2 tablespoons of sugar and a teaspoon of lemon juice until thickened, then cool completely before spreading over the cheesecake before adding ganache.
Why did my ganache turn out grainy or separate?
Graininess usually means the chocolate was overheated or the cream was too hot, causing the cocoa butter to separate. To fix it, add a tablespoon of room-temperature cream and whisk vigorously to re-emulsify. For prevention, always pour just-simmered cream over the chocolate and let it sit for 3 minutes before gently whisking.
PrintChocolate Covered Strawberry Cheesecake Recipe

Ingredients
- For the crust:
- 1 1/2 cups graham cracker crumbs (or chocolate wafer cookies, for extra chocolate flavor)
- 1/4 cup granulated sugar
- 1/2 cup unsalted butter, melted
- For the cheesecake filling:
- 3 (8 oz) packages cream cheese, softened
- 1 cup granulated sugar
- 1 tsp vanilla extract
- 3 large eggs
- 1/2 cup sour cream
- 1/4 cup heavy cream
- For the chocolate ganache:
- 1 cup heavy cream
- 1 cup semi-sweet chocolate chips
- For the strawberry topping:
- 1 lb fresh strawberries, hulled and sliced
- 1/4 cup strawberry jam or preserves (optional, for extra shine)
Instructions
- Preheat your oven to 325°F (163°C).
- In a medium bowl, combine the graham cracker crumbs and granulated sugar. Add the melted butter and stir until the mixture is evenly combined.
- Press the mixture into the bottom of a 9-inch springform pan to form an even crust. Use the back of a spoon to press it down firmly.
- Bake for 10 minutes, then remove from the oven and set aside to cool.
- In a large mixing bowl, beat the softened cream cheese and sugar with an electric mixer until smooth and creamy.
- Add the vanilla extract and mix until combined.
- Add the eggs one at a time, mixing well after each addition. Be sure not to over-mix.
- Add the sour cream and heavy cream and mix until smooth.
- Pour the cheesecake batter over the cooled crust in the springform pan.
- Place the cheesecake in the oven and bake for 55-60 minutes or until the edges are set and the center is slightly jiggly.
- Turn off the oven and leave the cheesecake in the oven for another hour to cool gradually (this helps prevent cracking).
- Once cooled, remove the cheesecake from the oven and let it cool completely at room temperature, then refrigerate for at least 4 hours (or overnight) to firm up.
- In a small saucepan, heat the heavy cream over medium heat until it begins to simmer.
- Remove from the heat and pour over the chocolate chips in a heatproof bowl. Let it sit for a minute, then stir until smooth and glossy.
- Let the ganache cool to room temperature. Once it has thickened slightly, pour it over the chilled cheesecake, spreading it evenly with a spatula. Refrigerate again for 30 minutes for the ganache to set.
- Slice the strawberries and set aside.
- (Optional) If you want a glossy finish on the strawberries, heat the strawberry jam in a small saucepan until it becomes liquid and then brush the jam over the sliced strawberries.
- Once the ganache has set, arrange the sliced strawberries on top of the cheesecake in a circular pattern or in any design you prefer.
- Serve chilled and enjoy!


