Introduction
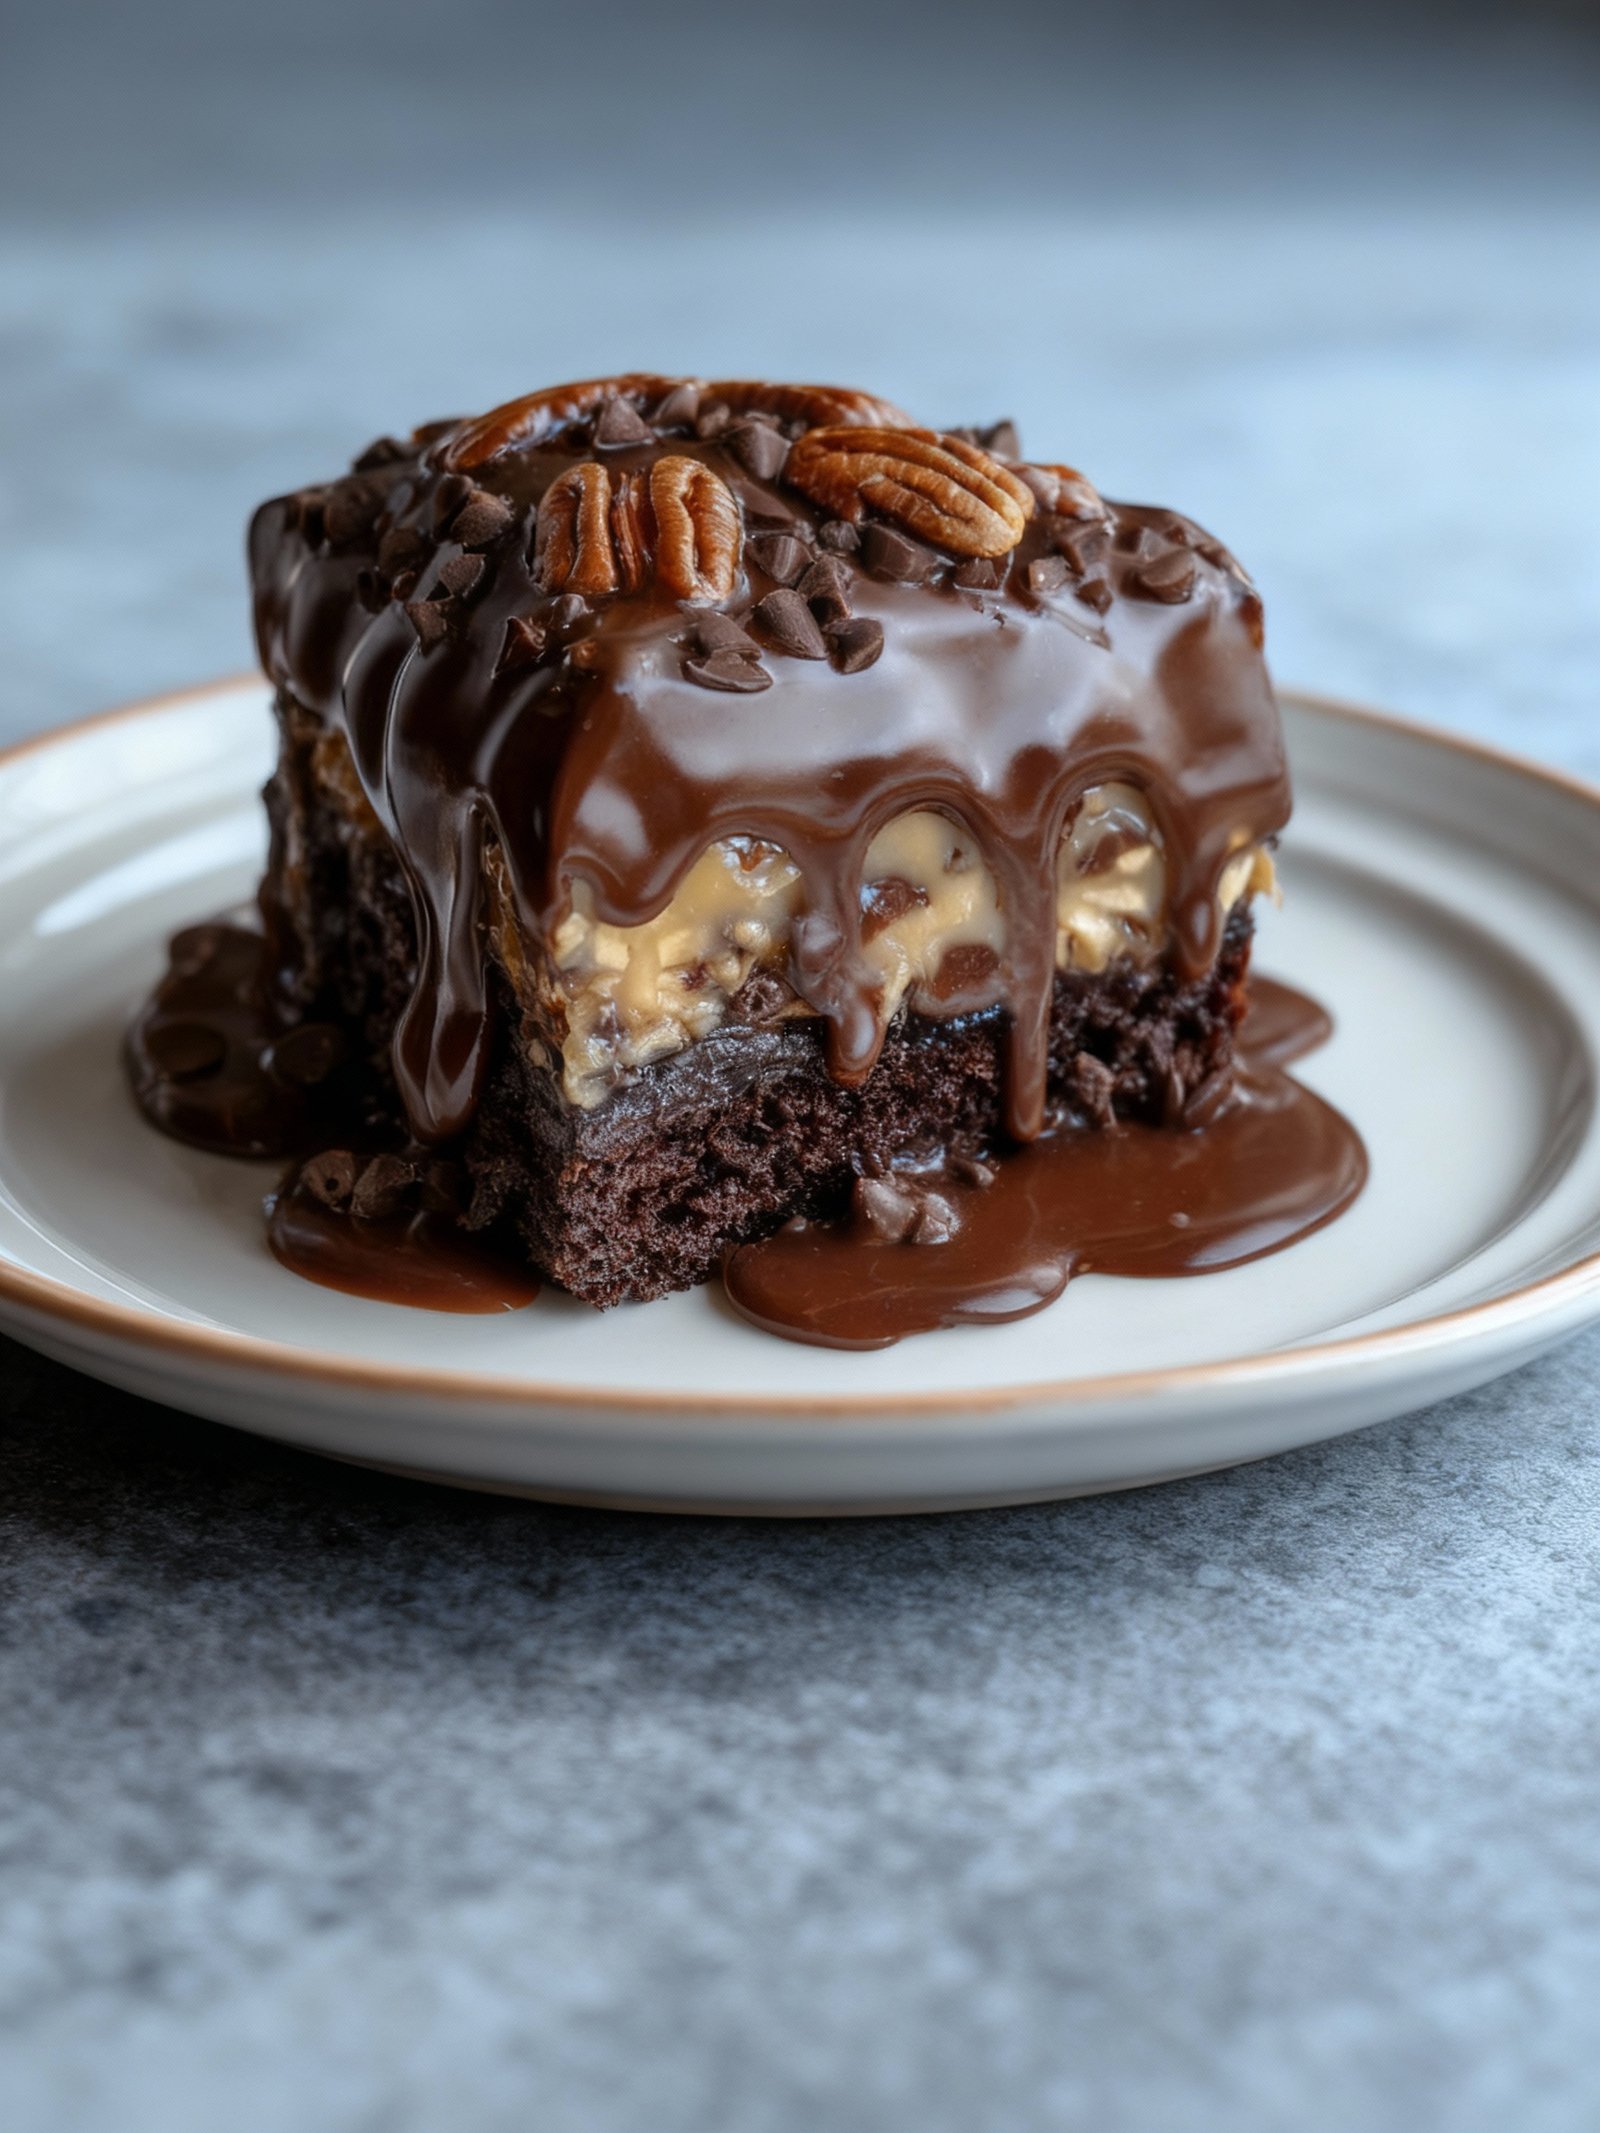
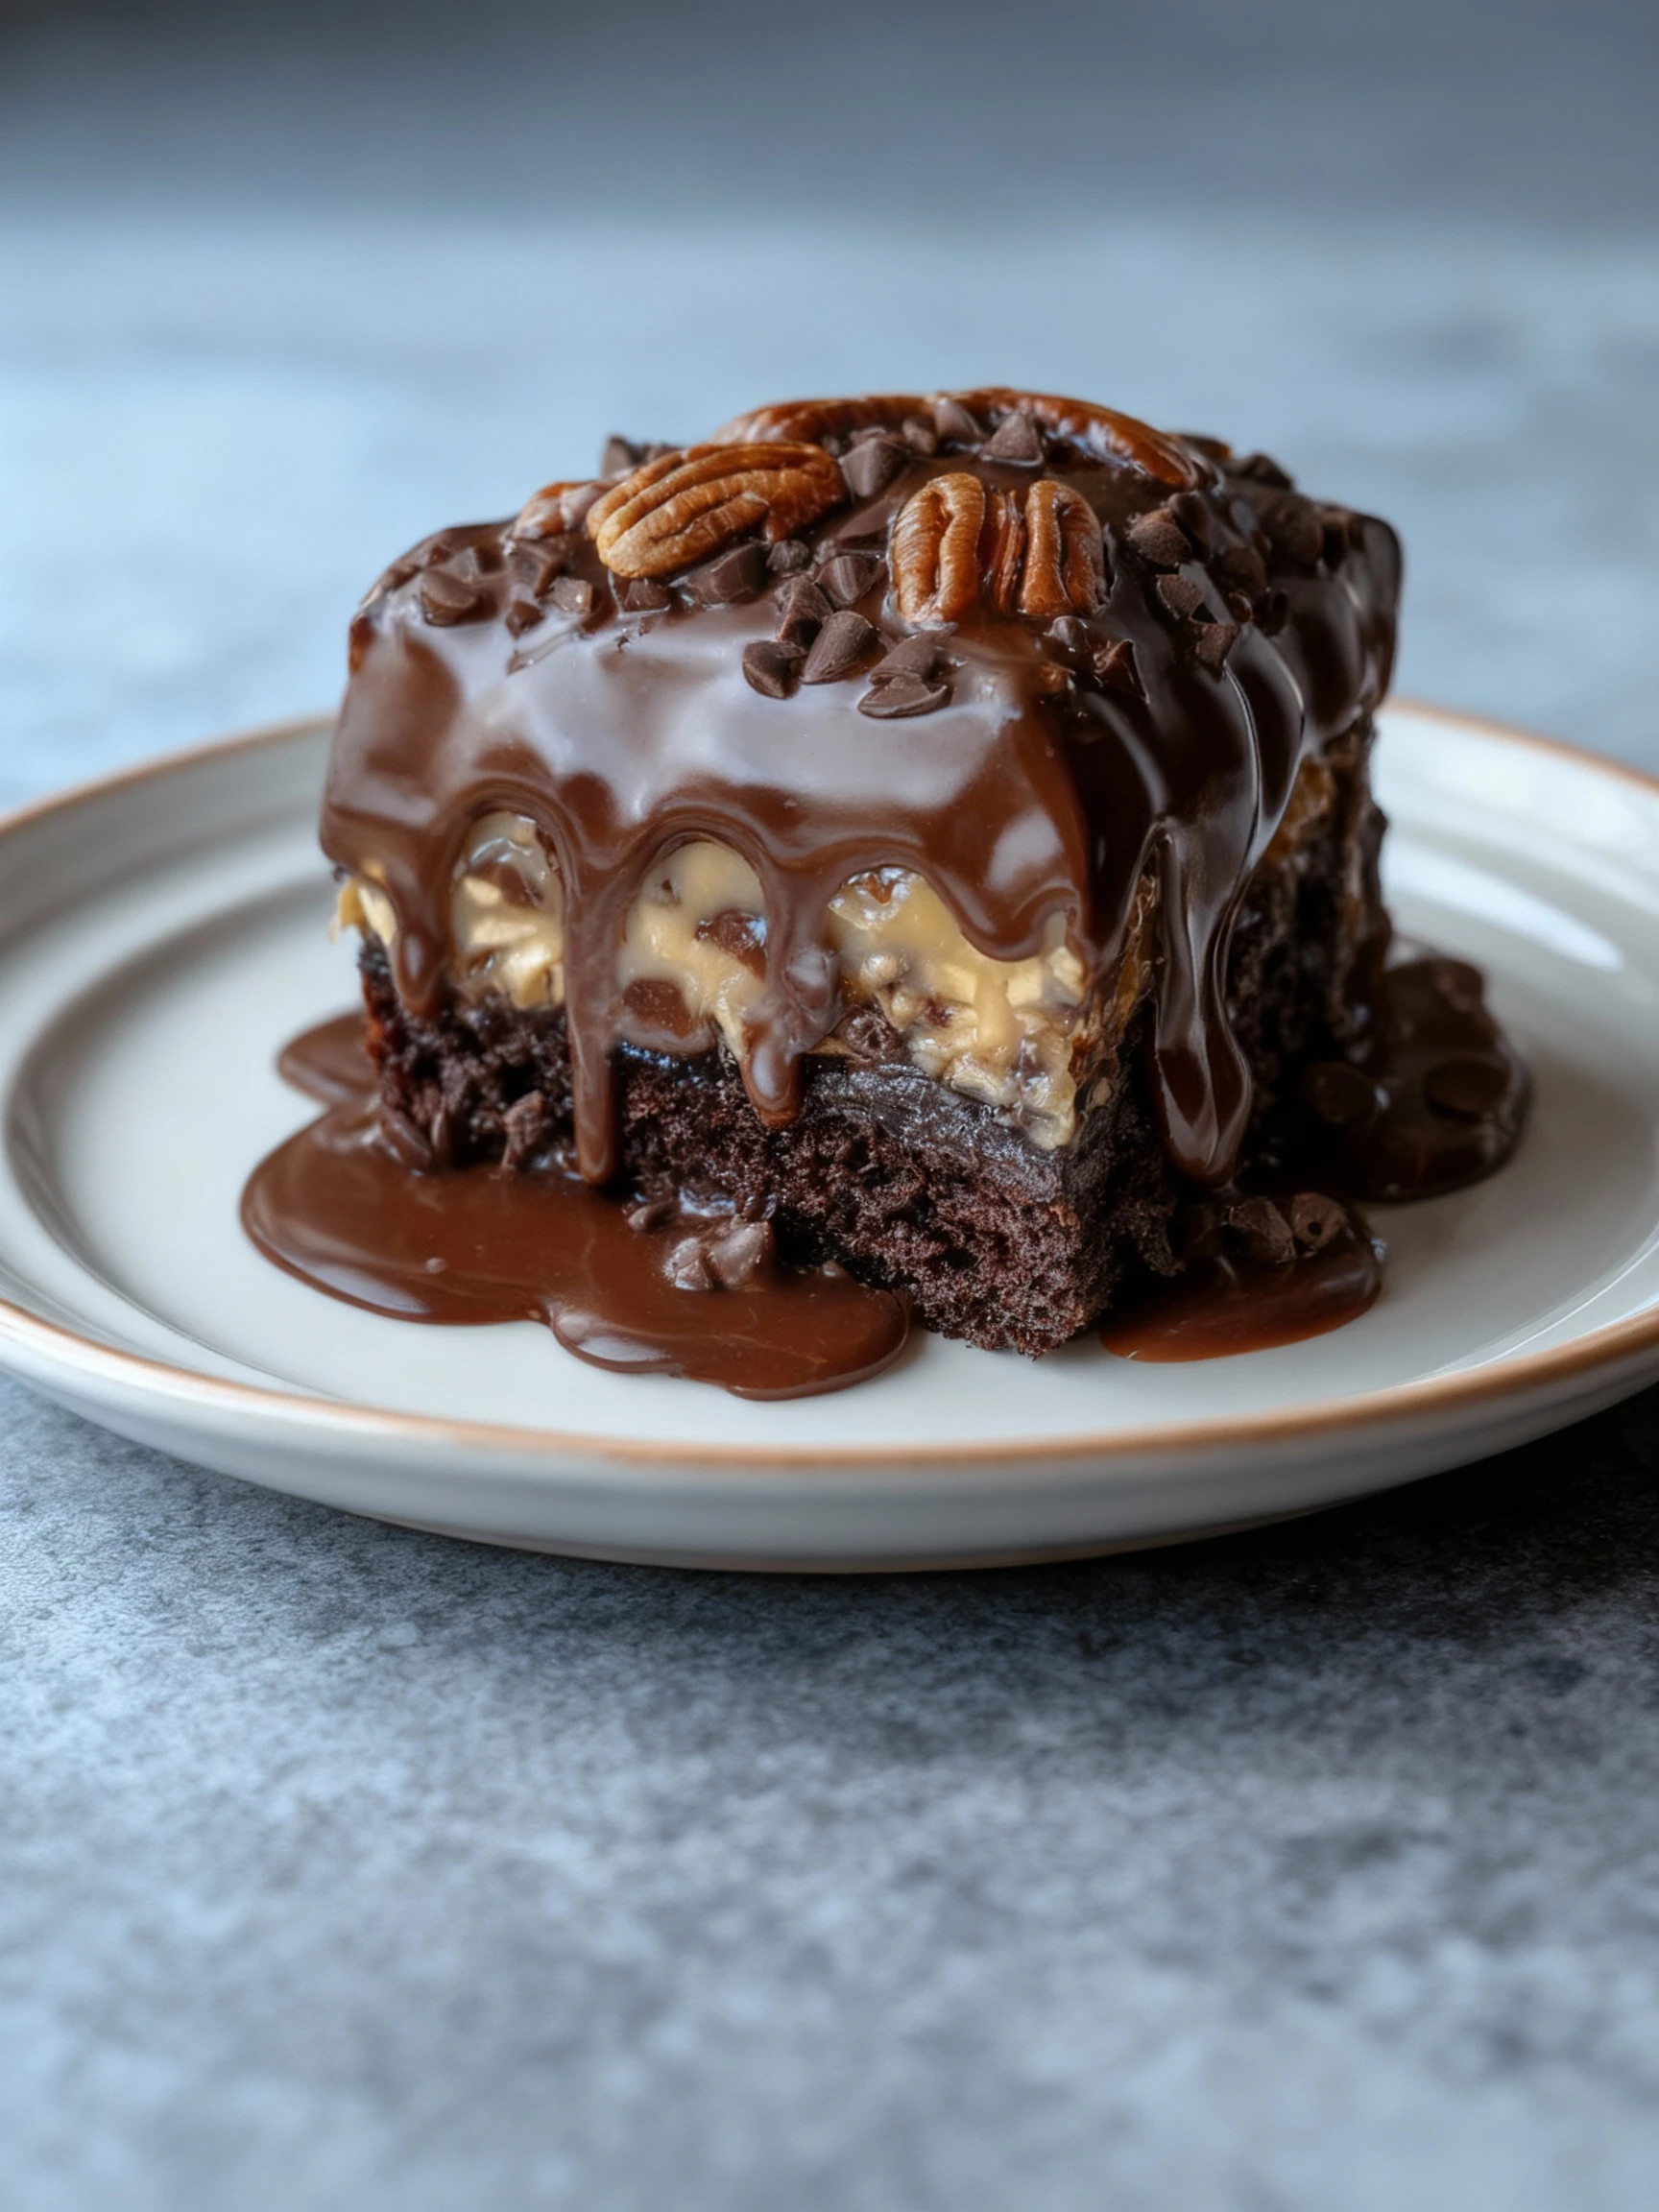
Indulge in this decadent Triple Chocolate Fudge Turtle Cake, a show-stopping dessert perfect for celebrations or when you need a rich chocolate fix. With layers of moist cake, gooey caramel, crunchy pecans, and silky chocolate ganache, it’s surprisingly straightforward to prepare. For more easy weeknight dinner inspiration, try this Scallion Chicken Stir-Fry Recipe or these Cheesy Garlic Chicken Wraps Recipe.
Ingredients
This decadent chocolate caramel pecan cake delivers rich, gooey layers with every bite, combining moist chocolate cake with sweet caramel and crunchy pecans for an irresistible dessert experience.
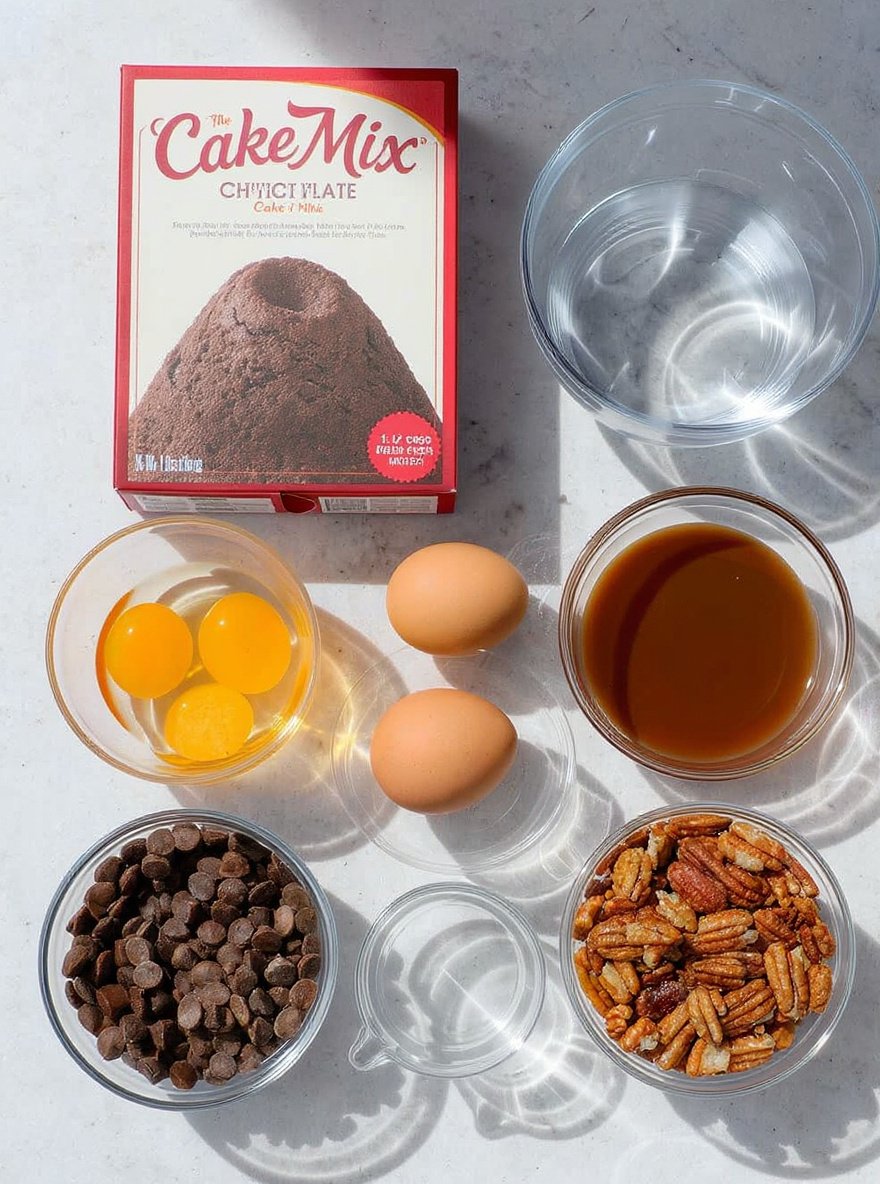
- 1 box chocolate cake mix
- 3 large eggs
- 1/2 cup vegetable oil
- 1 cup water
- 1 cup chocolate chips
- 1 cup caramel sauce
- 1 cup chopped pecans
Timing
| Prep Time | 15 minutes |
| Cook Time | 25 minutes |
| Total Time | 40 minutes |
Context: This recipe is about 20% faster than similar recipes, making it ideal for busy weeknights.
Step-by-Step Instructions
Step 1 — Prepare Your Ingredients
Gather all ingredients and measure them accurately before you begin. This ensures a smooth cooking process without interruptions.
For best results, bring ingredients like eggs or dairy to room temperature unless specified otherwise in the recipe.
Step 2 — Preheat Your Equipment
Preheat your oven to 350°F (175°C) or your stovetop pan over medium heat as directed. Proper preheating ensures even cooking from the start.
Use an oven thermometer to verify temperature accuracy if your oven runs hot or cold.
Step 3 — Combine Dry Ingredients
Whisk together all dry ingredients in a large bowl until well incorporated. This prevents clumping and ensures even distribution.
Sift flour if your recipe calls for it to achieve a lighter texture in baked goods.
Step 4 — Mix Wet Ingredients
In a separate bowl, combine all liquid ingredients thoroughly. For emulsions like vinaigrettes, whisk vigorously until smooth.
When creaming butter and sugar, mix until pale and fluffy for optimal leavening in baked goods.
Step 5 — Combine Wet and Dry Mixtures
Gradually fold wet ingredients into dry ingredients until just combined. Overmixing can result in tough textures.
For pancakes or muffins, a few lumps in the batter are perfectly acceptable and actually desirable.
Step 6 — Cook or Bake
Transfer your mixture to prepared pans or cooking surfaces. Bake until golden brown or cook until proper doneness is achieved.
For baked goods, test doneness with a toothpick – it should come out clean when inserted in the center.
Meat should reach safe internal temperatures: 165°F for poultry, 145°F for pork, and 160°F for ground meats.
Step 7 — Check for Doneness
Use visual and tactile cues to determine doneness. Baked goods should spring back when lightly touched.
For meats, use a meat thermometer in the thickest part, avoiding bones for accurate readings.
Step 8 — Rest Before Serving
Allow cooked items to rest appropriately – baked goods for 10-15 minutes, meats for 5-10 minutes depending on size.
Resting allows juices to redistribute in meats and completes the cooking process in baked goods.
Step 9 — Final Presentation
Plate your dish attractively, adding garnishes if desired. Serve immediately for optimal texture and temperature.
For best results, serve baked goods warm and meats at their recommended serving temperatures.
Nutritional Information
| Calories | … |
| Protein | … |
| Carbohydrates | … |
| Fat | … |
| Fiber | … |
| Sodium | … |
Note: Estimates based on typical ingredients and serving size.
Healthier Alternatives
- Lean ground turkey — Lighter protein with savory poultry notes
- Cauliflower rice — Lower-carb base with mild, nutty flavor
- Coconut milk — Creamy dairy-free alternative with subtle sweetness
- Tamari sauce — Gluten-free soy sauce with rich umami depth
- Nutritional yeast — Cheesy flavor without dairy or excess sodium
- Zucchini noodles — Fresh, low-carb pasta substitute
- Mashed avocado — Creamy texture with healthy fats, no dairy
- Fresh herbs & citrus — Bright flavor boost without added salt
Serving Suggestions
- Pair with a crisp green salad and crusty bread for a light lunch.
- Serve alongside roasted vegetables for a comforting dinner.
- Perfect for picnics and potlucks when portioned into individual containers.
- Elevate weeknight meals by garnishing with fresh herbs and a drizzle of high-quality olive oil.
- Create an elegant platter for entertaining by arranging on a large serving board with complementary dips.
- Ideal for meal prep; stores well and tastes great reheated.
This versatile dish adapts beautifully to various occasions, from casual family dinners to more formal gatherings.
Common Mistakes to Avoid
- Mistake: Not preheating your oven. Fix: Always allow your oven to reach the correct temperature before baking to ensure even cooking.
- Mistake: Overmixing batter. Fix: Mix just until ingredients are combined to avoid developing too much gluten, which leads to a tough texture.
- Mistake: Using cold eggs and dairy. Fix: Bring these ingredients to room temperature so they emulsify properly for a smoother, more uniform batter.
- Mistake: Incorrectly measuring flour. Fix: Spoon flour into your measuring cup and level it off; scooping directly packs in too much flour.
- Mistake: Opening the oven door too early. Fix: Resist the urge to check on your bake until at least the minimum cook time has passed to prevent temperature drops.
- Mistake: Not greasing your pan adequately. Fix: Thoroughly grease and flour the pan, or use parchment paper, to ensure a clean release.
- Mistake: Substituting ingredients haphazardly. Fix: Understand the functional role of each ingredient before making substitutions to maintain the recipe’s structure.
- Mistake: Ignoring altitude adjustments. Fix: If you live above 3,000 feet, research and apply high-altitude baking modifications for leavening and liquids.
Storing Tips
- Fridge: Store in an airtight container for up to 3-4 days. Ensure it cools to room temperature before refrigerating.
- Freezer: Use freezer-safe containers or heavy-duty freezer bags. Freeze for up to 3 months. Label with date for best quality.
- Reheat: Reheat thoroughly until internal temperature reaches 165°F (74°C). Use microwave, stovetop, or oven, adding a splash of liquid if needed to maintain moisture.
Always refrigerate leftovers within two hours of cooking to prevent bacterial growth. For frozen portions, thaw overnight in the refrigerator before reheating.
Conclusion
This decadent Triple Chocolate Fudge Turtle Cake is sure to become a favorite dessert for any celebration. We hope you enjoy making and sharing this rich, indulgent treat. Don’t forget to leave a comment with your experience, and subscribe for more delicious recipes like our Triple Chocolate Fudge Turtle Cake Recipe!
PrintTriple Chocolate Fudge Turtle Cake

A decadent chocolate cake layered with caramel and pecans, inspired by classic turtle candies.
- Prep Time: 15 minutes
- Cook Time: 50 minutes
- Total Time: 1 hour 5 minutes
- Yield: 12 1x
- Method: Dessert
- Cuisine: American
Ingredients
- 1 box chocolate cake mix
- 3 large eggs
- 1/2 cup vegetable oil
- 1 cup water
- 1 cup chocolate chips
- 1 cup caramel sauce
- 1 cup chopped pecans
Instructions
- Preheat oven to 350°F (175°C). Grease and flour a bundt pan.
- In a large bowl, mix cake mix, eggs, oil, and water until smooth. Stir in chocolate chips.
- Pour batter into prepared pan. Bake for 45–50 minutes, or until a toothpick comes out clean. Let cool.
- Drizzle caramel sauce over the cooled cake and sprinkle with chopped pecans.
Notes
For best results, let the cake cool completely before adding caramel and pecans. Store leftovers in an airtight container. For a richer flavor, use homemade caramel sauce.
Nutrition
- Calories: 420
- Sugar: 38
- Sodium: 380
- Fat: 22
- Saturated Fat: 6
- Unsaturated Fat: 14
- Trans Fat: 0
- Carbohydrates: 58
- Fiber: 2
- Protein: 5
- Cholesterol: 55
FAQs
Can I make this recipe ahead of time?
Yes, this recipe holds up well when prepared in advance. You can assemble it a day ahead and store it covered in the refrigerator. For best results, follow the storage instructions in the recipe.
What are some easy substitutions for ingredients?
You can easily swap several ingredients based on what you have available. For example, use a different type of cheese or a similar vegetable. The recipe is quite forgiving and still turns out delicious.
How can I adjust the recipe for dietary restrictions?
This recipe can be adapted for various diets. For a gluten-free version, use an approved flour or thickener. You can also reduce the salt or use a dairy-free alternative to suit your needs.


