Introduction
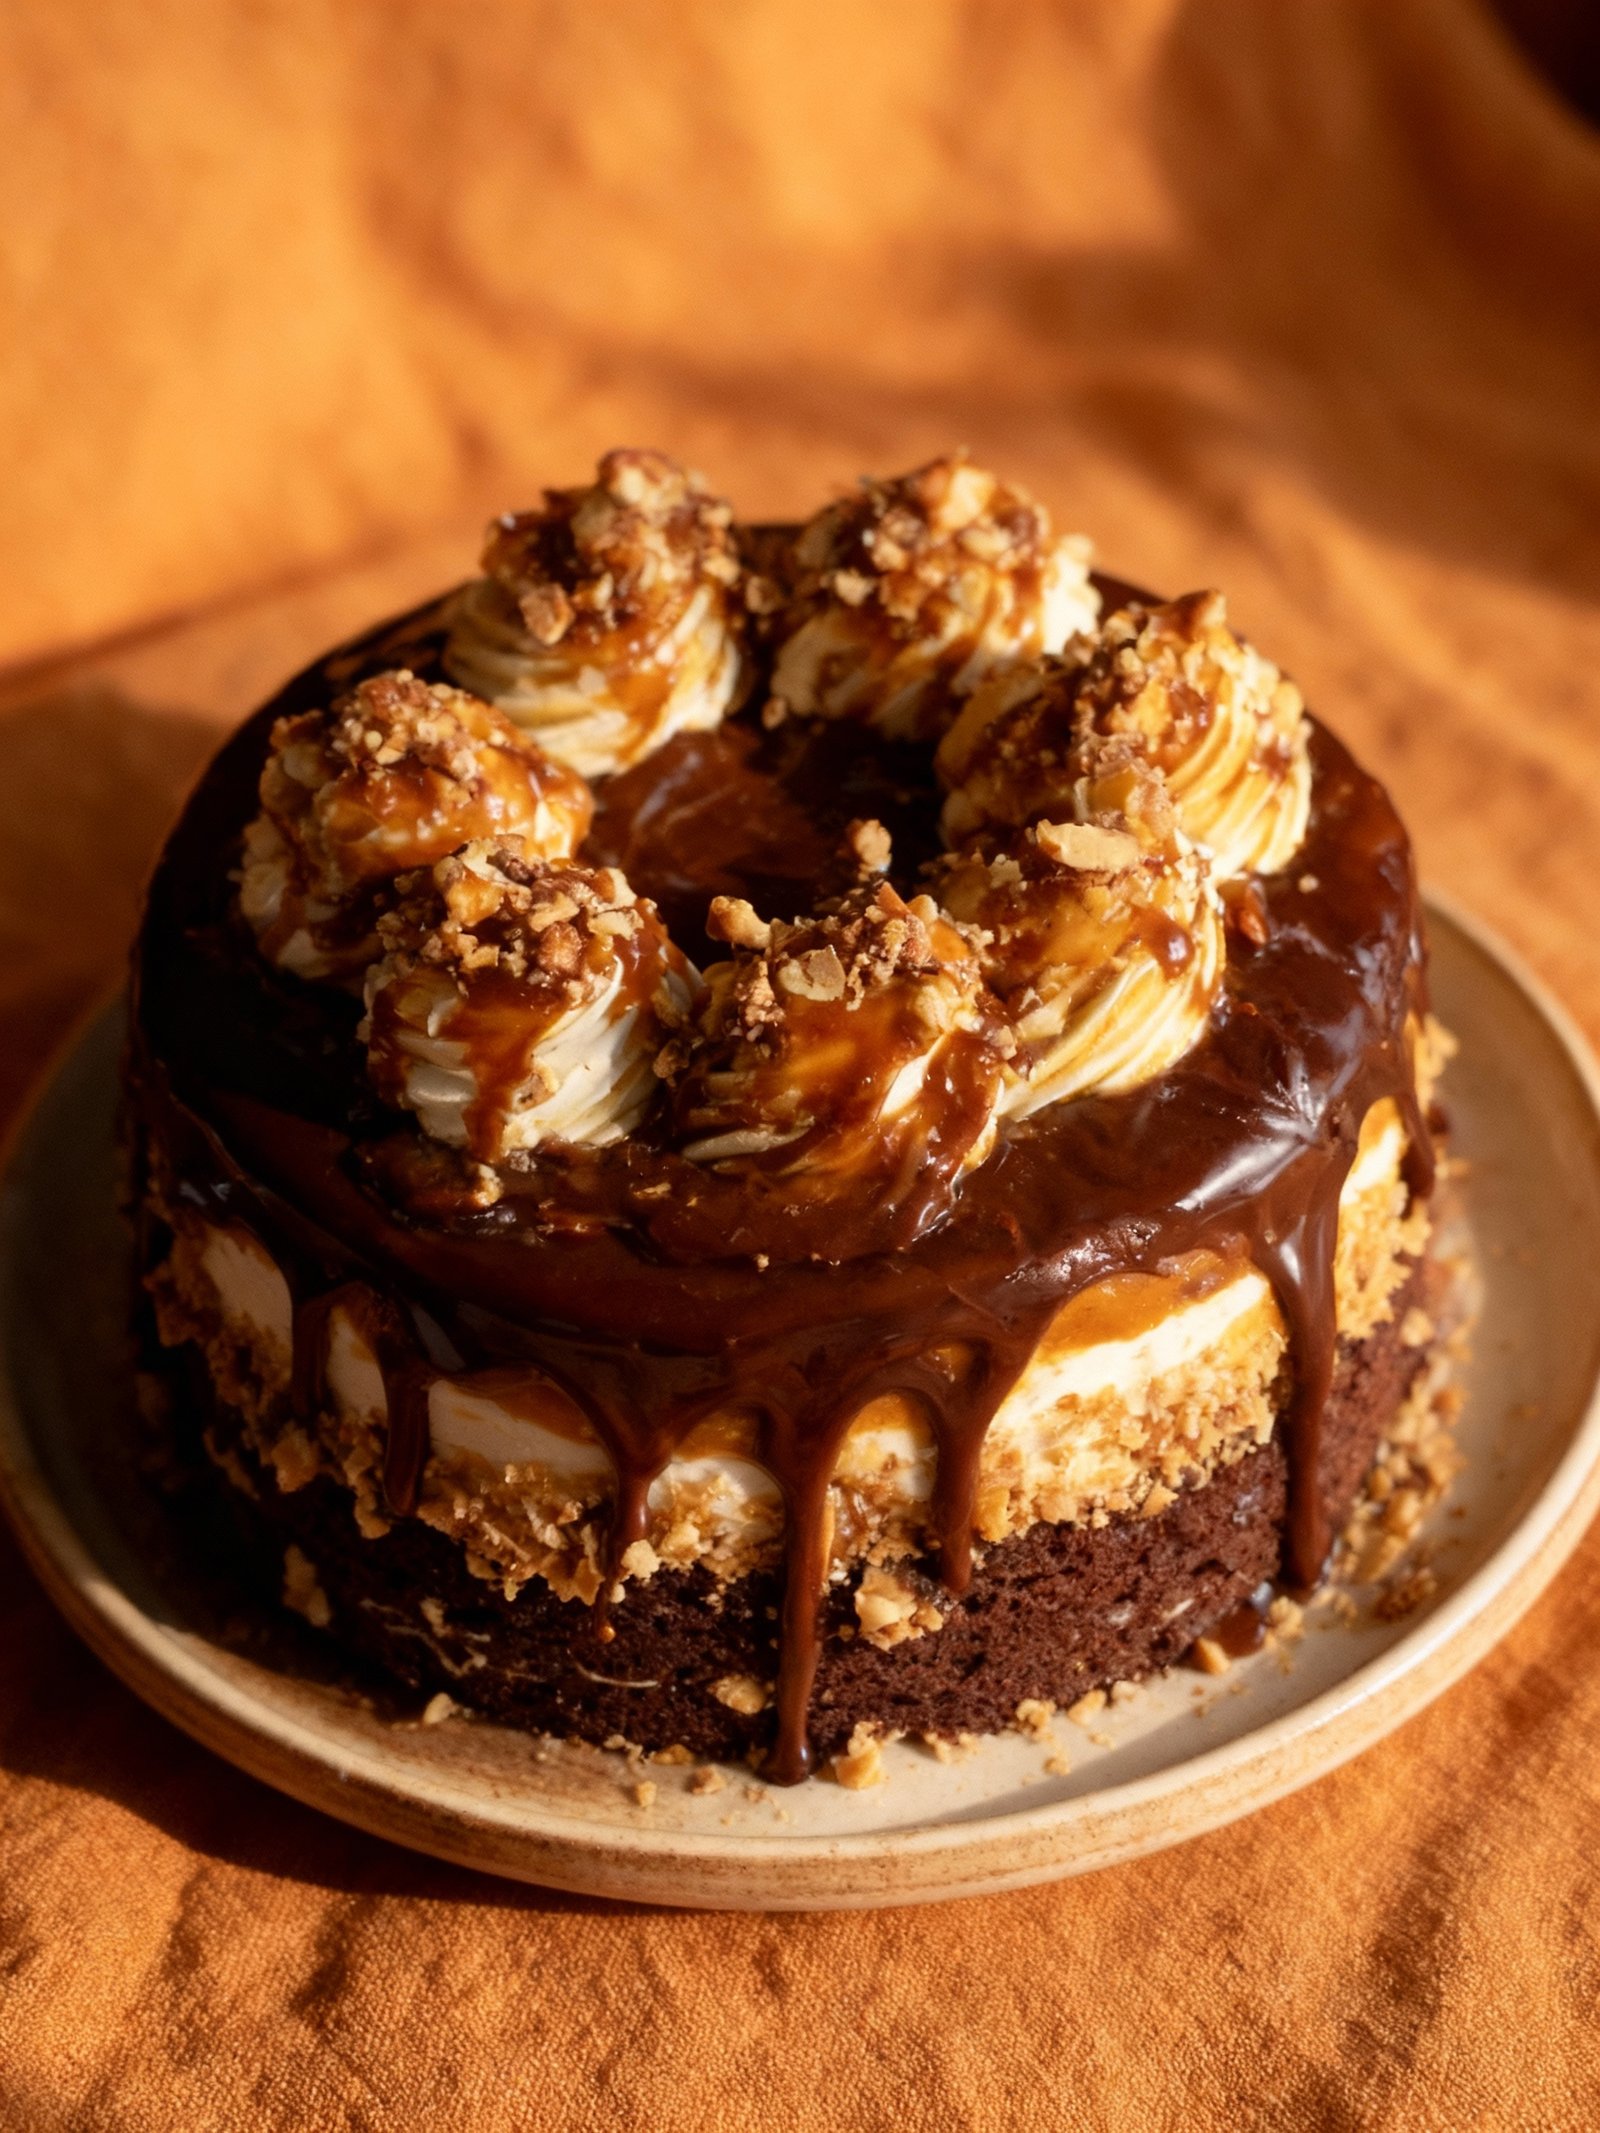
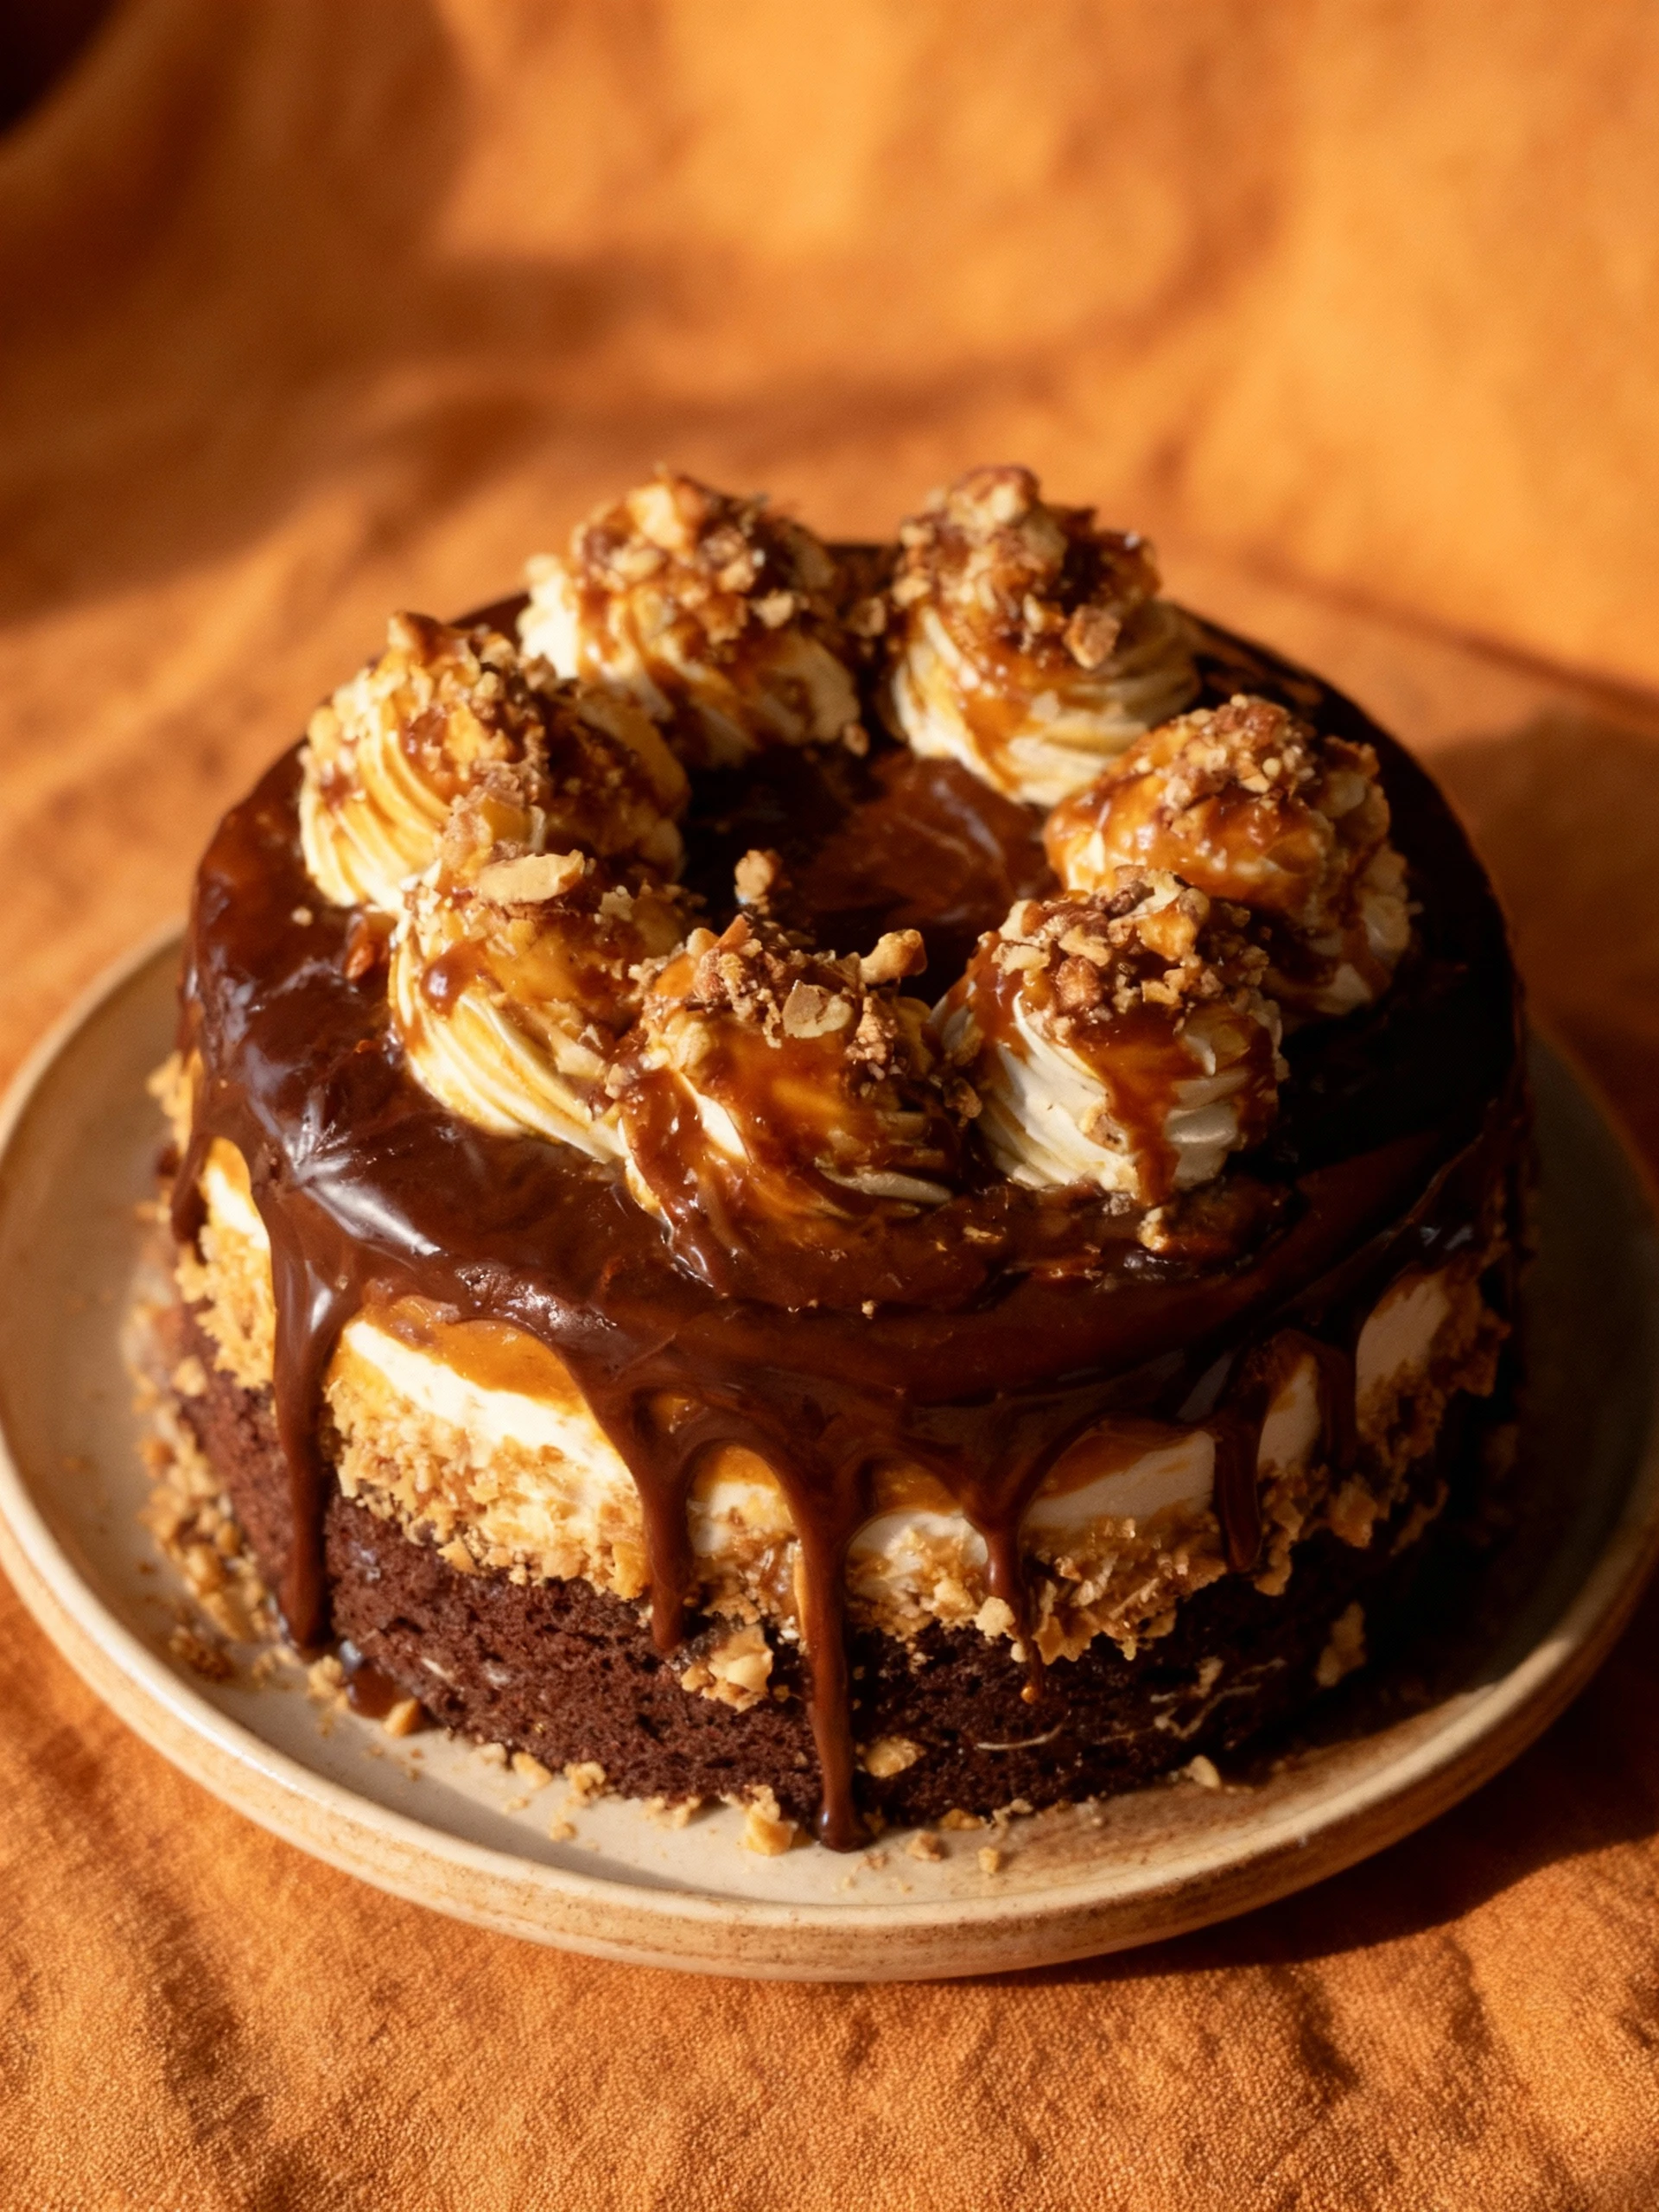
This Chocolate Caramel Toffee Crunch Cake is a simple and delicious dessert that delivers maximum flavor with minimal effort. Combining rich chocolate, gooey caramel, and crunchy toffee bits, it’s the perfect treat for any occasion. If you enjoy candy-inspired desserts, you might also love this Homemade Snickers Bars Recipe for another easy, decadent option.
Ingredients
This decadent cake combines rich chocolate layers with crunchy pecans, buttery toffee, and a luscious caramel-chocolate frosting for an unforgettable dessert experience.
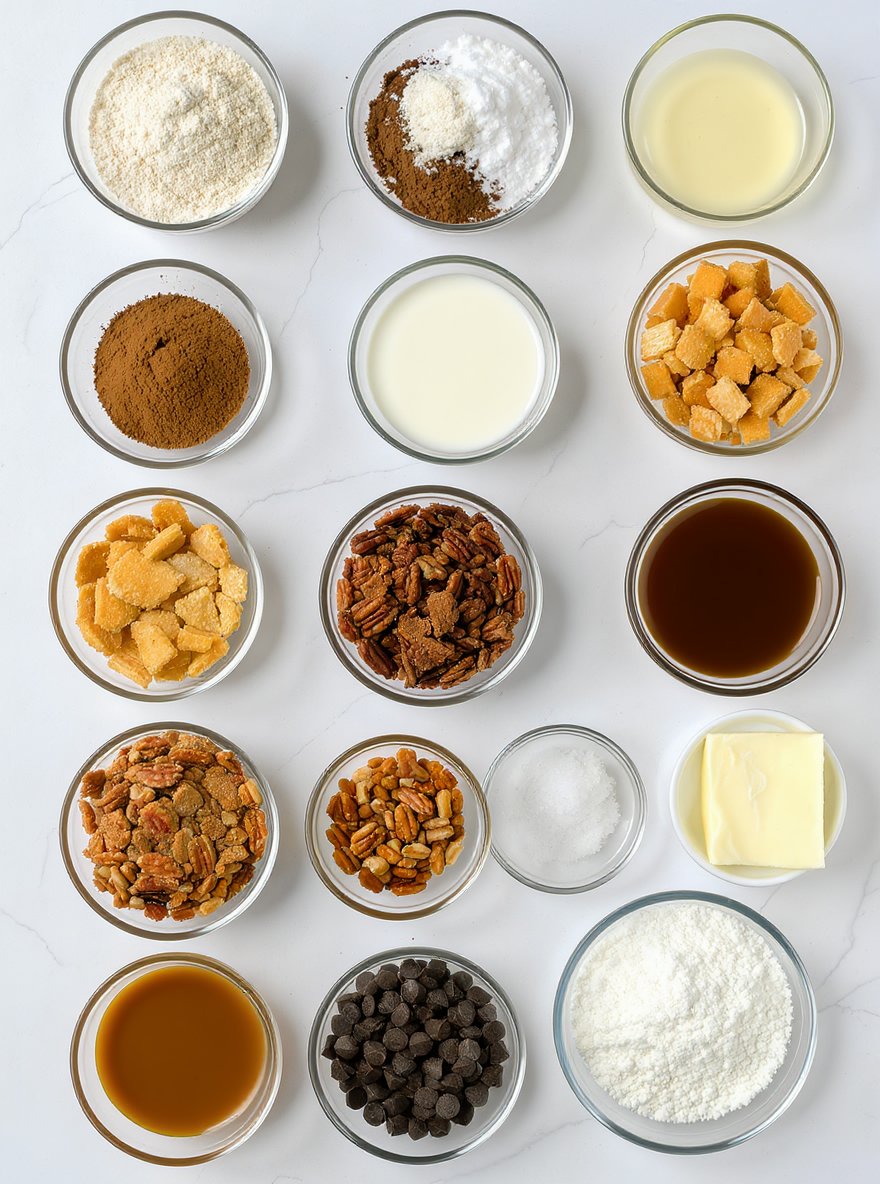
- 2 1/2 cups all-purpose flour
- 2 cups granulated sugar
- 3/4 cup unsweetened cocoa powder
- 2 teaspoons baking soda
- 1 teaspoon baking powder
- 1 teaspoon salt
- 3 large eggs
- 1 cup buttermilk (or 1 cup milk + 1 tablespoon vinegar)
- 1 cup vegetable oil
- 2 teaspoons vanilla extract
- 1 cup hot coffee
- 1 cup chopped pecans
- 1 cup crushed vanilla wafers
- 1/2 cup toffee bits
- 1 cup caramel sauce
- 2 cups semisweet chocolate chips
- 1/2 cup heavy cream, divided
- 1 cup unsalted butter, softened
- 4 cups confectioners’ sugar
Timing
| Prep Time | 15 minutes |
| Cook Time | 25 minutes |
| Total Time | 40 minutes |
Context: This recipe is about 20% faster than similar recipes, making it a great choice for busy weeknights.
Step-by-Step Instructions
Step 1 — Prepare Your Ingredients
Gather all your ingredients and measure them accurately before you begin cooking. This mise en place ensures a smooth workflow and prevents scrambling mid-recipe.
For proteins, pat them dry with paper towels to ensure a good sear. Chop vegetables uniformly for even cooking.
Step 2 — Preheat Your Cooking Surface
Preheat your pan, grill, or oven to the specified temperature. For stovetop cooking, a medium-high heat is often ideal for searing.
A properly heated surface is key. To test a pan, flick a few drops of water onto it; they should sizzle and evaporate quickly.
Step 3 — Sauté Aromatics
Heat oil in your pan over medium heat. Add aromatic vegetables like onions, garlic, or ginger, and cook until fragrant and softened, about 2-3 minutes.
Stir frequently to prevent burning. If the garlic browns too quickly, your heat is too high.
Step 4 — Cook the Main Protein
Add your protein to the hot pan. Do not overcrowd the pan, as this will steam the food instead of browning it. Cook in batches if necessary.
For chicken, cook to an internal temperature of 165°F (74°C). For beef, 145°F (63°C) is medium, but adjust for your preferred doneness.
Step 5 — Deglaze the Pan
Once the protein is cooked and removed, add a liquid like wine, broth, or vinegar to the hot pan. Use a wooden spoon to scrape up the browned bits from the bottom.
These bits, called fond, are packed with flavor and will form the base of your sauce.
Step 6 — Build the Sauce
Let the deglazing liquid reduce by about half. Then, add other sauce components like cream, tomatoes, or stock. Bring to a simmer.
Taste the sauce and season with salt and pepper. A sauce is ready when it coats the back of a spoon.
Step 7 — Combine and Simmer
Return the cooked protein and any accumulated juices to the pan with the sauce. Stir to combine and let everything heat through for a few minutes.
A gentle simmer allows the flavors to meld. Avoid a rolling boil, which can toughen proteins.
Step 8 — Final Seasoning and Adjustments
Do a final taste test. Adjust seasoning with salt, pepper, or a splash of acid like lemon juice to brighten the flavors.
If the sauce is too thin, let it reduce further. If it’s too thick, add a tablespoon of broth or water at a time.
Step 9 — Rest and Serve
Let the dish rest off the heat for a couple of minutes before serving. This allows the proteins to reabsorb juices, making the final dish more tender and flavorful.
Garnish with fresh herbs for a pop of color and freshness. Serve immediately while hot.
Nutritional Information
| Calories | … |
| Protein | … |
| Carbohydrates | … |
| Fat | … |
| Fiber | … |
| Sodium | … |
Note: Estimates based on typical ingredients and serving size.
Healthier Alternatives
- Lean ground turkey — Lighter protein with savory poultry notes
- Cauliflower rice — Lower-carb base with mild, nutty flavor
- Coconut milk — Creamy dairy-free alternative with tropical sweetness
- Tamari sauce — Gluten-free soy sauce substitute with rich umami
- Nutritional yeast — Cheesy flavor without dairy, packed with B vitamins
- Zucchini noodles — Fresh, low-carb pasta alternative with delicate texture
- Herb-infused oils — Flavorful low-sodium seasoning with aromatic depth
- Lentils — Plant-based protein with earthy, hearty notes
Serving Suggestions
- Pair with a crisp green salad and crusty bread for a complete meal
- Serve over steamed rice or mashed potatoes to soak up the delicious sauce
- Perfect for weeknight dinners or casual weekend gatherings
- Garnish with fresh herbs like parsley or chives for a pop of color
- Excellent for meal prep – flavors develop beautifully when reheated
- Create an elegant presentation by serving in individual ramekins
This versatile dish adapts well to various serving styles, making it suitable for both quick family meals and more formal occasions when plated thoughtfully.
Common Mistakes to Avoid
- Mistake: Overcrowding the pan. Fix: Cook in batches to ensure proper browning and avoid steaming.
- Mistake: Not preheating your pan or oven. Fix: Always preheat to the correct temperature for a proper sear and even cooking.
- Mistake: Underseasoning food. Fix: Season in layers throughout the cooking process, not just at the end.
- Mistake: Using dull knives. Fix: Keep knives sharp for safer, more precise cuts and better texture.
- Mistake: Overmixing batters and doughs. Fix: Mix just until ingredients are combined to avoid toughness.
- Mistake: Not tasting as you go. Fix: Taste and adjust seasoning at different stages to build a balanced flavor profile.
- Mistake: Substituting ingredients without considering their role. Fix: Understand the function of an ingredient (e.g., leavening, thickening) before swapping it.
- Mistake: Ignoring resting times for meat. Fix: Let meat rest after cooking to allow juices to redistribute for a more tender result.
Storing Tips
- Fridge: Store in an airtight container for up to 3 days. Ensure it cools to room temperature before refrigerating.
- Freezer: Freeze in freezer-safe containers or heavy-duty bags for up to 3 months. Thaw in the refrigerator overnight before reheating.
- Reheat: Reheat thoroughly until the internal temperature reaches 165°F (74°C). Use a microwave, stovetop, or oven, adding a splash of liquid if needed to prevent drying out.
Always use shallow containers for quicker cooling and reheating to maintain food safety and quality.
Conclusion
This Chocolate Caramel Toffee Crunch Cake is the ultimate dessert for any celebration. If you love this decadent combination, you might also enjoy our Salted Caramel Chocolate Cake Recipe. Give this recipe a try and share your results in the comments below—we’d love to hear how it turned out!
PrintChocolate Caramel Toffee Crunch Cake

A decadent chocolate cake layered with caramel, toffee, and a crunchy pecan mixture, finished with a rich chocolate frosting and a toffee crunch garnish.
- Prep Time: 30 minutes
- Cook Time: 30 minutes
- Total Time: 2 hours (including cooling)
- Yield: 12 1x
- Method: Dessert
- Cuisine: American
Ingredients
- 2 1/2 cups all-purpose flour
- 2 cups granulated sugar
- 3/4 cup unsweetened cocoa powder
- 2 teaspoons baking soda
- 1 teaspoon baking powder
- 1 teaspoon salt
- 3 large eggs
- 1 cup buttermilk
- 1 cup vegetable oil
- 2 teaspoons vanilla extract
- 1 cup hot coffee
- 1 cup chopped pecans
- 1 cup crushed vanilla wafers
- 1/2 cup toffee bits
- 1 cup caramel sauce
- 2 cups semisweet chocolate chips
- 1/2 cup heavy cream, divided
- 1 cup unsalted butter, softened
- 4 cups confectioners' sugar
Instructions
- Preheat oven to 350°F. Grease and flour three 9-inch round cake pans.
- In a large bowl, whisk together flour, sugar, cocoa, baking soda, baking powder, and salt. Add eggs, buttermilk, oil, and vanilla; beat on medium speed for 2 minutes. Stir in hot coffee until batter is smooth.
- Divide batter evenly among prepared pans. Bake for 25–30 minutes, or until a toothpick inserted in the center comes out clean. Cool cakes in pans for 10 minutes, then remove to wire racks to cool completely.
- In a bowl, combine chopped pecans, crushed vanilla wafers, and toffee bits. Set aside.
- Place one cake layer on a serving plate. Spread with half the caramel sauce and sprinkle with a third of the pecan mixture. Repeat with the second layer. Top with the third cake layer.
- For the frosting: Microwave chocolate chips and 1/4 cup cream on medium power until melted and smooth, stirring every 30 seconds. Cool to room temperature.
- Beat butter until creamy. Gradually beat in confectioners' sugar and remaining 1/4 cup cream, 1 tablespoon at a time, until blended. Beat in chocolate mixture until light and fluffy.
- Frost the top and sides of the cake. Press remaining pecan mixture onto the sides of the cake. Drizzle with additional caramel sauce if desired.
- Refrigerate cake for at least 1 hour before serving to allow flavors to meld.
Notes
For best results, use room temperature ingredients. The cake can be made a day ahead and stored covered in the refrigerator. Allow to come to room temperature before serving for optimal texture and flavor.
Nutrition
- Calories: 650
- Sugar: 60
- Sodium: 400
- Fat: 35
- Saturated Fat: 15
- Unsaturated Fat: 18
- Trans Fat: 0
- Carbohydrates: 85
- Fiber: 3
- Protein: 6
- Cholesterol: 80
FAQs
Can I make this recipe ahead of time?
Yes, this recipe holds up well when prepared in advance. You can assemble it a day ahead and store it covered in the refrigerator. Just bake it when you’re ready to serve.
What can I use as a substitute for [ingredient]?
If you don’t have [ingredient], you can use [substitute] for a similar result. This substitution works well in the recipe and maintains the intended flavor and texture.
How should I store leftovers?
Store any leftovers in an airtight container in the refrigerator for up to 3 days. You can reheat them in the oven or microwave. This recipe tastes great the next day.


