Introduction
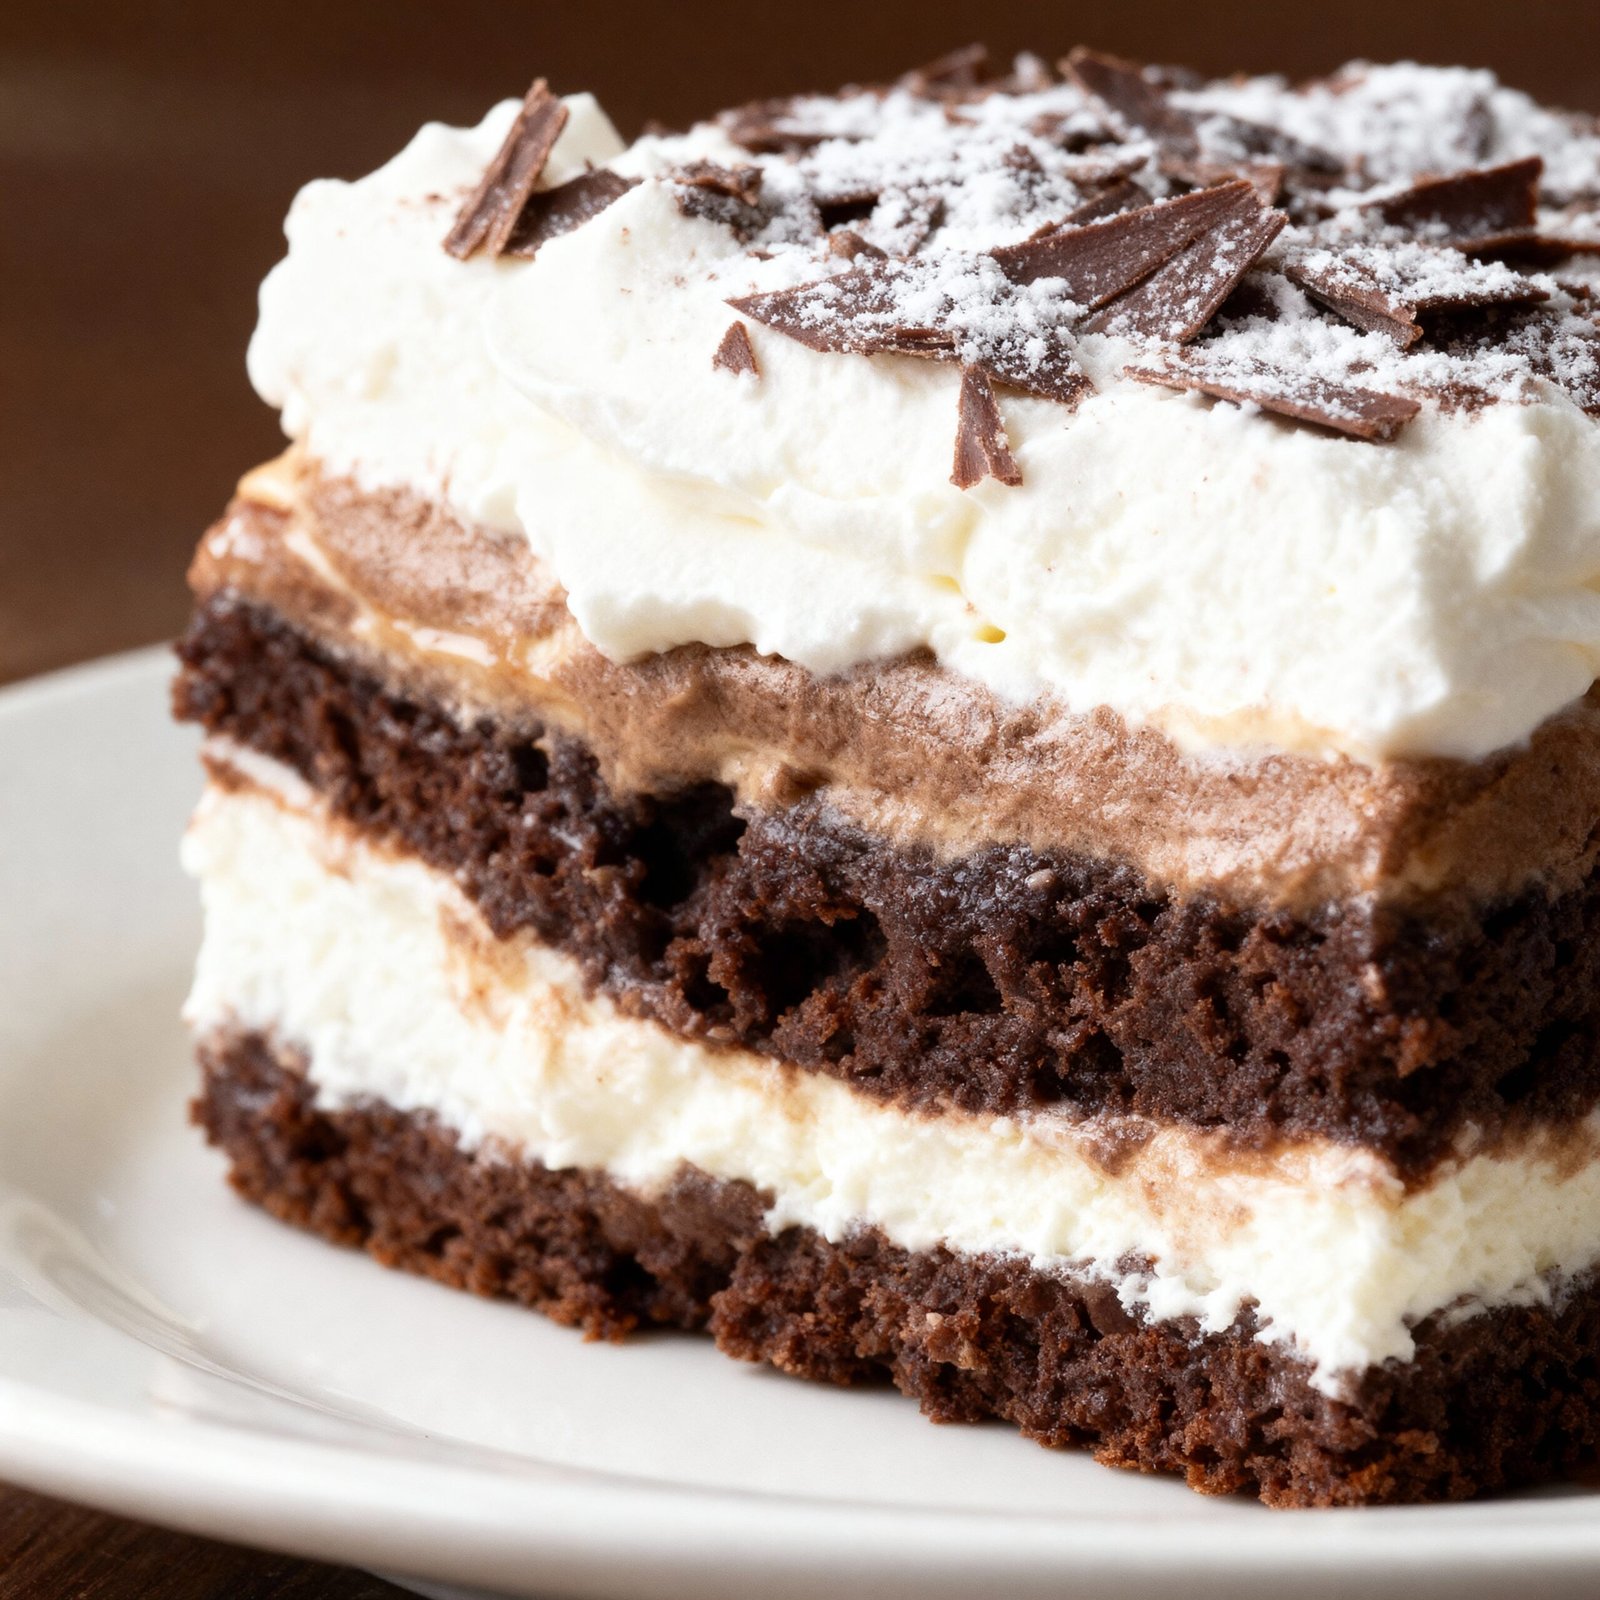
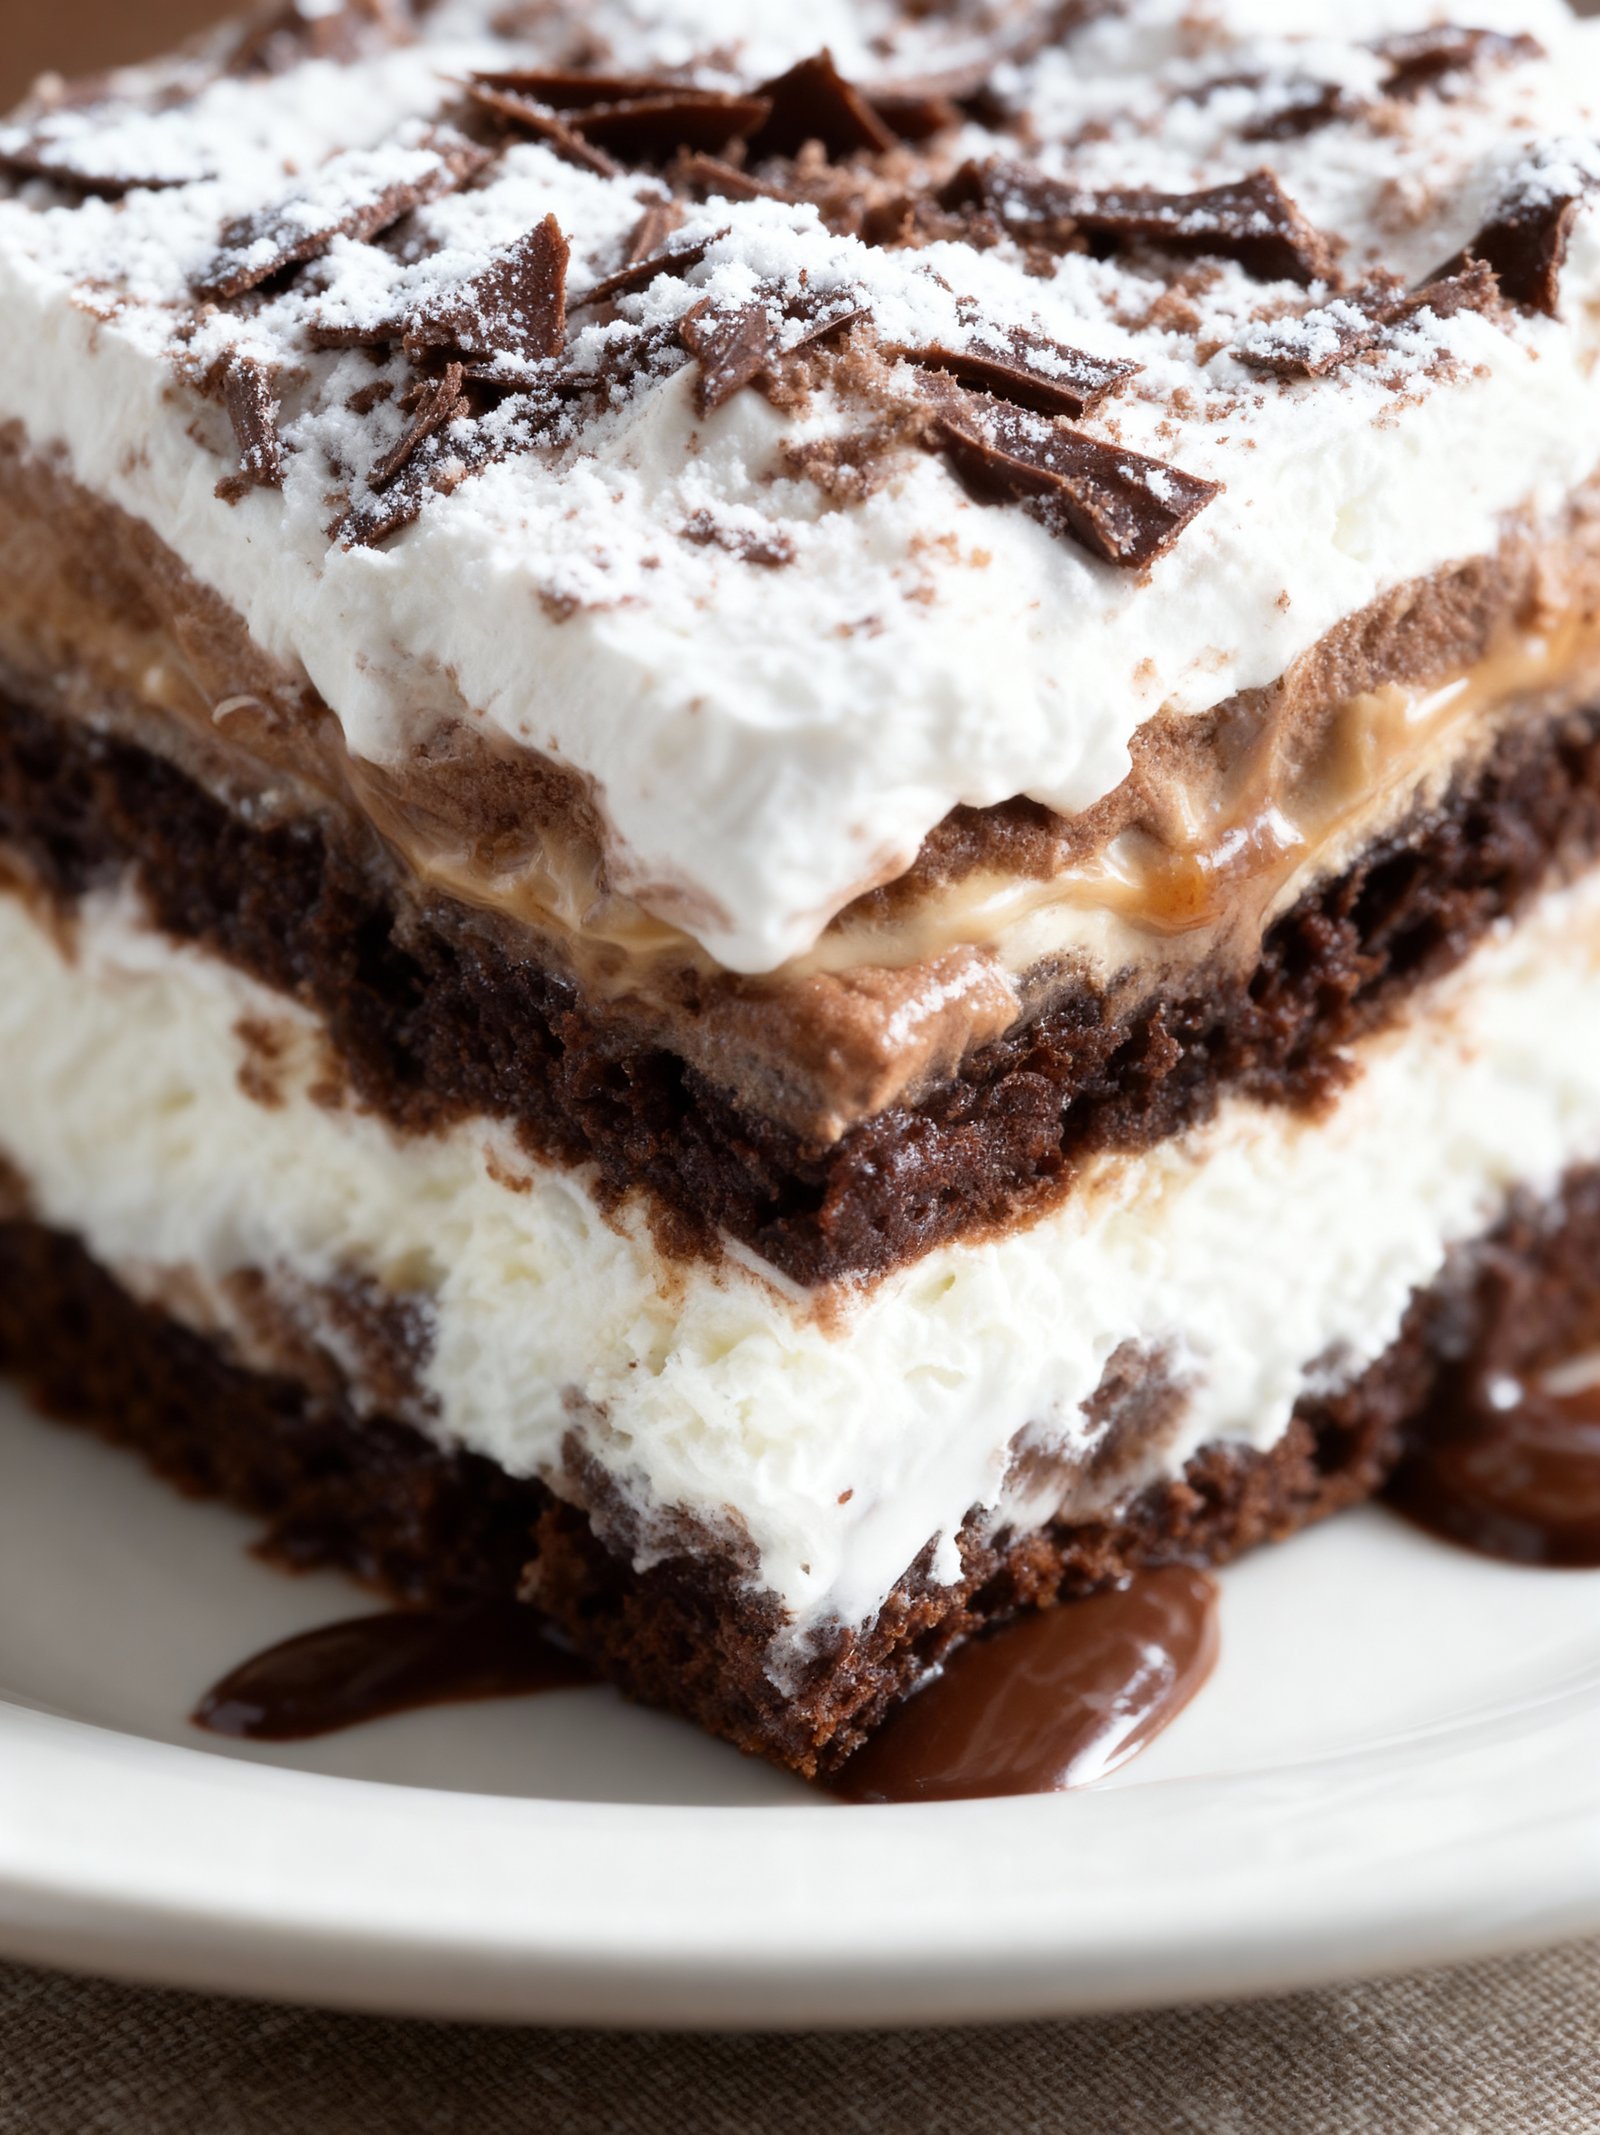
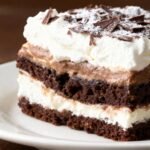
This chilled brownie refrigerator cake is the ultimate easy dessert for chocolate lovers. As a Meltaway Brownie Cookies Recipe fan, you’ll adore this no-bake brownie cake version that requires just 5 minutes of prep time. Simply mix, chill, and enjoy rich, fudgy layers without ever turning on your oven. Perfect for warm days or last-minute gatherings, this fuss-free treat delivers maximum chocolate satisfaction with minimal effort.
Ingredients
This decadent chilled brownie refrigerator cake combines rich, fudgy brownies with creamy layers of cheesecake and pudding for an irresistible no-bake dessert that’s perfect for warm weather.
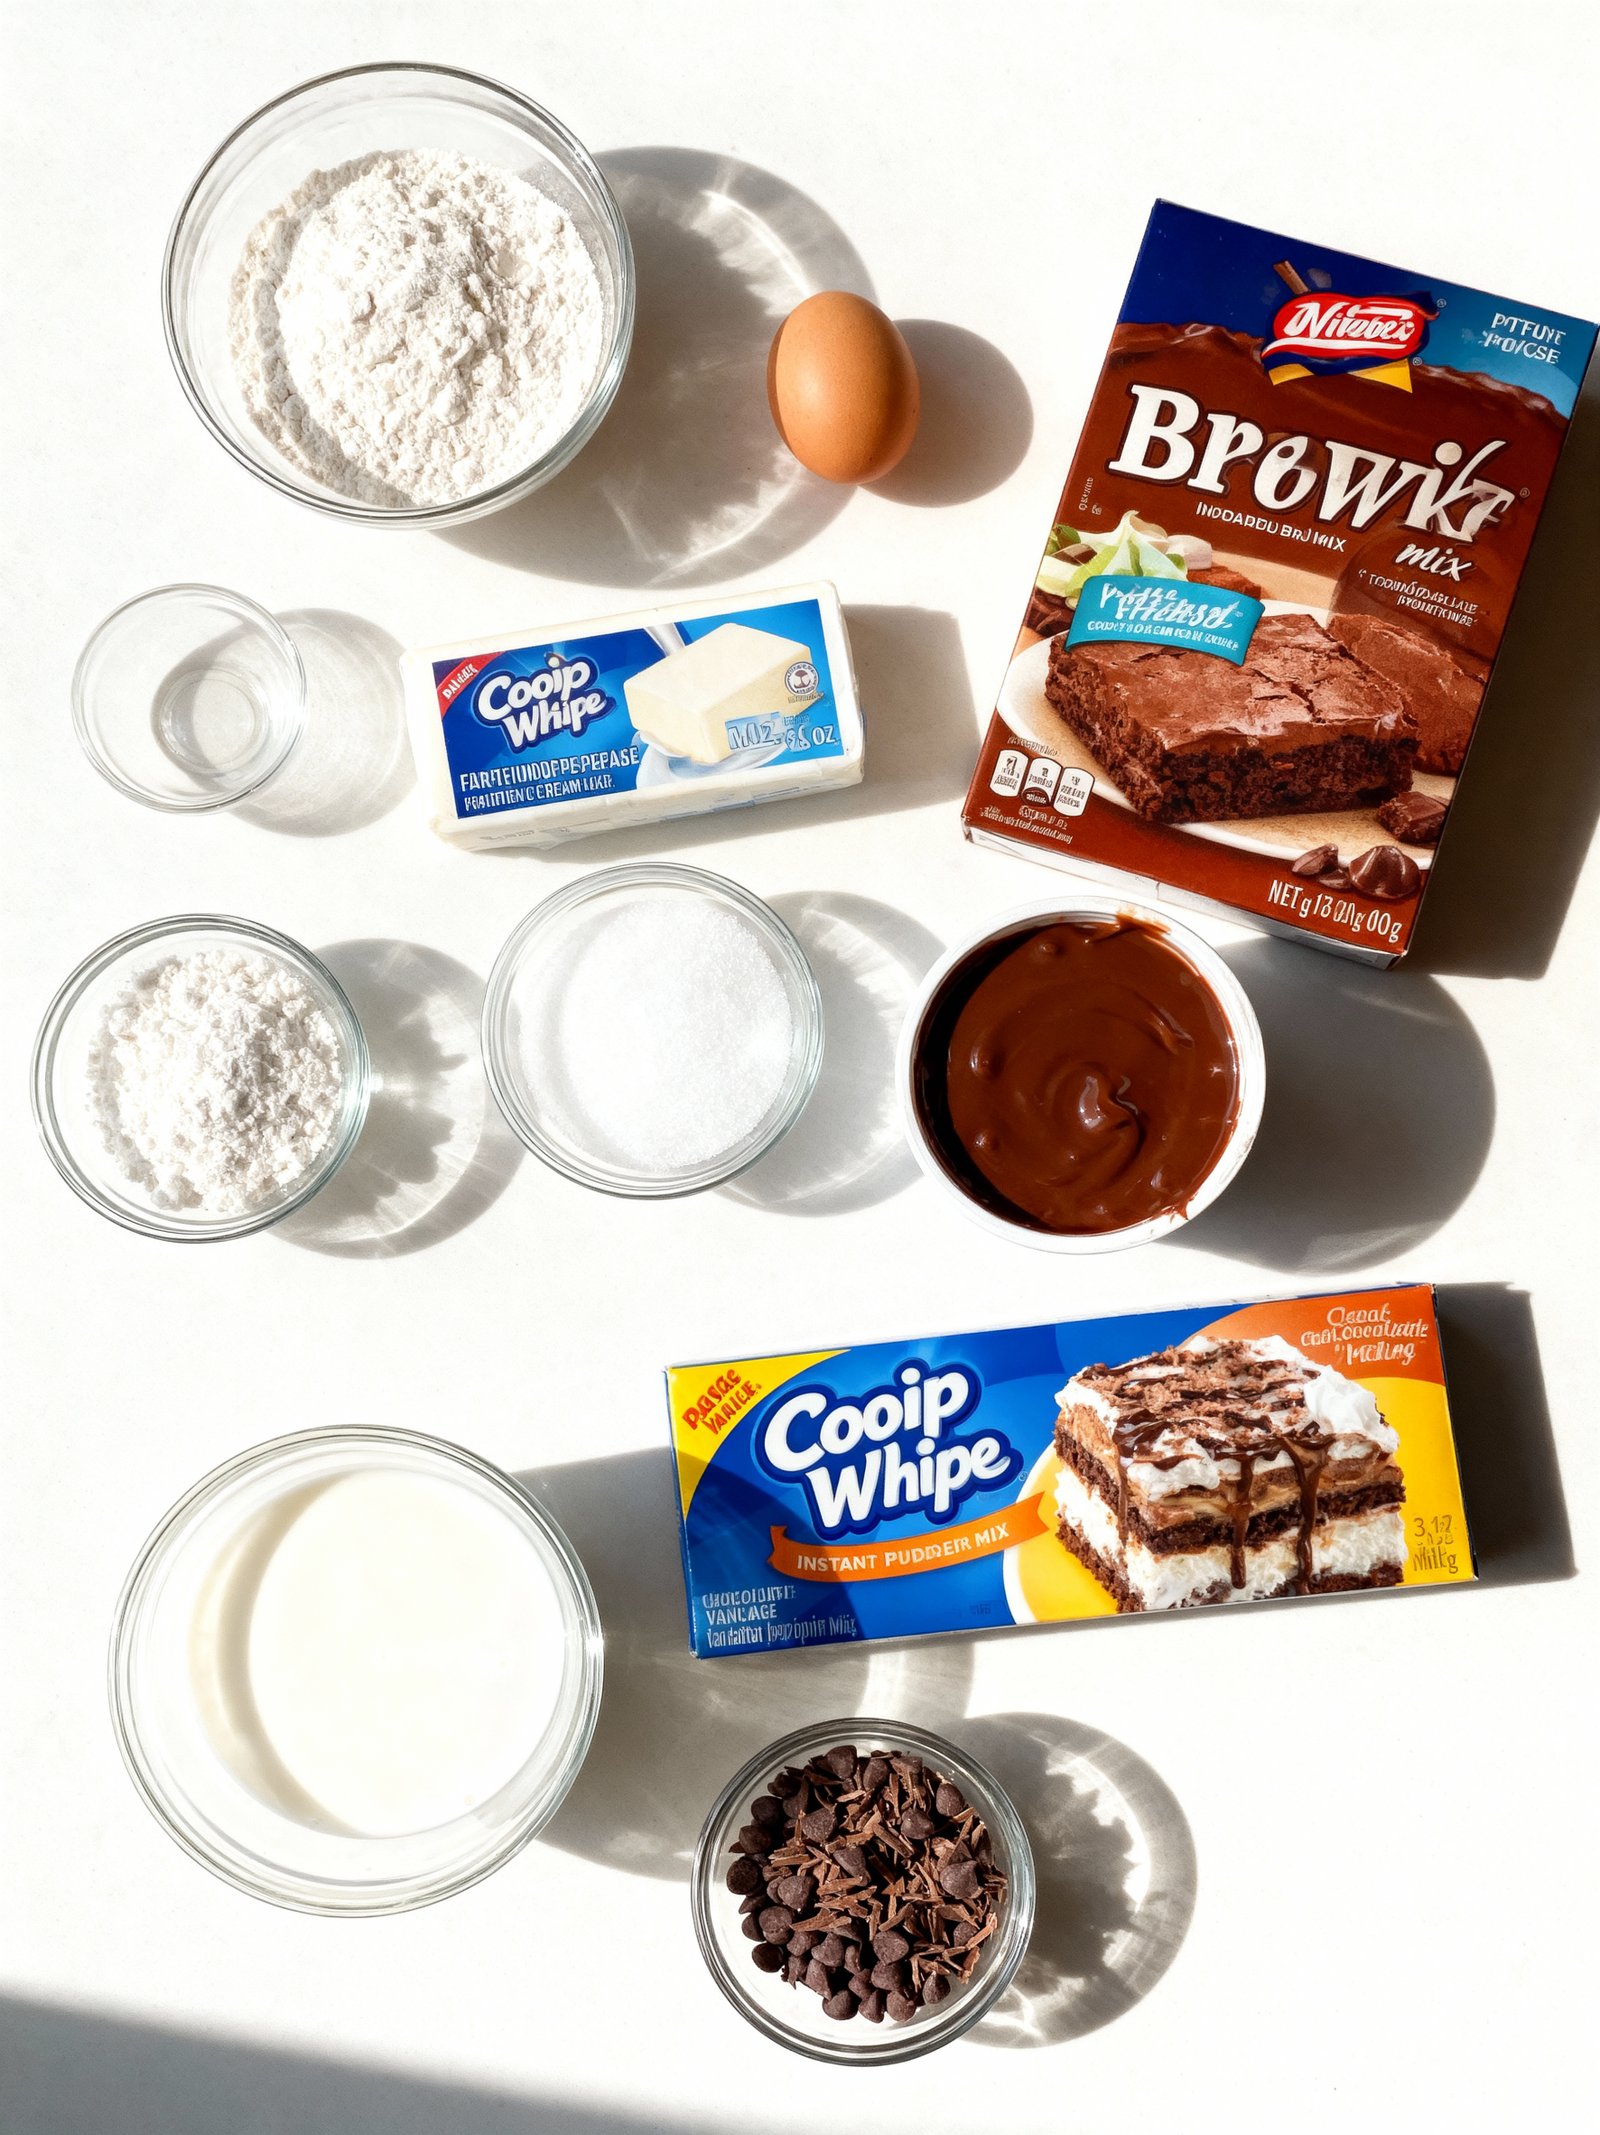
- 1 box brownie mix (plus ingredients required on the box)
- 1 additional egg (for a cakier brownie texture)
- 1 (8 oz) package cream cheese, softened
- 1 cup powdered sugar
- 2 (8 oz) containers Cool Whip or whipped topping
- 1 package chocolate instant pudding mix
- 1 package vanilla instant pudding mix
- 3 1/2 cups milk
- Mini chocolate chips or chocolate shavings for topping (optional)
Timing
| Prep Time | 15 minutes |
| Cook Time | 0 minutes |
| Total Time | 4 hours 15 minutes (includes chilling) |
Context: This Chilled Brownie Refrigerator Cake requires about 20% less active time than traditional baked brownie recipes.
Step-by-Step Instructions
Step 1 — Prepare Your Ingredients and Pan
Gather all ingredients for your Chilled Brownie Refrigerator Cake: brownie mix or homemade brownie batter, heavy cream, cream cheese, powdered sugar, and any mix-ins like chocolate chips or nuts. Line an 8×8 inch baking pan with parchment paper, leaving an overhang on two sides for easy removal later.
Tip: If using homemade brownies, prepare the batter according to your recipe. For best texture, ensure cream cheese and butter (if used) are at room temperature before mixing.
Step 2 — Bake the Brownie Base
Pour brownie batter into the prepared pan and spread evenly. Bake at 350°F (175°C) for 20–25 minutes, or until a toothpick inserted comes out with a few moist crumbs (not wet batter).
Tip: Avoid overbaking—the brownie will firm up as it cools and during chilling. Let the brownie cool completely in the pan on a wire rack before proceeding.
Step 3 — Whip the Cream Cheese Layer
In a large bowl, beat room-temperature cream cheese with powdered sugar until smooth and creamy. In a separate bowl, whip cold heavy cream to stiff peaks, then gently fold into the cream cheese mixture until no streaks remain.
Tip: Chill your mixing bowl and beaters before whipping cream for faster, more stable results. Sweeten to taste—about ½ cup powdered sugar works well for most palates.
Step 4 — Assemble the Chilled Brownie Refrigerator Cake
Spread the cream cheese whipped cream evenly over the completely cooled brownie base. Smooth the top with a spatula. If desired, sprinkle with chocolate shavings, crushed cookies, or mini chocolate chips for added texture.
Tip: For clean layers, ensure the brownie is fully cooled—warm brownie will melt the cream layer. Press toppings gently so they adhere during chilling.
Step 5 — Chill Until Firm
Cover the pan with plastic wrap or a lid and refrigerate for at least 4 hours, or preferably overnight. The Chilled Brownie Refrigerator Cake needs time to set so it slices neatly.
Tip: Don’t rush this step—the cream layer firms up and flavors meld with extended chilling. For a firmer set, you can place it in the freezer for 1 hour before serving.
Step 6 — Slice and Serve
Lift the Chilled Brownie Refrigerator Cake from the pan using the parchment overhang. Use a sharp knife dipped in hot water and wiped dry to cut clean squares.
Tip: For clean cuts, wipe the knife between slices. Serve cold, and store any leftovers covered in the refrigerator for up to 3 days.
Nutritional Information
| Calories | 380 |
| Protein | 5g |
| Carbohydrates | 45g |
| Fat | 22g |
| Fiber | 3g |
| Sodium | 180mg |
Note: Estimates based on typical ingredients and serving size.
Healthier Alternatives
- Protein Powder — Replace ¼ cup cocoa with chocolate protein powder for a protein boost without sacrificing rich flavor.
- Almond Flour — Substitute all-purpose flour with almond flour for a gluten-free, lower-carb version with a nutty taste.
- Coconut Oil — Use coconut oil instead of butter for a dairy-free alternative that adds a subtle tropical note.
- Greek Yogurt — Swap some butter for plain Greek yogurt to reduce fat and add protein while keeping moisture.
- Unsweetened Applesauce — Replace half the oil with unsweetened applesauce to cut calories and add natural sweetness.
- Low-Sodium Baking Soda — Opt for low-sodium baking soda to reduce sodium content without affecting the rise.
- Stevia or Monk Fruit — Use these natural sweeteners instead of sugar for a lower-carb Chilled Brownie Refrigerator Cake.
- Dark Chocolate Chips — Choose 70% dark chocolate chips over milk chocolate for less sugar and antioxidants.
Serving Suggestions
- Pair with strong coffee or cold milk to balance the rich chocolate flavor of this Chilled Brownie Refrigerator Cake
- Serve at summer barbecues and picnics where no-bake desserts are convenient and refreshing
- Perfect for birthday parties and potlucks where you need an easy, make-ahead crowd-pleaser
- Garnish with fresh berries like raspberries or strawberries to add color and cut through the sweetness
- Create elegant individual portions by setting in small mason jars or ramekins for dinner parties
- Top with a sprinkle of sea salt or crushed nuts for added texture and flavor contrast
- Excellent for holiday gatherings when you want a festive dessert without oven time
This Chilled Brownie Refrigerator Cake is incredibly versatile – slice it thick for a decadent dessert or cut into small squares for casual snacking. The no-bake nature makes it ideal for warm weather events when turning on the oven isn’t desirable.
Common Mistakes to Avoid
- Mistake: Using warm melted butter/chocolate. Fix: Cool mixtures completely before folding to prevent greasy separation.
- Mistake: Overmixing the batter after adding dry ingredients. Fix: Stir just until combined to maintain a fudgy, dense texture.
- Mistake: Skipping the parchment paper lining. Fix: Always line your pan for clean, easy removal of chilled slices.
- Mistake: Chilling for less than 4 hours. Fix: Refrigerate at least 4–6 hours to ensure proper setting and clean cuts.
- Mistake: Substituting sweetened condensed milk with evaporated milk. Fix: Stick to sweetened condensed milk for the right sweetness and binding.
- Mistake: Adding wet ingredients to hot melted chocolate. Fix: Temper eggs and dairy by gradually adding small amounts of the warm mixture first.
- Mistake: Using coarse sugar instead of fine granulated. Fix: Fine sugar dissolves better, preventing a gritty mouthfeel in the final Chilled Brownie Refrigerator Cake.
- Mistake: Pressing the mixture too firmly into the pan. Fix: Gently spread the batter to keep the texture light and avoid compacting.
- Mistake: Storing at room temperature after chilling. Fix: Keep refrigerated until serving to maintain structure and food safety.
Storing Tips
- Fridge: Store your Chilled Brownie Refrigerator Cake in an airtight container for up to 5 days. Keep the refrigerator temperature at or below 40°F (4°C) for food safety.
- Freezer: Wrap the cake tightly in plastic wrap and then in foil before placing it in a freezer-safe container. It will keep for up to 3 months.
- Reheat: Thaw frozen Chilled Brownie Refrigerator Cake overnight in the refrigerator. For a warm treat, microwave individual slices for 10-15 seconds until just warmed through.
Always use clean utensils when serving to maintain freshness and prevent contamination.
Conclusion
This Chilled Brownie Refrigerator Cake is the ultimate no-bake dessert for chocolate lovers. It’s rich, fudgy, and incredibly easy to make. Give this recipe a try and let us know how it turned out in the comments! For more decadent treats, check out our Hot Chocolate Cheesecake Brownies Recipe or Mississippi Mud Cake Recipe.
PrintChilled Brownie Refrigerator Cake
A creamy and chocolaty layered dessert combining a fudgy brownie base, cream cheese frosting, pudding layers, and whipped topping, chilled in the refrigerator for a refreshing, easy-to-make treat.
- Prep Time: 15 minutes
- Cook Time: 25-30 minutes
- Total Time: 4 hours 45 minutes (including chilling time)
- Yield: 12 1x
- Method: Dessert
- Cuisine: American
Ingredients
- 1 box brownie mix (plus ingredients required on the box)
- 1 additional egg (for a cakier brownie texture)
- 1 (8 oz) package cream cheese, softened
- 1 cup powdered sugar
- 2 (8 oz) containers Cool Whip or whipped topping
- 1 package chocolate instant pudding mix
- 1 package vanilla instant pudding mix
- 3 1/2 cups milk
- Mini chocolate chips or chocolate shavings for topping (optional)
Instructions
- Prepare the brownie mix according to package directions, adding the extra egg to make them more cakey.
- Pour the batter into a greased 9×13 inch baking pan and bake as directed on the box.
- Allow the brownies to cool completely in the pan.
- In a mixing bowl, combine the softened cream cheese, powdered sugar, and one container of Cool Whip; mix until smooth.
- Spread the cream cheese mixture evenly over the cooled brownies.
- In another bowl, whisk together the chocolate and vanilla instant pudding mixes with the milk until thickened.
- Pour the pudding mixture on top of the cream cheese layer and spread evenly.
- Spread the second container of Cool Whip over the pudding layer.
- Sprinkle mini chocolate chips or chocolate shavings on top as a garnish if desired.
- Cover and refrigerate the cake for at least 4 hours or overnight before serving.
Notes
For a lighter version, substitute light Cool Whip, skim milk, and light cream cheese. This dessert tastes best after chilling overnight to allow flavors to meld. Use a hot knife to slice neatly.
Nutrition
- Calories: 350
- Sugar: 30g
- Sodium: 220mg
- Fat: 18g
- Saturated Fat: 8g
- Unsaturated Fat: 6g
- Trans Fat: 0g
- Carbohydrates: 45g
- Fiber: 2g
- Protein: 4g
- Cholesterol: 40mg
FAQs
How long does the Chilled Brownie Refrigerator Cake need to set?
This Chilled Brownie Refrigerator Cake should be refrigerated for at least 4 hours, but overnight is best. This allows the layers to firm up properly and the flavors to meld together for the perfect texture.
Can I make this dessert ahead of time?
Yes, this Chilled Brownie Refrigerator Cake is an excellent make-ahead dessert. You can prepare it a full day in advance, as the extended chilling time only improves its rich, fudgy consistency.
Do I need to bake the brownie base?
No baking is required for the brownie layer in this no-bake recipe. Simply press the crumb mixture into the pan to form the base before adding the chilled toppings for your easy Chilled Brownie Refrigerator Cake.


