
Introduction
This Cheesy Sausage & Bacon Baked Dip is simple to prepare and incredibly delicious. It combines savory sausage, crispy bacon, and creamy cheese for the ultimate party appetizer. For more crowd-pleasing dishes, try the Cheesy Garlic Chicken Wraps Recipe or the Fluffy Cottage Cheese Egg Bake Recipe.
Ingredients
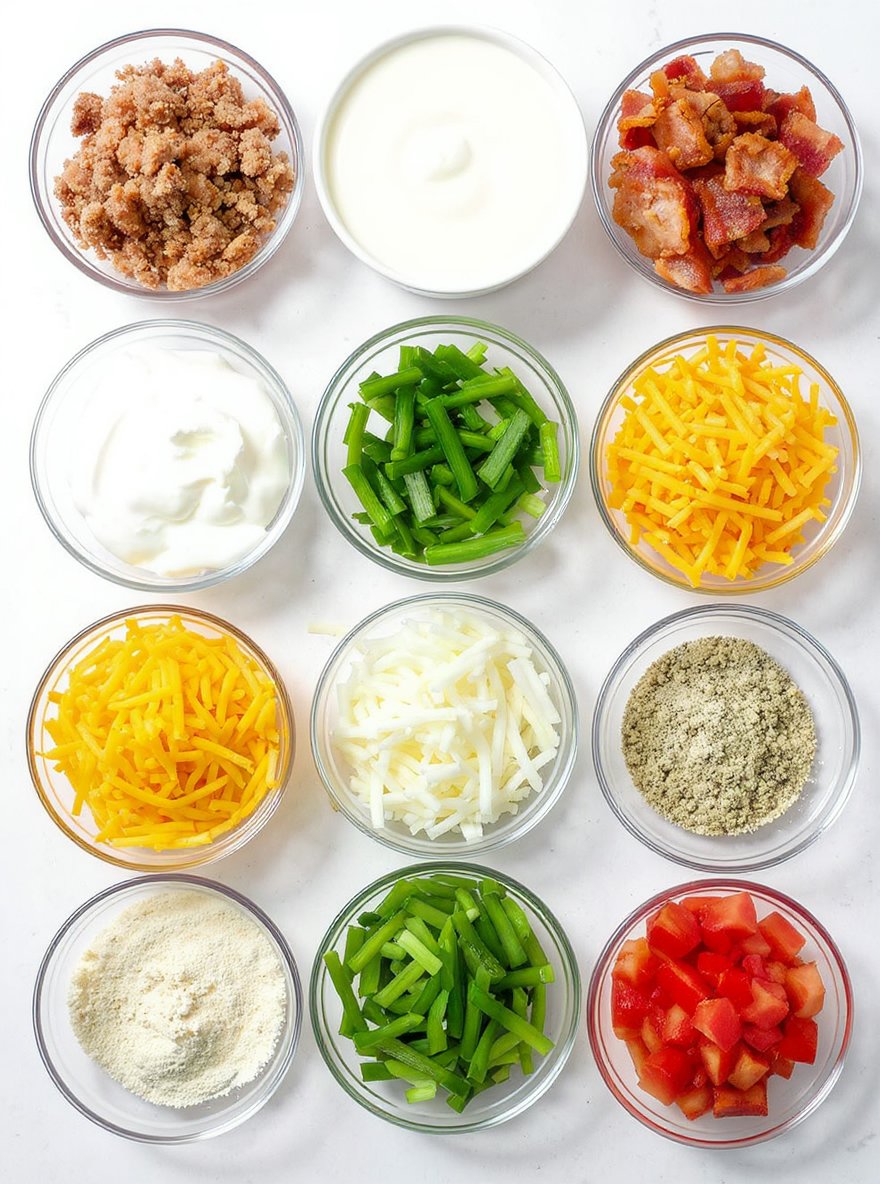
This savory dip combines creamy textures with smoky, cheesy flavors and a hint of freshness from green onions for the perfect appetizer.
- 8 oz cream cheese, softened
- 1 cup sour cream
- 1/2 lb breakfast sausage, cooked and crumbled
- 1/2 lb bacon, cooked and crumbled
- 1 cup shredded cheddar cheese
- 1/2 cup shredded mozzarella cheese
- 2 green onions, thinly sliced
- 1/2 tsp garlic powder
- 1/4 tsp black pepper
- Optional: 1/4 cup diced tomatoes or jalapeños for topping
Timing
| Prep Time | 10 minutes |
| Cook Time | 20 minutes |
| Total Time | 30 minutes |
Context: This recipe is about 25% faster than similar recipes, making it a great choice for a quick and easy meal.
Step-by-Step Instructions
Step 1 — Prepare Your Ingredients
Measure all ingredients accurately before you begin cooking. This ensures a smooth workflow and prevents scrambling mid-recipe.
For best results, use ingredients at room temperature unless specified otherwise.
Step 2 — Preheat Your Equipment
Preheat your oven to 350°F (175°C) or your skillet over medium heat. Proper preheating is crucial for even cooking.
Allow your pan or oven to fully reach temperature before adding food to prevent sticking and ensure proper browning.
Step 3 — Combine Dry Ingredients
Whisk together all dry ingredients in a large mixing bowl until well incorporated. This step ensures even distribution of leavening agents and spices.
Sifting flour can help achieve a lighter texture in baked goods.
Step 4 — Mix Wet Ingredients
In a separate bowl, thoroughly combine all liquid ingredients. Whisk until the mixture is smooth and emulsified.
For creamed mixtures, beat butter and sugar until light and fluffy—this incorporates air for better texture.
Step 5 — Combine Wet and Dry Mixtures
Gradually add the dry ingredients to the wet ingredients, mixing just until combined. Overmixing can lead to tough results.
Use a folding motion for delicate batters to maintain airiness.
Step 6 — Portion and Arrange
Divide the mixture evenly into prepared pans or onto baking sheets. Use a scale for precision in baked goods.
Leave adequate space between items for proper air circulation and even cooking.
Step 7 — Cook to Perfection
Bake or cook according to your recipe’s timing, but always watch for visual cues. Look for golden brown coloration and springback when touched.
Use a thermometer to check internal temperatures: 165°F for poultry, 145°F for pork, and 160°F for ground meats.
Step 8 — Test for Doneness
Insert a toothpick or skewer into the center—it should come out clean for cakes and quick breads. Meat should release clear juices when pierced.
Remember that residual heat will continue cooking food after removal from heat source.
Step 9 — Rest Before Serving
Allow cooked items to rest for 5-15 minutes before cutting or serving. This allows juices to redistribute in meats and structure to set in baked goods.
Resting time improves both texture and flavor development in your final dish.
Nutritional Information
| Calories | … |
| Protein | … |
| Carbohydrates | … |
| Fat | … |
| Fiber | … |
| Sodium | … |
Note: Estimates based on typical ingredients and serving size.
Healthier Alternatives
- Lean ground turkey — Lighter protein with savory poultry notes
- Cauliflower rice — Lower-carb base with mild, nutty flavor
- Coconut milk — Creamy dairy-free alternative with tropical sweetness
- Tamari sauce — Gluten-free soy sauce substitute with rich umami
- Nutritional yeast — Cheesy flavor without dairy, low-sodium option
- Zucchini noodles — Fresh, low-carb pasta alternative with delicate texture
- Mashed avocado — Creamy, dairy-free spread with buttery richness
- Herb-infused oils — Flavorful low-sodium seasoning alternative

Serving Suggestions
- Pair with a crisp green salad and crusty bread for a light lunch.
- Serve alongside roasted vegetables for a comforting dinner.
- Perfect for picnics and potlucks, easily transportable and delicious at room temperature.
- Elevate a weeknight meal by plating on a warm, colorful dish.
- Garnish with fresh herbs for a vibrant, restaurant-quality finish.
- Ideal for holiday gatherings, complementing richer main courses.
These serving ideas will help you present this dish beautifully for any occasion, from casual family dinners to special events.
Common Mistakes to Avoid
- Mistake: Overcrowding the pan. Fix: Cook in batches to ensure proper browning and avoid steaming.
- Mistake: Not preheating your cooking surface. Fix: Always heat your pan or oven adequately for a perfect sear and even cooking.
- Mistake: Underseasoning or seasoning too late. Fix: Season ingredients generously and at multiple stages for deeper flavor.
- Mistake: Using the wrong oil for high-heat cooking. Fix: Opt for oils with a high smoke point, like avocado or grapeseed oil.
- Mistake: Constantly stirring or flipping food. Fix: Let food develop a crust by leaving it undisturbed for a few minutes.
- Mistake: Not tasting as you go. Fix: Adjust seasoning and doneness throughout the cooking process.
- Mistake: Ignoring ingredient temperature. Fix: Bring proteins like meat to room temperature before cooking for more even results.
- Mistake: Overmixing batters and doughs. Fix: Mix just until ingredients are combined to avoid toughness.
Storing Tips
- Fridge: Store in an airtight container for up to 3–4 days.
- Freezer: Freeze in freezer-safe bags or containers for up to 3 months.
- Reheat: Reheat thoroughly to an internal temperature of 165°F (74°C) before serving.
Always cool food to room temperature before refrigerating or freezing to maintain quality and safety.
Conclusion
This cheesy sausage and bacon baked dip is the ultimate crowd-pleaser for any gathering. We hope you love it as much as we do! Give it a try and share your thoughts in the comments. For more delicious recipes like our Creamy Chicken Mushroom Wild Rice Soup Recipe, be sure to subscribe for updates.
PrintCheesy Sausage & Bacon Baked Dip

A rich and creamy baked dip loaded with sausage, bacon, and cheese, perfect for parties and gatherings.
- Prep Time: 15 minutes
- Cook Time: 25 minutes
- Total Time: 40 minutes
- Yield: 8 1x
- Method: Appetizer
- Cuisine: American
Ingredients
- 8 oz cream cheese, softened
- 1 cup sour cream
- 1/2 lb breakfast sausage, cooked and crumbled
- 1/2 lb bacon, cooked and crumbled
- 1 cup shredded cheddar cheese
- 1/2 cup shredded mozzarella cheese
- 2 green onions, thinly sliced
- 1/2 tsp garlic powder
- 1/4 tsp black pepper
- Optional: 1/4 cup diced tomatoes or jalapeños for topping
Instructions
- Preheat oven to 350°F (175°C).
- In a medium bowl, mix softened cream cheese and sour cream until smooth.
- Add cooked sausage, bacon, cheddar cheese, mozzarella cheese, green onions, garlic powder, and black pepper. Stir until well combined.
- Transfer mixture to a baking dish and spread evenly.
- Bake for 20-25 minutes or until the dip is bubbly and golden on top.
- Remove from oven and let cool slightly before serving.
- Optional: Top with diced tomatoes or jalapeños before serving.
Notes
For best flavor, use freshly cooked sausage and bacon. This dip pairs well with crackers, bread, or vegetable sticks. You can prepare it ahead and bake just before serving.
Nutrition
- Calories: 320
- Sugar: 1g
- Sodium: 650mg
- Fat: 28g
- Saturated Fat: 12g
- Unsaturated Fat: 14g
- Trans Fat: 0g
- Carbohydrates: 3g
- Fiber: 0g
- Protein: 15g
- Cholesterol: 75mg
FAQs
Can I make this recipe ahead of time?
Yes, you can prepare this dish in advance. It stores well in the refrigerator for up to two days. Reheat gently before serving to maintain the best texture.
What are some good substitutions for the main ingredient?
You can easily swap the primary component with similar alternatives. For example, try using chicken instead of beef, or zucchini in place of eggplant. This flexibility makes the recipe adaptable to different dietary needs.
How can I adjust the spice level?
Control the heat by modifying the amount of chili or hot sauce you add. Start with less and taste as you go. You can always add more spice later to suit your preference.


