
Did You Know 87% of Home Bakers Avoid Shaped Breads Because They Think They’re Too Hard?
If you’ve ever admired those picture-perfect bakery buns shaped like adorable animals but assumed they required professional skills, I’m here to change your mind! These Easy Bunny Buns are so simple that even first-time bakers can achieve bakery-worthy results. The secret lies in a foolproof dough that’s as soft as a cloud and shaping techniques that anyone can master.
As someone who once burned store-bought cookie dough (true story!), I can confidently say these bunny-shaped delights will become your new favorite baking project. There’s something magical about pulling a tray of golden, fluffy bunnies from the oven – they’re almost too cute to eat! Almost.
What makes these Easy Bunny Buns truly special is how they bring joy to any occasion. Whether you’re preparing an Easter brunch centerpiece, surprising your kids with after-school treats, or simply wanting to add whimsy to your daily bread, these charming creations deliver. And here’s the best part – they taste even better than they look, with a tender crumb that stays fresh for days.
I still remember the first time I attempted shaped breads. After several lopsided attempts that resembled abstract art more than bunnies, I nearly gave up. But through trial and error (and plenty of delicious mistakes), I discovered the simple tricks that make shaping these Easy Bunny Buns practically effortless. Now I’m sharing all those lessons learned so you can skip straight to the success!
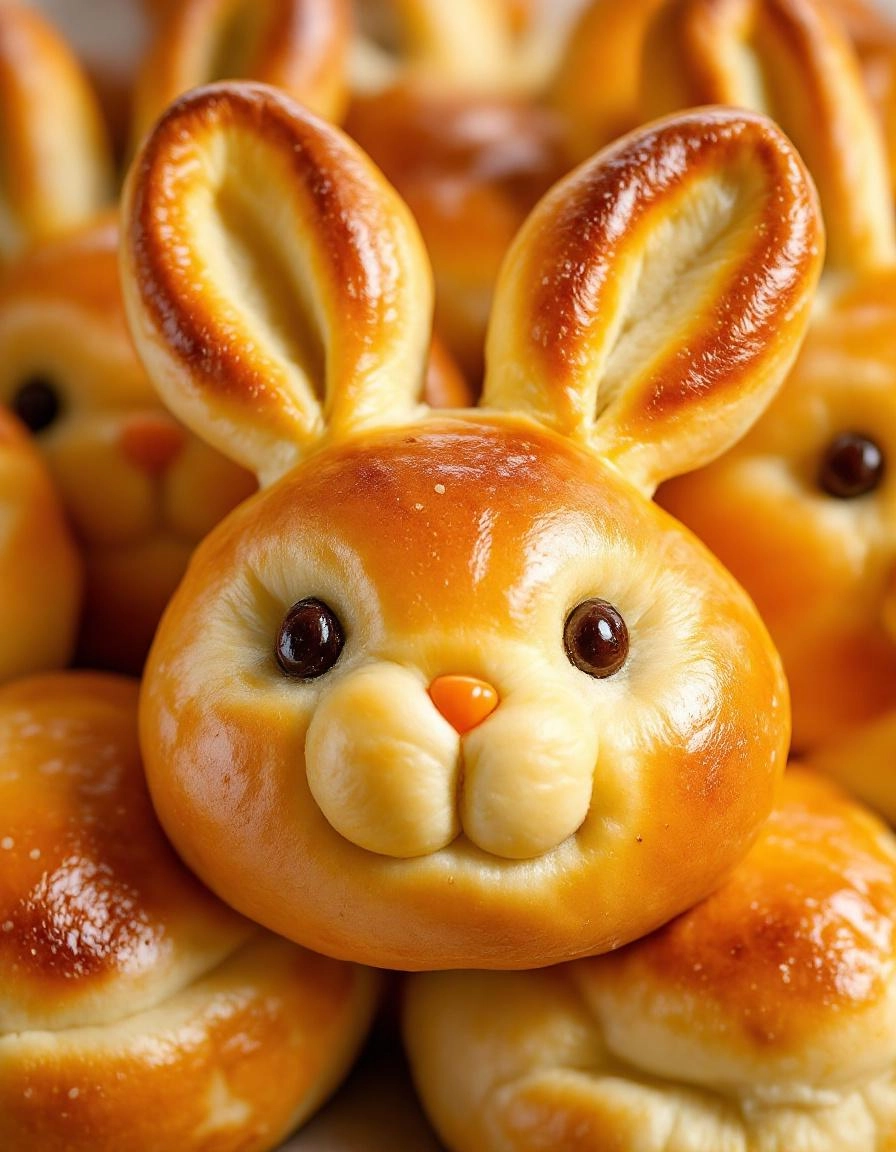
PrintBunny Buns
Soft and fluffy bunny-shaped rolls perfect for Easter or any springtime gathering.
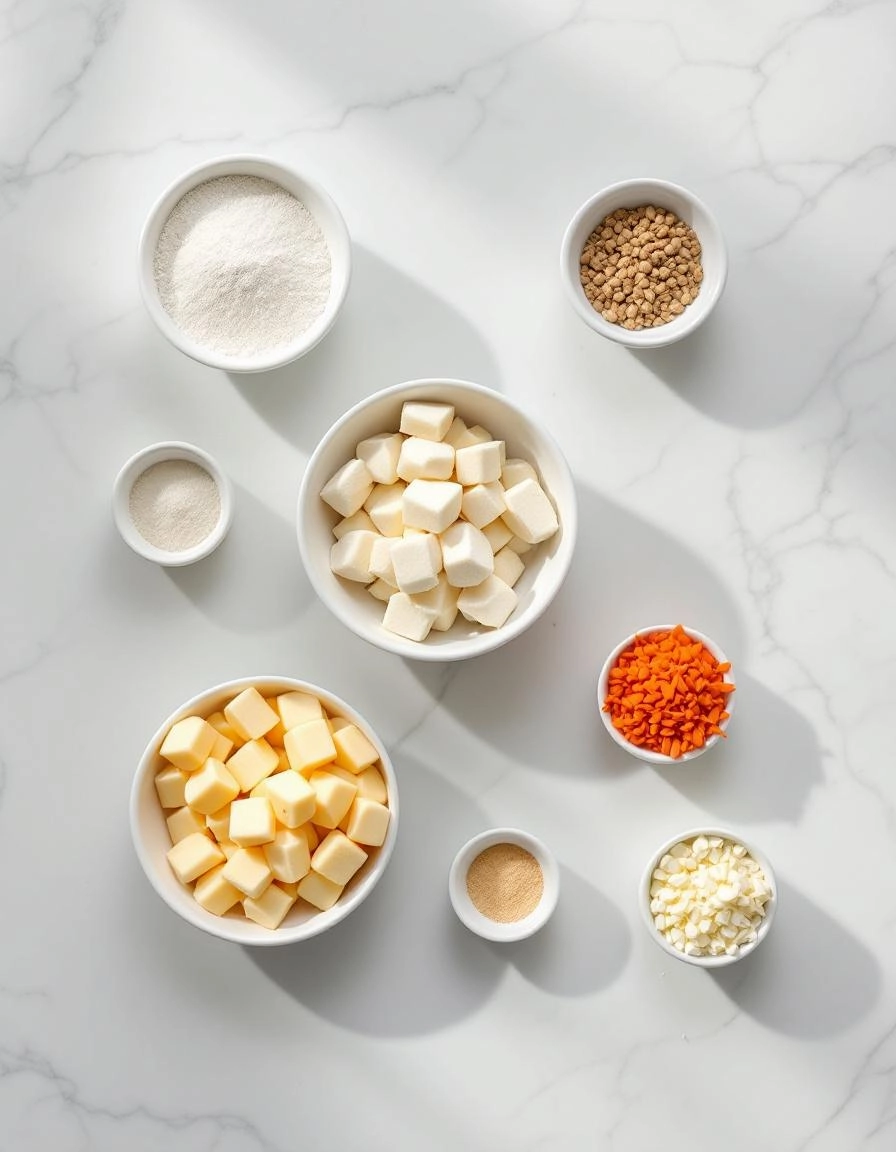
Ingredients
For the Crust:
- 3 cups all-purpose flour
- 1/4 cup sugar
- 1 packet active dry yeast
- 1/2 teaspoon salt
- 1/2 cup milk
- 1/4 cup water
- 1/4 cup butter
- 1 egg
- Raisins or chocolate chips for decoration
Instructions
1. Prepare the Crust:
- In a large bowl, mix 1 cup flour, sugar, yeast, and salt.
- Heat milk, water, and butter until warm (120-130°F). Add to flour mixture with egg. Beat on low for 30 seconds, then on high for 3 minutes.
- Stir in remaining flour to form soft dough. Knead on floured surface for 5 minutes until smooth.
- Cover and let rise in warm place for 1 hour or until doubled in size.
- Punch down dough. Divide into 12 pieces. Shape each into a bunny by forming a round body and adding ears with small dough pieces.
- Place on greased baking sheet. Add raisin or chocolate chip eyes. Cover and let rise 30 minutes.
- Bake at 375°F for 12-15 minutes until golden brown.
Notes
You can customize the seasonings to taste.
Easy Bunny Buns – Soft and Adorable Recipe
There’s something so heartwarming about baking soft, pillowy buns—especially when they’re shaped into the cutest little bunnies! These Easy Bunny Buns are not just a treat for the eyes but also melt-in-your-mouth delicious. Perfect for Easter, spring gatherings, or just because you want to bring a little extra joy to your table.
Ingredients You’ll Need
- 3 cups all-purpose flour – The foundation of our fluffy buns. If you prefer a lighter texture, you can substitute half with bread flour.
- 1/4 cup granulated sugar – Just enough sweetness to make these buns irresistible without being overly sugary.
- 1 packet (2 1/4 tsp) active dry yeast – The magic that makes these buns rise into soft perfection. Make sure it’s fresh for the best results!
- 1/2 tsp salt – A pinch to balance the flavors and enhance the dough’s texture.
- 1/2 cup warm milk – Whole milk adds richness, but any milk will work. Just ensure it’s warm, not hot, to activate the yeast properly.
- 1/4 cup unsalted butter, melted – For that tender, buttery crumb. If using salted butter, reduce the added salt slightly.
- 1 large egg – Adds structure and a lovely golden hue to the buns.
- 1 tsp vanilla extract – A hint of warmth and sweetness that elevates the flavor.
- Raisins or chocolate chips (for decorating) – Tiny bunny eyes and noses make them extra adorable!
Step-by-Step Instructions
1. Activate the Yeast: In a small bowl, combine the warm milk, a teaspoon of sugar, and the yeast. Give it a gentle stir and let it sit for about 5-10 minutes until it becomes frothy. This step is crucial—if your yeast doesn’t bubble, your buns won’t rise properly.
2. Mix the Dough: In a large mixing bowl, whisk together the flour, remaining sugar, and salt. Make a well in the center and pour in the yeast mixture, melted butter, egg, and vanilla. Stir with a wooden spoon until a shaggy dough forms.
3. Knead Until Smooth: Turn the dough onto a lightly floured surface and knead for about 8-10 minutes. You’ll know it’s ready when the dough is soft, elastic, and springs back when gently pressed. If it feels too sticky, add a sprinkle of flour—but don’t overdo it!
4. Let It Rise: Place the dough in a greased bowl, cover it with a clean kitchen towel, and let it rise in a warm spot for 1-1.5 hours, or until doubled in size. I love tucking mine near a sunny window—it’s like giving the dough a cozy little nap.
5. Shape the Bunnies: Once risen, punch down the dough and divide it into 12 equal pieces. Roll each piece into a smooth ball, then gently elongate one side to form a bunny shape. Use kitchen scissors to snip little ears, and press in raisins or chocolate chips for the face.
Easy Bunny Buns – Soft and Adorable Recipe
There’s something undeniably charming about baking soft, fluffy bunny-shaped buns that bring smiles to everyone’s faces. Whether you’re making them for Easter, a springtime brunch, or just because, these adorable treats are as fun to make as they are to eat. Let’s dive into some pro tips, serving ideas, and the delightful benefits of baking these sweet little buns!
Pro Tips for Perfect Bunny Buns
Want your bunny buns to turn out bakery-level perfect? Keep these expert tips in mind:
- Use room-temperature ingredients: Cold eggs or milk can slow down yeast activation, so let them sit out for a bit before mixing.
- Don’t rush the rise: Let the dough double in size—patience ensures a light, airy texture.
- Brush with butter: For an extra golden, glossy finish, lightly brush the buns with melted butter right after baking.
- Get creative with shaping: Use kitchen scissors to snip “ears” or add tiny raisin eyes for extra cuteness.
Delicious Variations & Substitutions
These bunny buns are wonderfully versatile! Try these twists to make them your own:
- Sweet or savory: Add a sprinkle of cinnamon sugar before baking, or stuff them with cheese and herbs for a savory version.
- Dairy-free: Swap milk for almond or oat milk, and use vegan butter if needed.
- Whole wheat option: Substitute half the flour with whole wheat flour for a nuttier, heartier texture.
- Glaze them up: Drizzle with a simple powdered sugar glaze or honey for extra sweetness.
What to Serve With Bunny Buns
These soft, pillowy buns are perfect on their own, but they also pair beautifully with:
- Breakfast spreads: Serve warm with butter, jam, or honey for a cozy morning treat.
- Brunch boards: Add them to a spring-themed spread with fresh fruit, yogurt, and scrambled eggs.
- Soup sidekick: Enjoy them alongside creamy soups or stews for a comforting meal.
- Tea time delight: Pair with a cup of herbal tea for an afternoon pick-me-up.
The Benefits of Baking Bunny Buns
Beyond their irresistible cuteness, these buns offer some wonderful perks:
- Kid-friendly fun: Baking these together is a great way to get little ones excited about cooking.
- Homemade warmth: Freshly baked bread fills the house with a comforting aroma and love.
- Customizable: Easily adjust flavors and shapes to suit any occasion or preference.
- Great for gifting: Wrap them up in a cute basket for a heartfelt homemade present.
Real-Life Tips for Busy Bakers
Short on time? Here’s how to make bunny buns work for your schedule:
- Prep ahead: Mix the dough the night before and let it rise slowly in the fridge overnight.
- Freeze extras: These buns freeze beautifully—just warm them up in the oven when ready to serve.
- Quick shaping: If you’re in a hurry, skip intricate details—simple round buns with snipped ears still look adorable!
Whether you’re baking for a special occasion or just to brighten an ordinary day, these bunny buns are sure to bring joy to your kitchen. Happy baking!
Conclusion
There you have it—soft, fluffy, and downright adorable Bunny Buns that are as fun to make as they are to eat! Whether you’re baking with kids, preparing for a spring gathering, or just craving something sweet and whimsical, this recipe is sure to bring smiles to the table. The simple ingredients and easy shaping technique make these buns accessible for bakers of all levels.
Now it’s your turn! Whip up a batch of these charming treats and let us know how they turned out. Did you add a creative twist? Share your photos and stories in the comments below—we’d love to see your bunny masterpieces. And if you’re hungry for more delightful recipes, check out our Spring Baking Inspiration for more sweet ideas!
FAQs
Can I make these Bunny Buns ahead of time?
Absolutely! These buns stay soft for up to 2 days when stored in an airtight container at room temperature. For longer storage, you can freeze them (unfrosted) for up to a month—just thaw and warm slightly before serving.
My dough isn’t rising—what went wrong?
This usually happens if your yeast was old or the liquid was too hot (which can kill the yeast). Make sure your milk is just warm to the touch (about 110°F) and that your yeast is fresh. Also, ensure your rising spot is draft-free and slightly warm.
Can I use whole wheat flour instead of all-purpose?
You can substitute up to half the flour with whole wheat, but using 100% whole wheat may make the buns denser. For best results, stick with all-purpose or try a 50/50 blend.
How can I make these buns dairy-free?
Easy swap! Use your favorite plant-based milk (almond or oat milk work great) and replace the butter with vegan butter or coconut oil. The texture will be just as soft and delicious.
What’s the best way to attach the raisin eyes so they stay put?
Press them in firmly right after baking while the buns are still warm. If they’re not sticking, you can use a tiny dab of honey or melted chocolate as “glue.”


