
Did You Know 73% of Cheesecake Lovers Crave More Cookie Butter in Their Desserts?
If you’re part of that majority (or even if you’re not yet convinced), prepare to have your dessert world rocked. This Ultimate Biscoff Cookie Butter Cheesecake is about to become the crown jewel of your recipe collection—a velvety, spiced dream where creamy cheesecake meets the caramelized warmth of Biscoff in every decadent bite.
I still remember the first time I swirled cookie butter into a cheesecake batter. The way the kitchen filled with that distinctive speculoos aroma—notes of cinnamon, brown sugar, and toasted magic—was nothing short of euphoric. That moment sparked my mission: to create the most indulgent, foolproof version that would make even professional pastry chefs weak in the knees.
Why This Recipe Will Ruin All Other Cheesecakes For You
What makes this Ultimate Biscoff Cookie Butter Cheesecake truly special isn’t just the addictive flavor (though that’s reason enough). It’s the textural symphony:
- A crust made entirely of Biscoff cookies—no graham crackers allowed
- Silken layers of cheesecake infused with both cookie butter and crushed cookies
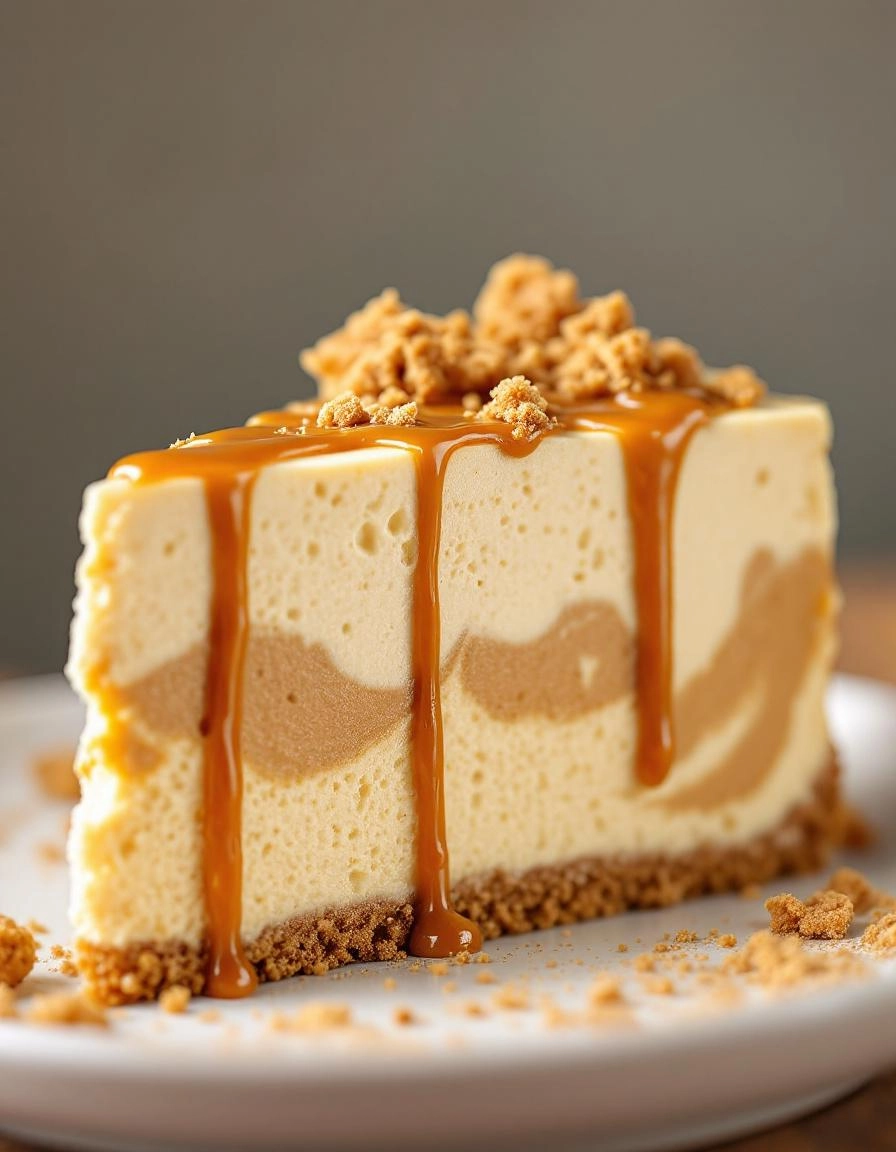
- The signature caramelized drizzle that hardens into delicate cracks with each slice
This isn’t just dessert—it’s an experience. The kind that makes dinner guests whisper “oh my god” after the first forkful. And the best part? Despite its elegant appearance, it’s surprisingly simple to make. Let me walk you through the key elements before we dive into the recipe…
PrintBiscoff Cookie Butter Cheesecake
A creamy and rich cheesecake with the irresistible flavor of Biscoff cookie butter, perfect for any occasion.
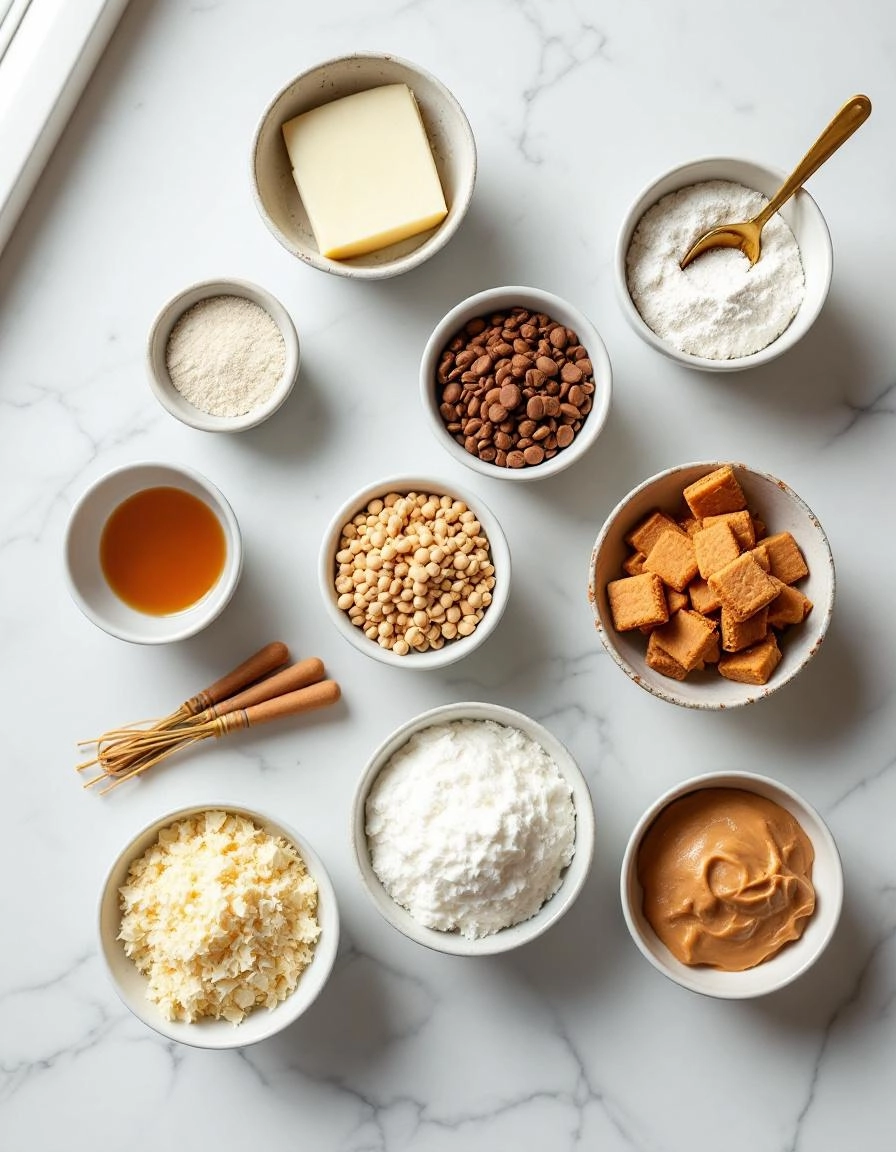
Ingredients
For the Crust:
- 2 cups Biscoff cookie crumbs
- 6 tbsp unsalted butter, melted
- 24 oz cream cheese, softened
- 1 cup granulated sugar
- 1 cup Biscoff cookie butter
- 3 large eggs
- 1 tsp vanilla extract
- 1/2 cup sour cream
- 1/4 cup heavy cream
Instructions
1. Prepare the Crust:
- Preheat oven to 325°F (160°C). Grease a 9-inch springform pan.
- Mix Biscoff cookie crumbs with melted butter and press firmly into the bottom of the pan. Bake for 10 minutes, then let cool.
- In a large bowl, beat cream cheese and sugar until smooth. Add Biscoff cookie butter and mix well.
- Add eggs one at a time, mixing after each addition. Stir in vanilla, sour cream, and heavy cream until fully combined.
- Pour filling over the crust. Bake for 50-60 minutes or until the center is set but slightly jiggly.
- Turn off the oven, leave the cheesecake inside with the door slightly ajar for 1 hour. Then refrigerate for at least 4 hours before serving.
Notes
You can customize the seasonings to taste.
The Ultimate Biscoff Cookie Butter Cheesecake Recipe
There’s something magical about the combination of creamy cheesecake and the warm, spiced sweetness of Biscoff cookie butter. This recipe is a celebration of textures—crunchy crust, velvety filling, and a luscious topping that’ll make your spoon dive right in. Whether you’re serving it at a dinner party or indulging in a quiet moment with a cup of tea, this cheesecake is pure comfort in every bite.
Ingredients You’ll Need
- For the Crust:
- 2 cups Biscoff cookie crumbs (about 24 cookies)—because what’s better than a crust made entirely of those caramelized, spiced cookies?
- 6 tbsp melted unsalted butter—just enough to bind those crumbs into a perfect, buttery base.
- 1 tbsp brown sugar (optional, but it deepens that caramel flavor beautifully).
- For the Cheesecake Filling:
- 24 oz (3 blocks) full-fat cream cheese, room temperature—this is non-negotiable for that silky texture.
- 1 cup smooth Biscoff cookie butter—the star of the show, rich and spiced.
- 1 cup granulated sugar—to balance the warmth of the cookie butter.
- 3 large eggs, room temperature—for structure and that classic cheesecake wobble.
- 1 tsp vanilla extract—a little warmth to round out the flavors.
- 1/2 cup sour cream—this secret ingredient keeps the filling luxuriously creamy.
- A pinch of salt—to make all those sweet notes sing.
- For the Topping:
- 1/2 cup Biscoff cookie butter, gently warmed—for that glossy, drippy finish.
- Crushed Biscoff cookies—because extra crunch is always a good idea.
- A dollop of whipped cream (optional, but highly recommended).
Step-by-Step Instructions
Step 1: Prep Your Pan and Preheat
Start by preheating your oven to 325°F (160°C). Grease a 9-inch springform pan and line the bottom with parchment paper—this ensures your cheesecake slides out effortlessly later. Wrap the outside of the pan tightly with aluminum foil to prevent any water from seeping in during the water bath.
Step 2: Make the Crust
In a food processor, pulse the Biscoff cookies into fine crumbs (or crush them in a sealed bag with a rolling pin—therapy in baking form!). Mix the crumbs with melted butter and brown sugar until it resembles wet sand. Press the mixture firmly into the bottom of your prepared pan, using the back of a spoon or measuring cup to create an even layer. Bake for 10 minutes, then let it cool while you prepare the filling.
Step 3: Whip Up the Filling
In a large bowl, beat the cream cheese until smooth and lump-free—this is crucial for avoiding a grainy texture. Add the Biscoff cookie butter and sugar, mixing until fully incorporated. Scrape down the sides of the bowl often! Next, add the eggs one at a time, mixing just until combined (overbeating can lead to cracks). Stir in the vanilla, sour cream, and salt with a gentle hand.
Step 4: Bake to Perfection
Pour the filling over the cooled crust. Place the springform pan inside a larger roasting pan and fill the outer pan with hot water until it reaches halfway up the sides of the springform. This water bath ensures even baking and prevents cracks. Bake for 55-65 minutes—the edges should be set, but the center should still have a slight jiggle. Turn off the oven, crack the door open, and let the cheesecake cool inside for an hour. This gradual cooling helps prevent sinking.
Pro Tips for the Perfect Biscoff Cookie Butter Cheesecake
Want to take your cheesecake to the next level? Here are some insider secrets:
- Room temperature is key – Make sure all your dairy ingredients (cream cheese, sour cream, eggs) are at room temperature for the smoothest filling
- Water bath magic – Bake your cheesecake in a water bath to prevent cracking and ensure even cooking
- Patience pays off – Let the cheesecake cool gradually in the oven with the door slightly ajar, then chill for at least 4 hours (overnight is best!)
- Clean slices – Dip your knife in hot water and wipe clean between each slice for picture-perfect servings
Delicious Variations to Try
This recipe is wonderfully adaptable to different tastes and dietary needs:
- Chocolate lovers – Add 1/2 cup melted chocolate to the filling or make a chocolate cookie crust
- Nutty twist – Mix chopped toasted hazelnuts into the crust or sprinkle on top
- Dairy-free – Use vegan cream cheese and coconut cream instead of dairy products
- Mini cheesecakes – Make individual portions in a muffin tin (reduce baking time to 15-20 minutes)
What to Serve With Your Biscoff Cheesecake
This rich dessert pairs beautifully with:
- A dollop of lightly sweetened whipped cream
- Fresh berries or a berry compote for a tart contrast
- Warm espresso or a glass of dessert wine
- Extra Biscoff cookies crumbled on top for added crunch
The Sweet Benefits of This Dessert
Beyond being absolutely delicious, this cheesecake has some surprising perks:
- Make-ahead friendly – It actually tastes better after chilling overnight
- Crowd-pleaser – The unique Biscoff flavor impresses guests every time
- Versatile presentation – Dress it up for special occasions or keep it simple for casual gatherings
- Freezes well – You can make it weeks ahead for special events
Real-Life Tips From My Kitchen
After making this cheesecake dozens of times, here are my hard-earned lessons:
- If your crust sticks to the pan, run a thin knife around the edge before releasing the springform
- For extra insurance against leaks in the water bath, wrap your springform pan in foil
- Don’t skip the parchment paper circle on the bottom – it makes removal so much easier
- The cheesecake will continue to set as it chills, so don’t worry if the center seems slightly jiggly
- Leftovers (if you have any!) taste amazing straight from the fridge the next day
Conclusion
There you have it—the ultimate Biscoff Cookie Butter Cheesecake recipe that’s sure to become a showstopper at your next gathering! With its creamy, spiced filling, buttery Biscoff crust, and luscious whipped topping, this dessert is a dream come true for cookie butter lovers. Whether you’re celebrating a special occasion or simply indulging in a sweet craving, this cheesecake delivers perfection in every bite.
Ready to give it a try? Gather your ingredients, preheat that oven, and let the magic happen. Don’t forget to snap a photo of your masterpiece and share it with us—we’d love to see your creations! And if you’re craving more decadent desserts, check out our other cheesecake and cookie butter recipes for more inspiration.
FAQs
Can I make this cheesecake ahead of time?
Absolutely! In fact, cheesecakes often taste even better the next day as the flavors meld together. Store it covered in the fridge for up to 3 days, or freeze it (without toppings) for up to a month. Just thaw it in the refrigerator before serving.
What can I use if I don’t have Biscoff cookies for the crust?
No worries! Graham crackers or speculoos cookies make a great substitute. You could even use digestive biscuits for a slightly different but equally delicious base.
How do I prevent cracks in my cheesecake?
The key is to avoid overmixing and to bake it in a water bath (as mentioned in the recipe). Also, let the cheesecake cool gradually in the oven with the door slightly ajar to prevent sudden temperature changes that can cause cracks.
Can I use a different type of pan?
While a springform pan is ideal for easy removal, you can use a regular cake pan lined with parchment paper. Just be extra careful when unmolding it.
Is there a no-bake version of this recipe?
Yes! Swap the baked filling for a no-bake cheesecake mixture by using gelatin or whipped cream to set it. The crust remains the same, but you’ll need to refrigerate it for at least 6 hours instead of baking.


