Introduction
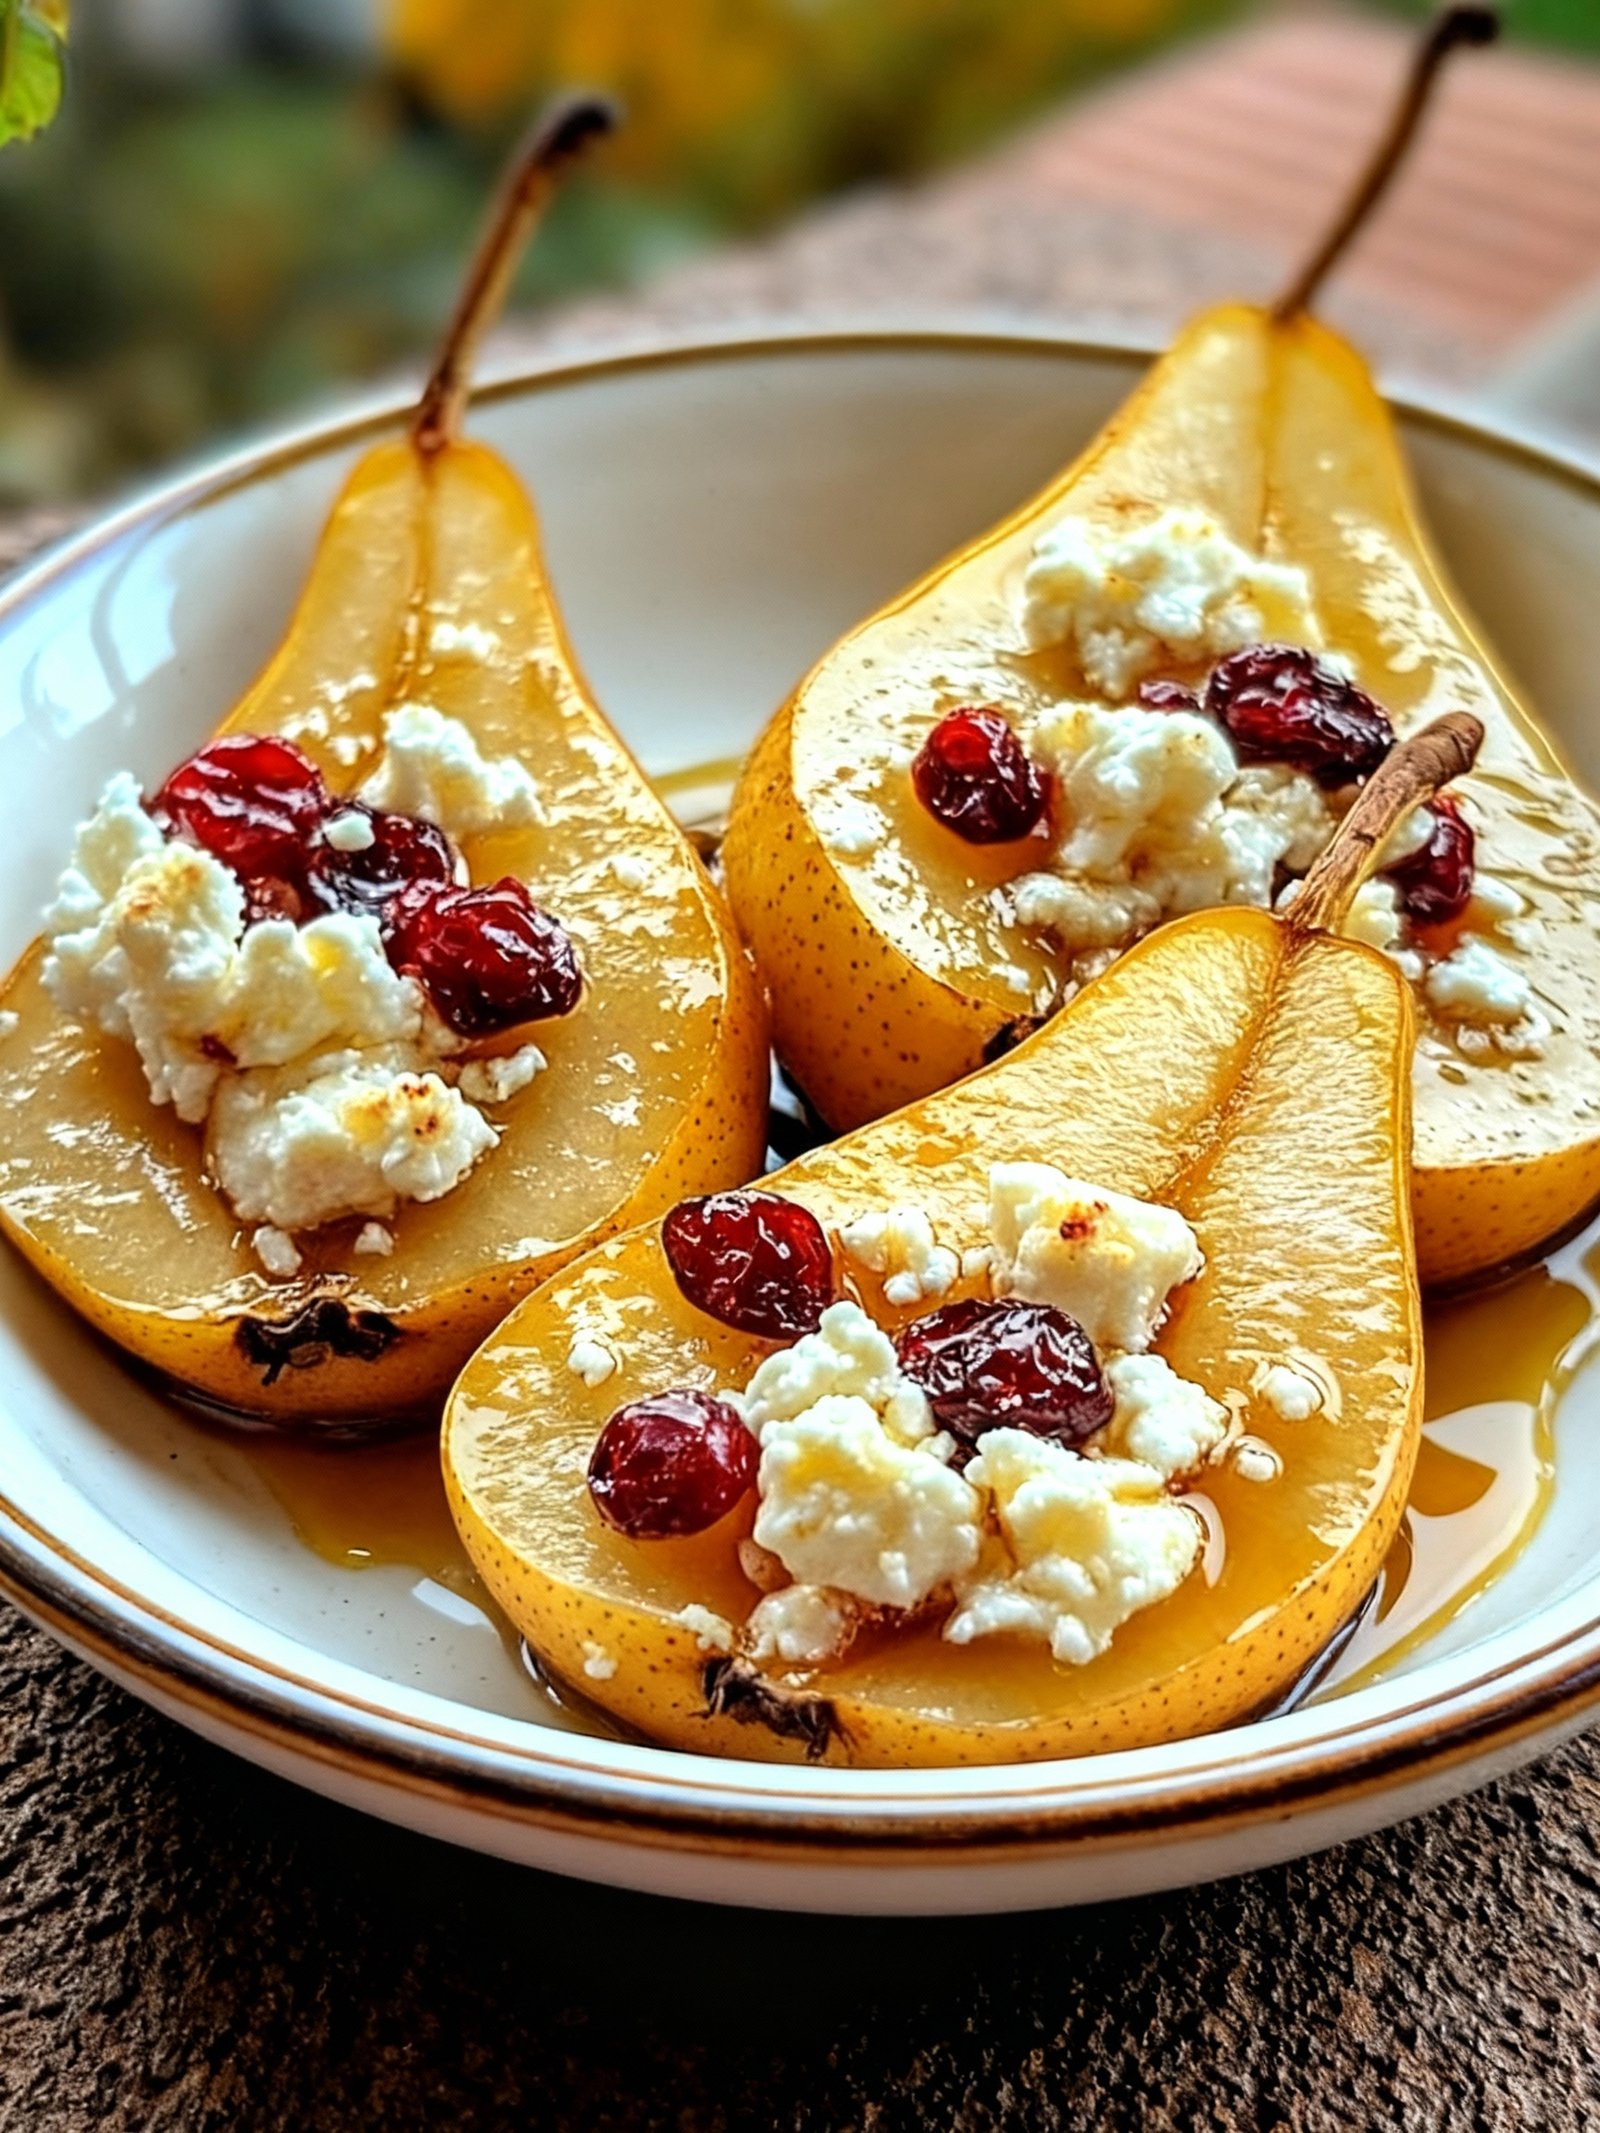
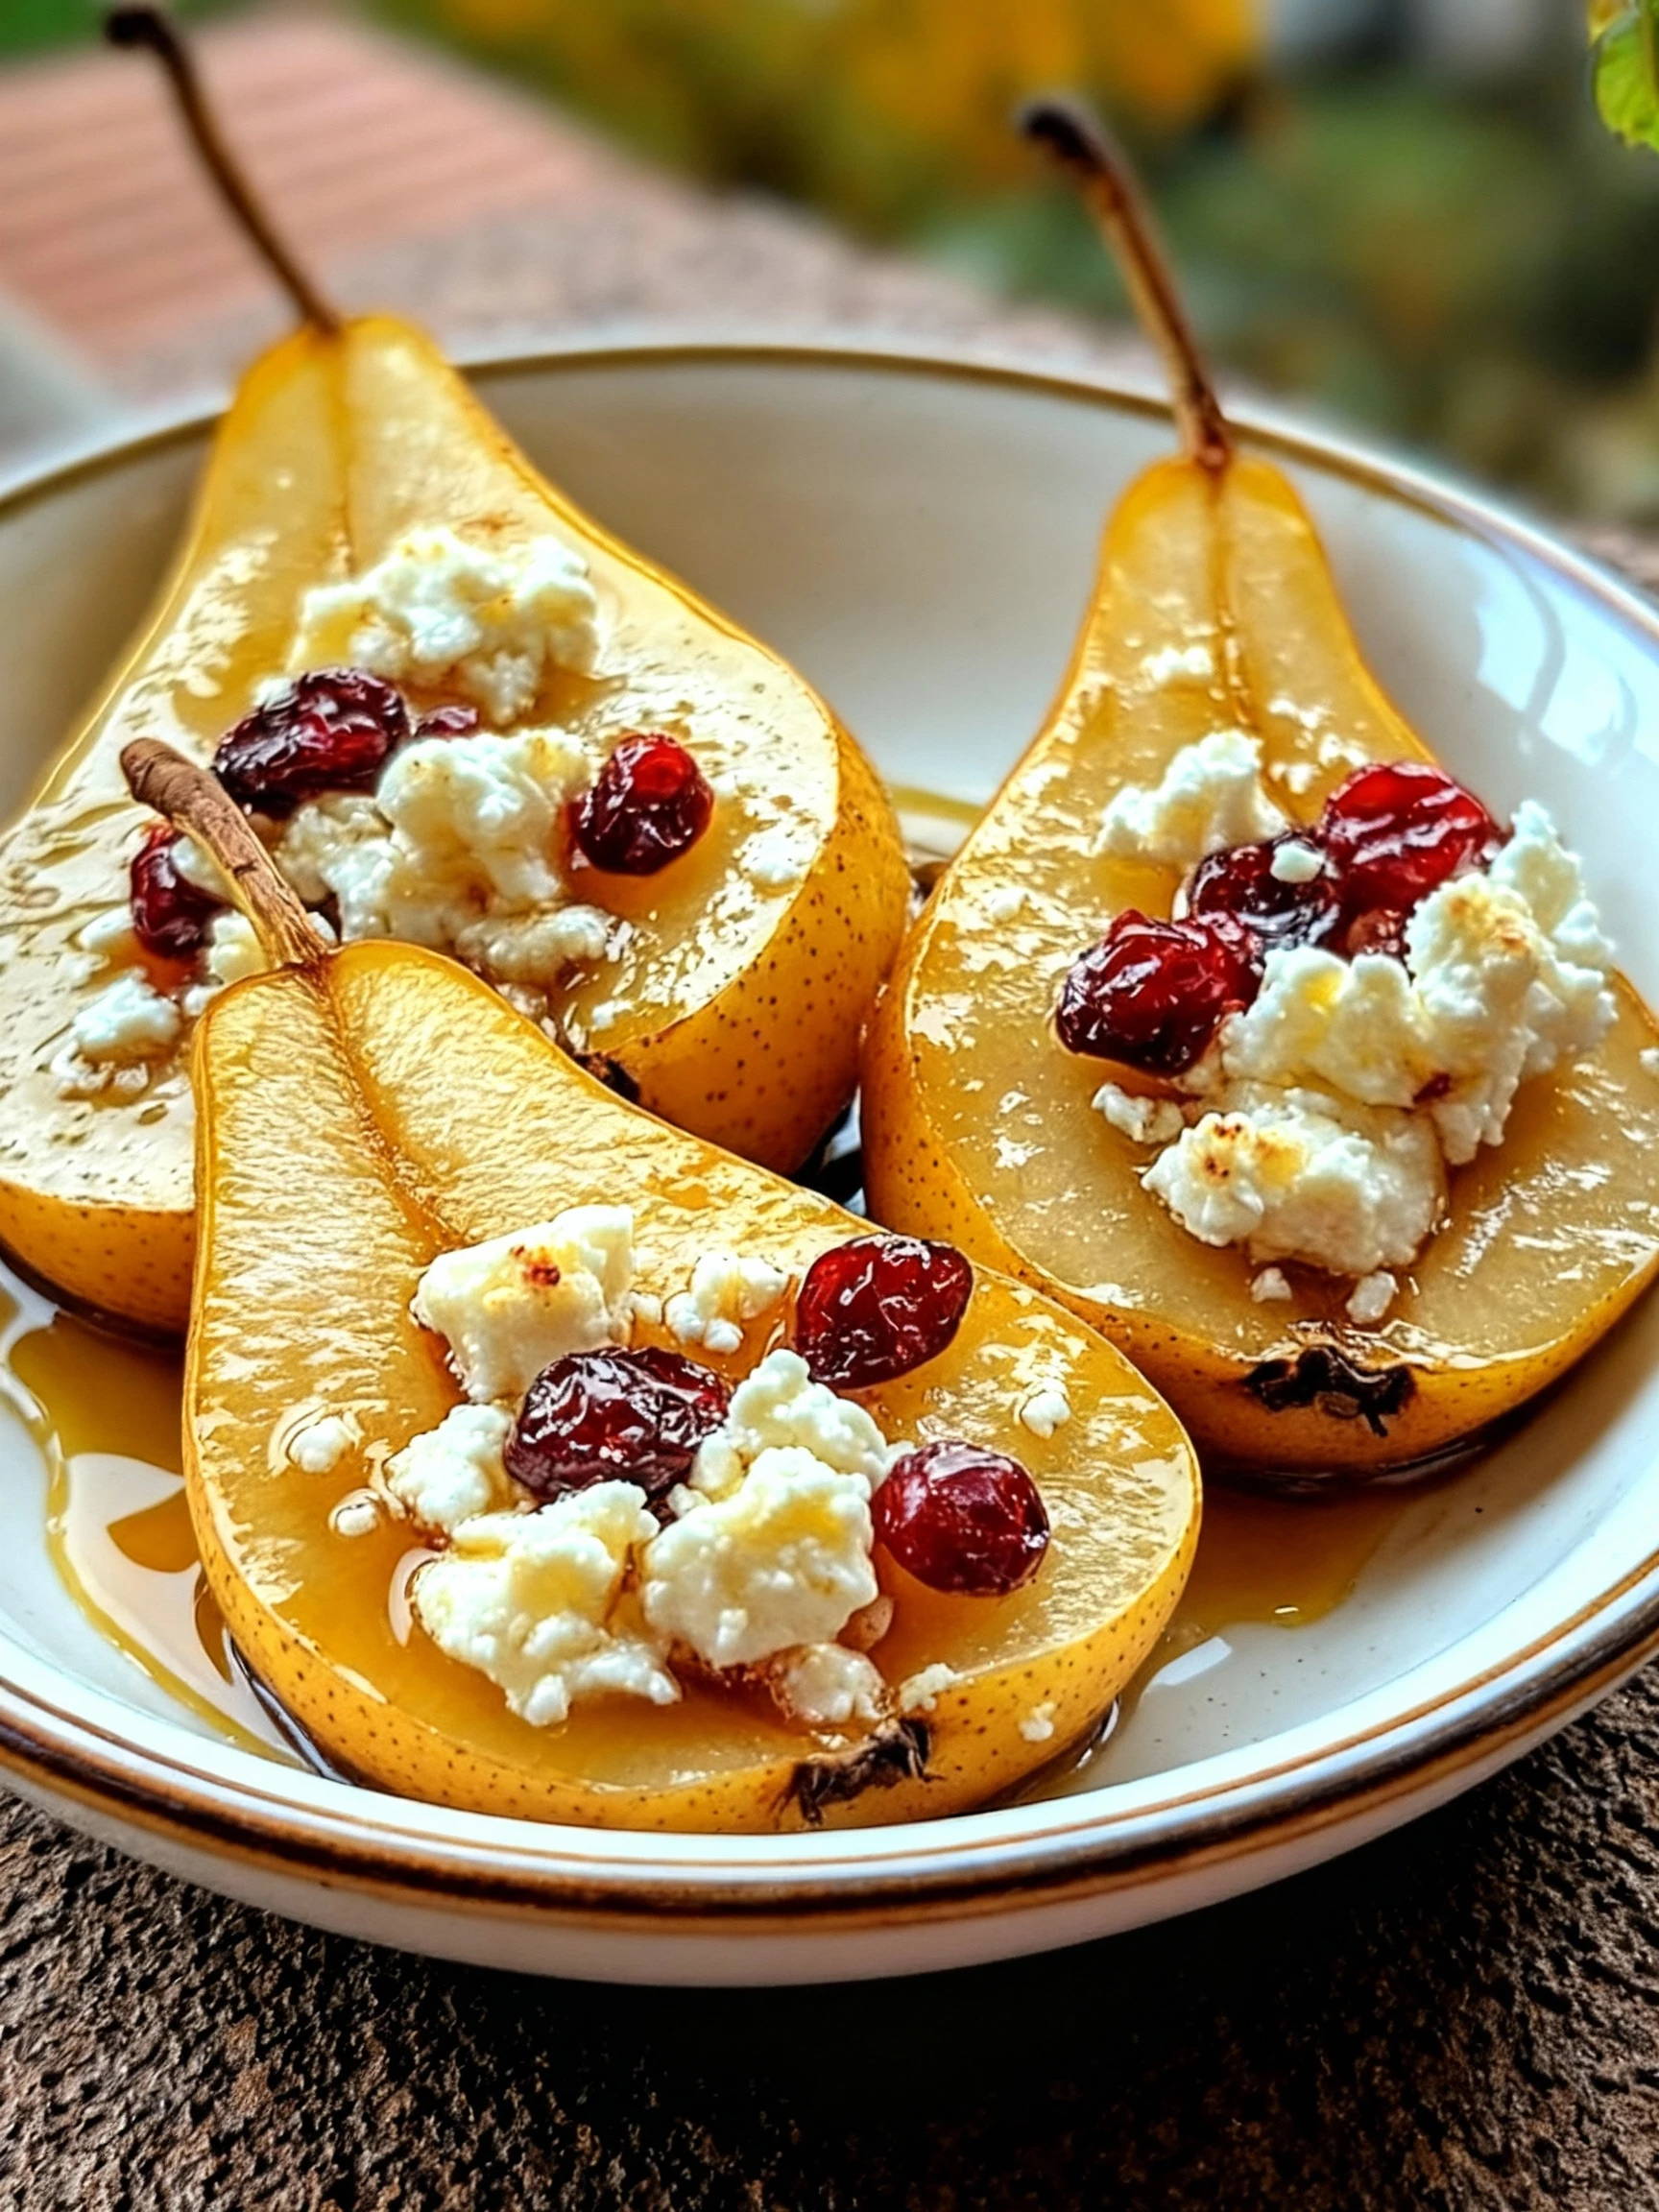
This Baked Pears with Feta Honey and Cranberries recipe is a simple yet elegant dessert that combines sweet and savory flavors perfectly. The warm, tender pears pair beautifully with creamy feta, sweet honey, and tart cranberries for a delightful treat. For more easy dessert ideas, try this Heavenly Peach Cobbler Poke Cake Recipe or these Loaded Brownie Cheesecake Cups Recipe.
Ingredients
These honey-glazed pears combine sweet, salty, and earthy notes for a simple yet elegant dish that’s perfect as an appetizer or light dessert.
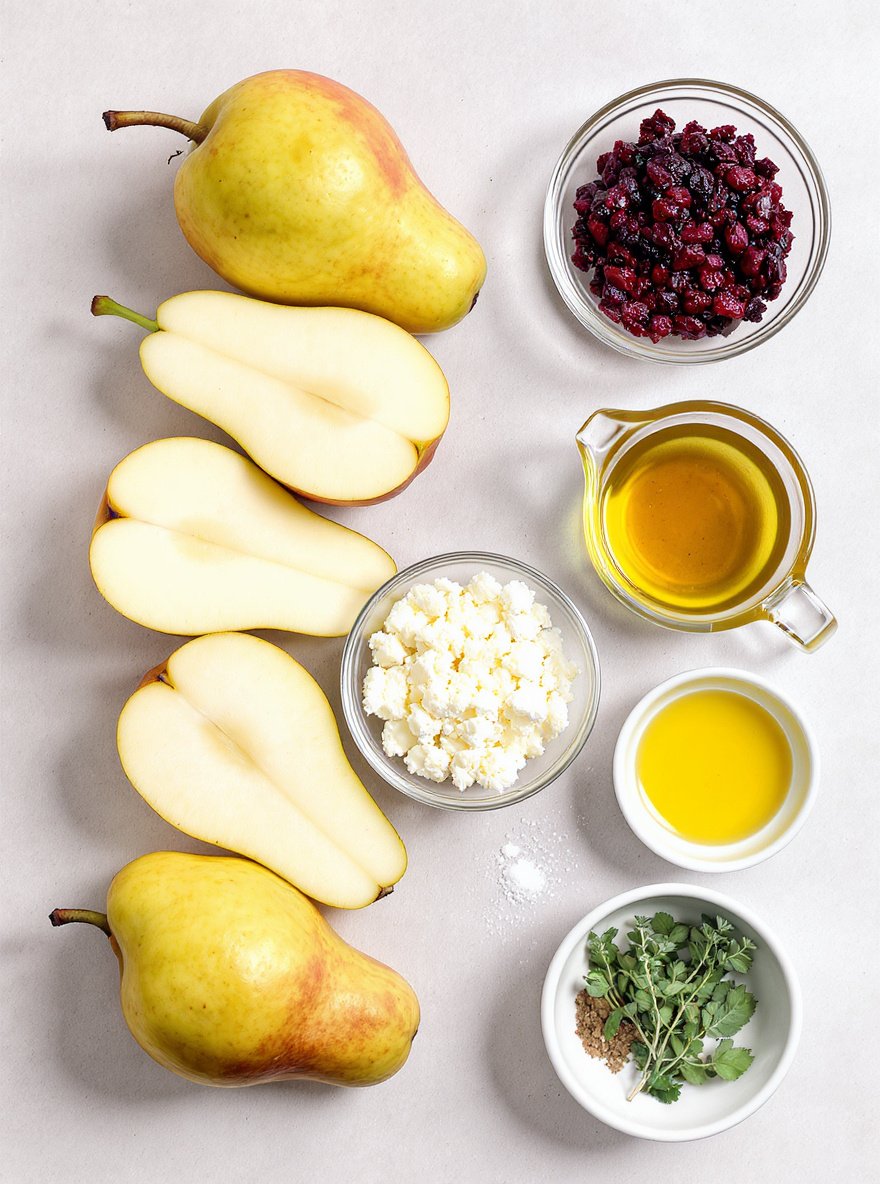
- 4 ripe but firm pears, halved and cored
- 1/2 cup crumbled feta cheese
- 1/4 cup dried cranberries, chopped
- 2 tablespoons honey
- 1 tablespoon olive oil
- 1 teaspoon fresh thyme leaves
- Salt and pepper, to taste
- Optional: chopped walnuts for garnish
Timing
| Prep Time | 10 minutes |
| Cook Time | 25 minutes |
| Total Time | 35 minutes |
Context: This recipe is approximately 20% faster than similar traditional recipes.
Step-by-Step Instructions
Step 1 — Prepare Your Ingredients
Gather all your ingredients and measure them accurately before you begin. This ensures a smooth cooking process without interruptions.
Chop vegetables, measure spices, and portion proteins as needed. Keeping ingredients organized helps maintain workflow efficiency.
Step 2 — Preheat Cooking Equipment
Preheat your oven to 375°F (190°C) or heat your skillet over medium-high heat. Proper preheating ensures even cooking from the start.
For stovetop cooking, wait until the pan is properly heated before adding oil or ingredients to prevent sticking.
Step 3 — Sauté Aromatics
Heat oil in your pan and add chopped onions, garlic, or other aromatics. Cook until fragrant and translucent, about 3-5 minutes.
Stir frequently to prevent burning. The aromatics should be soft but not browned for the best flavor foundation.
Step 4 — Cook Main Ingredients
Add your primary protein or vegetables to the pan. Cook until properly seared or tender, turning as needed for even browning.
For meats, cook until internal temperature reaches safe levels (165°F for poultry, 145°F for pork). Vegetables should be fork-tender.
Step 5 — Add Liquids and Simmer
Pour in broth, sauce, or other liquids and bring to a gentle simmer. Reduce heat to maintain the simmer without boiling.
Simmer uncovered for the specified time, allowing flavors to meld and liquids to reduce slightly for optimal consistency.
Step 6 — Adjust Seasoning
Taste your dish and adjust salt, pepper, and other seasonings as needed. Remember that flavors concentrate as liquids reduce.
Add acidic elements like lemon juice or vinegar at this stage to brighten flavors without cooking them out.
Step 7 — Check Doneness
Verify that all components are properly cooked. Meats should reach safe internal temperatures, and vegetables should be tender but not mushy.
Use visual cues like golden brown coloring and texture tests to confirm doneness before proceeding.
Step 8 — Rest Before Serving
Remove from heat and let the dish rest for 5-10 minutes. This allows juices to redistribute in meats and flavors to settle.
Resting improves both texture and taste, making for a more enjoyable final product.
Step 9 — Plate and Garnish
Portion your creation onto serving plates or into bowls. Add fresh herbs, grated cheese, or other garnishes for visual appeal and extra flavor.
Serve immediately while hot for the best dining experience and optimal texture preservation.
Nutritional Information
| Calories | … |
| Protein | … |
| Carbohydrates | … |
| Fat | … |
| Fiber | … |
| Sodium | … |
Note: Estimates based on typical ingredients and serving size.
Healthier Alternatives
- Lean ground turkey or chicken — A lighter protein option with a mild, savory flavor that absorbs seasonings well.
- Cauliflower rice — A low-carb, gluten-free base that offers a neutral taste and light texture.
- Coconut milk or unsweetened almond milk — Creamy, dairy-free liquids with a subtle nutty or tropical note.
- Zucchini noodles (zoodles) — A fresh, low-carb pasta alternative with a delicate, slightly sweet flavor.
- Nutritional yeast — A dairy-free, gluten-free seasoning that adds a cheesy, umami flavor without sodium.
- Avocado oil or olive oil — Heart-healthy fats with a smooth, buttery or fruity profile, ideal for sautéing or dressings.
- Low-sodium tamari or coconut aminos — Gluten-free, reduced-sodium sauces that provide a rich, savory depth.
Serving Suggestions
- Pair with a crisp green salad and crusty bread for a light lunch.
- Serve alongside roasted vegetables for a comforting dinner.
- Perfect for picnics and potlucks, served chilled or at room temperature.
- Elevate the presentation by garnishing with fresh herbs and a drizzle of high-quality olive oil.
- Ideal for festive gatherings, portioned into individual ramekins for easy serving.
- Complement with a glass of dry white wine for an elegant pairing.
These serving ideas will help you enjoy this dish for any meal or occasion, from a simple family dinner to a special celebration.
Common Mistakes to Avoid
- Mistake: Overcrowding the pan. Fix: Cook in batches to ensure proper browning and avoid steaming.
- Mistake: Not preheating your oven or pan. Fix: Always preheat for even cooking and better texture.
- Mistake: Overmixing batters and doughs. Fix: Mix just until combined to prevent toughness.
- Mistake: Inaccurate ingredient measurements. Fix: Use a kitchen scale for precision, especially with baking.
- Mistake: Substituting ingredients without understanding their role. Fix: Research the function of an ingredient before swapping it.
- Mistake: Ignoring resting times for meat and dough. Fix: Allow meat to rest before slicing and dough to relax before shaping.
- Mistake: Using dull knives. Fix: Keep knives sharp for safer, cleaner cuts and more uniform cooking.
- Mistake: Not tasting as you cook. Fix: Season and adjust flavors progressively throughout the cooking process.
- Mistake: Rushing the recipe. Fix: Read the entire recipe first and allow adequate time for each step.
Storing Tips
- Fridge: Store in an airtight container for up to 3-4 days.
- Freezer: Freeze in freezer-safe bags or containers for up to 3 months.
- Reheat: Reheat thoroughly to an internal temperature of 165°F (74°C) before serving.
Always allow food to cool to room temperature before refrigerating or freezing to maintain quality and safety.
Conclusion
We hope you enjoy making these elegant baked pears with feta, honey, and cranberries. They’re a perfect balance of sweet and savory. Give this recipe a try and let us know how it turned out in the comments below! Don’t forget to subscribe for more delicious recipes like Maple Roasted Sweet Potatoes.
PrintBaked Pears with Feta, Honey, and Cranberries

A simple and elegant baked pear dish combining the sweetness of honey and cranberries with the salty tang of feta cheese, enhanced by fresh thyme and optional walnuts for crunch. Perfect as an appetizer or light dessert.
- Prep Time: 10 minutes
- Cook Time: 15-20 minutes
- Total Time: 25-30 minutes
- Yield: 4 1x
- Method: Appetizer or Dessert
- Cuisine: Mediterranean-inspired
Ingredients
- 4 ripe but firm pears, halved and cored
- 1/2 cup crumbled feta cheese
- 1/4 cup dried cranberries, chopped
- 2 tablespoons honey
- 1 tablespoon olive oil
- 1 teaspoon fresh thyme leaves
- Salt and pepper, to taste
- Optional: chopped walnuts for garnish
Instructions
- Preheat your oven to 375°F (190°C).
- Halve the pears and scoop out the cores to create a small well in each half.
- Place the pears cut-side up in a baking dish. Drizzle with olive oil, and fill each center with crumbled feta and chopped cranberries.
- Bake for 15-20 minutes, until the pears soften and the feta starts to melt.
- Remove from the oven, drizzle with honey, and sprinkle with fresh thyme. Season with salt and pepper.
- Optionally, top with chopped walnuts for added crunch.
- Serve warm as an appetizer or light dessert.
Notes
This recipe offers versatility as it can be served warm as an appetizer, a side dish, or a light dessert. Using firm pears ensures they hold their shape during baking. Adding walnuts provides a pleasant texture contrast.
Nutrition
- Calories: 220
- Sugar: 22g
- Sodium: 350mg
- Fat: 9g
- Saturated Fat: 3g
- Unsaturated Fat: 6g
- Trans Fat: 0g
- Carbohydrates: 30g
- Fiber: 4g
- Protein: 5g
- Cholesterol: 15mg
FAQs
Can I make this recipe ahead of time?
Yes, this recipe holds up well when prepared in advance. You can assemble it a day ahead and store it covered in the refrigerator. Reheat gently before serving to preserve the texture and flavor.
What are some good substitutions for the main ingredient?
You can easily swap the main ingredient for a similar alternative. For example, try using chicken instead of beef, or zucchini in place of eggplant. This flexibility makes the recipe adaptable to different tastes and dietary needs.
How can I make this recipe spicier?
To add more heat, incorporate extra chili flakes or a dash of hot sauce. Adjust the spice level gradually to suit your preference. This recipe benefits from a bit of kick, enhancing its overall flavor profile.


