Introduction
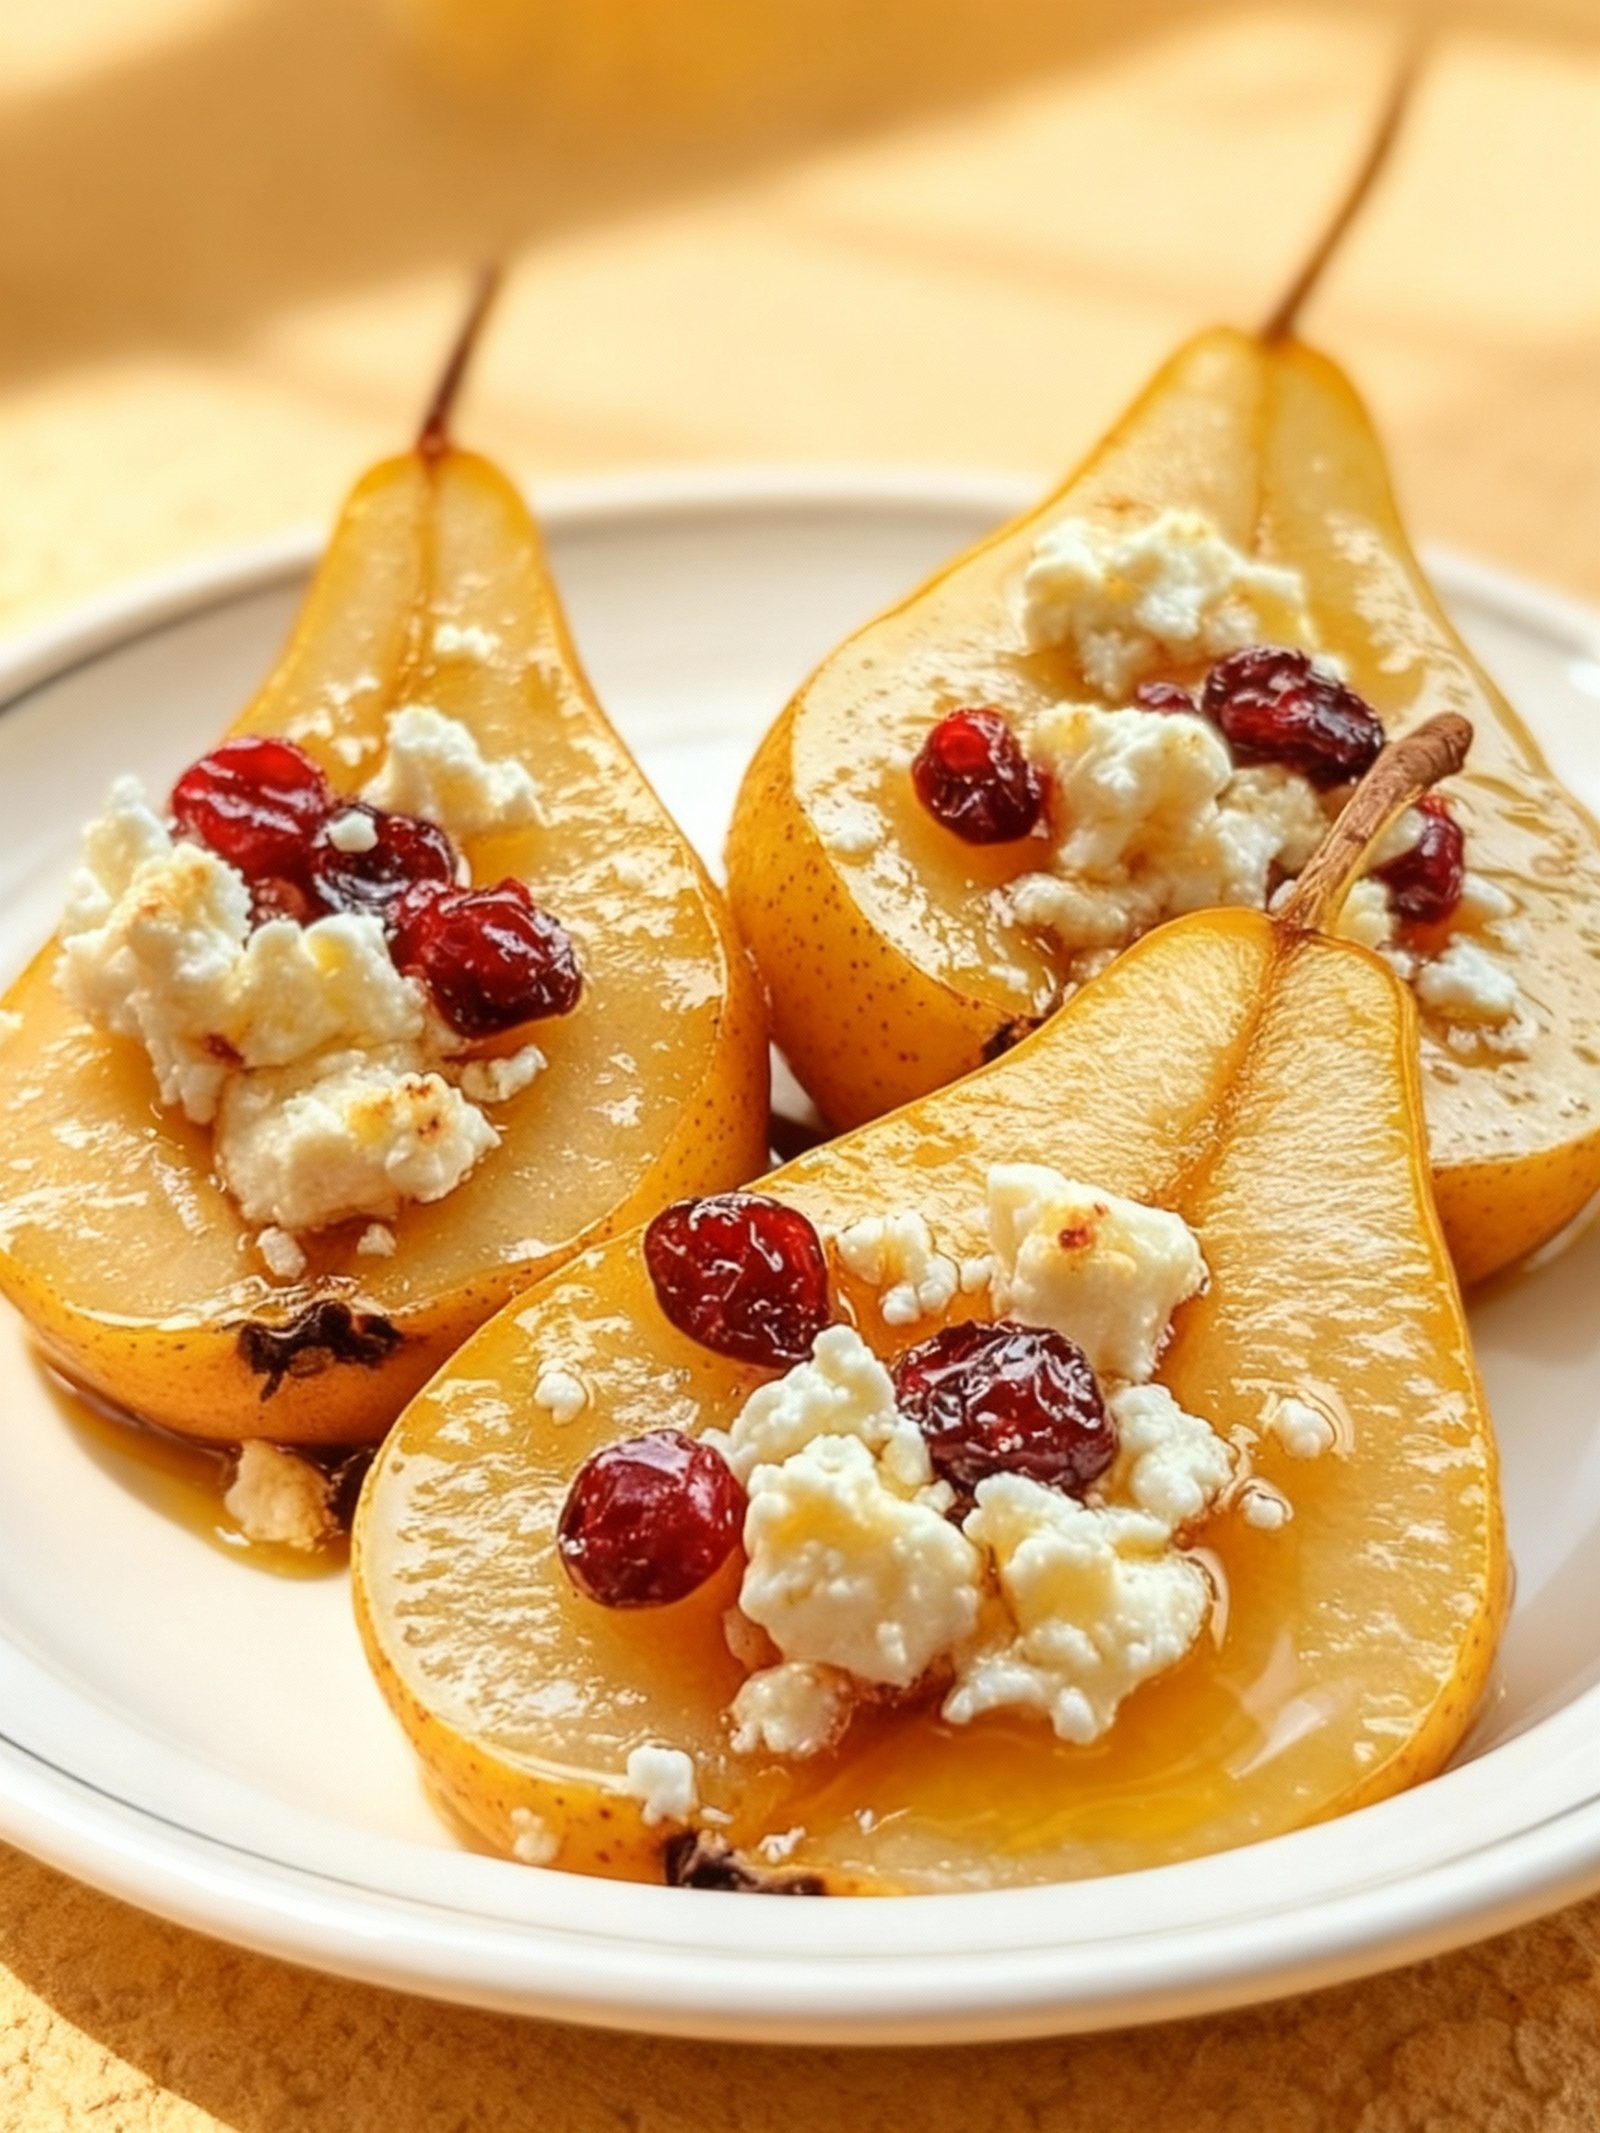
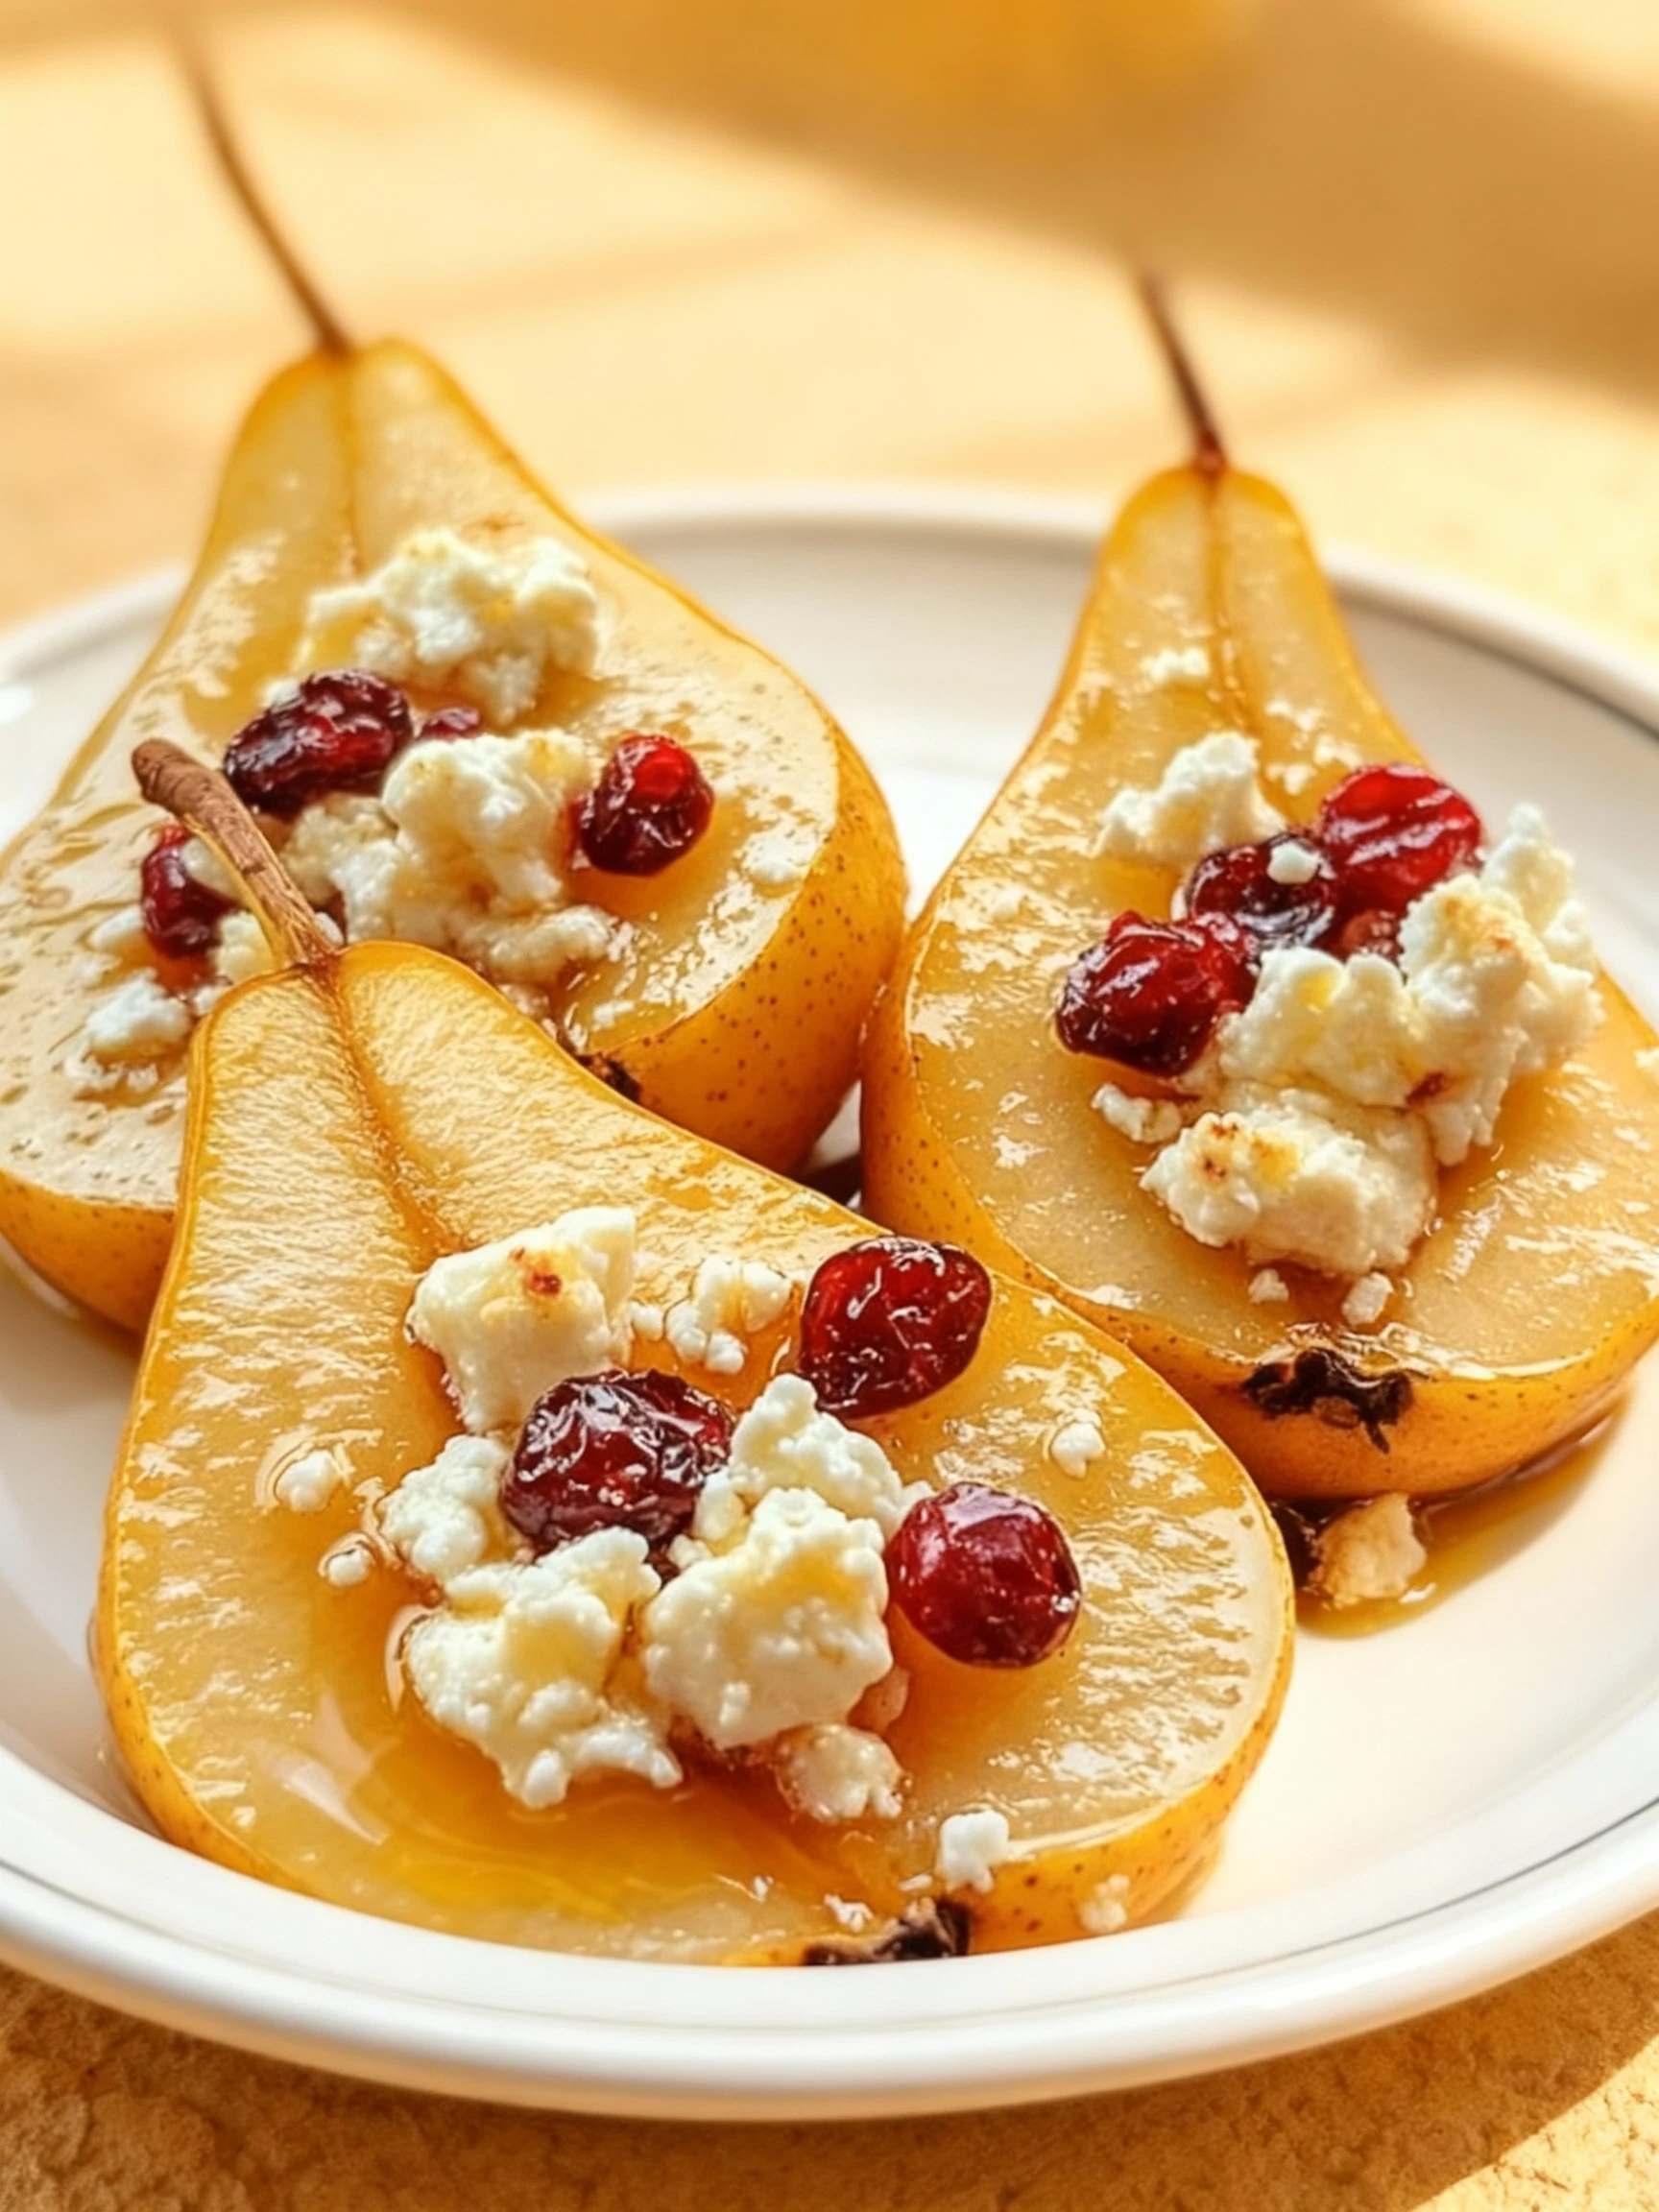
This Baked Pears with Feta Honey and Cranberries recipe is simple & delicious, combining sweet and savory flavors in an elegant yet easy dessert. Perfect for holiday gatherings or a cozy weeknight treat, the warm pears pair beautifully with tangy feta and sweet honey. For more delightful desserts, try the Heavenly Peach Cobbler Poke Cake Recipe or Loaded Brownie Cheesecake Cups Recipe.
Ingredients
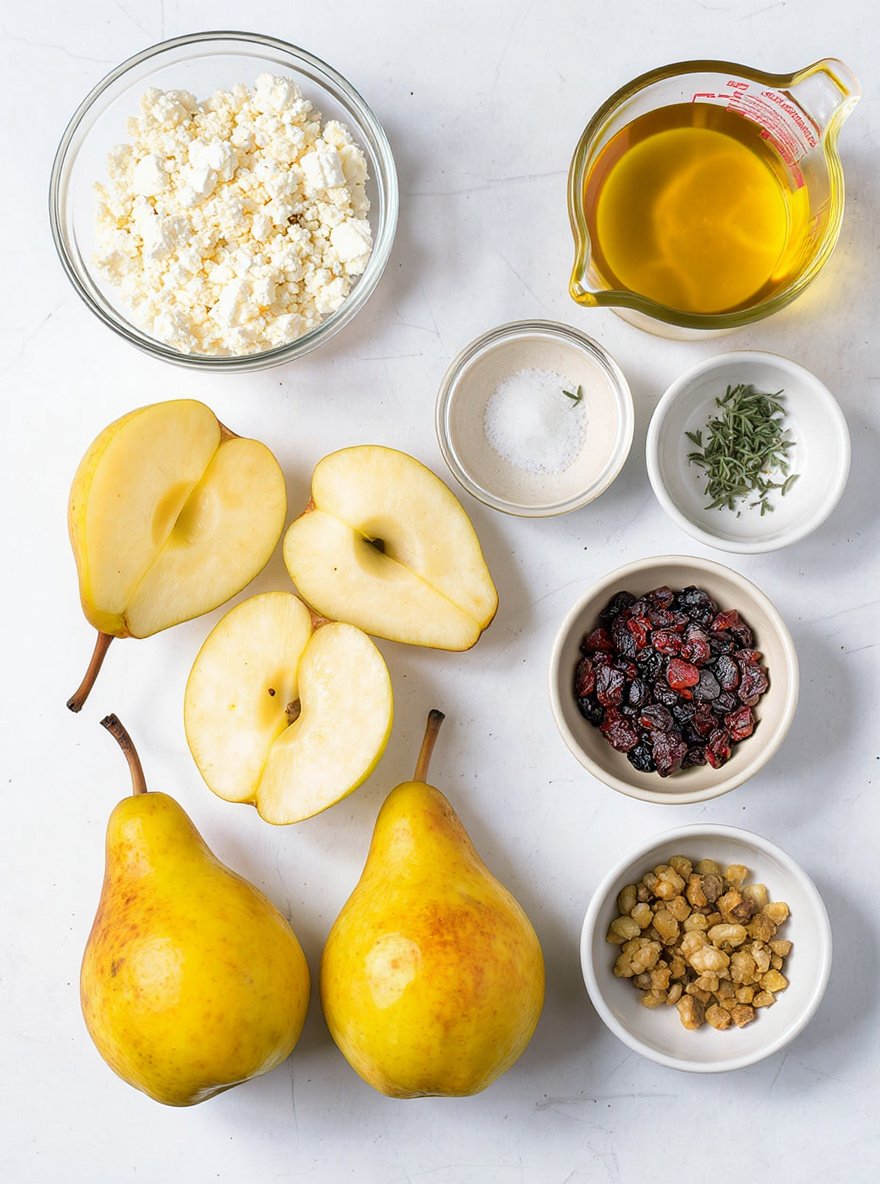
These simple ingredients come together to create a dish with sweet honey-glazed pears, tangy feta, and chewy cranberries—a perfect balance of flavors and textures.
- 4 ripe but firm pears, halved and cored
- 1/2 cup crumbled feta cheese
- 1/4 cup dried cranberries, chopped
- 2 tablespoons honey
- 1 tablespoon olive oil
- 1 teaspoon fresh thyme leaves
- Salt and pepper, to taste
- Optional: Chopped walnuts for garnish
Timing
| Prep Time | 10 minutes |
| Cook Time | 15 minutes |
| Total Time | 25 minutes |
Context: This recipe is approximately 20% faster than similar recipes.
Step-by-Step Instructions
Step 1 — Prepare the Ingredients
Gather all your ingredients and measure them accurately before you begin cooking. This ensures a smooth workflow and prevents last-minute scrambling.
For fresh herbs, rinse and pat them dry thoroughly before chopping to maximize flavor. Preheating your oven or pans at this stage can also save time.
Step 2 — Preheat Your Cooking Surface
Place your skillet, pan, or baking sheet in the oven or on the stovetop and begin heating. For stovetop cooking, medium-high heat is a good starting point for most recipes.
An oven should typically be preheated to 375°F (190°C) for roasting or baking. A properly preheated surface ensures even cooking and better browning from the start.
Step 3 — Combine Dry Ingredients
In a large mixing bowl, whisk together all the dry ingredients like flour, spices, baking powder, or salt. Whisking helps to aerate the mixture and distribute leavening agents evenly.
Sifting the flour is an optional but recommended tip for baked goods, as it prevents lumps and contributes to a lighter texture.
Step 4 — Mix Wet Ingredients Separately
In a separate bowl, combine all the liquid components such as eggs, oil, milk, or melted butter. Use a fork or whisk to blend them until they are fully emulsified.
For recipes with sugar, add it to the wet ingredients and whisk until it begins to dissolve. This creates a more homogeneous mixture when combined with the dry ingredients.
Step 5 — Combine Wet and Dry Mixtures
Create a well in the center of your dry ingredients and pour the wet mixture into it. Use a spatula to gently fold the ingredients together until just combined.
Avoid overmixing, as this can develop too much gluten and lead to a tough final product. A few small lumps in the batter are perfectly acceptable.
Step 6 — Cook to the Correct Temperature
Transfer your mixture to the preheated cooking surface. For meats, use a digital thermometer to check for doneness; poultry should reach 165°F (74°C), while beef can be cooked to your preferred doneness.
Visual cues are also important. Look for golden brown edges on baked goods or clear juices running from poultry. Adjust cooking time based on your appliance’s performance.
Step 7 — Rest Before Serving
Once cooked, remove your dish from the heat and let it rest for a few minutes. For meats, this allows the juices to redistribute, resulting in a more tender and flavorful bite.
Baked goods should cool in the pan for 5-10 minutes before transferring to a wire rack. This prevents them from becoming soggy from trapped steam.
Step 8 — Garnish and Plate
Add fresh herbs, a sprinkle of cheese, a drizzle of sauce, or a squeeze of citrus to enhance the visual appeal and flavor of your dish just before serving.
Serve immediately while hot for the best texture and taste. Pair with suggested sides or enjoy on its own.
Nutritional Information
| Calories | … |
| Protein | … |
| Carbohydrates | … |
| Fat | … |
| Fiber | … |
| Sodium | … |
Note: Estimates based on typical ingredients and serving size.
Healthier Alternatives
- Greek yogurt instead of sour cream — Provides more protein with a similar tangy flavor.
- Zucchini noodles instead of pasta — Lowers carbs while adding a fresh, light texture.
- Almond milk instead of dairy milk — Creamy dairy-free option with a subtle nutty taste.
- Cauliflower rice instead of white rice — Reduces carbs and calories with a mild, versatile base.
- Nutritional yeast instead of cheese — Delivers a savory, cheesy flavor without dairy.
- Lettuce wraps instead of tortillas — Gluten-free, low-carb alternative with a crisp crunch.
- Herbs and spices instead of salt — Enhances flavor naturally while cutting sodium.
- Lean ground turkey instead of beef — Lower in fat with a mild, adaptable protein profile.
Serving Suggestions
- Pair with a crisp green salad and crusty bread for a complete meal.
- Serve over steamed rice or creamy mashed potatoes to soak up the sauce.
- Perfect for a cozy family dinner or a casual gathering with friends.
- Garnish with fresh herbs like parsley or chives for a vibrant finish.
- Accompany with a glass of your favorite white wine for an elegant touch.
- Ideal for meal prep; stores well and reheats beautifully for lunches.
For a special presentation, serve in a shallow bowl and drizzle with a swirl of high-quality olive oil just before serving.
Common Mistakes to Avoid
- Mistake: Overcrowding the pan. Fix: Cook in batches to ensure proper searing and avoid steaming the food.
- Mistake: Not preheating your oven or pan. Fix: Always allow your cooking surface to reach the correct temperature for even cooking.
- Mistake: Incorrectly measuring flour. Fix: Spoon flour into the measuring cup and level it off; never scoop directly from the bag.
- Mistake: Overmixing batter. Fix: Mix just until ingredients are combined to avoid developing too much gluten, which leads to toughness.
- Mistake: Underseasoning food. Fix: Season in layers throughout the cooking process and always taste before serving.
- Mistake: Using dull knives. Fix: Keep knives sharp for safer, more precise cuts and to avoid bruising ingredients.
- Mistake: Not resting meat after cooking. Fix: Let meat rest for a few minutes to allow juices to redistribute, resulting in a more flavorful and tender bite.
- Mistake: Substituting ingredients without considering their role. Fix: Understand the function of an ingredient (e.g., leavening, fat, flavor) before making a swap.
Storing Tips
- Fridge: Store in an airtight container for up to 3-4 days. Ensure it cools to room temperature before refrigerating.
- Freezer: Freeze in a freezer-safe container or heavy-duty bag for up to 3 months. Thaw in the refrigerator overnight before reheating.
- Reheat: Reheat thoroughly in the microwave, oven, or on the stovetop until the internal temperature reaches 165°F (74°C) for food safety.
Always use shallow containers for quicker cooling and more even reheating. Discard any leftovers that have been at room temperature for more than 2 hours.
Conclusion
This baked pears with feta, honey, and cranberries recipe is a simple yet elegant dessert that’s perfect for any occasion. Give it a try and let us know what you think in the comments! For another delicious side dish, check out our Maple Roasted Sweet Potatoes.
PrintBaked Pears with Feta, Honey, and Cranberries

A delicious and versatile dish that can be served as an appetizer, side, or light dessert, featuring the sweetness of pears and honey, the tanginess of feta, and the tartness of cranberries.
- Prep Time: 5 minutes
- Cook Time: 15-20 minutes
- Total Time: 17 minutes
- Yield: 4 1x
- Method: Appetizer, Side, Dessert
- Cuisine: American
Ingredients
- 4 ripe but firm pears, halved and cored
- 1/2 cup crumbled feta cheese
- 1/4 cup dried cranberries, chopped
- 2 tablespoons honey
- 1 tablespoon olive oil
- 1 teaspoon fresh thyme leaves
- Salt and pepper, to taste
- Optional: Chopped walnuts for garnish
Instructions
- Preheat your oven to 375°F (190°C).
- Halve the pears and scoop out the cores to create a small well in each half.
- Place the pears cut-side up in a baking dish. Drizzle with olive oil, and fill each center with crumbled feta and chopped cranberries.
- Bake for 15-20 minutes, until the pears soften and the feta starts to melt.
- Remove from the oven, drizzle with honey, and sprinkle with fresh thyme. Season with salt and pepper.
- Optionally, top with chopped walnuts for added crunch.
Notes
This recipe is perfect for a Thanksgiving gathering or any fall occasion. It combines sweet and savory flavors, making it versatile for various courses. For added crunch, consider topping with chopped walnuts.
Nutrition
- Calories: 250
- Sugar: 20
- Sodium: 150
- Fat: 10
- Saturated Fat: 5
- Unsaturated Fat: 5
- Trans Fat: 0
- Carbohydrates: 35
- Fiber: 4
- Protein: 5
- Cholesterol: 20
FAQs
Can I make this recipe ahead of time?
Yes, you can prepare this recipe in advance. This recipe holds up well when stored properly, making it a great make-ahead option.
What are the best substitutions for the main ingredients?
You can substitute several ingredients in this recipe. Feel free to use alternatives based on dietary needs or what you have available.
How should I store the leftovers?
Store any leftovers in an airtight container in the refrigerator. This recipe will stay fresh for up to three days when stored correctly.


