Homemade Roasted Tomato Spaghetti Sauce Canning Recipe
Introduction
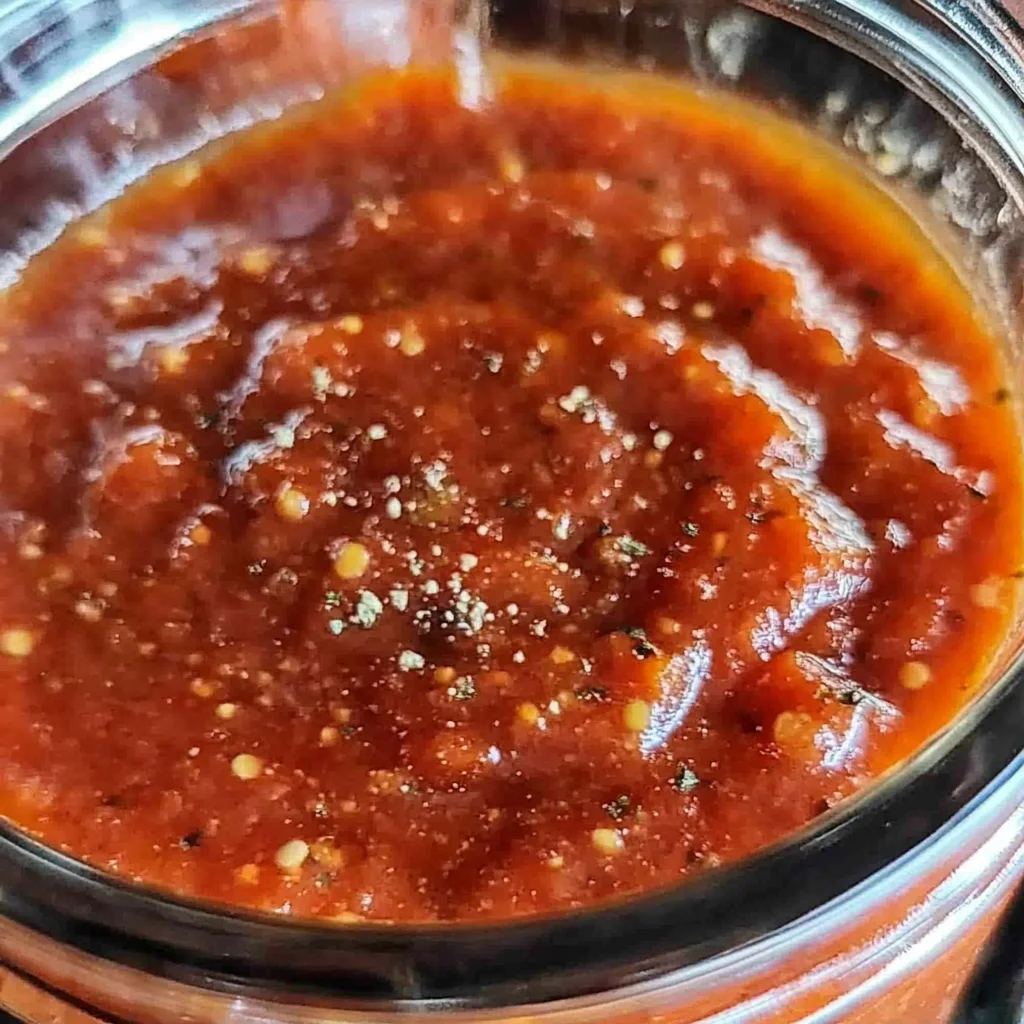
Capture the deep, sweet essence of summer all year with this Homemade Roasted Tomato Spaghetti Sauce Canning Recipe. Roasting the tomatoes and vegetables first caramelizes their natural sugars, creating a rich, complex flavor base that far surpasses any store-bought jar. After years of testing and canning, I’ve perfected this method to ensure a safe, shelf-stable sauce that’s packed with garden-fresh taste.
Ingredients
The magic of this sauce starts with quality produce. Using ripe, in-season tomatoes and fresh aromatics will yield the most vibrant flavor, transforming simple ingredients into a pantry staple you’ll be proud to serve.
- 14 cups Tomatoes: chopped with a food processor (measure after chopping with the food processor)
- 1 Onion: Chopped with a food processor
- 3 – 4 Bell Peppers: Chopped with a food processor.
- 3 tsp Worcestershire Sauce
- 2 tsp Dried Parsley Flakes
- 4 tsp Dried Oregano
- 2 tsp Dried Basil Leaves
- 2 tsp Dried Italian Seasoning
- 4 tsp Canning Salt (do not substitute with table salt)
- 3 tsp Minced Garlic
- Lemon Juice: 1 Tablespoon for each jar (this is a critical acid for safe canning)
Timing
| Prep Time | 45 minutes |
| Cook Time | 2 hours 30 minutes |
| Total Time | 3 hours 15 minutes |
Context: While this recipe requires a dedicated afternoon, the hands-on prep is concentrated at the beginning. The roasting and simmering do most of the work, filling your kitchen with an incredible aroma. This process is a fantastic weekend project that yields multiple jars, saving you significant time and money compared to buying premium sauce throughout the year.
Step-by-Step Instructions
Step 1 — Prep and Roast the Vegetables
Preheat your oven to 425°F (220°C). Core and roughly chop your tomatoes, onion, and bell peppers. In my tests, using a food processor to chop everything to a uniform, coarse texture ensures even roasting and a better final consistency. Spread the chopped vegetables in a single layer on one or two large, rimmed baking sheets.
Roast for 45-60 minutes, stirring halfway through, until the tomatoes have collapsed and the edges of the vegetables are deeply caramelized and slightly charred. This roasting step, unlike boiling, intensifies the flavor by concentrating the natural sugars.
Step 2 — Simmer the Sauce Base
Carefully transfer the roasted vegetables and all their flavorful juices to a large, heavy-bottomed stockpot. Add the Worcestershire sauce, dried parsley, oregano, basil, Italian seasoning, canning salt, and minced garlic.
Bring the mixture to a boil over medium-high heat, then reduce to a steady simmer. Let it cook uncovered for about 1 to 1.5 hours, stirring occasionally to prevent sticking, until the sauce has thickened significantly. You’ll know it’s ready when you can drag a spoon across the bottom of the pot and the path holds for a few seconds.
Step 3 — Prepare Jars and Canner
While the sauce simmers, prepare your canning equipment. Wash your jars, lids, and bands in hot, soapy water. Keep the jars hot by submerging them in your boiling water canner or a separate large pot of simmering water. Place the lids in a small saucepan of hot (not boiling) water to soften the sealing compound.
Fill your canner with enough water to cover the jars by at least 1 inch and begin heating it to a boil. Proper jar sterilization is a non-negotiable step for safe preservation.
Step 4 — Add Acid and Fill Jars
Once your sauce has reached the desired thickness, you’re ready to fill the jars. Using a jar lifter, remove one hot jar from the canner, emptying the water back into the pot. Place the jar on a clean towel or cutting board.
Add 1 tablespoon of bottled lemon juice to the bottom of each pint jar. (Pro tip: Bottled lemon juice has a consistent acidity level, which is crucial for safe canning; fresh lemon juice can vary.) Immediately ladle the hot sauce into the jar, leaving ½ inch of headspace at the top.
Step 5 — Remove Air Bubbles and Seal
Run a clean, non-metallic utensil like a plastic bubble remover or chopstick around the inside of the jar to release any trapped air bubbles. This step ensures a proper seal and consistent fill level. Wipe the jar rim with a damp paper towel to remove any sauce residue, which could prevent sealing.
Place a hot lid on the jar and screw on the band until it is fingertip-tight—just snug, not forced. This allows air to escape during processing.
Step 6 — Process in a Boiling Water Bath
Using the jar lifter, carefully lower each filled jar into the rack of your boiling water canner. Ensure the jars are covered by at least 1 inch of water. Cover the canner, return the water to a full rolling boil, and start your timer. Process pint jars for 35 minutes, adjusting for altitude if necessary.
After processing, turn off the heat and let the canner sit, lid on, for 5 minutes. Then, remove the jars and place them on a towel-lined counter, undisturbed, for 12-24 hours. You should hear the satisfying “ping” of lids sealing as they cool.
Nutritional Information
| Calories | ~85 |
| Protein | 3g |
| Carbohydrates | 18g |
| Fat | 1g |
| Fiber | 4g |
| Sodium | 480mg |
This homemade canned tomato sauce is a good source of vitamins A and C from the roasted tomatoes and peppers, and lycopene, a powerful antioxidant. Estimates are per ½-cup serving and based on typical ingredients. Values may vary depending on produce ripeness and specific brands used.
Healthier Alternatives
- Lower Sodium: — Omit the canning salt from the recipe and add a pinch to taste when serving. This reduces sodium by about 480mg per serving without sacrificing the deep flavor from roasting.
- Boost Protein: — Stir in 1 cup of cooked lentils or crumbled plant-based meat when simmering. They absorb the rich sauce beautifully, adding 9g of protein per serving.
- Extra Veggies: — Add 2 cups of finely chopped mushrooms or grated zucchini to the roasting pan. They caramelize alongside the tomatoes, adding nutrients and thickening the sauce naturally.
- Herb Freshness: — Replace half the dried oregano and basil with ¼ cup of fresh chopped herbs added in the last 10 minutes of simmering for a brighter, more vibrant flavor profile.
- Spice It Up: — Add ½ teaspoon of red pepper flakes to the roasting vegetables. The heat balances the sweetness of the caramelized tomatoes, creating a more complex sauce.
Serving Suggestions
- Toss with classic spaghetti and a sprinkle of Parmesan for a timeless weeknight dinner.
- Use as a robust pizza sauce on a pre-baked crust, topped with fresh mozzarella and basil.
- Layer it in a vegetable lasagna with ricotta, spinach, and no-boil noodles for a comforting bake.
- Serve as a dipping sauce for homemade meatballs or crispy garlic breadsticks.
- Simmer meatballs directly in the sauce for 30 minutes to create a hearty, all-in-one meal.
- Pair with a medium-bodied red wine like a Chianti or a crisp Italian white like Pinot Grigio.
This versatile roasted tomato sauce is your secret weapon for quick, flavorful meals. Having jars ready means you can pull together a restaurant-quality pasta dish in the time it takes to boil water, making it perfect for busy weeknights or last-minute entertaining.
Common Mistakes to Avoid
- Mistake: Substituting table salt for canning salt. Fix: Always use pure canning or pickling salt. Table salt contains anti-caking agents that can cloud your beautiful sauce and affect flavor.
- Mistake: Skipping the bubble-removing step (Step 5). Fix: Always run a tool around the jar’s interior. Trapped air can reduce headspace, cause siphoning during processing, and compromise the seal’s integrity.
- Mistake: Over-tightening jar bands before processing. Fix: Screw bands on until they are “fingertip-tight.” This allows air to escape during the boiling water bath, which is critical for forming a vacuum seal as the jars cool.
- Mistake: Not adjusting processing time for altitude. Fix: Consult the USDA guidelines. For this sauce, add 5 minutes to the 35-minute process time for every 3,000 feet above sea level to ensure safe preservation.
- Mistake: Using under-ripe or watery tomatoes. Fix: Choose ripe, meaty paste tomatoes like Roma or San Marzano. They have less water and more flesh, resulting in a thicker, more flavorful canned spaghetti sauce after roasting.
- Mistake: Storing sealed jars with the bands on. Fix: Once jars are cool and sealed, remove the bands, wash and dry them, and store separately. This prevents rust and allows you to easily detect a failed seal if the lid pops off.
Storing Tips
- Fridge: Store an opened jar in the refrigerator for up to 5 days. Always use a clean spoon to scoop out sauce to prevent bacterial introduction.
- Freezer: For long-term storage without canning, cool the sauce completely and freeze in airtight containers or freezer bags for up to 6 months, leaving 1-inch headspace for expansion. Thaw overnight in the fridge.
- Reheat: Gently warm sauce in a saucepan over medium-low heat, stirring occasionally, until it reaches 165°F. For best texture, avoid boiling vigorously after thawing.
Properly processed jars of this homemade roasted tomato sauce are shelf-stable for 12-18 months. Store them in a cool, dark, dry place like a pantry. For the best flavor and quality, I recommend using your canned sauce within the first year. Always inspect jars before use—the lid should be concave and not move when pressed.
Conclusion
This Homemade Roasted Tomato Spaghetti Sauce Canning Recipe delivers a depth of flavor that only slow roasting can achieve, turning your pantry into a treasure trove of gourmet meals. For more quick pasta inspiration using fresh tomatoes, try this Easy One Pot Creamy Tomato Pasta Recipe. I hope you love this sauce as much as my family does—please share your canning success in the comments!
Frequently Asked Questions
How many jars does this Homemade Roasted Tomato Spaghetti Sauce Canning Recipe yield?
This recipe yields approximately 6 to 7 pint (16 oz) jars. The exact number can vary slightly depending on the juiciness of your tomatoes and how much the sauce reduces during simmering. It’s always wise to prepare one extra jar, just in case.
Can I use fresh herbs instead of dried in this canned spaghetti sauce?
Yes, but the substitution ratio and timing are crucial for safety and flavor. Use three times the amount of fresh herbs (e.g., 1 tablespoon fresh for every 1 teaspoon dried). Add them in the last 10 minutes of simmering, as their more delicate oils can break down during long cooking and processing.
Why did my canned tomato sauce separate in the jar after processing?
Separation, with liquid at the top and solids at the bottom, is natural and does not indicate spoilage. It happens because the pectin that holds everything together breaks down during the high-heat canning process. Simply shake the jar gently before opening to recombine the sauce, and it will be perfectly fine to use.
PrintHomemade Roasted Tomato Spaghetti Sauce Canning Recipe
Ingredients
- 14 cups Tomatoes: chopped with a food processor (measure after chopping with the food processor)
- 1 Onion: Chopped with a food processor
- 3 – 4 Bell Peppers: Chopped with a food processor.
- 3 tsp Worcestershire Sauce
- 2 tsp Dried Parsley Flakes
- 4 tsp Dried Oregano
- 2 tsp Dried Basil Leaves
- 2 tsp Dried Italian Seasoning
- 4 tsp Canning Salt
- 3 tsp Minced Garlic
- Lemon Juice: 1 Tablespoon for each jar
Instructions
- 1
- First, rinse the fresh tomatoes and peppers
- 2
- Cut up the tomatoes and peppers and place them in a baking pan and broil or roast in the oven
- As an estimate about 10 to 15 minutes under the broiler
- Or roast at 400 for 20 minutes
- Check on them frequently.
- 3
- Chop up the tomatoes, peppers, and onion with a food processor and add to a large pot or roasting pan
- 4
- Add the remaining ingredients
- 5
- Bring to a boil and then simmer, until desired thickness
- 6
- Ladle the sauce into canning jars
- 7
- Add 1 Tablespoon of Lemon Juice to each pint jar (2 Tablespoons for Quarts)
- 7
- Wipe rims, remove air bubbles and add lids.
- 8
- Place the jars in a water bath canner and process at a rolling boil for 20 minutes for pints, 25 minutes for quarts.
- 9
- Remove the hot jars with a jar lifter and set them on the counter
- Do not disturb for 24 hours.