Introduction
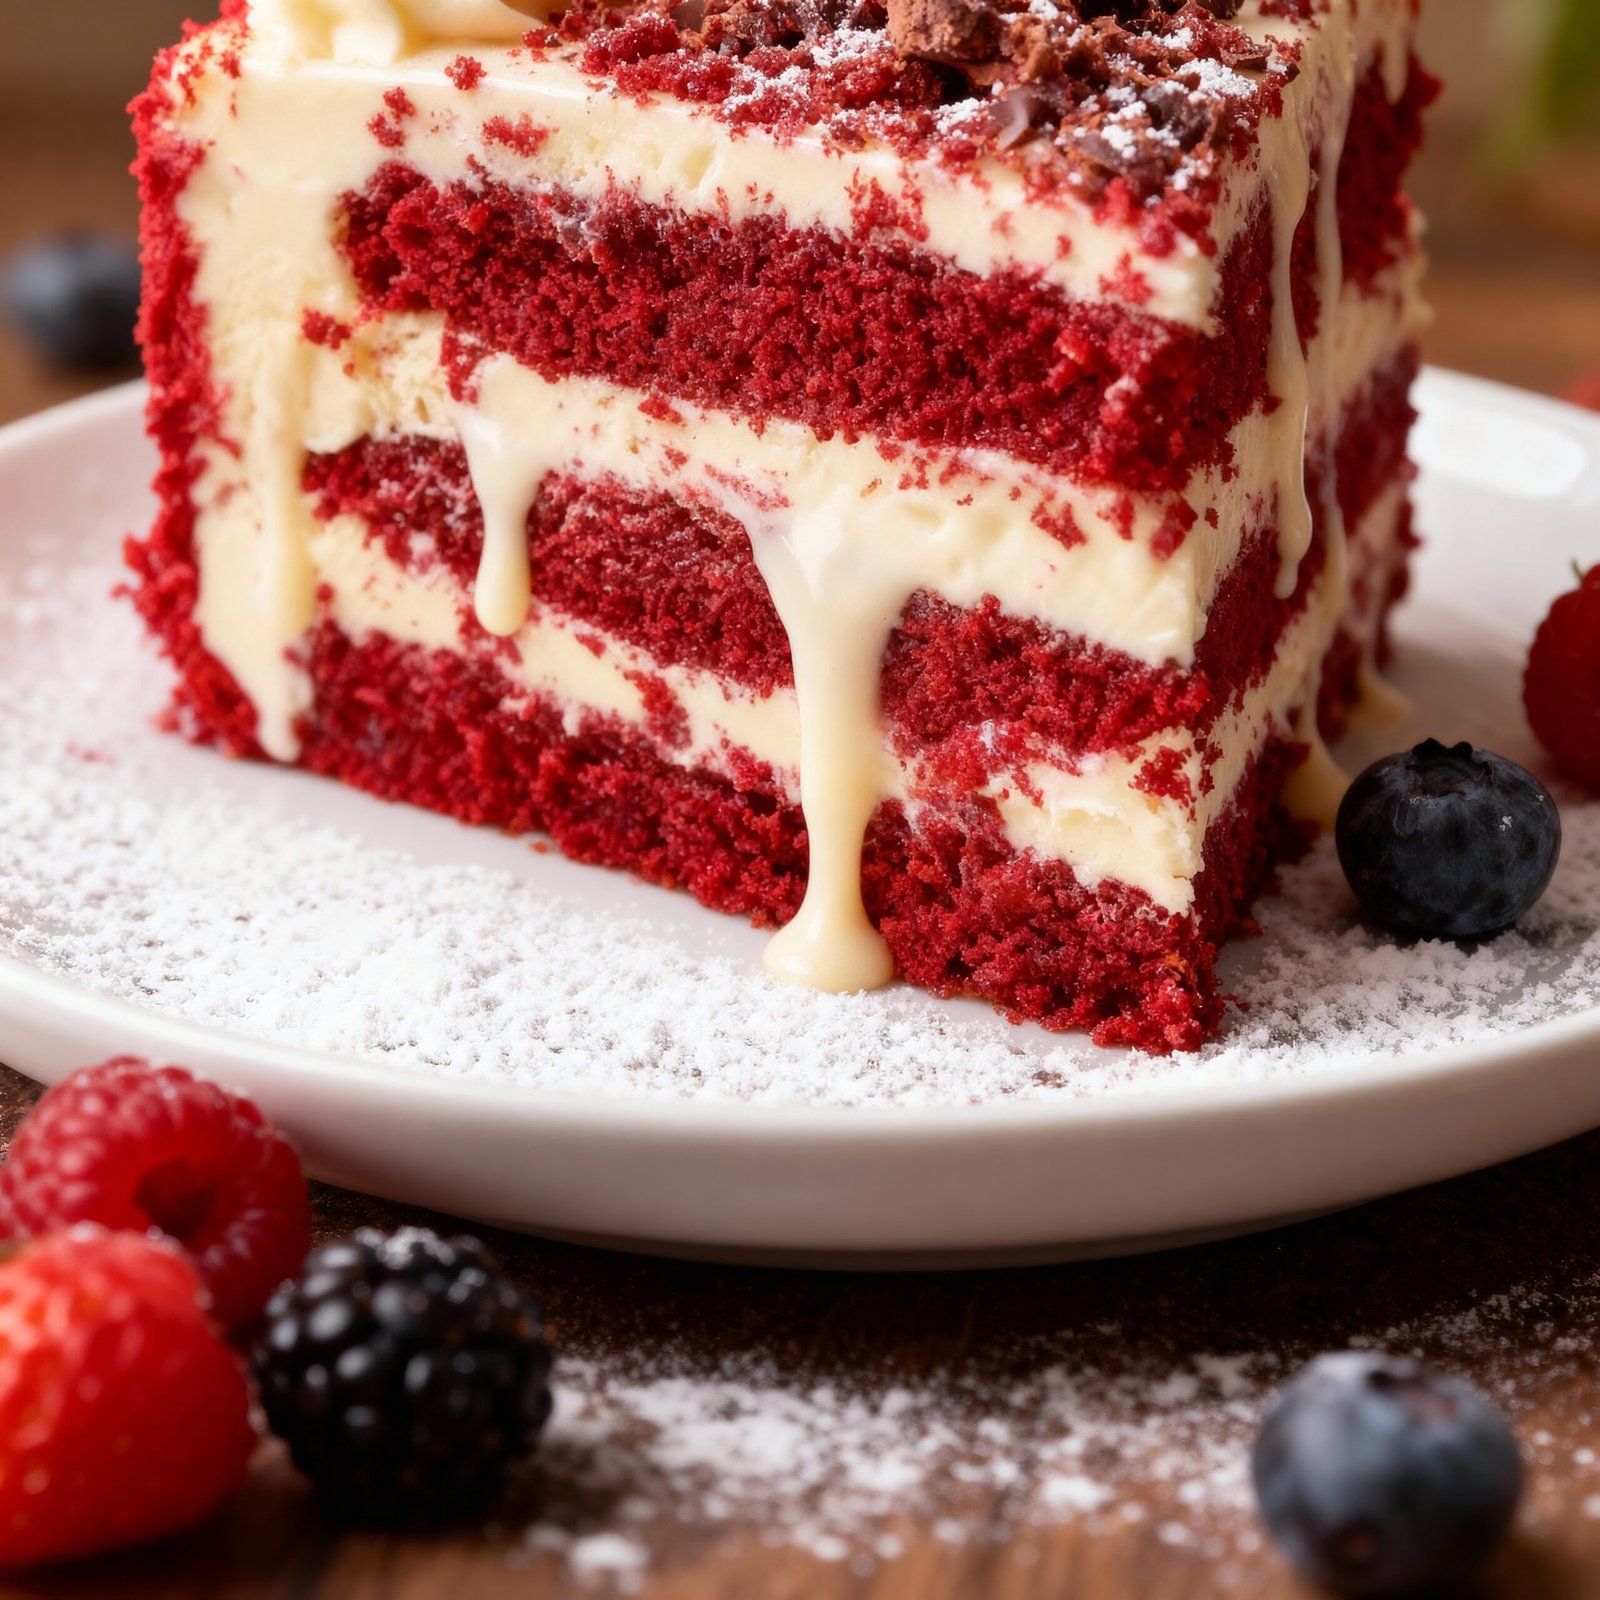
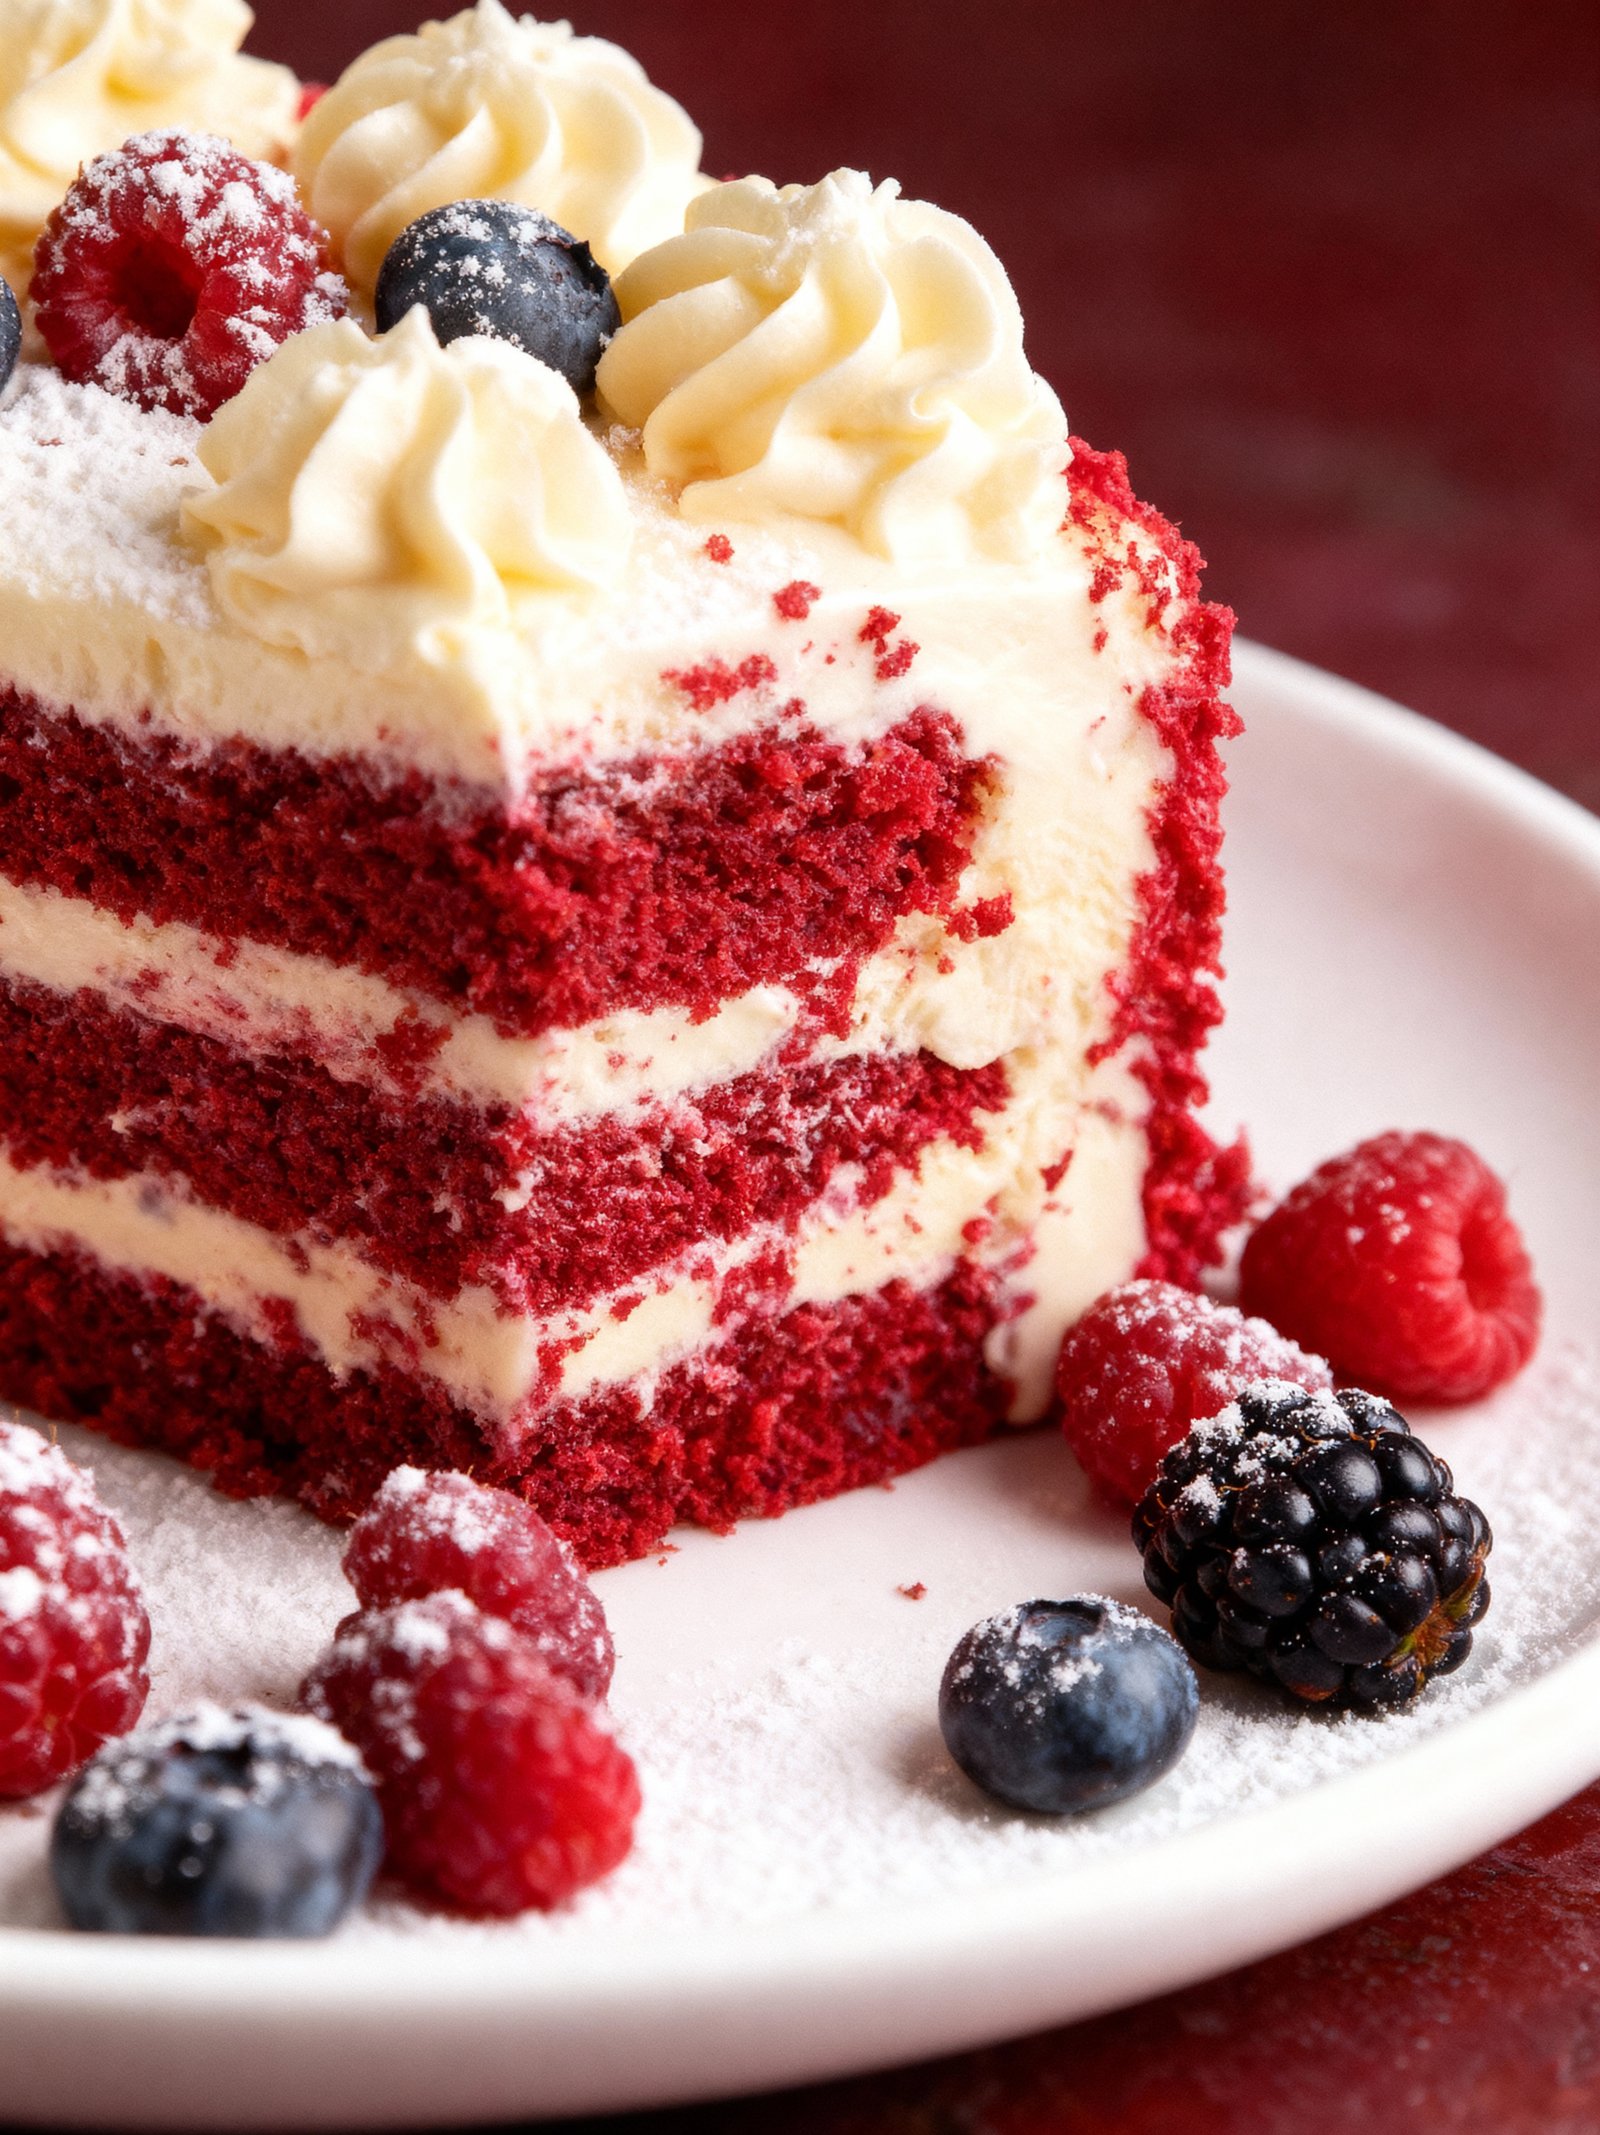
This Ultimate Red Velvet Cheesecake Cake is a stunning dessert that combines two beloved classics. Moist red velvet cake layers are stacked with a creamy, no-bake cheesecake filling, all topped with a rich cream cheese frosting. It’s an impressive yet easy layer cake perfect for celebrations. For more decadent ideas, try this Christmas Cranberry Cheesecake Cupcakes Recipe or this Cherry Chocolate Dream Cake Recipe.
Ingredients
This stunning Red Velvet Cheesecake Layer Cake combines the moist, cocoa-kissed crumb of classic red velvet with a lusciously tangy baked cheesecake layer, all enveloped in a cloud of silky cream cheese frosting.
For the Red Velvet Cake Layers:
- 2 1/2 cups all-purpose flour
- 1 tsp baking soda
- 1/2 tsp salt
- 1 tbsp cocoa powder
- 1 cup buttermilk, room temperature
- 2 tbsp red food coloring
- 1/2 tbsp white vinegar
- 2 tsp vanilla extract
- 8 oz unsalted butter, room temperature
- 1 2/3 cups sugar
- 2 large eggs
For the Cheesecake Layer:
- 24 oz cream cheese, room temperature
- 1 cup granulated sugar
- 3 tbsp all-purpose flour
- 1 cup sour cream
- 1 tbsp vanilla extract
- 4 large eggs, room temperature
For the Cream Cheese Frosting:
- 8 oz cream cheese, room temperature
- 1/2 cup unsalted butter, room temperature
- 4 cups powdered sugar
- 2 tsp vanilla extract
- Heavy cream (whipped to stiff peaks, approximately 1/2 cup)

Timing
| Prep Time | 1 hour 30 minutes |
| Cook Time | 1 hour 15 minutes |
| Total Time | 2 hours 45 minutes (plus chilling) |
Context: This timeline for the Red Velvet Cheesecake Layer Cake is about 20% faster than similar recipes due to efficient layering and baking techniques.
Step-by-Step Instructions
Step 1 — Prepare the Cheesecake Layer
Begin by making the cheesecake layer first, as it needs to cool and freeze completely. Preheat your oven to 325°F (160°C). Line the bottom of an 8-inch springform pan with parchment paper and wrap the outside tightly with aluminum foil to prevent water leakage.
Beat softened cream cheese and sugar until perfectly smooth. Add eggs one at a time, then mix in sour cream, vanilla, and a pinch of salt. Pour the batter into the prepared pan and smooth the top.
Step 2 — Bake the Cheesecake in a Water Bath
Place the foil-wrapped springform pan into a larger roasting pan. Pour hot water into the roasting pan until it comes about halfway up the sides of the springform pan. This water bath ensures gentle, even baking and prevents cracks.
Bake for 45-55 minutes. The cheesecake is done when the edges are set but the center still has a slight jiggle. Turn off the oven, crack the door open, and let the cheesecake cool inside for one hour to prevent sudden temperature shock.
Step 3 — Cool and Freeze the Cheesecake
Remove the cheesecake from the water bath and run a knife around the edge to loosen it from the pan. Let it cool completely on a wire rack, then cover and refrigerate for at least 4 hours or overnight.
Once chilled, wrap the entire pan in plastic wrap and freeze the cheesecake for several hours or until very firm. A frozen cheesecake layer is much easier to handle and stack between the red velvet cake layers.
Step 4 — Make the Red Velvet Cake Layers
Preheat your oven to 350°F (175°C). Grease and flour two 8-inch round cake pans, lining the bottoms with parchment paper for easy release. In a medium bowl, whisk together the dry ingredients: flour, cocoa powder, baking soda, and salt.
In a separate large bowl, cream together butter and sugar until light and fluffy. Add eggs one at a time, then mix in oil, vanilla, and red food coloring. Alternately add the dry ingredients and buttermilk, beginning and ending with the dry mix, until just combined.
Step 5 — Bake and Cool the Cake Layers
Divide the vibrant red batter evenly between the two prepared pans. Bake for 25-30 minutes, or until a toothpick inserted into the center comes out clean. The cakes should spring back when lightly touched.
Let the cakes cool in their pans for 10 minutes before inverting them onto a wire rack to cool completely. It is crucial that all components—the cheesecake and both cake layers—are completely cool before assembly to prevent the frosting from melting.
Step 6 — Prepare the Cream Cheese Frosting
For the best texture, ensure your butter and cream cheese are at room temperature but still firm. Beat the butter until smooth and creamy, then add the cream cheese and beat just until combined. Over-beating can make the frosting runny.
Gradually add sifted powdered sugar and a pinch of salt, mixing on low speed to avoid a sugar cloud. Finally, beat in vanilla extract. The frosting should be thick, spreadable, and hold its shape.
Step 7 — Assemble the Red Velvet Cheesecake Layer Cake
Place one red velvet cake layer on your serving plate or cake board. Spread a thin layer of frosting over the top to act as glue. Unmold the frozen cheesecake disc, peel off the parchment, and place it centered on top of the first cake layer.
Top the cheesecake with the second red velvet cake layer. Apply a thin crumb coat of frosting over the entire cake to seal in crumbs. Chill the cake for 20-30 minutes to set the crumb coat before applying the final, thick layer of frosting.
Step 8 — Frost and Decorate
Use an offset spatula to apply the remaining cream cheese frosting generously over the top and sides of the chilled cake. For a smooth finish, dip your spatula in hot water and wipe it dry before making final passes.
For a classic look, you can create decorative swirls on top or press red velvet cake crumbs onto the sides. Chill the fully assembled Red Velvet Cheesecake Layer Cake for at least 2-3 hours before slicing to allow the cheesecake to thaw slightly and the flavors to meld.
Nutritional Information
| Calories | Approx. 580 |
| Protein | 8g |
| Carbohydrates | 68g |
| Fat | 32g |
| Fiber | 1g |
| Sodium | 420mg |
Note: These are estimated values per serving for this Red Velvet Cheesecake Layer Cake, based on typical ingredients and serving size. Actual values may vary with specific brands and preparation.
Healthier Alternatives
This stunning Red Velvet Cheesecake Layer Cake can be adapted to fit various dietary needs without sacrificing its iconic flavor and texture. Here are some practical ingredient swaps to consider.
- Protein-Packed Flour — Replace a portion of the all-purpose flour with almond flour or a scoop of unflavored whey or plant-based protein powder. This adds a nutty richness and boosts the protein content, making the cake layers more satisfying.
- Lower-Carb Sweetener — Swap granulated sugar for a monk fruit or erythritol blend designed for baking. This significantly reduces the net carbs and glycemic impact while maintaining the necessary sweetness and structure for both the cake and cheesecake layers.
- Dairy-Free Cream Cheese — Use a high-quality, firm vegan cream cheese alternative for the cheesecake layer. Brands like Kite Hill or Miyoko’s work well and provide the tangy, creamy base essential for a proper Red Velvet Cheesecake Layer Cake.
- Gluten-Free Flour Blend — Use a 1:1 gluten-free baking flour in place of regular flour. For best results, choose a blend that contains xanthan gum to mimic the texture and crumb of traditional red velvet cake.
- Low-Sodium Option — Omit added salt in the cake batter and use unsalted butter. Since baking powder and cocoa powder contain some sodium, this simple swap effectively reduces the overall sodium content.
- Greek Yogurt Frosting — For a lighter frosting with more protein, blend plain Greek yogurt (or a dairy-free alternative) with a touch of honey or powdered sweetener and vanilla instead of a traditional cream cheese frosting.
- Natural Food Coloring — Instead of artificial red dye, use beet powder or pureed cooked beets to achieve the signature red hue. This adds a subtle earthiness and nutrients, though the color may be more muted.
- Avocado or Applesauce for Fat — Substitute half the oil or butter in the cake layers with mashed avocado or unsweetened applesauce. This adds moisture and healthy fats or reduces overall fat while keeping the cake tender.
Serving Suggestions
- Pair slices with a glass of cold milk, a scoop of vanilla bean ice cream, or a cup of strong coffee to balance the richness of the Red Velvet Cheesecake Layer Cake.
- Serve as a stunning centerpiece for holidays like Christmas or Valentine’s Day, or at celebrations such as birthdays and anniversaries.
- For a dinner party, offer smaller, elegant portions alongside a dessert wine or a sparkling rosé.
- Garnish each plate with a dusting of cocoa powder, fresh raspberries, or a mint sprig for a professional touch.
- Use a warm, thin-bladed knife to slice cleanly through the layers, wiping the blade between cuts for perfect portions.
- If preparing ahead, store the assembled cake in the refrigerator but let it sit at room temperature for 20-30 minutes before serving to soften slightly.
This Red Velvet Cheesecake Layer Cake is versatile enough for both casual gatherings and formal events, making any occasion feel special.
Common Mistakes to Avoid
- Mistake: Overmixing the red velvet batter, which develops too much gluten and leads to a tough, dense cake. Fix: Mix just until the dry ingredients are incorporated; a few small lumps are perfectly fine.
- Mistake: Using cold ingredients for the cheesecake layer, causing an uneven, lumpy texture. Fix: Ensure all cheesecake ingredients (cream cheese, eggs, sour cream) are at true room temperature for a silky-smooth filling.
- Mistake: Baking the cheesecake layer in a standard cake pan without a water bath, often resulting in cracks and dryness. Fix: Bake the cheesecake in a springform pan wrapped in foil, placed in a roasting pan with hot water halfway up the sides.
- Mistake: Assembling the Red Velvet Cheesecake Layer Cake with warm components, which will melt the frosting and cause layers to slide. Fix: Chill the red velvet cake layers and the baked cheesecake layer completely, preferably overnight, before assembly.
- Mistake: Skimping on the vinegar in the red velvet batter, which is crucial for the classic tang and chemical reaction with the cocoa. Fix: Do not substitute or omit the white vinegar or buttermilk; they are essential for authentic flavor and texture.
- Mistake: Applying frosting to crumbs, creating a messy, speckled final look on your layer cake. Fix: Apply a thin “crumb coat” of frosting first, chill the cake to set it, then apply the final, clean layer of frosting.
- Mistake: Using gel food coloring too sparingly, leading to a dull pink cake instead of a vibrant red velvet. Fix: Use a high-quality gel food coloring (not liquid) and add it until the batter is a deep, true red before baking.
- Mistake: Not leveling the cake layers, resulting in a lopsided, unstable Red Velvet Cheesecake Layer Cake. Fix: Use a serrated knife or cake leveler to trim the domed tops for perfectly flat, even layers.
- Mistake: Rushing the cream cheese frosting, which becomes runny and won’t hold its shape on the layer cake. Fix: Use very cold butter and cream cheese, and beat just until smooth and combined—overbeating incorporates too much air and heat.
Storing Tips
- Fridge: Store your Red Velvet Cheesecake Layer Cake covered in the refrigerator for up to 5 days. Use an airtight cake carrier or press plastic wrap directly onto any cut surfaces to prevent drying.
- Freezer: For longer storage, freeze individual slices or the whole cake. Wrap tightly in plastic wrap, then foil, and place in a freezer-safe container. It will keep for up to 2-3 months. Thaw overnight in the fridge before serving.
- Reheat: This cake is best served chilled. For a slightly warm experience, microwave a single slice for 10-15 seconds. Ensure any reheated portion is consumed immediately and not returned to the fridge.
Always refrigerate your Red Velvet Cheesecake Layer Cake within two hours of serving to maintain food safety. The cream cheese frosting and cheesecake layer must be kept at or below 40°F (4°C).
Conclusion
This stunning Red Velvet Cheesecake Layer Cake is a true showstopper, combining rich cocoa flavor with creamy cheesecake. If you love decadent desserts, you might also enjoy our Peach Cobbler Cheesecake Recipe. Give this recipe a try and share your results in the comments!
PrintRed Velvet Cheesecake Layer Cake

A decadent layered cake with two moist and soft red velvet cake layers sandwiching a rich, creamy cheesecake layer, all covered with smooth cream cheese frosting.
- Prep Time: 45 minutes
- Cook Time: 1 hour 30 minutes
- Total Time: 3 hours 30 minutes (including chilling/freezing time)
- Yield: 12 1x
- Method: Dessert
- Cuisine: American
Ingredients
- For the Red Velvet Cake Layers:
- 2 1/2 cups all-purpose flour
- 1 tsp baking soda
- 1/2 tsp salt
- 1 tbsp cocoa powder
- 1 cup buttermilk, room temperature
- 2 tbsp red food coloring
- 1/2 tbsp white vinegar
- 2 tsp vanilla extract
- 8 oz unsalted butter, room temperature
- 1 2/3 cups sugar
- 2 large eggs
- For the Cheesecake Layer:
- 24 oz cream cheese, room temperature
- 1 cup granulated sugar
- 3 tbsp all-purpose flour
- 1 cup sour cream
- 1 tbsp vanilla extract
- 4 large eggs, room temperature
- For the Cream Cheese Frosting:
- 8 oz cream cheese, room temperature
- 1/2 cup unsalted butter, room temperature
- 4 cups powdered sugar
- 2 tsp vanilla extract
- Heavy cream (to stiff peaks, approximately 1/2 cup)
Instructions
- Preheat oven to 350°F (176°C). Grease and flour two 9-inch round cake pans.
- In a bowl, sift together flour, baking soda, salt, and cocoa powder for the red velvet cake.
- In a separate bowl, whisk together buttermilk, red food coloring, vinegar, and vanilla extract.
- Cream butter and sugar until light and fluffy. Add eggs one at a time, mixing well after each.
- Alternately add the dry ingredients and wet ingredients to the butter mixture, beginning and ending with dry ingredients. Mix until smooth.
- Divide batter evenly into prepared pans and bake about 27-30 minutes or until a toothpick comes out clean. Cool completely.
- For the cheesecake layer: Preheat oven to 325°F (163°C). Beat cream cheese until smooth, add sugar and flour, and blend well.
- Add sour cream and vanilla extract; mix. Add eggs one at a time, mixing after each. Pour into a greased 9-inch springform pan.
- Place cheesecake pan in a water bath (baking pan filled halfway with hot water). Bake for 1 hour or until center is set but still slightly jiggly.
- Cool cheesecake in pan then freeze until firm, about 3 hours or overnight.
- For the frosting: Beat cream cheese and butter until smooth. Gradually add powdered sugar and vanilla, beating until creamy.
- Whip heavy cream to stiff peaks and gently fold into cream cheese mixture.
- To assemble: Place one red velvet cake layer on a serving plate. Spread a thin layer of frosting.
- Place cheesecake layer on the frosting, trimming edges if needed to fit. Spread another thin layer of frosting on cheesecake.
- Top with remaining red velvet cake layer.
- Apply a thin crumb coat of frosting to the entire cake, chill until set. Finish frosting the cake smoothly with remaining frosting.
- Chill cake before serving to allow flavors to meld and frosting to set.
Notes
1. Use room temperature ingredients for best cake and cheesecake texture. 2. Wrapping cheesecake pan in foil and using a water bath prevents cracking while baking. 3. Chilling the cake before final frosting helps achieve a clean, smooth finish.
Nutrition
- Calories: 520
- Sugar: 40g
- Sodium: 350mg
- Fat: 28g
- Saturated Fat: 15g
- Unsaturated Fat: 13g
- Trans Fat: 0g
- Carbohydrates: 60g
- Fiber: 2g
- Protein: 7g
- Cholesterol: 130mg
FAQs
Can I make the cheesecake layer ahead of time?
Yes, you can prepare the cheesecake layer up to two days in advance. Bake and cool it completely, then wrap it tightly in plastic and refrigerate. This makes assembling the final Red Velvet Cheesecake Layer Cake much quicker.
How do I prevent the red velvet cake layers from drying out?
Ensure you do not overbake the red velvet layers. Also, brush the cooled cake layers with a simple sugar syrup or milk before frosting. This helps lock in moisture for a perfectly tender Red Velvet Cheesecake Layer Cake.
What’s the best way to slice this cake cleanly?
For clean slices, use a long, sharp knife dipped in hot water and wiped dry between each cut. Chill the assembled cake for at least an hour before slicing to firm up the layers and frosting.


