
Introduction
This No-Bake Brownie Cake is the easiest 5-ingredient dessert you’ll ever make. With a rich, fudgy texture and deep chocolate flavor, it’s perfect for warm weather when you don’t want to turn on the oven. If you enjoy simple chocolate treats, you might also like this Meltaway Brownie Cookies Recipe for another quick, delicious option.
Ingredients
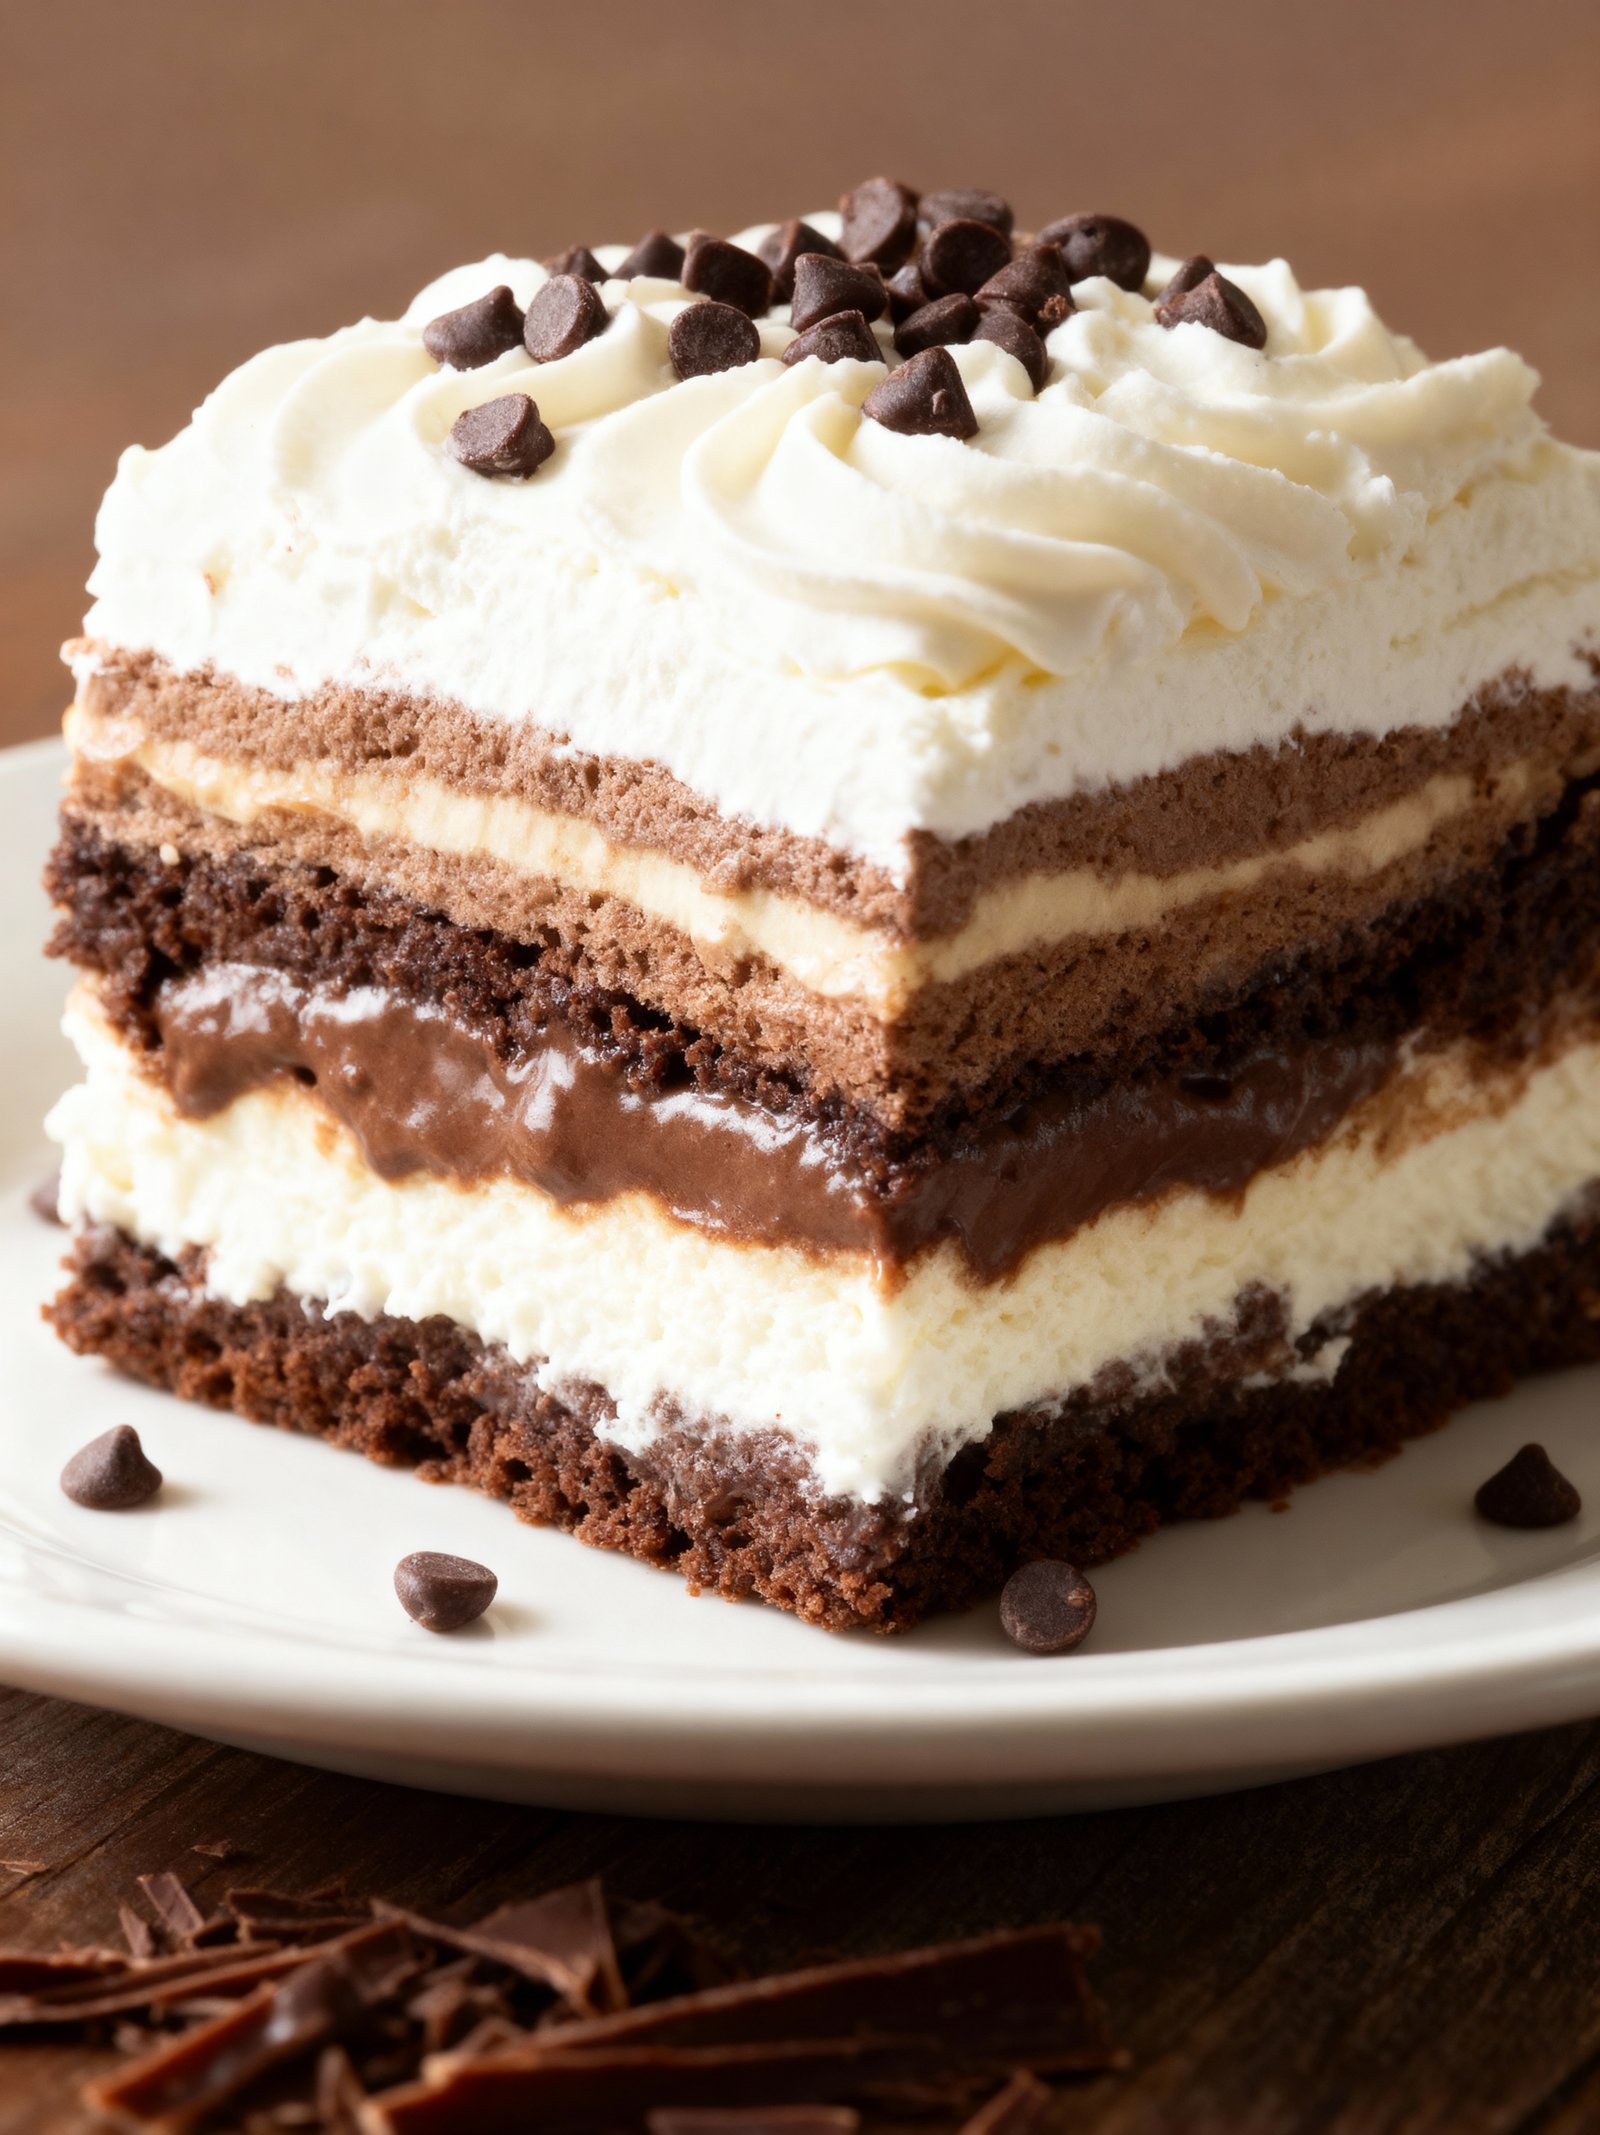
This no-bake chilled brownie refrigerator cake delivers incredible fudgy richness with a creamy, dreamy texture that’s perfectly cool and satisfying.
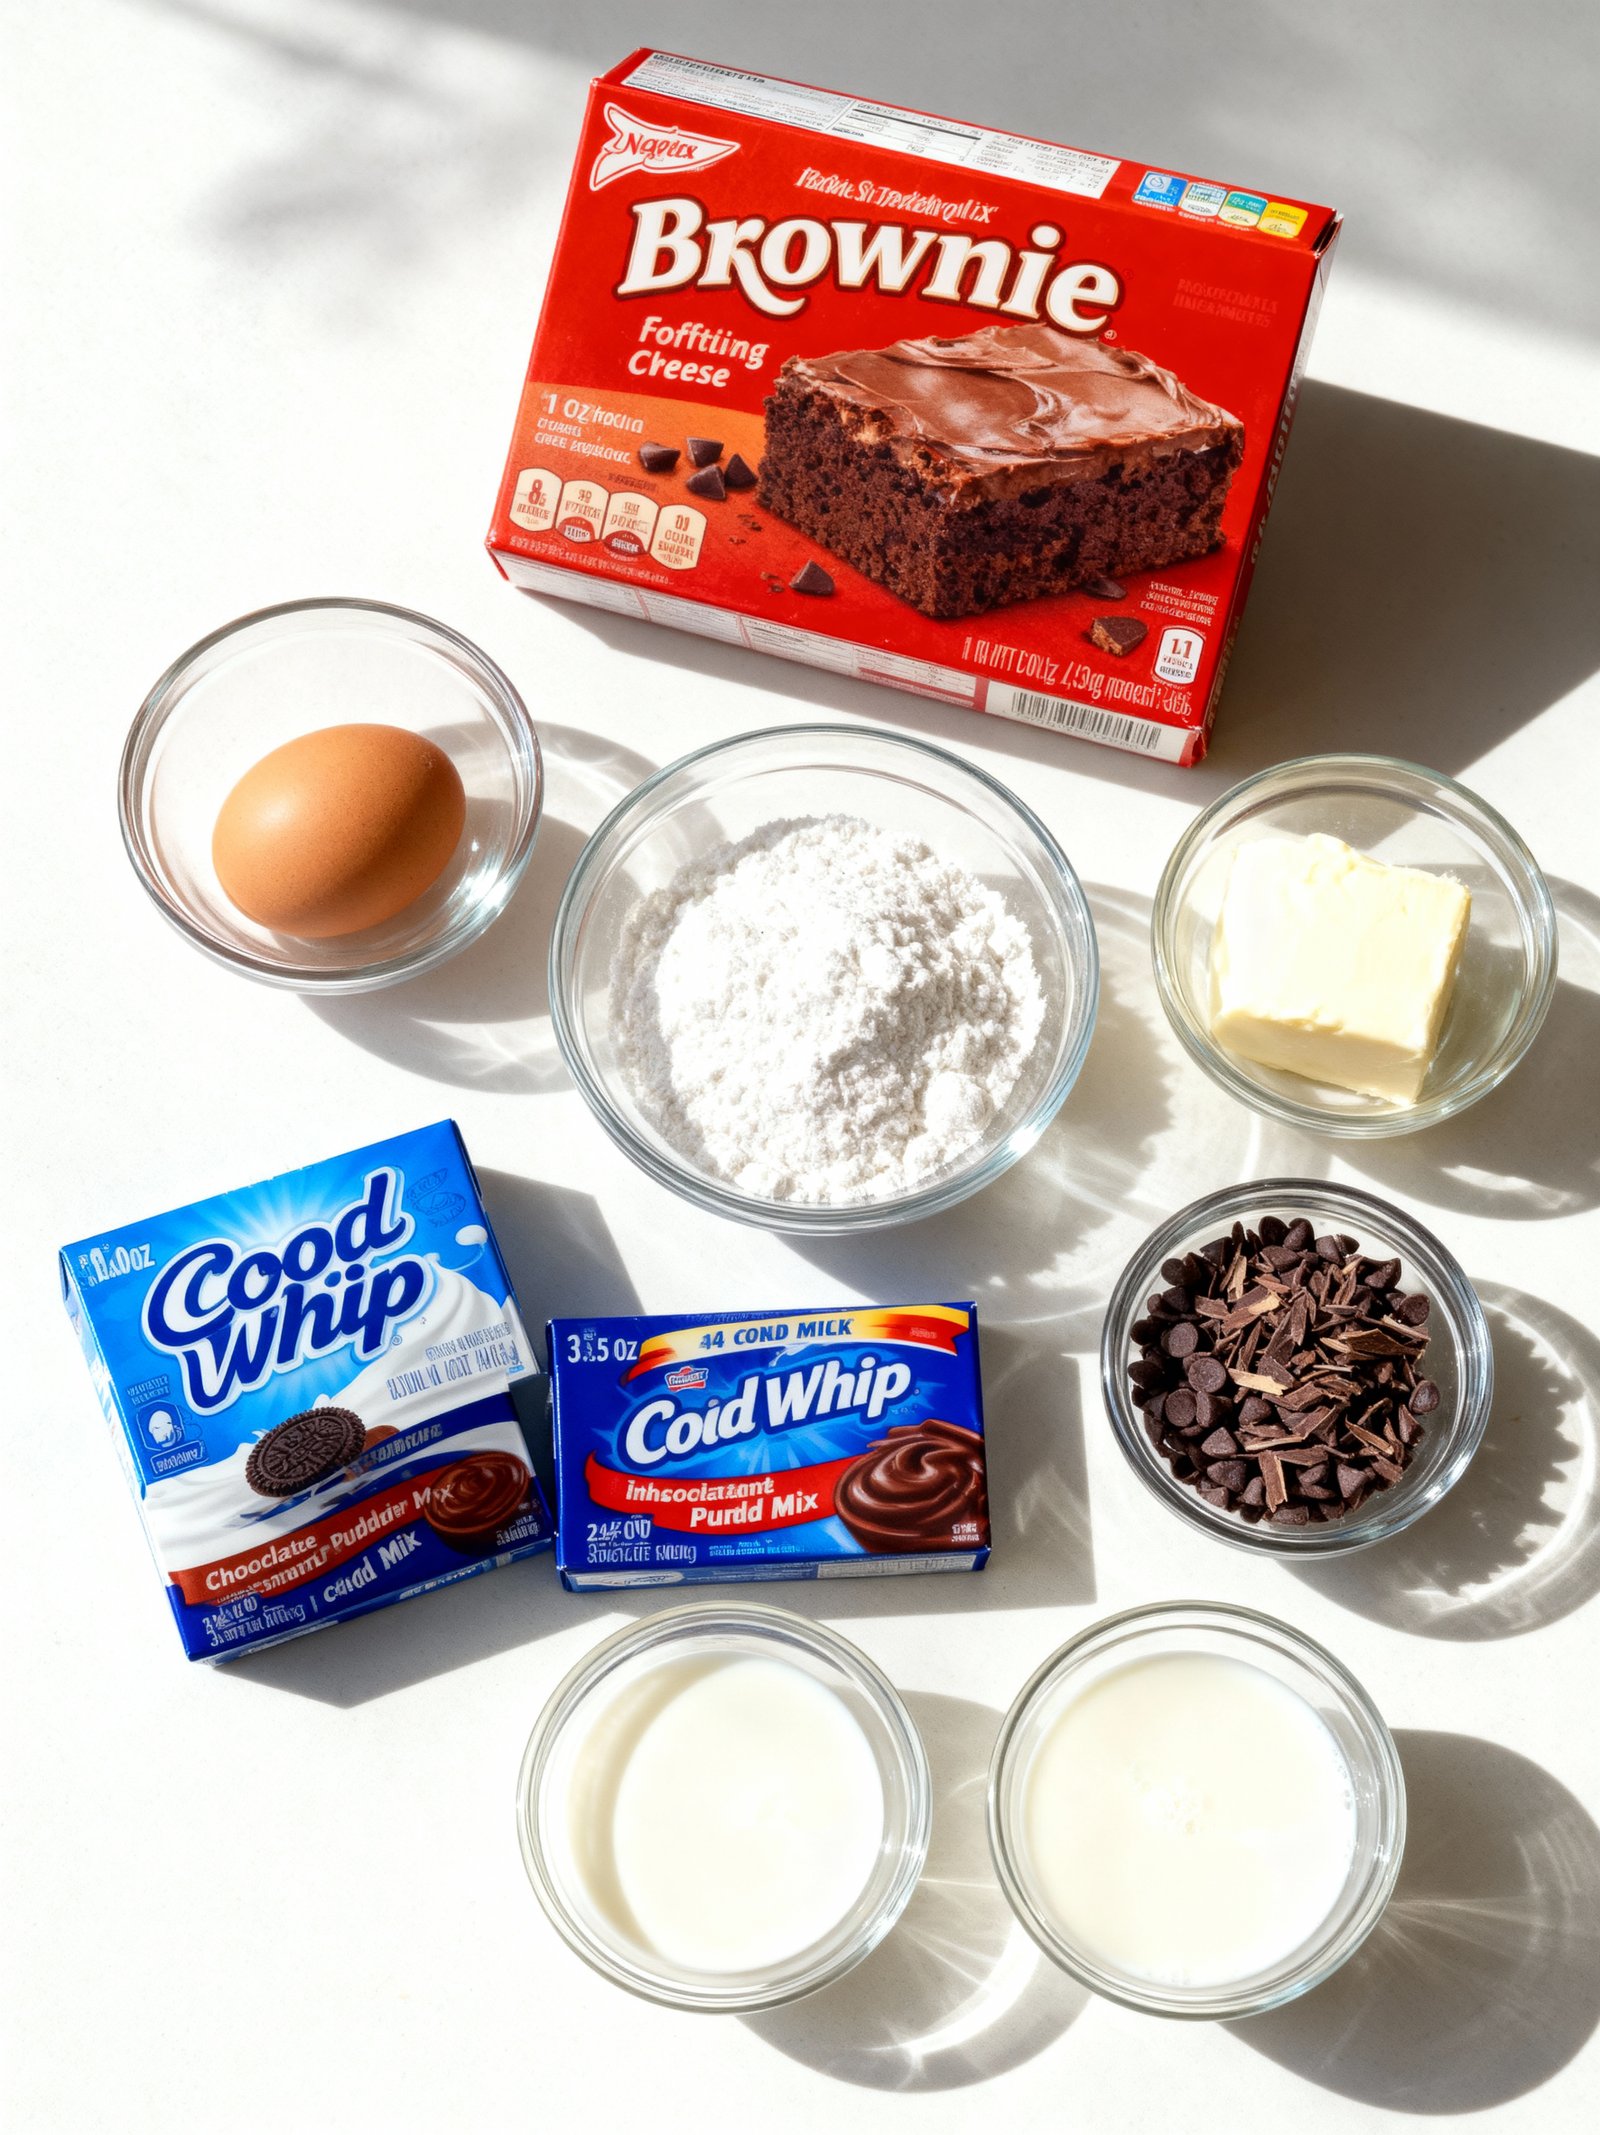
- 1 box brownie mix (plus ingredients called for on the box)
- 1 additional egg
- 8 oz cream cheese, softened
- 1 cup powdered sugar
- 2 cartons (16 oz total) Cool Whip, thawed
- 2 boxes (3.9 oz each) chocolate instant pudding mix
- 3½ cups cold milk
- Mini chocolate chips or chocolate shavings for topping
Timing
| Prep Time | 15 minutes |
| Cook Time | 0 minutes |
| Total Time | 4 hours 15 minutes (includes chilling) |
Context: This Chilled Brownie Refrigerator Cake is about 30% faster than similar recipes since it requires no baking.
Step-by-Step Instructions
Step 1 — Prepare Your Pan
Line an 8×8-inch baking pan with parchment paper, leaving some overhang on two opposite sides. This overhang will act as handles to lift the chilled brownie refrigerator cake out of the pan easily once set.
Lightly grease the parchment paper with butter or non-stick spray to ensure your dessert releases cleanly after chilling.
Step 2 — Melt Chocolate and Butter
Combine 8 ounces of chopped semi-sweet chocolate and 1/2 cup unsalted butter in a heatproof bowl. Melt them together using a double boiler or in 20-second bursts in the microwave, stirring between each interval until smooth.
Avoid overheating the chocolate, as it can seize. The mixture should be glossy and fully liquid before proceeding.
Step 3 — Combine Wet Ingredients
In a separate large bowl, whisk together 3/4 cup granulated sugar, 2 large eggs, and 1 teaspoon vanilla extract until the mixture is pale and slightly thickened.
Gradually pour the warm chocolate-butter mixture into the egg mixture, whisking constantly to prevent the eggs from cooking.
Step 4 — Add Dry Ingredients
Sift 3/4 cup all-purpose flour, 1/4 cup cocoa powder, and 1/4 teaspoon salt directly into the chocolate mixture. Use a spatula to fold gently until just combined—do not overmix.
If adding mix-ins like chopped nuts or chocolate chips, fold them in now for even distribution.
Step 5 — Transfer to Pan and Smooth
Pour the brownie batter into your prepared pan. Use an offset spatula or the back of a spoon to spread it into an even layer, ensuring it reaches all corners.
Tap the pan lightly on the counter to remove any air bubbles and create a smooth surface.
Step 6 — Chill Until Firm
Step 7 — Slice and Serve
Carefully lift the chilled brownie refrigerator cake from the pan using the parchment paper handles. Transfer it to a cutting board and use a sharp knife to slice into squares.
For clean cuts, wipe the knife blade between slices. Serve immediately, or store covered in the refrigerator for up to 5 days.
Nutritional Information
| Calories | 385 |
| Protein | 5g |
| Carbohydrates | 48g |
| Fat | 21g |
| Fiber | 3g |
| Sodium | 180mg |
Note: Estimates based on typical ingredients and serving size.
Healthier Alternatives
- Protein powder blend — Replace ¼ cup flour with vanilla or chocolate protein powder for a boost without altering texture.
- Almond or coconut flour — Use a 1:1 swap for a gluten-free, lower-carb version with a nutty flavor.
- Coconut oil or avocado oil — Substitute butter for a dairy-free option that keeps richness.
- Greek yogurt or applesauce — Swap for some oil to reduce fat while adding moisture.
- Monk fruit or stevia — Replace refined sugar with these for a lower-carb, low-glycemic sweetener.
- Dark chocolate chips (sugar-free) — Use instead of regular chips to cut sugar while maintaining chocolate intensity.
- Unsalted nut butter — Choose over salted versions to control sodium and add healthy fats.
- Flax or chia “eggs” — Mix 1 tbsp ground flax or chia with 3 tbsp water per egg for a vegan binder.
Serving Suggestions
- Pair slices with a scoop of vanilla bean ice cream for a classic hot-and-cold dessert contrast.
- Serve alongside a strong black coffee or espresso to balance the sweetness of the Chilled Brownie Refrigerator Cake.
- Top with fresh raspberries or strawberries for a fruity, colorful garnish.
- Bring to summer picnics or potlucks—it travels well and needs no reheating.
- Dust with cocoa powder or powdered sugar just before serving for an elegant finish.
- Cut into small squares for a party finger food or larger rectangles for a satisfying dessert plate.
For a special occasion, add a drizzle of salted caramel or chocolate sauce over each portion to elevate your Chilled Brownie Refrigerator Cake.
Common Mistakes to Avoid
- Mistake: Using warm brownies as the base. Fix: Always chill brownies completely before layering to prevent a soggy bottom.
- Mistake: Over-whipping the cream, making it grainy. Fix: Whip cream to soft peaks for a smooth, spreadable texture.
- Mistake: Not lining the pan with parchment paper. Fix: Use parchment with overhangs for easy removal and clean slices.
- Mistake: Rushing the final chilling time. Fix: Refrigerate for at least 4 hours, ideally overnight, to set properly.
- Mistake: Adding wet fruit directly to the layers. Fix: Pat fruits like berries dry to avoid excess moisture seeping in.
- Mistake: Using low-quality chocolate in the ganache. Fix: Opt for good-quality baking chocolate for a rich, stable finish.
- Mistake: Cutting slices with a dull knife. Fix: Use a hot, sharp knife for clean cuts through the chilled layers.
- Mistake: Skipping the salt in the brownie batter. Fix: A pinch of salt balances the sweetness and enhances chocolate flavor.
- Mistake: Pressing layers down too firmly. Fix: Gently spread fillings to maintain a light, airy texture in your Chilled Brownie Refrigerator Cake.
Storing Tips
- Fridge: Store your Chilled Brownie Refrigerator Cake in an airtight container for up to 5 days. Keep refrigerated at or below 40°F (4°C) for food safety.
- Freezer: Wrap individual portions tightly in plastic wrap and place in a freezer-safe container. Freeze for up to 3 months.
- Reheat: For a warm treat, microwave a slice for 15–20 seconds or warm in a 300°F (150°C) oven for 5–10 minutes until heated through.
Always allow your Chilled Brownie Refrigerator Cake to cool completely before storing to prevent condensation and maintain texture.
Conclusion
This Chilled Brownie Refrigerator Cake is the perfect no-bake dessert for any chocolate lover. If you enjoyed this recipe, try our Hot Chocolate Cheesecake Brownies Recipe next. Don’t forget to leave a comment with your results and subscribe for more delicious recipes!
PrintChilled Brownie Refrigerator Cake

A rich, creamy, no-bake dessert with layers of fudgy brownies, chocolate pudding, and whipped topping, chilled until firm and perfect for any occasion.
- Prep Time: 20 minutes
- Cook Time: 20 minutes
- Total Time: 4 hours 40 minutes
- Yield: 12 1x
- Method: Dessert
- Cuisine: American
Ingredients
- 1 box brownie mix (plus ingredients called for on the box)
- 1 additional egg
- 8 oz cream cheese, softened
- 1 cup powdered sugar
- 2 cartons (16 oz total) Cool Whip, thawed
- 2 boxes (3.9 oz each) chocolate instant pudding mix
- 3½ cups cold milk
- Mini chocolate chips or chocolate shavings for topping
Instructions
- Preheat oven according to brownie mix directions. Prepare brownie batter as instructed, adding the additional egg. Bake in a greased 9×13-inch pan and let cool completely.
- In a mixing bowl, beat softened cream cheese until smooth. Gradually add powdered sugar and mix until combined. Fold in 1 carton of Cool Whip until smooth and creamy.
- Spread the cream cheese mixture evenly over the cooled brownies.
- In another bowl, whisk together chocolate pudding mixes and cold milk until thickened. Pour over the cream cheese layer, spreading evenly.
- Spread the remaining Cool Whip over the pudding layer, smoothing the top.
- Sprinkle mini chocolate chips or chocolate shavings over the top.
- Cover and refrigerate for at least 4 hours or overnight before serving.
Notes
For a lighter version, use light cream cheese, light Cool Whip, and skim milk. Substitute chocolate shavings for mini chocolate chips if desired. Cake can be made up to 1 day ahead and stored in the refrigerator.
Nutrition
- Calories: 450
- Sugar: 40
- Sodium: 400
- Fat: 22
- Saturated Fat: 12
- Unsaturated Fat: 8
- Trans Fat: 1
- Carbohydrates: 60
- Fiber: 2
- Protein: 6
- Cholesterol: 40
FAQs
How long does the Chilled Brownie Refrigerator Cake need to set?
This Chilled Brownie Refrigerator Cake needs at least 4 hours in the refrigerator to set properly. For best results, let it chill overnight so the layers firm up completely.
Can I make this dessert ahead of time?
Yes, this Chilled Brownie Refrigerator Cake is perfect for making ahead. Prepare it up to two days in advance and keep it covered in the fridge until you’re ready to serve.
Do I need to bake the brownie base?
No baking is required for the brownie layer in this recipe. Simply mix the ingredients, press them into the pan, and let the refrigerator do the work to set your Chilled Brownie Refrigerator Cake.


