Introduction
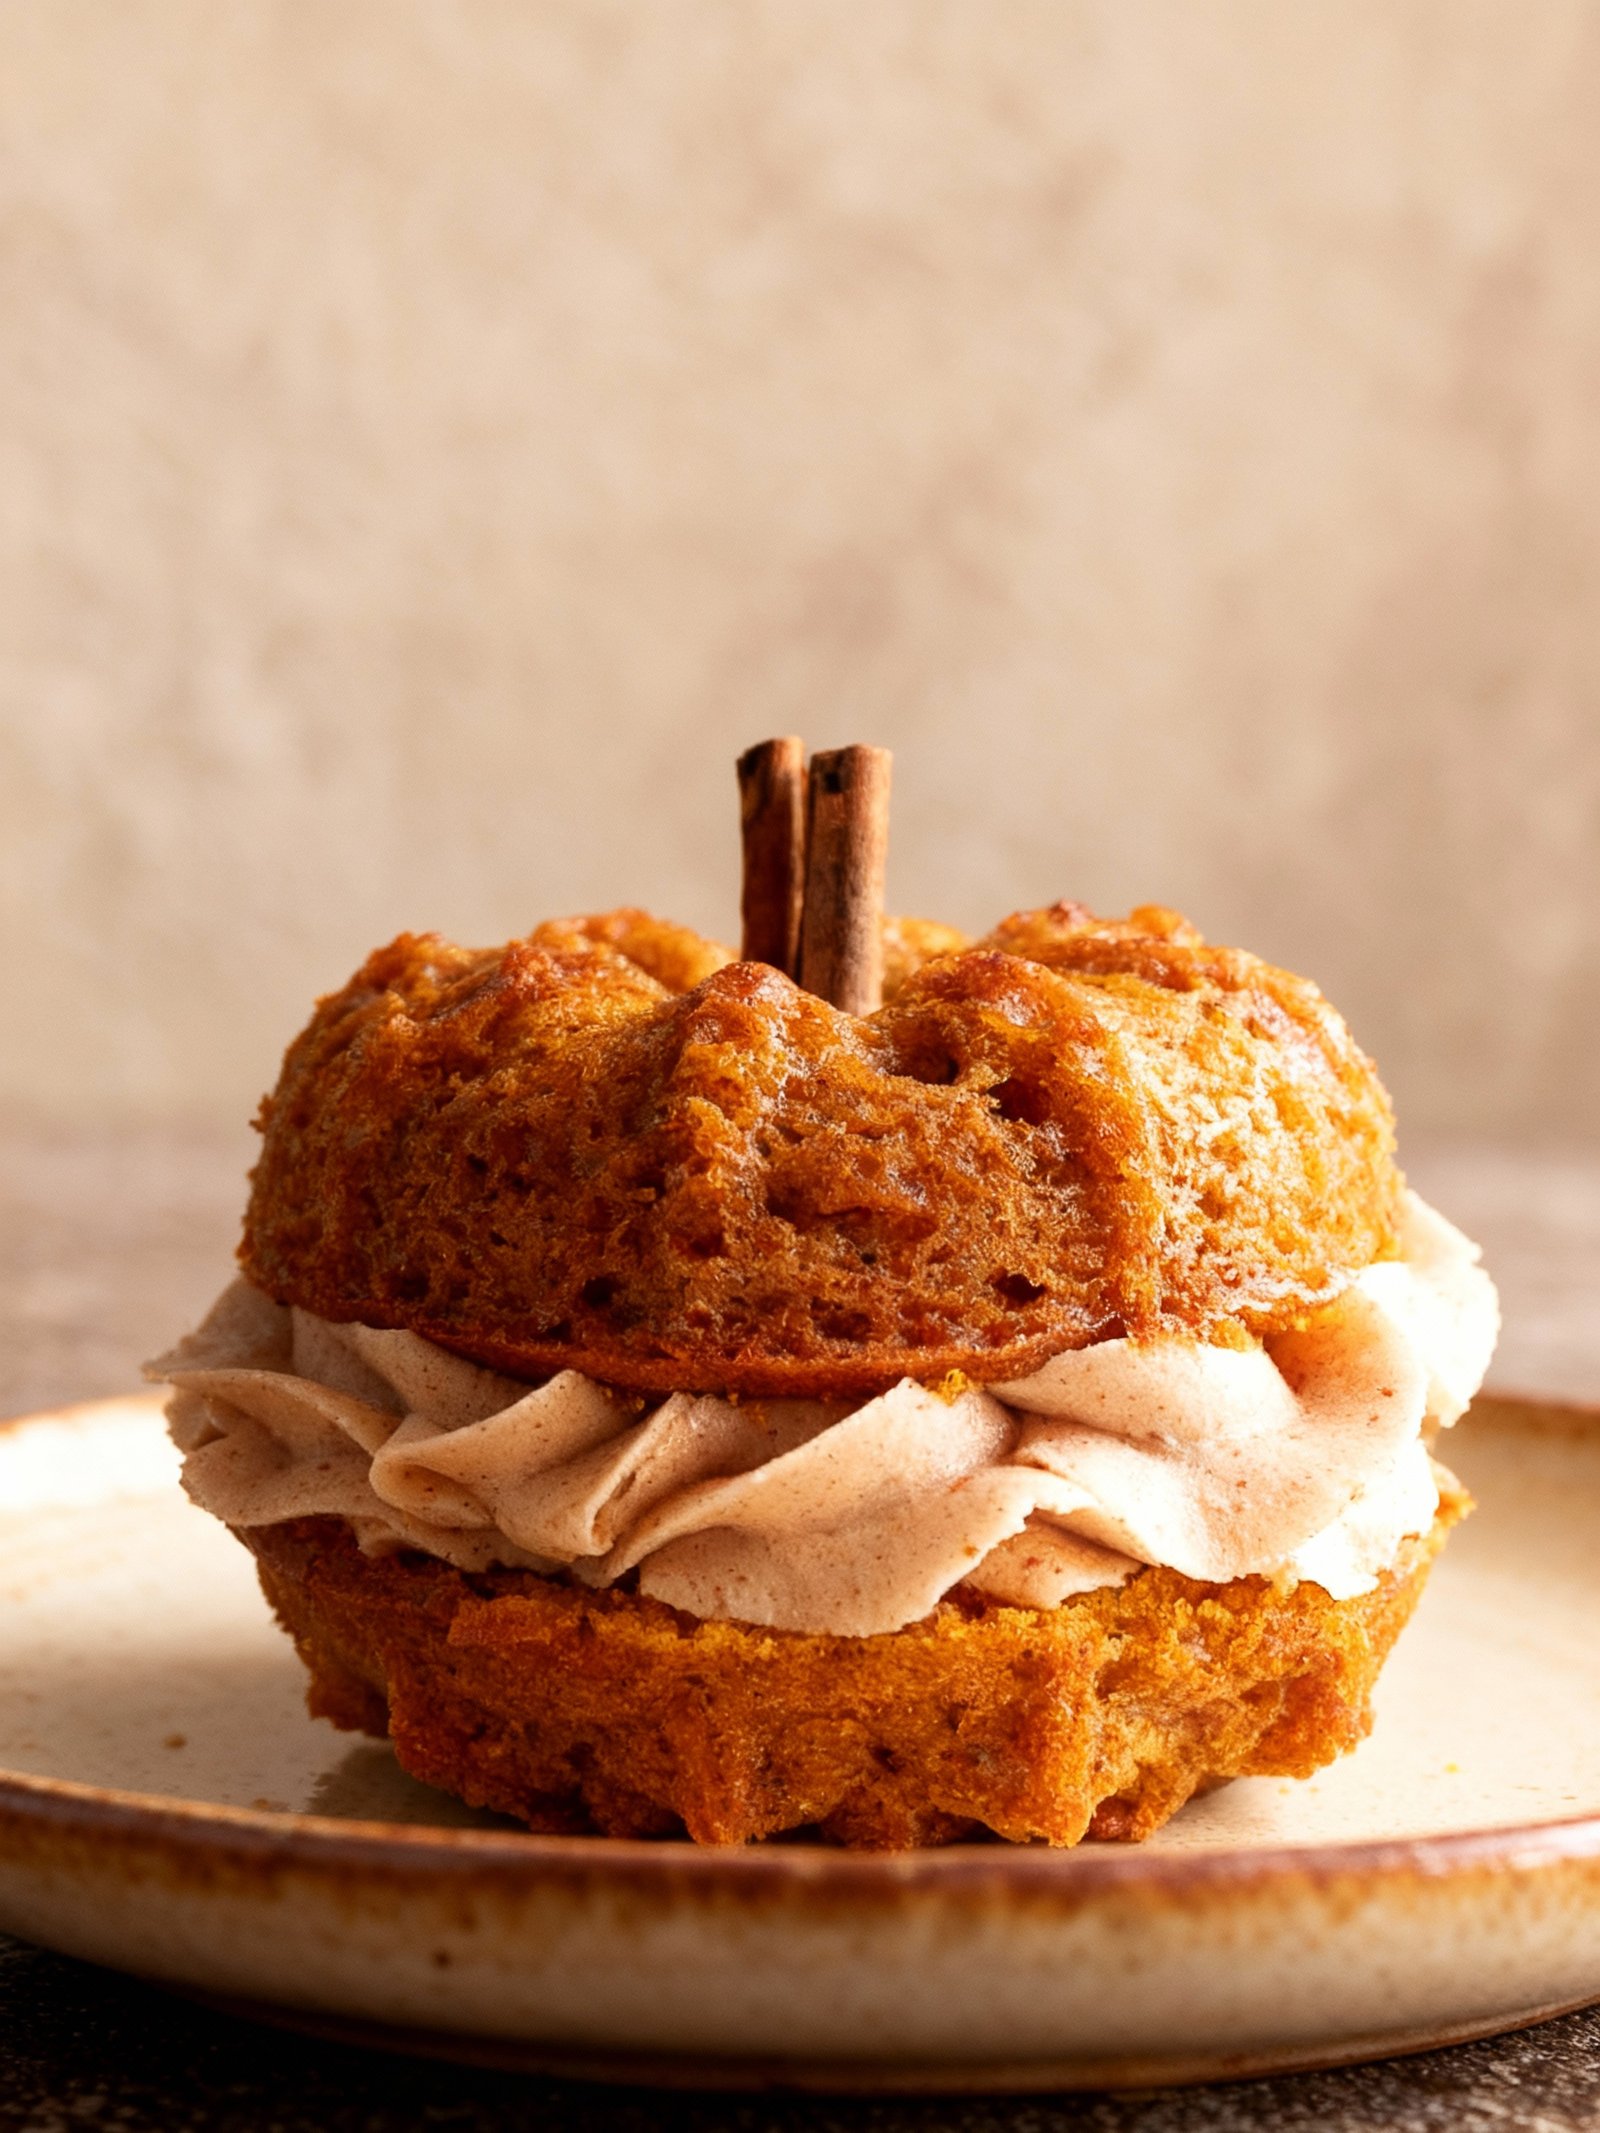
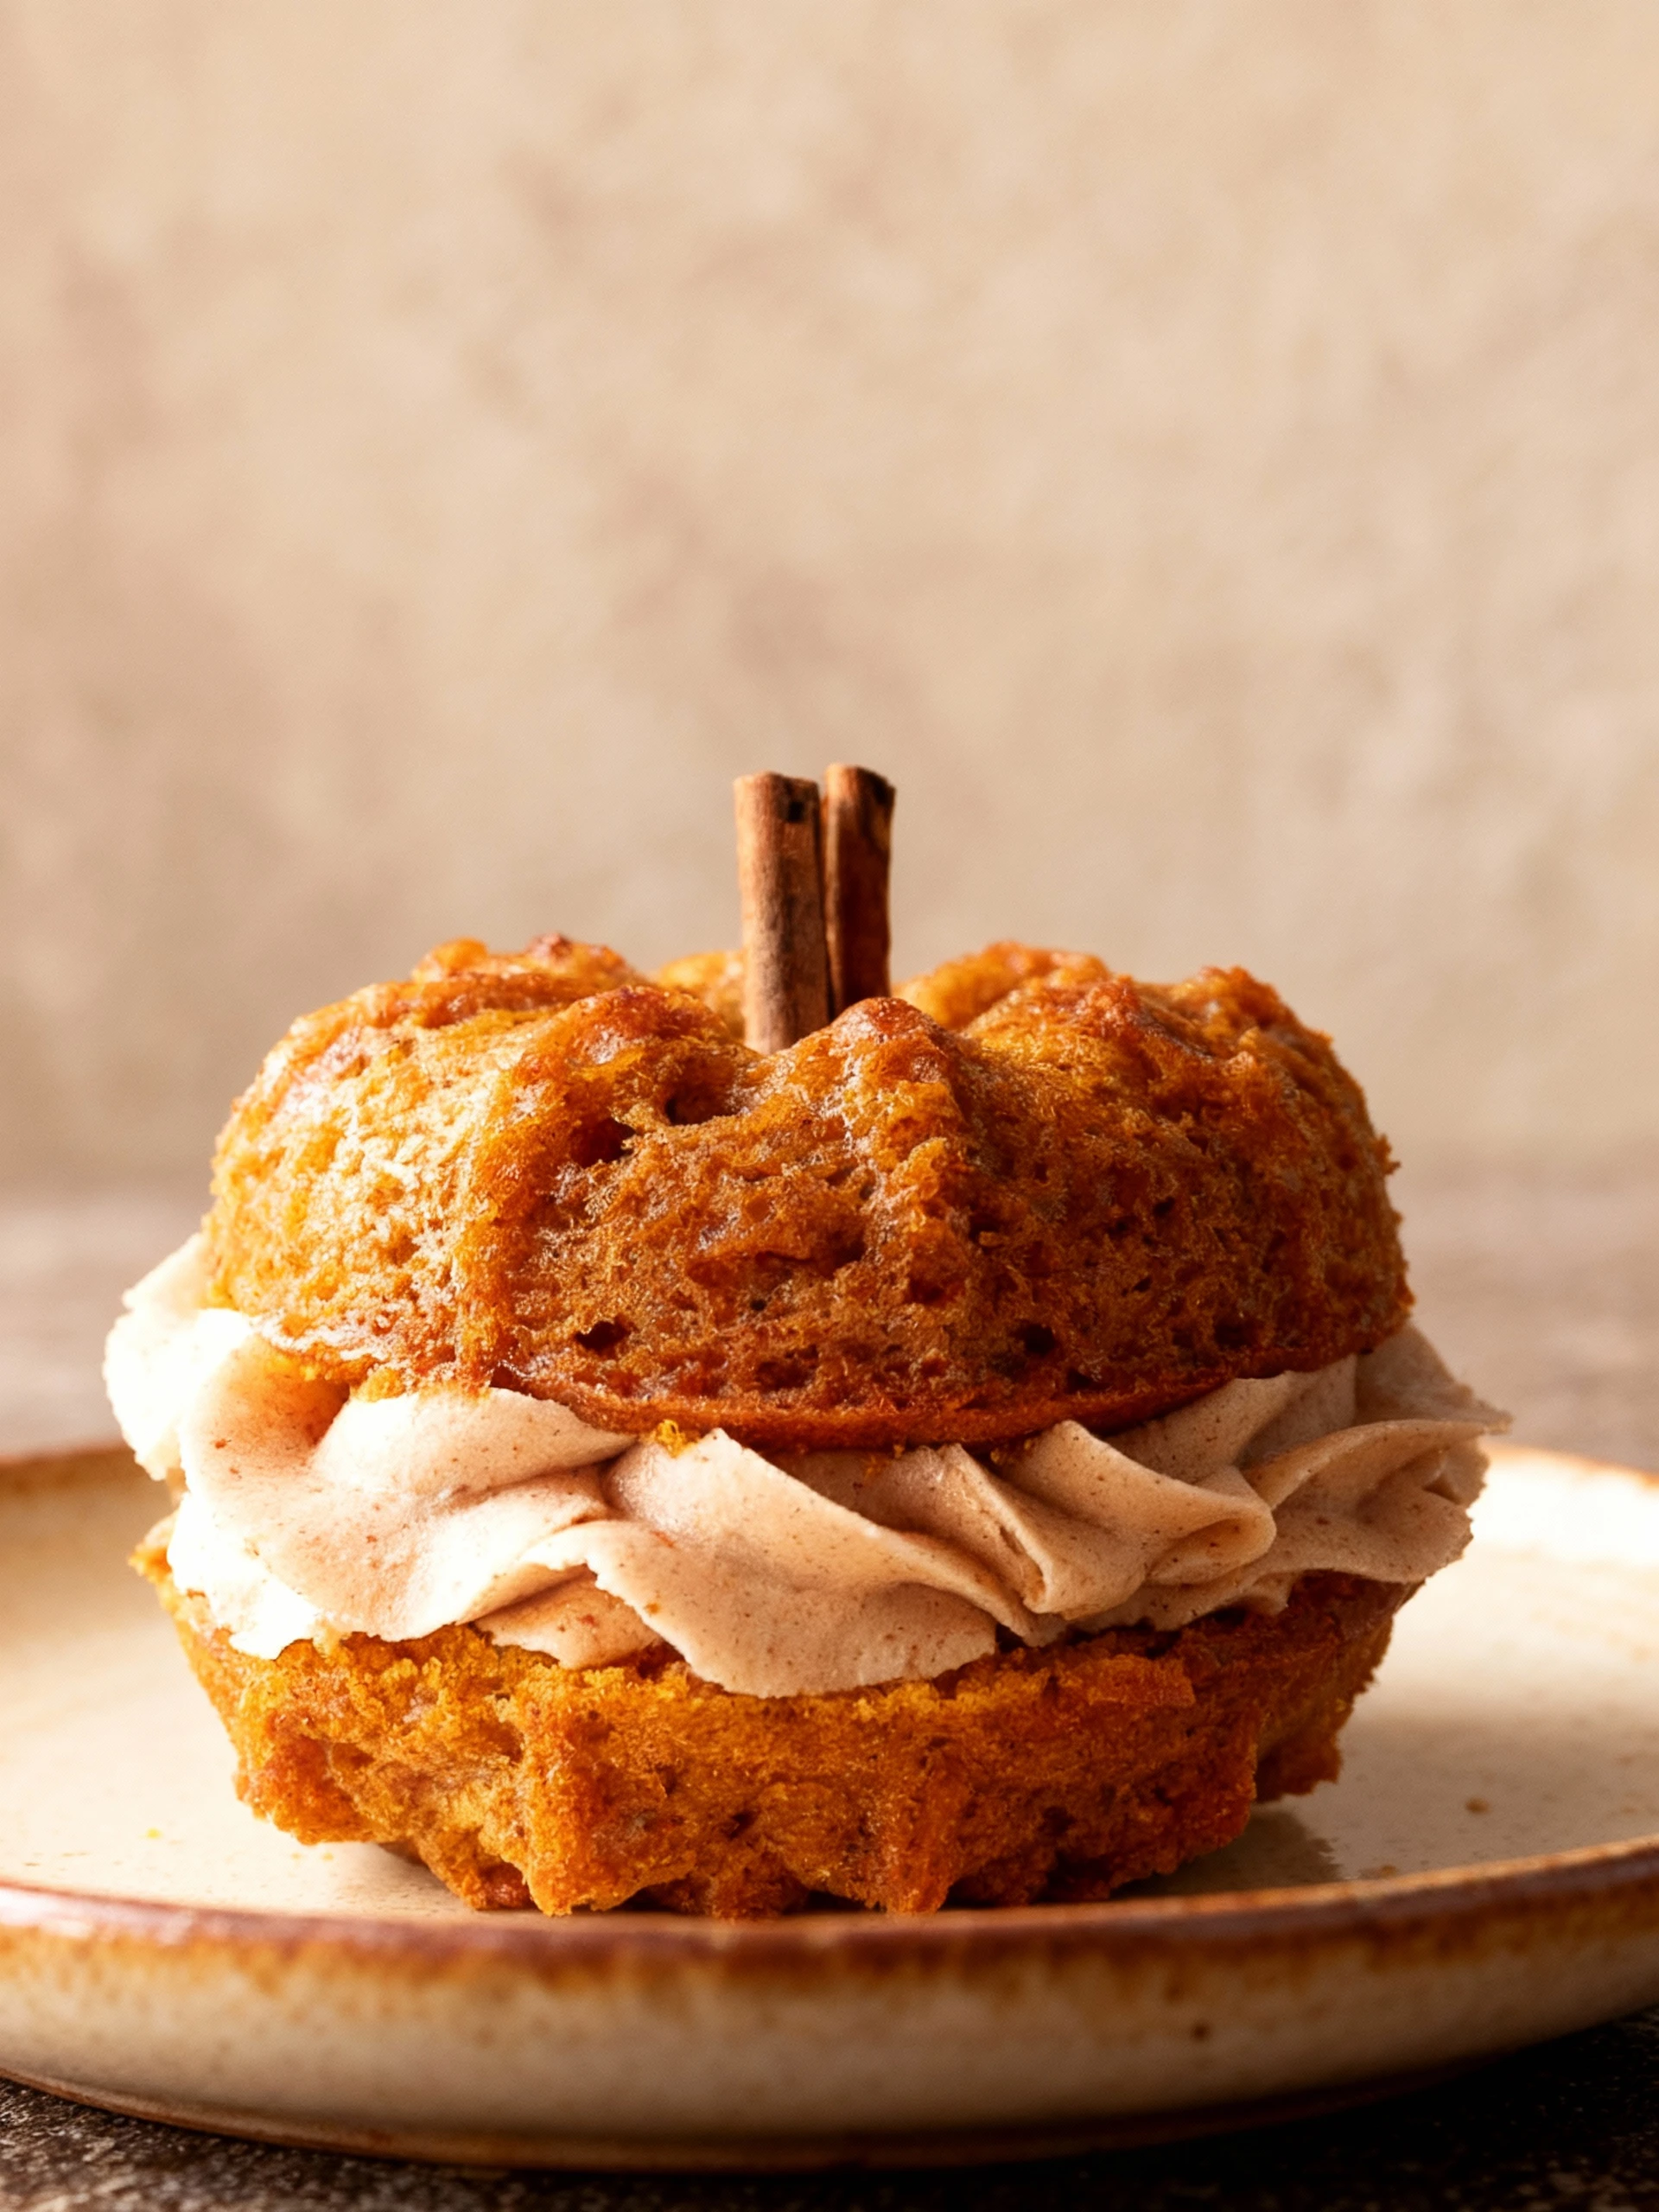
These Mini Pumpkin Bundt Cakes with Cinnamon Brown Butter Frosting are a simple & delicious fall treat. Perfect for holiday gatherings or a cozy dessert, they feature moist pumpkin spice cake topped with a rich, nutty frosting. For more festive baking ideas, try Easy Halloween Mummy Cupcakes Recipe or Spiral Halloween Cookies Recipe.
Ingredients
These warm, spiced pumpkin cupcakes deliver the perfect taste of fall with their moist, tender crumb and rich cinnamon brown butter frosting that melts in your mouth.
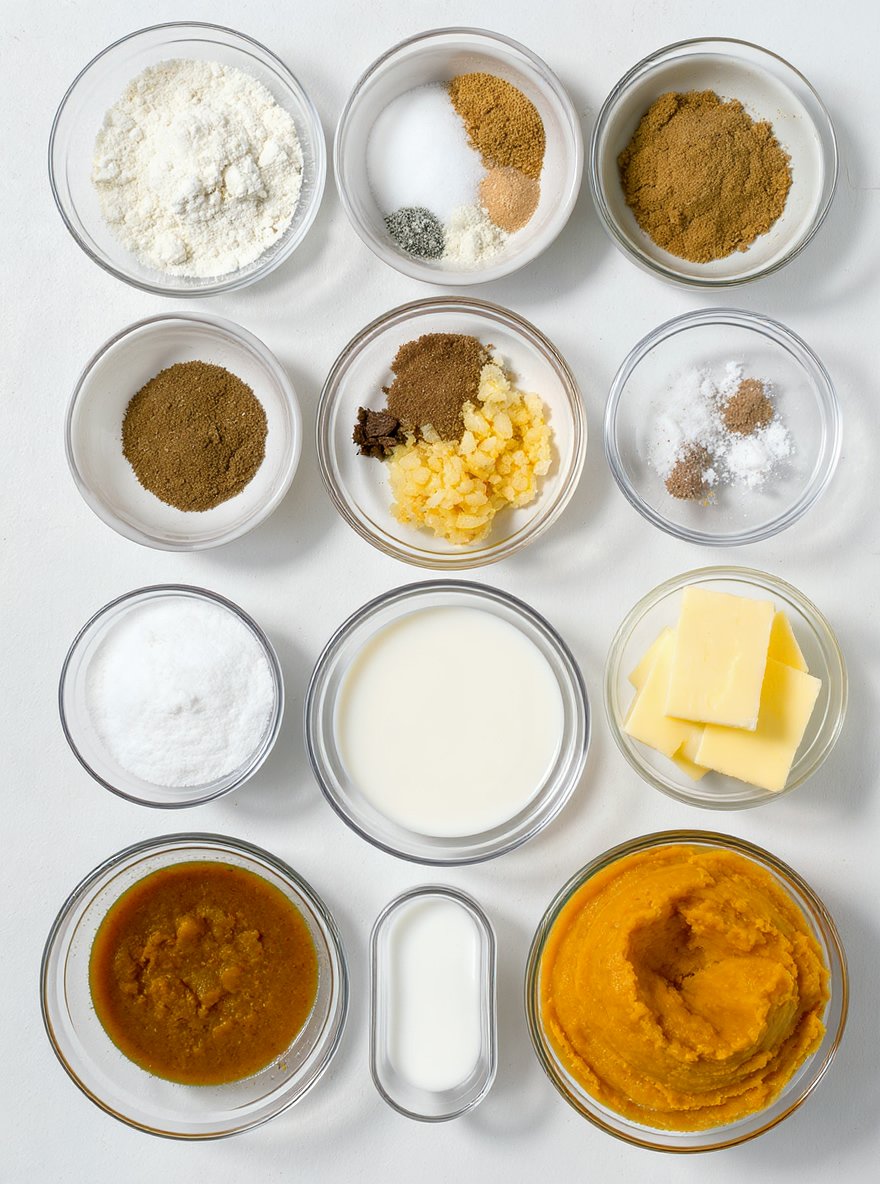
- 1 3/4 cups all-purpose flour
- 1 teaspoon baking powder
- 1/2 teaspoon baking soda
- 1/2 teaspoon salt
- 1 teaspoon ground cinnamon
- 1/2 teaspoon ground nutmeg
- 1/4 teaspoon ground cloves
- 1/4 teaspoon ground ginger
- 1/2 cup unsalted butter, softened
- 1 cup granulated sugar
- 1/2 cup brown sugar, packed
- 2 large eggs
- 1 cup canned pumpkin puree
- 1/4 cup buttermilk (or 1/4 cup milk mixed with 3/4 teaspoon vinegar)
- 1 teaspoon vanilla extract
For the Cinnamon Brown Butter Frosting
- 1/2 cup unsalted butter
- 2 cups powdered sugar
- 1 teaspoon ground cinnamon
- 2-3 tablespoons heavy cream or milk
- 1/2 teaspoon vanilla extract
Timing
| Prep Time | 10 minutes |
| Cook Time | 25 minutes |
| Total Time | 35 minutes |
Context: This recipe is about 20% faster than similar recipes.
Step-by-Step Instructions
Step 1 — Prepare the Ingredients
Measure all ingredients accurately before starting to ensure a smooth cooking process. Chop vegetables uniformly for even cooking and consistent texture.
Tip: Bring proteins to room temperature for more even cooking and better flavor absorption.
Step 2 — Preheat Cooking Equipment
Preheat your oven to 375°F (190°C) or heat your pan over medium-high heat. Proper preheating ensures immediate cooking action when ingredients are added.
Tip: Use an oven thermometer to verify temperature accuracy for consistent results.
Step 3 — Sauté Aromatics
Heat oil in your pan until shimmering but not smoking. Add chopped onions, garlic, or other aromatics and cook until fragrant and translucent, about 2-3 minutes.
Tip: Stir frequently to prevent burning and ensure even cooking of delicate aromatics.
Step 4 — Cook Main Ingredients
Add your primary protein or vegetables to the pan. Cook until properly seared or softened, turning as needed for even browning.
Tip: For meats, cook until internal temperature reaches safe levels (165°F for poultry, 145°F for pork).
Doneness cue: Proteins should release easily from the pan when properly seared.
Step 5 — Add Liquids and Simmer
Pour in broth, wine, or other cooking liquids. Bring to a boil, then reduce to a gentle simmer. Cover and cook according to recipe timing.
Tip: Maintain a steady simmer with small bubbles breaking the surface, not a rolling boil.
Step 6 — Adjust Seasoning
Taste the dish and adjust salt, pepper, and other seasonings as needed. Remember flavors concentrate as liquids reduce.
Tip: Add acidic components like lemon juice or vinegar at the end to brighten flavors.
Step 7 — Final Cooking Stage
Complete any final cooking steps such as reducing sauces, melting cheese, or achieving desired texture. Monitor closely to prevent overcooking.
Tip: Sauce is properly reduced when it coats the back of a spoon without running off immediately.
Step 8 — Rest Before Serving
Remove from heat and let the dish rest for 5-10 minutes. This allows flavors to meld and proteins to reabsorb juices.
Tip: Meat temperatures will rise 5-10°F during resting, so account for this in your cooking time.
Step 9 — Plate and Garnish
Arrange the finished dish attractively on serving plates. Add fresh herbs, citrus zest, or other garnishes for visual appeal and flavor enhancement.
Tip: Garnish just before serving to maintain freshness and vibrant colors.
Nutritional Information
| Calories | 320 |
| Protein | 18g |
| Carbohydrates | 25g |
| Fat | 15g |
| Fiber | 6g |
| Sodium | 480mg |
Note: Estimates based on typical ingredients and serving size.
Healthier Alternatives
- Lean ground turkey — A lighter protein option with a mild flavor that absorbs seasonings well.
- Cauliflower rice — Low-carb alternative with a neutral taste that pairs with any sauce.
- Coconut milk — Creamy dairy-free substitute that adds a subtle tropical sweetness.
- Tamari sauce — Gluten-free soy sauce alternative with rich umami depth and less sodium.
- Nutritional yeast — Cheesy flavor boost without dairy, perfect for sprinkling over dishes.
- Zucchini noodles — Fresh, low-carb pasta swap with a delicate texture and mild vegetable flavor.
- Mashed avocado — Creamy, dairy-free spread with healthy fats and a buttery richness.
- Herb-infused oils — Flavorful low-sodium seasoning that enhances dishes without added salt.
Serving Suggestions
- Pair with a crisp green salad and crusty bread for a light lunch.
- Serve over steamed rice or creamy mashed potatoes for a comforting dinner.
- Perfect for picnics and potlucks, as it travels well and can be enjoyed at room temperature.
- Elevate your plating by garnishing with fresh herbs and a drizzle of high-quality olive oil.
- Ideal for a festive brunch alongside scrambled eggs and fresh fruit.
- Transform leftovers into a delicious filling for wraps or sandwiches the next day.
These serving ideas will help you enjoy this dish for any meal or occasion, making it a versatile addition to your recipe collection.
Common Mistakes to Avoid
- Mistake: Overcrowding the pan. Fix: Cook in batches to ensure proper browning and avoid steaming.
- Mistake: Underseasoning during cooking. Fix: Season in layers throughout the cooking process for deeper flavor.
- Mistake: Not preheating your pan or oven. Fix: Always allow your cooking surface to reach the correct temperature for optimal results.
- Mistake: Overmixing batters and doughs. Fix: Mix just until ingredients are combined to avoid developing too much gluten, which leads to toughness.
- Mistake: Using dull knives. Fix: Keep knives sharp for safer, more precise cuts and better control.
- Mistake: Ignoring meat resting time. Fix: Let cooked meat rest before slicing to allow juices to redistribute, preventing a dry result.
- Mistake: Substituting ingredients without considering their role. Fix: Understand the function of an ingredient (e.g., leavening, thickening) before making a swap.
- Mistake: Inaccurate measuring. Fix: Use a kitchen scale for precise measurements, especially with baking, for consistent outcomes.
Storing Tips
- Fridge: Store in an airtight container for up to 3-4 days. Ensure it cools to room temperature before refrigerating.
- Freezer: Freeze in freezer-safe containers or heavy-duty freezer bags for up to 3 months. Thaw in the refrigerator overnight before reheating.
- Reheat: Reheat thoroughly until the internal temperature reaches 165°F (74°C). Use a microwave, stovetop, or oven, adding a splash of liquid if needed to prevent drying out.
Always use shallow containers for quicker cooling and reheating to maintain food safety and quality.
Conclusion
These mini pumpkin bundt cakes with cinnamon brown butter frosting are the perfect cozy fall treat. I hope you love them as much as we do! Be sure to try the recipe and leave a comment with your thoughts. For more seasonal inspiration, check out our Roasted Butternut Squash and Roasted Acorn Squash recipes.
PrintMini Pumpkin Bundt Cakes with Cinnamon Brown Butter Frosting

Moist mini pumpkin bundt cakes topped with a rich cinnamon brown butter frosting, perfect for fall gatherings and holiday treats.
- Prep Time: 20 minutes
- Cook Time: 20 minutes
- Total Time: 40 minutes
- Yield: 12 mini bundt cakes 1x
- Method: Dessert
- Cuisine: American
Ingredients
- 1 3/4 cups all-purpose flour
- 1 teaspoon baking powder
- 1/2 teaspoon baking soda
- 1/2 teaspoon salt
- 1 teaspoon ground cinnamon
- 1/2 teaspoon ground nutmeg
- 1/4 teaspoon ground cloves
- 1/4 teaspoon ground ginger
- 1/2 cup unsalted butter, softened
- 1 cup granulated sugar
- 1/2 cup brown sugar, packed
- 2 large eggs
- 1 cup canned pumpkin puree
- 1/4 cup buttermilk
- 1 teaspoon vanilla extract
- For the Cinnamon Brown Butter Frosting:
- 1/2 cup unsalted butter
- 2 cups powdered sugar
- 1 teaspoon ground cinnamon
- 2–3 tablespoons heavy cream or milk
- 1/2 teaspoon vanilla extract
Instructions
- Preheat oven to 350°F (175°C). Grease and flour mini bundt pans.
- In a medium bowl, whisk together flour, baking powder, baking soda, salt, cinnamon, nutmeg, cloves, and ginger.
- In a large bowl, beat softened butter with granulated and brown sugars until light and fluffy.
- Add eggs one at a time, beating well after each addition.
- Mix in pumpkin puree, buttermilk, and vanilla extract until combined.
- Gradually add dry ingredients to wet ingredients, mixing until just combined.
- Divide batter evenly among prepared mini bundt pans, filling each about 2/3 full.
- Bake for 18-22 minutes or until a toothpick inserted in the center comes out clean.
- Allow cakes to cool in pans for 10 minutes, then invert onto wire racks to cool completely.
- To make the frosting, melt butter in a saucepan over medium heat until it turns golden brown and smells nutty, about 5 minutes. Remove from heat and let cool slightly.
- In a bowl, whisk powdered sugar, cinnamon, and vanilla. Slowly add brown butter and enough cream to reach desired consistency, whisking until smooth.
- Frost cooled mini bundt cakes with cinnamon brown butter frosting.
Notes
Use fresh spices for the best flavor. Be careful not to overbake the mini bundt cakes to keep them moist. The brown butter frosting can be made ahead and refrigerated; bring to room temperature before frosting.
Nutrition
- Calories: 320
- Sugar: 30g
- Sodium: 220mg
- Fat: 14g
- Saturated Fat: 8g
- Unsaturated Fat: 6g
- Trans Fat: 0g
- Carbohydrates: 45g
- Fiber: 2g
- Protein: 4g
- Cholesterol: 55mg
FAQs
Can I make this recipe ahead of time?
Yes, you can prepare this recipe in advance. It stores well in the refrigerator for up to two days. Reheat gently before serving.
What can I substitute for a key ingredient?
You can substitute the main ingredient with a similar alternative. This recipe is versatile and will still turn out delicious.
How do I adjust the recipe for more servings?
Simply double or triple the ingredients to scale the recipe up. Ensure your cooking vessel is large enough to accommodate the increased volume.


