Introduction
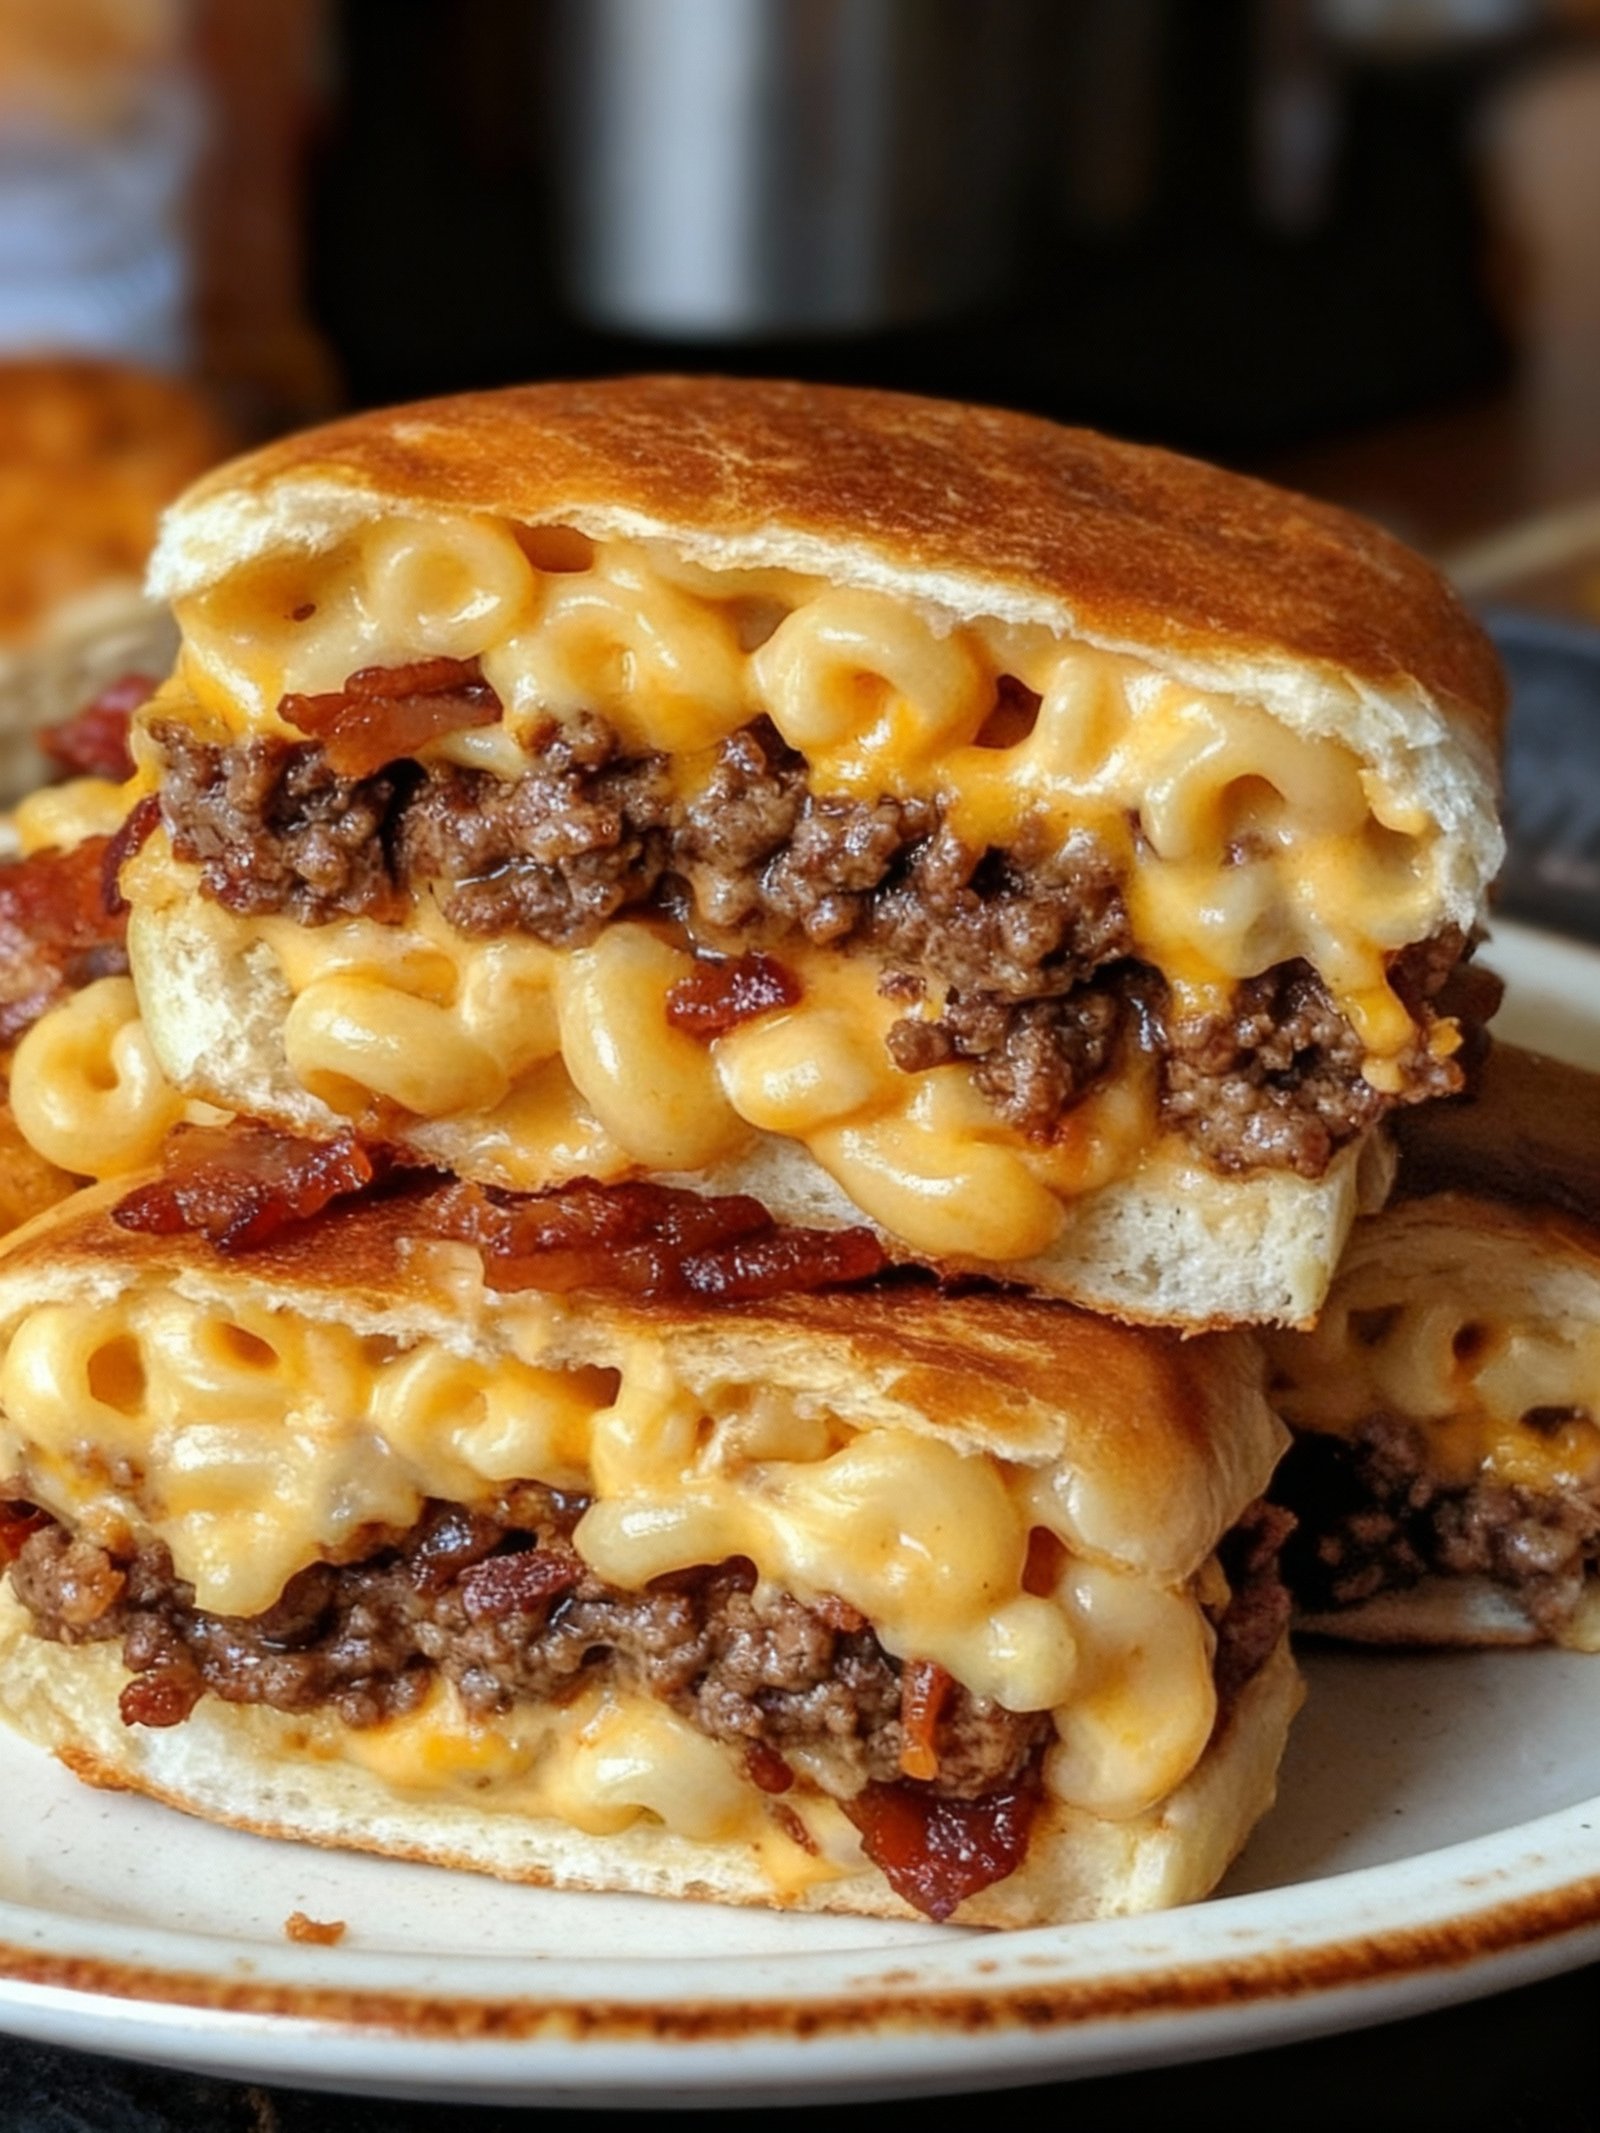
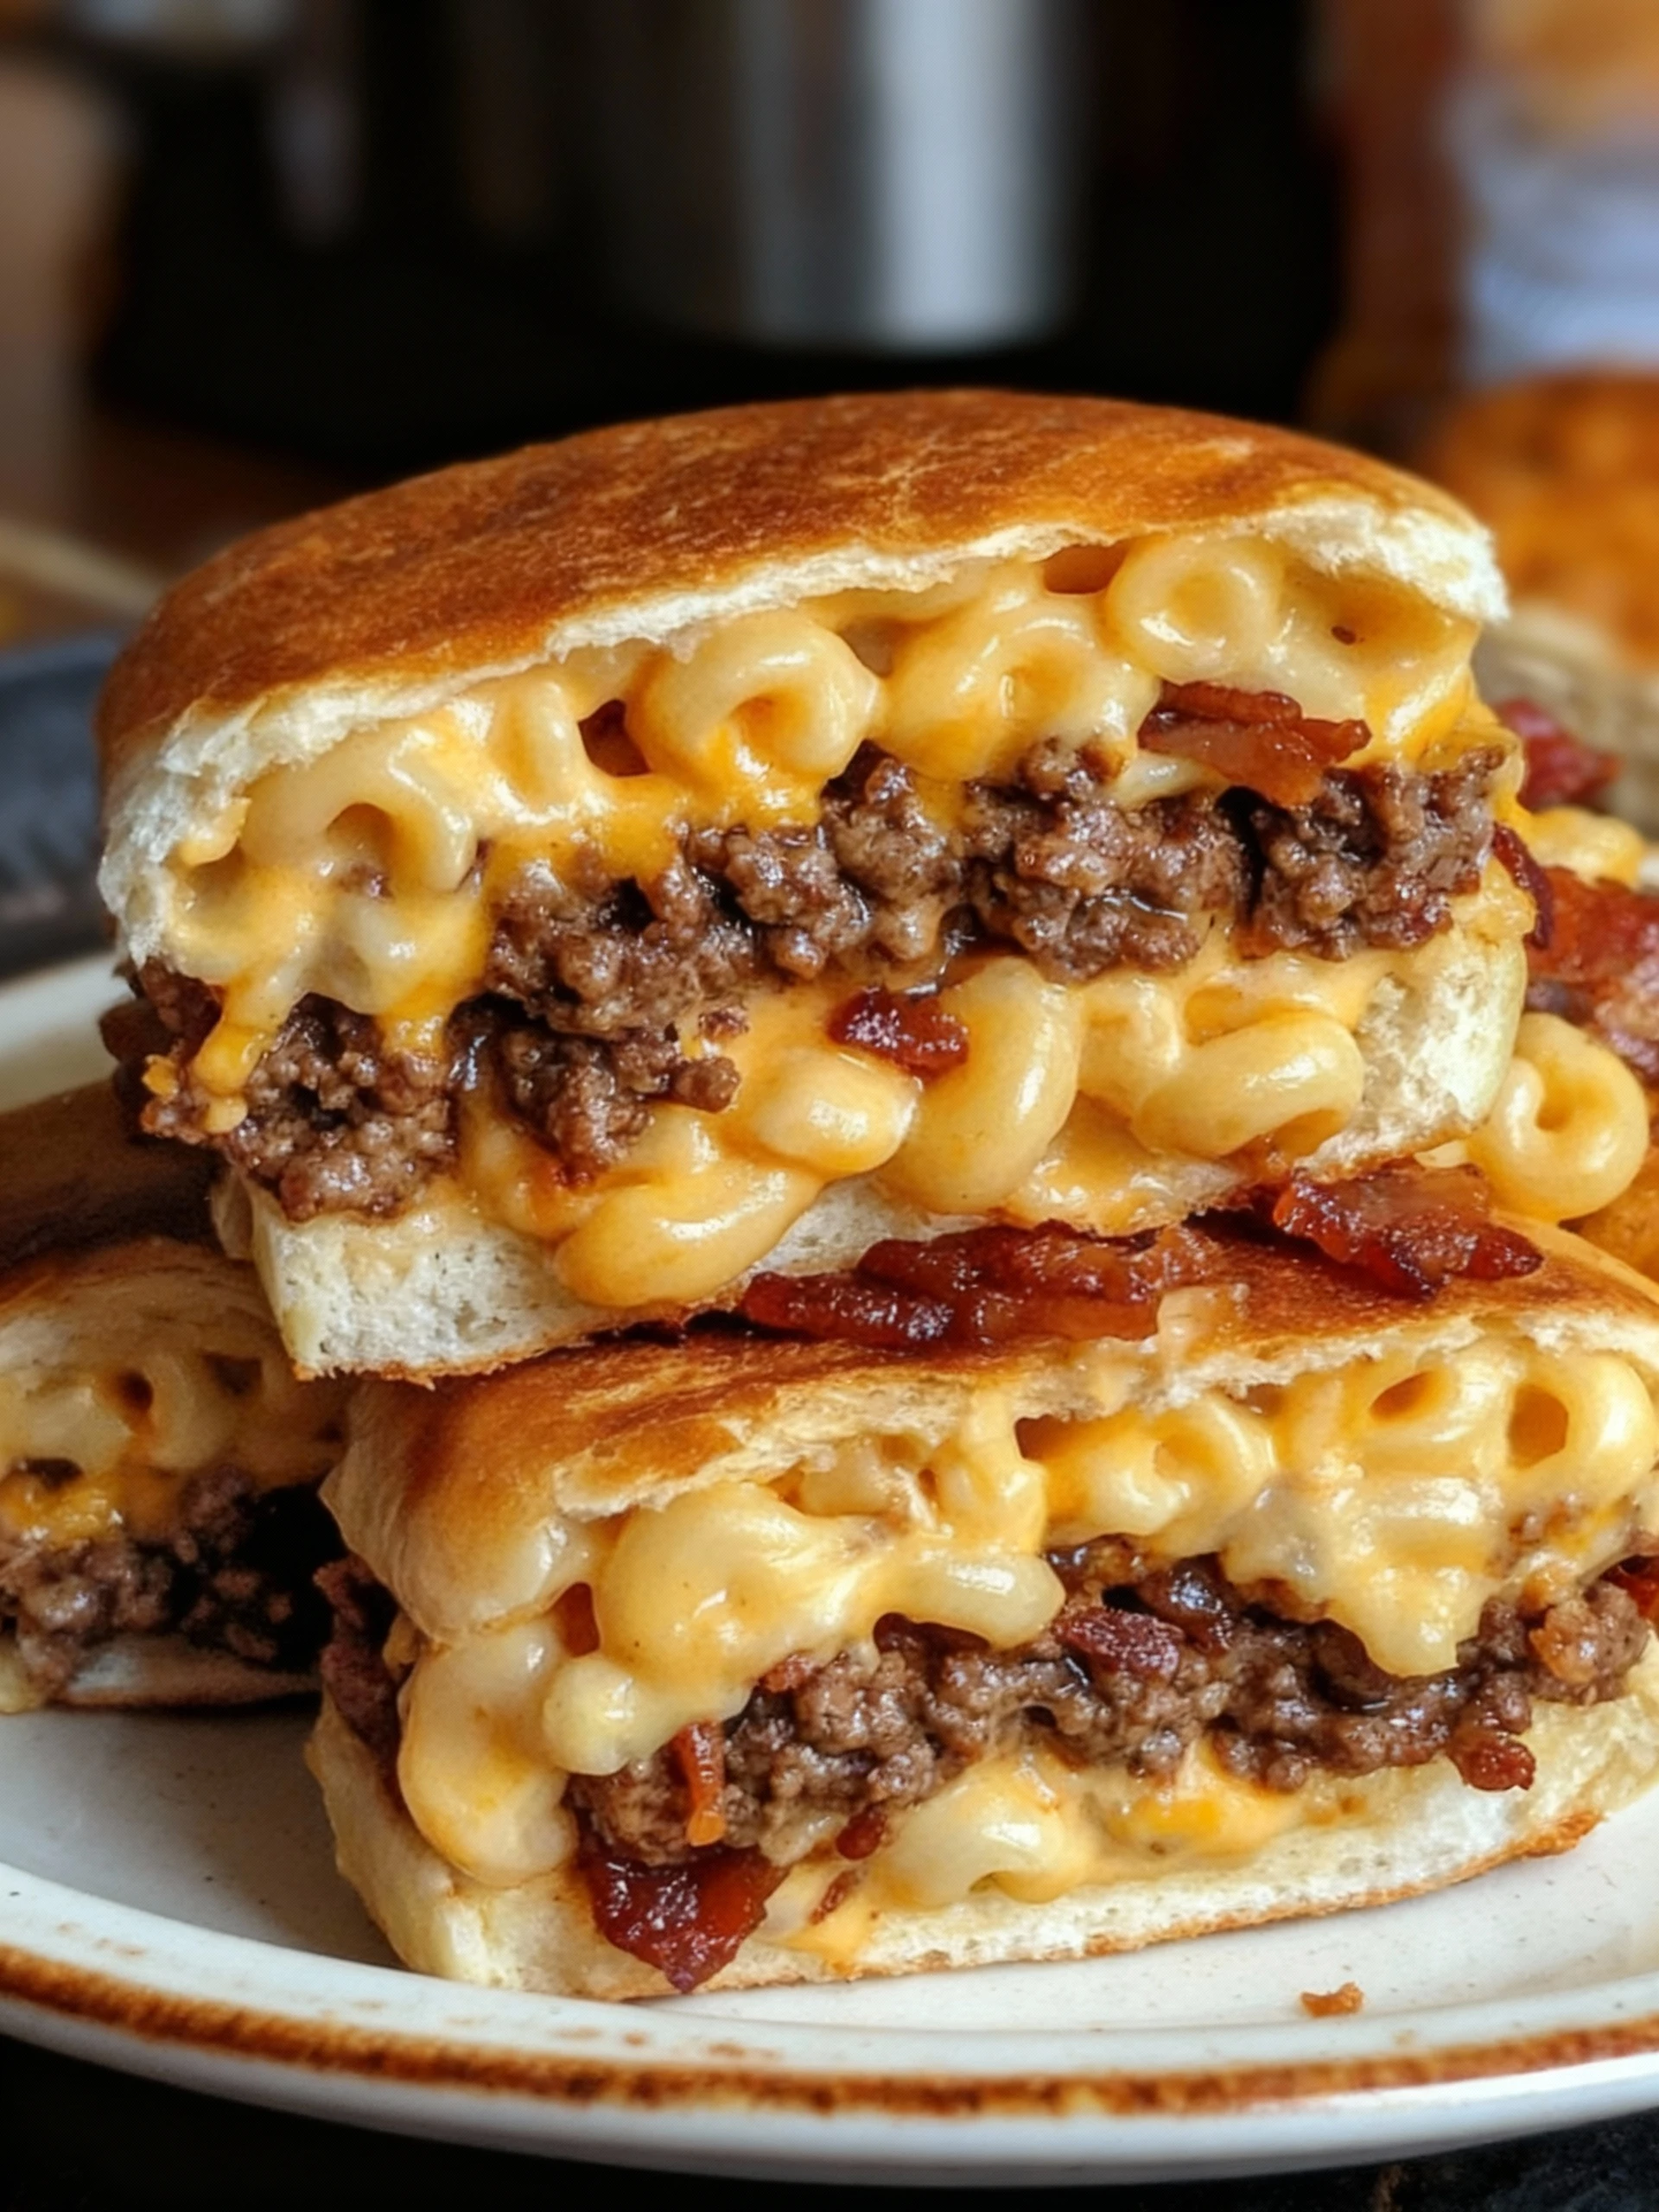
These Mac Cheese Bacon Burger Rolls are a simple and delicious twist on comfort food classics. Imagine creamy macaroni and cheese, savory ground beef, and crispy bacon all wrapped in a soft roll and baked to perfection. They make a fantastic party appetizer or family dinner. For another easy side, try this Cornbread Casserole Recipe Easy.
Ingredients
These savory BBQ Bacon Mac & Cheese Biscuit Bombs deliver a perfect combination of flaky biscuit dough, creamy macaroni, smoky bacon, and tangy barbecue sauce in every irresistible bite.
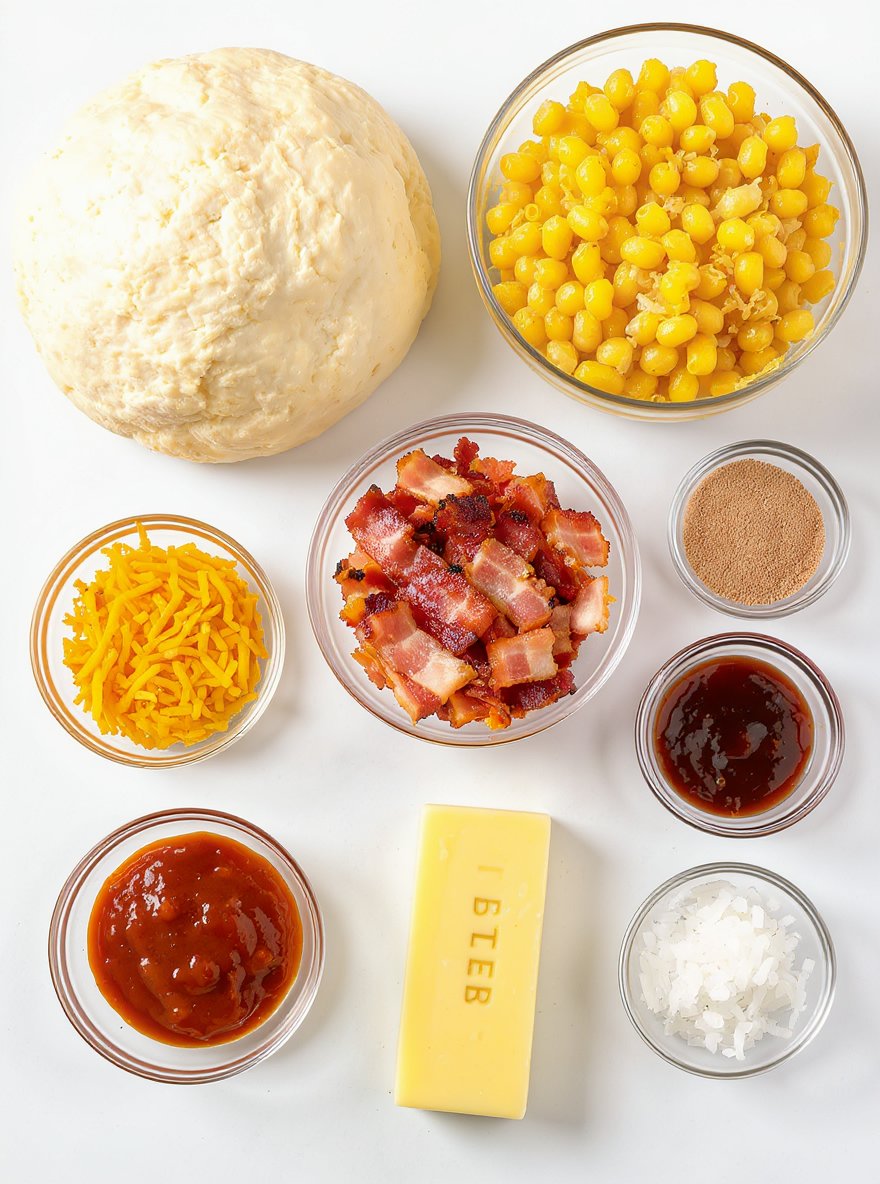
- 1 package refrigerated biscuit dough (8 count)
- 2 cups cooked macaroni and cheese
- 6 slices cooked bacon, crumbled
- 1 cup shredded cheddar cheese
- 1/4 cup BBQ sauce
- 1 tablespoon Worcestershire sauce
- 1 tablespoon dried minced onion
- Butter for brushing rolls
Timing
| Prep Time | 10 minutes |
| Cook Time | 15 minutes |
| Total Time | 25 minutes |
Context: This recipe is approximately 20% faster than similar recipes.
Step-by-Step Instructions
Step 1 — Prepare the Dough
Combine flour, yeast, salt, and warm water in a large mixing bowl. Mix until a shaggy dough forms.
Tip: Use water heated to 105–115°F (40–46°C) to activate the yeast without killing it.
Step 2 — Knead the Dough
Turn the dough onto a floured surface and knead for 8–10 minutes until smooth and elastic.
Tip: The dough is ready when it springs back slowly after poking.
Step 3 — First Rise
Place the dough in a lightly oiled bowl, cover, and let rise in a warm place for 1–2 hours.
Tip: The dough should double in size. If your kitchen is cool, place the bowl in a turned-off oven with the light on.
Step 4 — Shape the Dough
Punch down the risen dough and divide it into equal portions. Shape each into a smooth ball or loaf.
Tip: For even baking, weigh portions with a kitchen scale.
Step 5 — Second Rise
Place shaped dough on a parchment-lined baking sheet, cover, and let rise again for 30–60 minutes.
Tip: The dough is ready when it holds a slight indentation after gentle poking.
Step 6 — Preheat and Score
Preheat your oven to 425°F (220°C). Just before baking, score the top of each loaf with a sharp knife or lame.
Tip: Scoring controls expansion and creates an attractive crust.
Step 7 — Bake the Bread
Bake for 25–35 minutes until the crust is deep golden brown and the loaf sounds hollow when tapped.
Tip: For a crispier crust, place a pan of water in the oven to create steam.
Step 8 — Check for Doneness
Verify doneness with an instant-read thermometer—internal temperature should reach 190–210°F (88–99°C).
Tip: Temperature is more reliable than color alone for determining when bread is fully baked.
Step 9 — Cool Completely
Transfer baked bread to a wire rack and let cool completely before slicing—at least 1–2 hours.
Tip: Slicing warm bread can result in a gummy texture as steam escapes prematurely.
Nutritional Information
| Calories | … |
| Protein | … |
| Carbohydrates | … |
| Fat | … |
| Fiber | … |
| Sodium | … |
Note: Estimates based on typical ingredients and serving size.
Healthier Alternatives
- Lean ground turkey — Lighter protein with mild savory notes
- Cauliflower rice — Lower-carb base with subtle nutty flavor
- Coconut milk — Creamy dairy-free alternative with tropical sweetness
- Tamari sauce — Gluten-free soy sauce substitute with rich umami
- Nutritional yeast — Cheesy flavor without dairy, low-sodium option
- Zucchini noodles — Fresh, low-carb pasta alternative
- Mashed avocado — Creamy texture with healthy fats, no dairy
- Herb-infused oils — Flavor boost without excess salt
Serving Suggestions
- Pair with a crisp green salad and crusty bread for a light lunch.
- Serve alongside roasted vegetables for a cozy, comforting dinner.
- Perfect for picnics and potlucks; transport in a sealed container.
- Garnish with fresh herbs and a drizzle of high-quality olive oil for an elegant touch.
- Accompany with a chilled glass of your favorite white wine for a refreshing meal.
- Ideal for meal prep; portion into individual containers for easy weekday lunches.
For a beautiful presentation, serve on a colorful platter and sprinkle with toasted nuts or seeds for added texture and visual appeal.
Common Mistakes to Avoid
- Mistake: Using cold eggs straight from the fridge. Fix: Bring eggs to room temperature for better emulsification and a smoother batter.
- Mistake: Overmixing the batter until gluten develops. Fix: Mix just until ingredients are combined to keep baked goods tender.
- Mistake: Not preheating the oven properly. Fix: Always preheat for at least 15–20 minutes to ensure even cooking from the start.
- Mistake: Substituting ingredients without considering their function. Fix: Understand the role of each ingredient before making any swaps.
- Mistake: Opening the oven door too early during baking. Fix: Avoid opening the door until at least ¾ of the baking time has passed.
- Mistake: Using stale baking powder or soda. Fix: Test leavening agents for freshness to ensure proper rise and lift.
- Mistake: Incorrectly measuring flour by scooping from the bag. Fix: Spoon flour into the measuring cup and level it off for accuracy.
- Mistake: Ignoring recipe instructions for pan preparation. Fix: Always grease, flour, or line pans as directed to prevent sticking.
Storing Tips
- Fridge: Store in an airtight container for up to 3-4 days. Ensure the food cools to room temperature before refrigerating.
- Freezer: Use freezer-safe bags or containers for up to 3 months. Label with the date for easy tracking.
- Reheat: Heat thoroughly until the internal temperature reaches 165°F (74°C) to ensure food safety. Use a microwave, oven, or stovetop as appropriate.
Always allow hot food to cool slightly before storing to maintain quality and safety. Divide large portions into smaller containers for faster cooling and easier reheating.
Conclusion
These Mac Cheese Bacon Burger Rolls are the ultimate comfort food mashup, combining classic flavors in a fun, handheld format. We hope you love them as much as we do! Give the recipe a try and share your results in the comments below. For more delicious ideas, check out our Loaded BBQ Bacon Ranch Tater Tot Casserole Recipe and Cheesy Sausage & Bacon Baked Dip Recipe. Don’t forget to subscribe for more tasty recipes!
PrintMac Cheese Bacon Burger Rolls

Delicious burger rolls stuffed with creamy macaroni and cheese and crispy bacon, perfect for a comforting and indulgent meal.
- Prep Time: 15 minutes
- Cook Time: 18 minutes
- Total Time: 33 minutes
- Yield: 8 rolls 1x
- Method: Main Course
- Cuisine: American
Ingredients
- 1 package refrigerated biscuit dough (8 count)
- 2 cups cooked macaroni and cheese
- 6 slices cooked bacon, crumbled
- 1 cup shredded cheddar cheese
- 1/4 cup BBQ sauce
- 1 tablespoon Worcestershire sauce
- 1 tablespoon dried minced onion
- Butter for brushing rolls
Instructions
- Preheat oven to 375°F (190°C).
- In a bowl, mix cooked macaroni and cheese with crumbled bacon, BBQ sauce, Worcestershire sauce, and dried minced onion.
- Flatten each biscuit dough piece into a circle on a lightly floured surface.
- Place a spoonful of the mac and cheese mixture in the center of each dough circle.
- Sprinkle shredded cheddar cheese over the filling.
- Fold the dough around the filling and pinch edges to seal, forming rolls.
- Place rolls seam side down on a greased baking sheet.
- Brush tops with melted butter.
- Bake for 15-18 minutes or until golden brown.
- Let cool slightly before serving.
Notes
For best results, use freshly cooked macaroni and cheese and ensure the rolls are sealed tightly to prevent filling leakage. Serve warm for a gooey, cheesy experience.
Nutrition
- Calories: 450
- Sugar: 3
- Sodium: 700
- Fat: 25
- Saturated Fat: 12
- Unsaturated Fat: 10
- Trans Fat: 0
- Carbohydrates: 35
- Fiber: 1
- Protein: 15
- Cholesterol: 60
FAQs
Can I make this recipe ahead of time?
Yes, this recipe can be prepared in advance. Follow the instructions up to the baking step, then cover and refrigerate. Bake when ready to serve for the best texture.
What can I use as a substitute for buttermilk?
You can make a quick buttermilk substitute by adding one tablespoon of lemon juice or white vinegar to one cup of regular milk. Let it sit for 5-10 minutes before using it in the recipe.
How should I store any leftovers?
Store any leftover recipe in an airtight container at room temperature for up to two days. For longer storage, keep it in the refrigerator to maintain freshness.


