Introduction
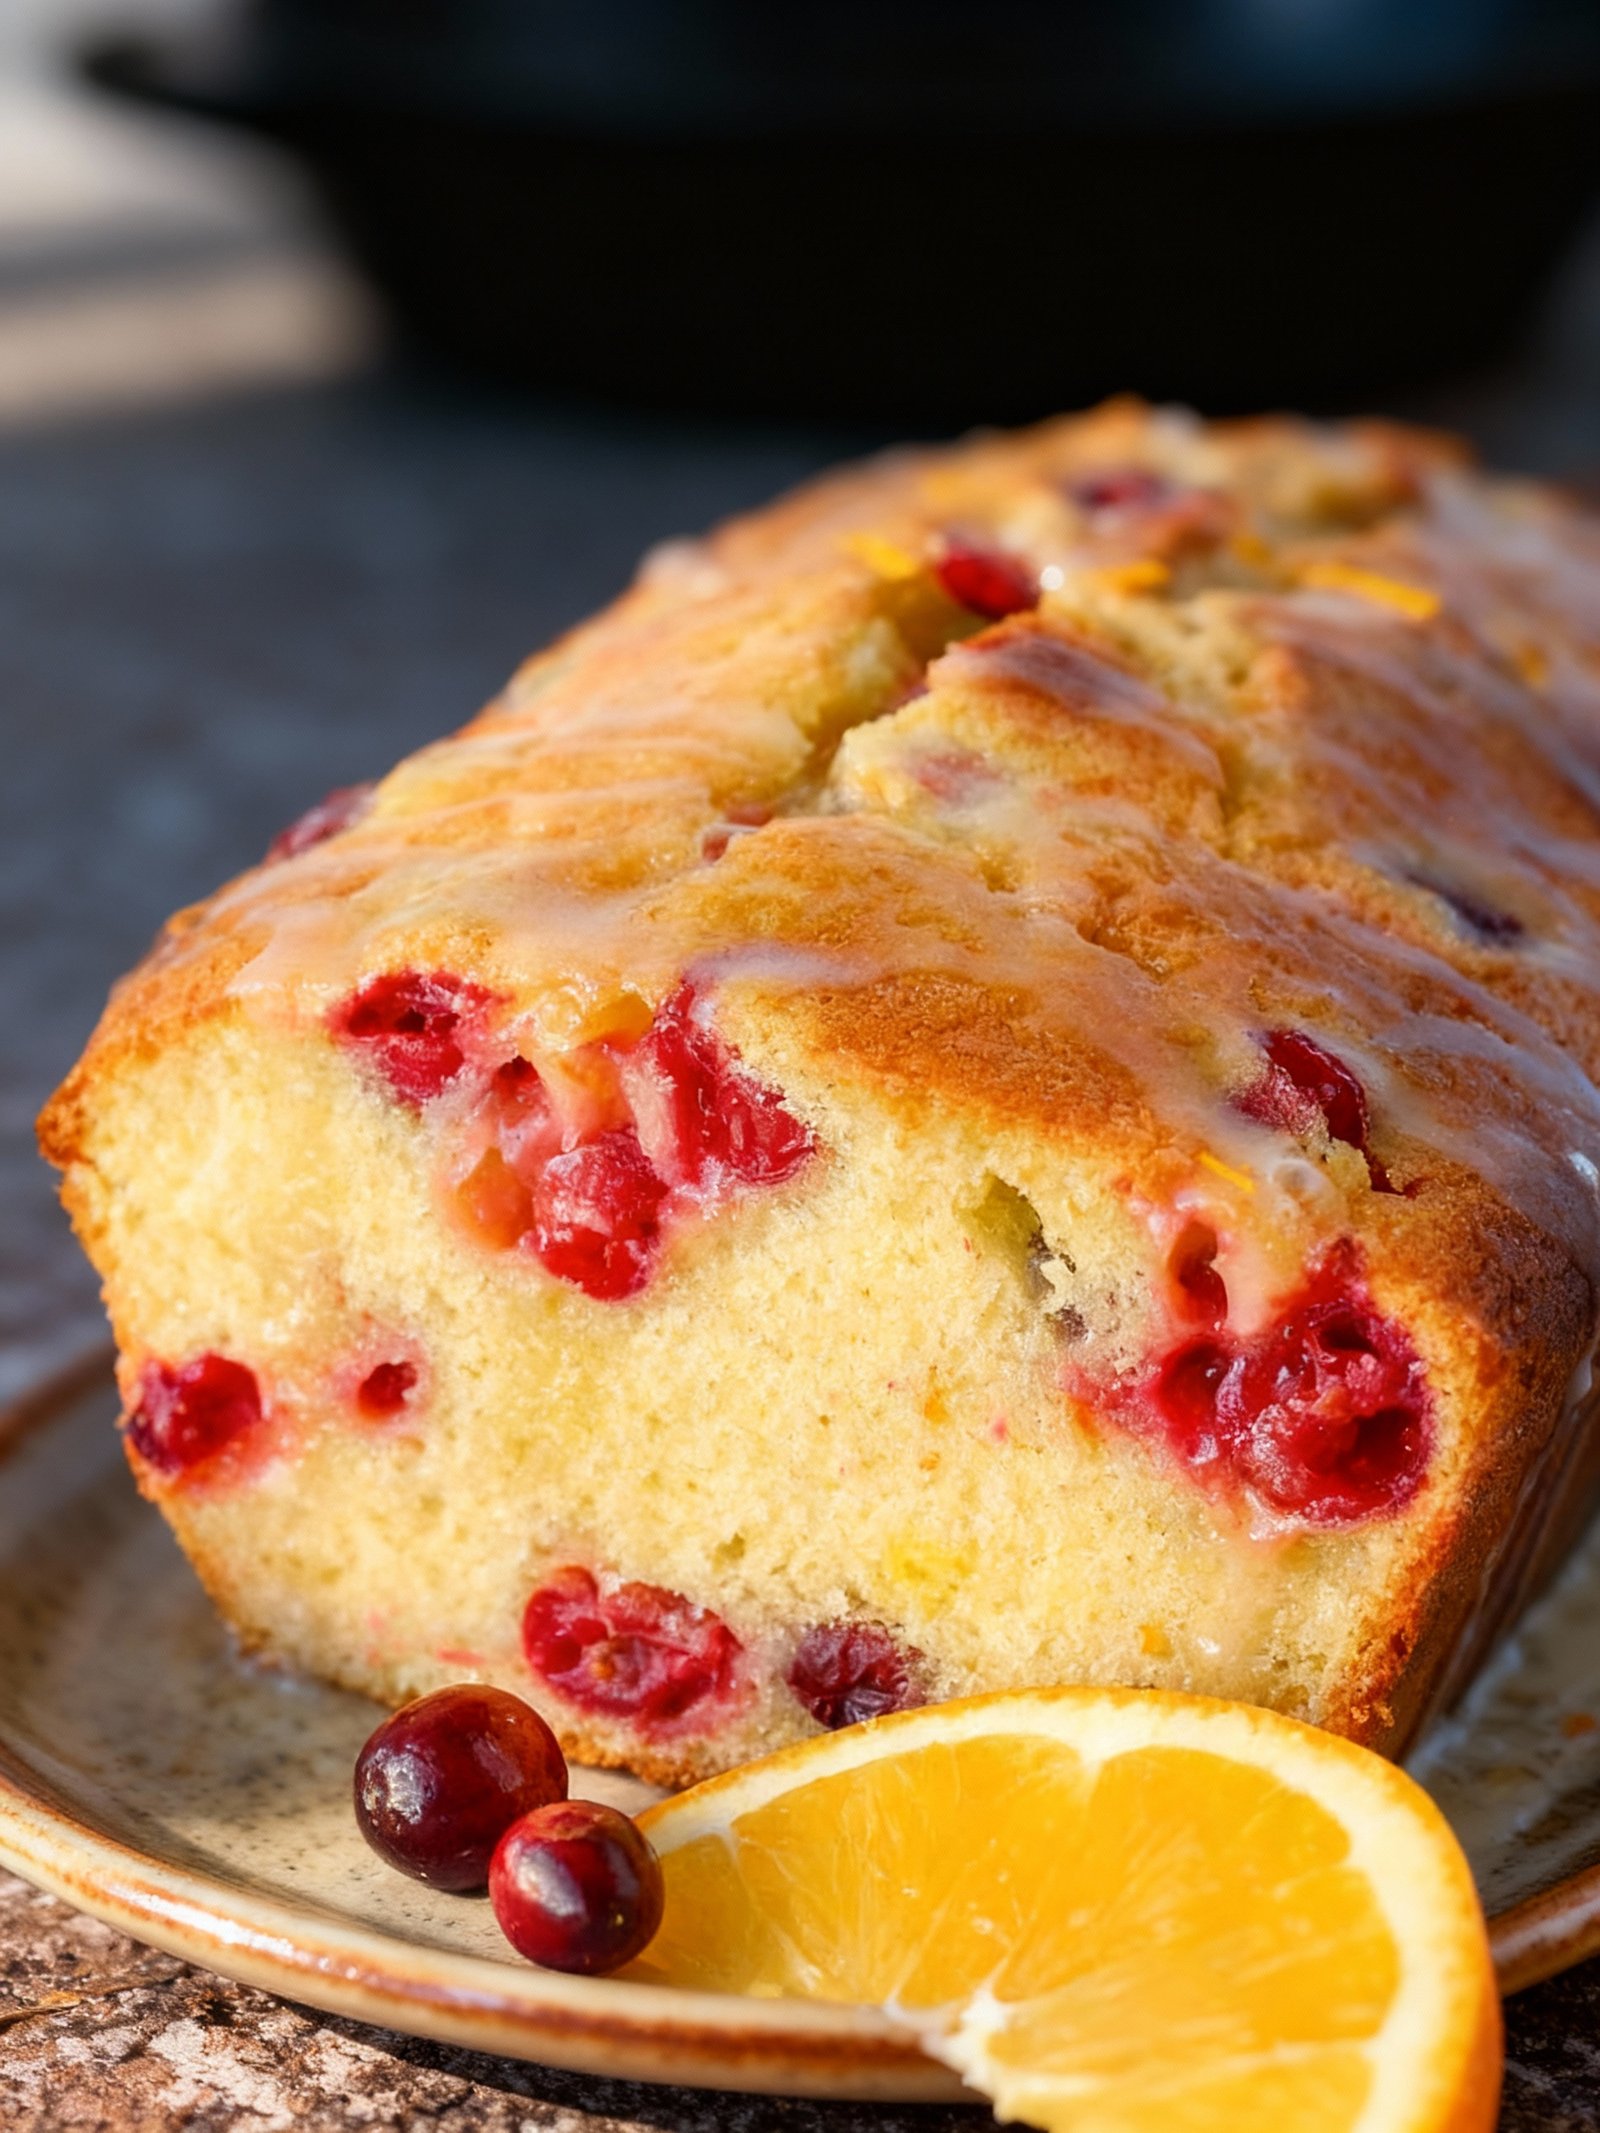
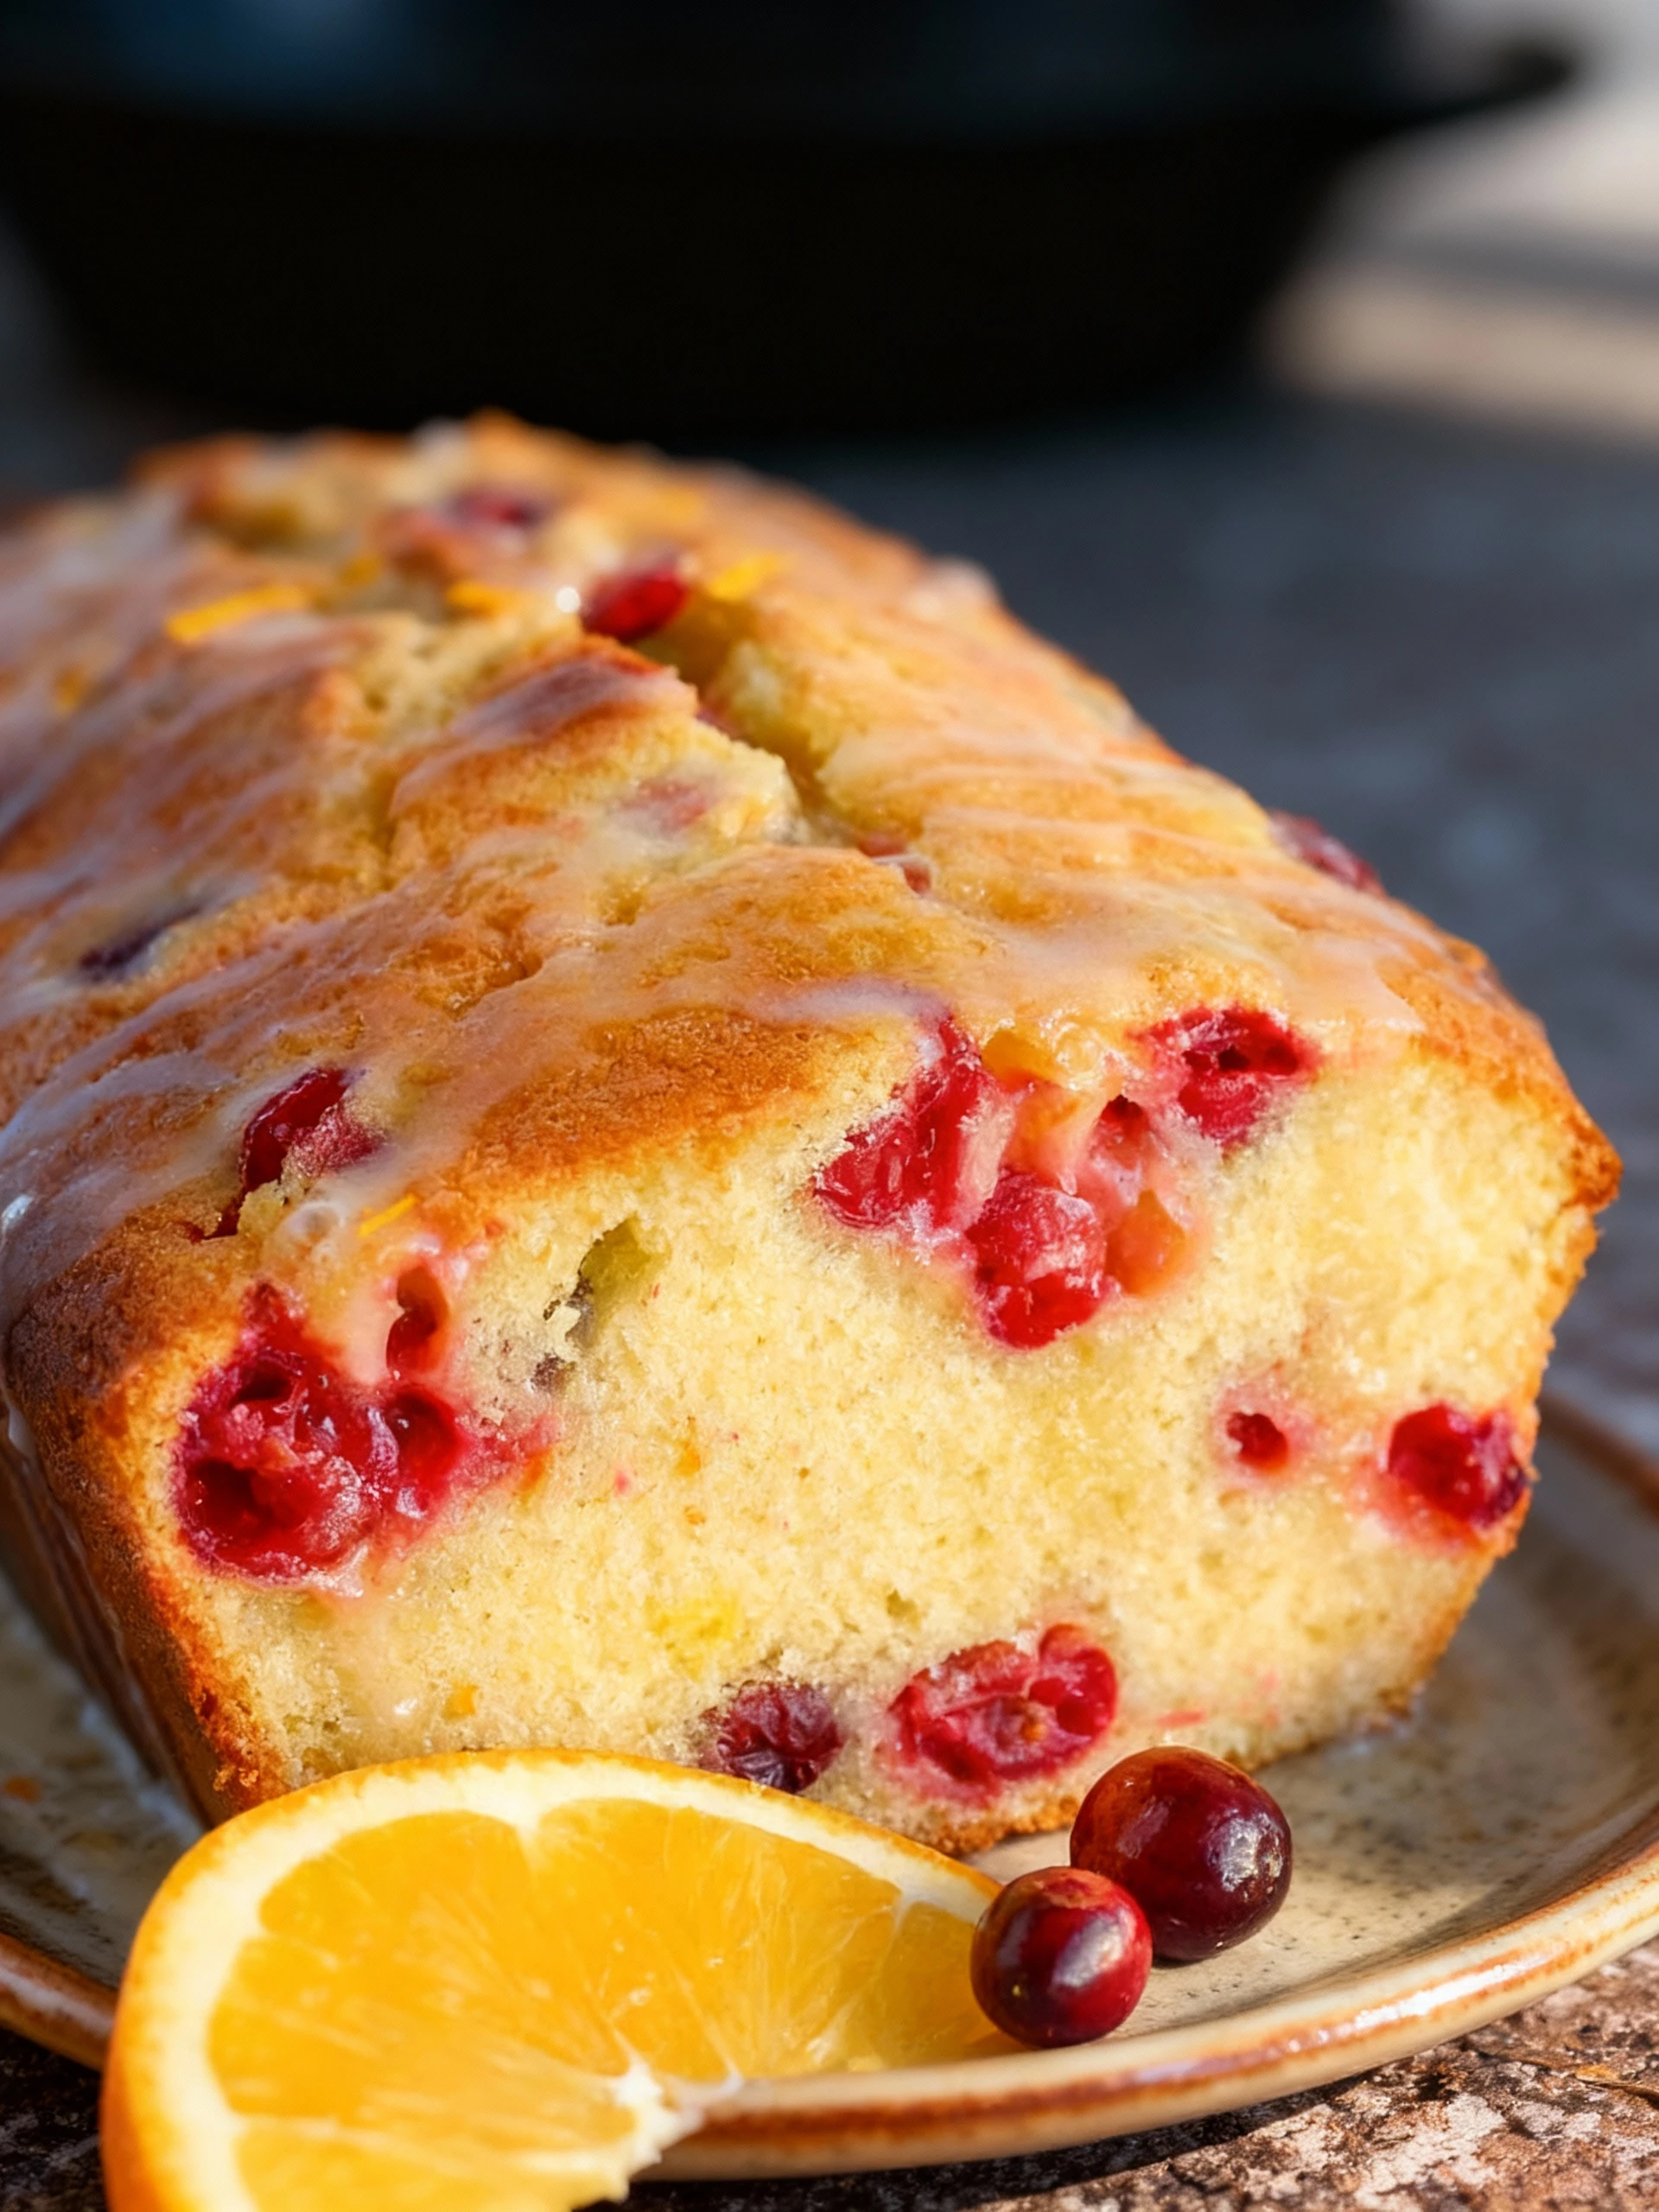
This cranberry orange bread is moist and bursting with flavor, making it the perfect holiday treat or breakfast indulgence. With a simple one-bowl prep method, you can have this beautiful loaf ready in no time. The combination of tart cranberries and bright citrus creates a wonderful balance that pairs beautifully with other seasonal favorites like White Chocolate Cranberry Pecan Clusters Recipe.
Ingredients
This moist, tender cranberry orange loaf bursts with bright citrus aroma and tart berry flavor in every slice.
- 2 cups all-purpose flour
- 1 cup granulated sugar
- 1 1/2 teaspoons baking powder
- 1 teaspoon fine salt
- 1/2 teaspoon baking soda
- Finely grated zest of 1 medium orange
- 1 cup fresh cranberries
- 1/2 cup fresh orange juice
- 1/4 cup cranberry juice
- 1 large egg
- 1/3 cup vegetable oil

Timing
| Prep Time | 10 minutes |
| Cook Time | 15 minutes |
| Total Time | 25 minutes |
Context: This recipe is approximately 20% faster than similar recipes.
Step-by-Step Instructions
Step 1 — Prepare the Ingredients
Gather all your ingredients and measure them accurately before you begin. This mise en place approach ensures a smooth cooking process without interruptions.
Chop vegetables to uniform sizes for even cooking. Bring proteins to room temperature for more consistent results.
Step 2 — Preheat Your Equipment
Preheat your oven to 375°F (190°C) or heat your skillet over medium-high heat. Proper preheating is crucial for achieving the right cooking temperature from the start.
For stovetop cooking, wait until a drop of water sizzles and evaporates immediately when testing pan heat.
Step 3 — Build Your Base Flavors
Heat oil in your pan and sauté aromatics like onions and garlic until fragrant and translucent, about 3-5 minutes. This foundation layer develops deep flavor complexity.
Don’t rush this step—properly caramelized aromatics provide the flavor backbone for your entire dish.
Step 4 — Cook Main Ingredients
Add your primary ingredients and cook according to their requirements. For meats, sear until golden brown on all sides before reducing heat.
Use a meat thermometer to check doneness: poultry should reach 165°F, beef 145°F for medium, and pork 145°F.
Step 5 — Incorporate Liquids and Simmer
Add any broths, wines, or sauces and bring to a gentle simmer. Scrape up any browned bits from the pan bottom to incorporate those flavorful fond.
Maintain a steady bubble without boiling vigorously. Cover partially if reducing quickly is needed.
Step 6 — Adjust Seasoning and Texture
Taste and adjust salt, pepper, and other seasonings. Remember that flavors concentrate as liquids reduce, so season conservatively at first.
If your sauce is too thin, create a slurry with cornstarch and cold water, then whisk in gradually until desired thickness.
Step 7 — Finish with Fresh Elements
Stir in fresh herbs, citrus zest, or a pat of butter off heat to brighten flavors. These final additions provide freshness and complexity.
For creamy dishes, temper any dairy by adding a small amount of hot liquid to it first before incorporating fully.
Step 8 — Rest Before Serving
Allow meats to rest for 5-10 minutes after cooking to redistribute juices. Cover loosely with foil to retain warmth.
This resting period allows flavors to meld and temperatures to equalize throughout the dish.
Step 9 — Plate and Garnish
Arrange your dish attractively on warm plates. Garnish with fresh herbs, a drizzle of quality oil, or crunchy elements for contrast.
Serve immediately while hot for the best texture and flavor experience.
Nutritional Information
| Calories | … |
| Protein | … |
| Carbohydrates | … |
| Fat | … |
| Fiber | … |
| Sodium | … |
Note: Estimates based on typical ingredients and serving size.
Healthier Alternatives
- Lean ground turkey or chicken — A lighter protein option with a mild, savory flavor that absorbs seasonings well.
- Cauliflower rice or zucchini noodles — Low-carb vegetable bases that add freshness and texture while keeping dishes light.
- Coconut milk or almond milk — Creamy, dairy-free alternatives with a subtle nutty sweetness perfect for sauces and soups.
- Tamari or coconut aminos — Gluten-free, lower-sodium substitutes for soy sauce, offering a rich umami depth.
- Nutritional yeast — A dairy-free, cheesy-flavored topping that adds a savory, nutty note to pastas and salads.
- Avocado oil or olive oil — Heart-healthy fats with mild, buttery notes ideal for sautéing and dressings.
- Mashed avocado or Greek yogurt — Creamy, nutrient-rich swaps for mayonnaise or sour cream, adding tang and richness.
Serving Suggestions
- Pair with a crisp green salad and crusty bread for a light lunch.
- Serve alongside roasted vegetables for a comforting dinner.
- Perfect for picnics and potlucks, easily transportable and delicious at room temperature.
- Elevate your brunch spread by adding this dish to the menu.
- Garnish with fresh herbs for a pop of color and freshness.
- Ideal for meal prep; portion into containers for easy weekday lunches.
These serving ideas will help you enjoy this recipe for any occasion, from a casual family meal to entertaining guests.
Common Mistakes to Avoid
- Mistake: Overcrowding the pan. Fix: Cook in batches to ensure proper browning and avoid steaming ingredients.
- Mistake: Underseasoning throughout the cooking process. Fix: Season in layers, tasting and adjusting as you go for a more developed flavor.
- Mistake: Using ingredients straight from the refrigerator. Fix: Let key items like meat and dairy come to room temperature for more even cooking.
- Mistake: Substituting key ingredients without considering their role. Fix: Understand the function of an ingredient (e.g., leavening, thickening) before making a swap.
- Mistake: Ignoring recipe prep (mise en place). Fix: Measure and prepare all your ingredients before you start cooking to prevent burning or mistakes.
- Mistake: Overmixing batters and doughs. Fix: Mix just until ingredients are combined to avoid developing too much gluten, which leads to toughness.
- Mistake: Not preheating your oven or pan. Fix: Always allow your cooking surface to reach the correct temperature for optimal results.
- Mistake: Skipping the rest time for meat. Fix: Let cooked meat rest before slicing to allow the juices to redistribute, resulting in a more tender and flavorful dish.
Storing Tips
- Fridge: Store in an airtight container for up to 3 days. Ensure it cools to room temperature before refrigerating.
- Freezer: Freeze in freezer-safe bags or containers for up to 3 months. Thaw overnight in the refrigerator before reheating.
- Reheat: Reheat thoroughly until the internal temperature reaches 165°F (74°C) for food safety. Use a microwave, oven, or stovetop.
Always use clean utensils and containers to prevent contamination, and never leave leftovers at room temperature for more than 2 hours.
Conclusion
We hope you love this festive cranberry orange bread as much as we do! If you try it, please leave a comment below with your thoughts. For more seasonal sides, try our Cranberry Apple Stuffing or Herbed Wild Rice with Pomegranate. Don’t forget to subscribe for more delicious recipes!
PrintCranberry Orange Bread

This Cranberry Orange Bread is the perfect blend of tart cranberries and bright citrus. Moist, sweet, and bursting with flavor, it makes a delightful quick bread for any occasion.
- Prep Time: 15 minutes
- Cook Time: 55 minutes
- Total Time: 1 hour 10 minutes
- Yield: 8 1x
- Method: Breakfast / Snack
- Cuisine: American
Ingredients
- 2 cups all-purpose flour
- 1 cup granulated sugar
- 1 1/2 teaspoons baking powder
- 1 teaspoon fine salt
- 1/2 teaspoon baking soda
- Finely grated zest of 1 medium orange
- 1 cup fresh cranberries
- 1/2 cup fresh orange juice
- 1/4 cup cranberry juice
- 1 large egg
- 1/3 cup vegetable oil
Instructions
- Preheat oven to 350°F (175°C). Grease and flour a 9×5 inch loaf pan.
- In a large bowl, whisk together flour, sugar, baking powder, salt, baking soda, and orange zest.
- In a small bowl, whisk orange juice, cranberry juice, egg, and vegetable oil until combined.
- Pour the wet ingredients over the dry ingredients and gently stir until just combined.
- Fold in the fresh cranberries carefully to avoid breaking them.
- Pour the batter into the prepared loaf pan and smooth the top.
- Bake for 50-60 minutes or until a toothpick inserted into the center comes out clean.
- Allow the bread to cool in the pan for 10 minutes, then transfer to a wire rack to cool completely.
Notes
For best results, use fresh cranberries and freshly squeezed orange juice. The bread can be stored in an airtight container for up to 3 days or frozen for longer storage.
Nutrition
- Calories: 280
- Sugar: 25g
- Sodium: 300mg
- Fat: 8g
- Saturated Fat: 1g
- Unsaturated Fat: 7g
- Trans Fat: 0g
- Carbohydrates: 45g
- Fiber: 3g
- Protein: 3g
- Cholesterol: 35mg
FAQs
Can I make this recipe ahead of time?
Yes, this recipe holds up well when prepared in advance. You can store it in an airtight container in the refrigerator for up to two days. Reheat gently before serving.
What are some good substitutions for the main ingredient?
You can easily swap the main ingredient for a similar alternative. For example, try using chicken thighs instead of breasts, or zucchini in place of eggplant. This recipe is quite versatile and forgiving with substitutions.
How can I adjust the spice level to my taste?
You can control the spice level by increasing or decreasing the amount of chili flakes or hot sauce. Start with a small amount, taste, and add more gradually until it suits your preference.


