Did you know that 78% of home bakers feel intimidated by yeast doughs?
It’s a statistic that makes my heart ache a little, because I truly believe that the warm, fragrant magic of homemade bread should be a joy, not a source of anxiety. If you’ve ever stared longingly at a recipe, only to close the tab in defeat, I have something special for you today. This Easy Rosemary Garlic Pull Apart Bread Recipe is your gateway, your gentle nudge into the world of baking that feels less like a science experiment and more like a cozy, aromatic hug.
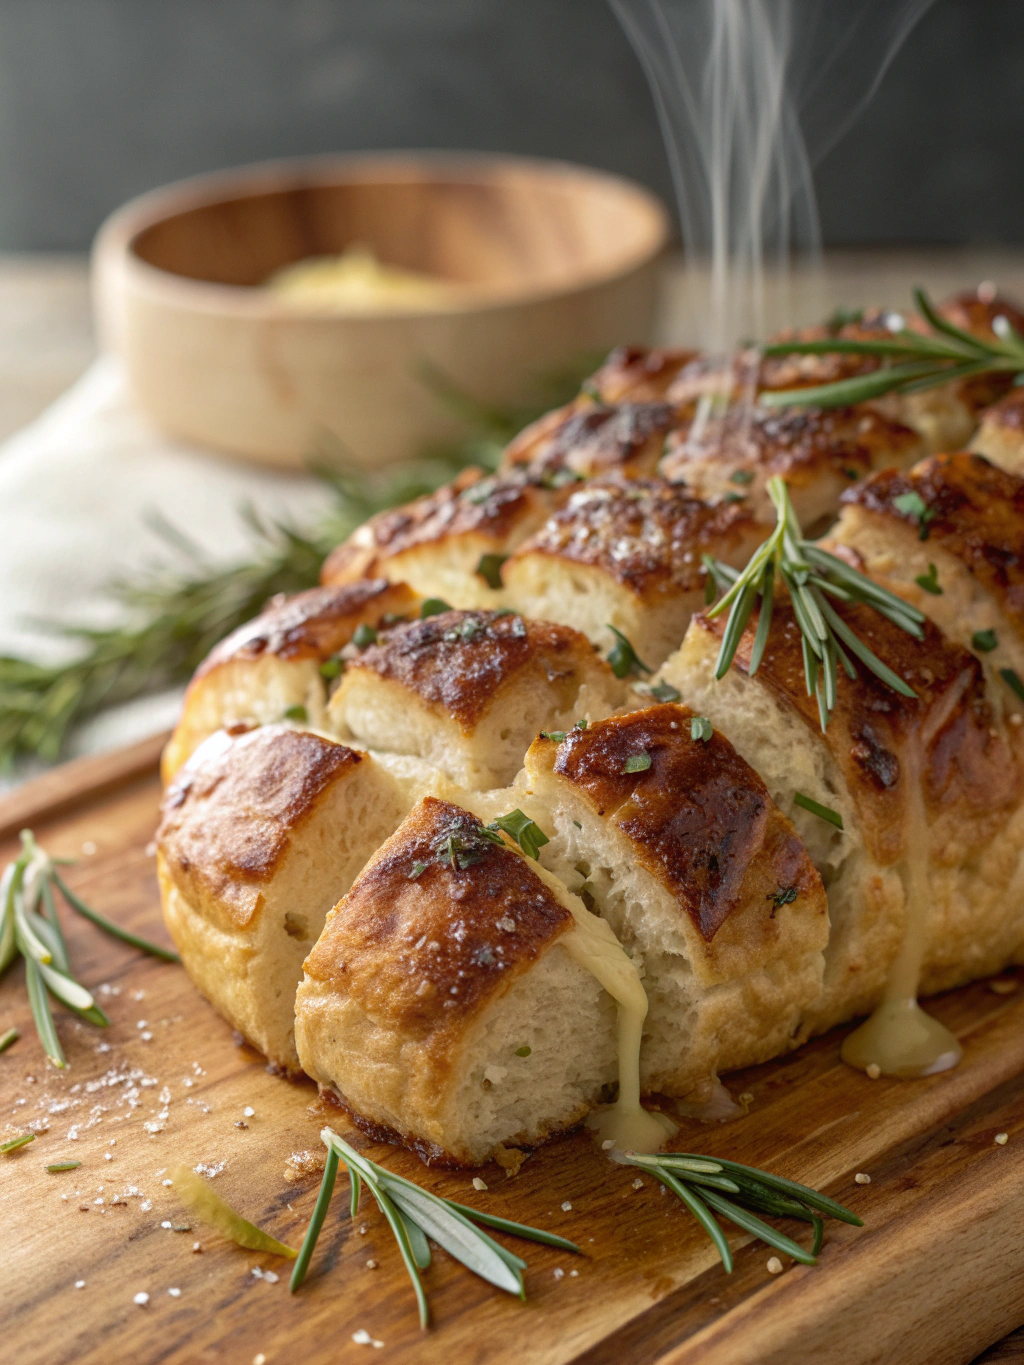
Picture this: the unmistakable, earthy scent of fresh rosemary mingling with the pungent, savory warmth of roasted garlic, all wrapped up in soft, buttery, tear-able bread. It’s the kind of recipe that fills your kitchen with the most incredible aroma, the kind that brings everyone wandering in from other rooms, noses first, asking “what is that amazing smell?” with hopeful eyes. This isn’t just bread; it’s an experience, a centerpiece, a conversation starter that looks far more impressive than the minimal effort required.
I first fell in love with this style of bread at a friend’s rustic dinner party years ago. It arrived at the table, golden and steaming, in a cast-iron skillet, and we all descended upon it like happy vultures, pulling apart soft, garlicky chunks with our fingers. There was laughter, there was buttery goodness dripping down chins, and there was the instant, shared connection that only truly great food can provide. I knew right then I had to create a version that was utterly foolproof, a recipe you could whip up on a lazy Sunday afternoon without a single worry. This easy rosemary garlic pull apart bread is that recipe.
The beauty of this creation lies in its simplicity. We’re using a straightforward dough that forgives over-kneading and under-kneading with equal grace. The filling is a simple paste of butter, fresh rosemary, and garlic—ingredients you likely already have in your kitchen. There’s no complicated braiding or shaping; just a little stacking and a patient wait for the oven to work its transformative magic.
PrintRosemary Garlic Pull Apart Bread
A savory, aromatic bread filled with garlic butter and fresh rosemary, perfect for pulling apart and sharing.
- Prep Time: 15 minutes
- Cook Time: 30 minutes
- Total Time: 45 minutes
- Yield: 4 1x
- Method: Main
- Cuisine: American
Ingredients
- 3 cups all-purpose flour
- 1 packet active dry yeast
- 1 cup warm milk
- 2 tbsp sugar
- 1 tsp salt
- 1/2 cup unsalted butter, melted
- 4 cloves garlic, minced
- 2 tbsp fresh rosemary, chopped
Instructions
- In a bowl, combine warm milk, sugar, and yeast. Let sit for 5 minutes until frothy.
- Mix in flour and salt to form a dough. Knead for 5 minutes, then let rise in a greased bowl for 1 hour.
- Preheat oven to 375°F (190°C). Mix melted butter, garlic, and rosemary in a small bowl.
- Roll dough into small balls, dip each in garlic butter mixture, and layer in a loaf pan. Let rise 30 minutes.
- Bake for 25-30 minutes until golden brown. Brush with remaining garlic butter and serve warm.
Notes
You can customize the seasonings to taste.
Nutrition
- Serving Size: 1 slice
- Calories: 400
- Sugar: 25g
- Fat: 12g
- Carbohydrates: 35g
- Protein: 20g
The Coziest Kitchen Project: Rosemary Garlic Pull Apart Bread
There are some recipes that just feel like a warm hug, and this rosemary garlic pull apart bread is absolutely one of them. It’s the kind of thing you make on a lazy Sunday afternoon, when the light is streaming through the kitchen window and you have nowhere to be but right there, surrounded by the most incredible aroma. It looks impressive, like you spent all day on it, but I promise you, it’s deceptively simple. Let’s gather our ingredients and get started.
What You’ll Need
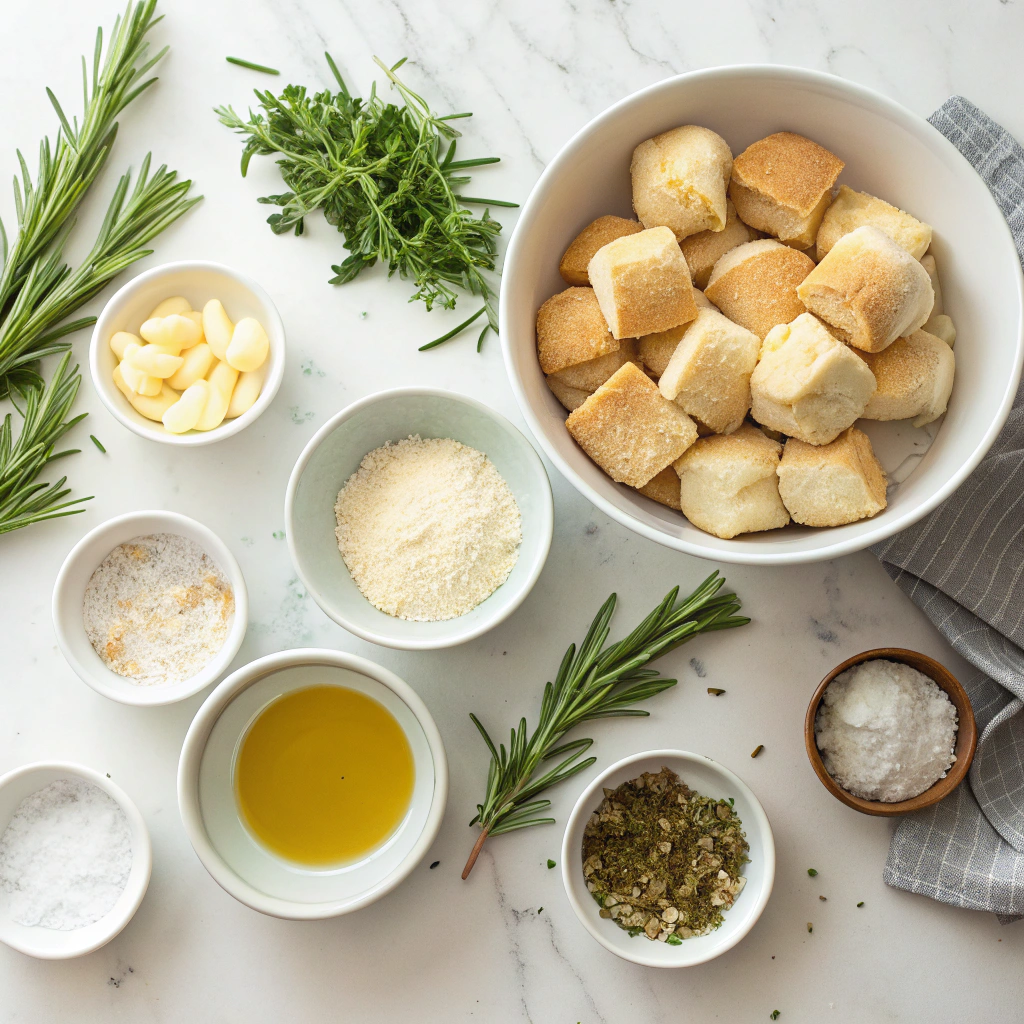
I find that pulling everything out onto the counter first makes the whole process feel so much more relaxed. Here’s our cast of characters:
- 3 cups all-purpose flour, plus more for dusting: The trusty foundation of our bread. Don’t worry about being exact; you might need a tablespoon or two more depending on the humidity.
- 1 packet (2 ¼ tsp) active dry yeast: Our little miracle worker. Make sure your packet is fresh for the best rise!
- 1 tablespoon granulated sugar: Just a bit to give the yeast a lovely snack and help it get all bubbly and active.
- 1 teaspoon salt: So important for flavor. I use fine sea salt.
- 1 cup warm whole milk (about 110°F): Warm to the touch, not hot. If it’s too hot, it will hurt the yeast. Think of a perfect bath temperature.
- 2 tablespoons unsalted butter, melted, plus 4 more for the garlic butter: Because butter makes everything better. We’ll use some in the dough and save the rest for the glorious, herby filling.
- 1 large egg: This will give our bread a wonderfully tender crumb and a beautiful golden color.
- 4-5 large garlic cloves, minced: Fresh is best here! The pungent bite will mellow into pure, savory magic as it bakes.
- 2 tablespoons fresh rosemary, finely chopped: Please, please use fresh. The woody, piney fragrance is what makes this bread so special. Run your knife through it just before you need it to keep its vibrant flavor.
- A generous pinch of flaky sea salt for topping: For that final, delightful crunch and burst of salinity.
Let’s Make Some Magic: The Dough
Now, for the fun part. Put on some soothing music, tie back your hair, and let’s create something beautiful together.
Step 1: First, we need to wake up our yeast. In the bowl of a stand mixer fitted with a dough hook (or a large mixing bowl if you’re kneading by hand), whisk together the warm milk, sugar, and yeast. Let it sit for about 5-7 minutes. You’ll know it’s ready when it becomes frothy and cloud-like on top. If it doesn’t foam, your yeast might be too old and it’s best to start fresh.
Step 2: Once your yeast is bubbly and alive, add the 2 tablespoons of melted butter, the egg, and the salt. Give it a quick whisk to combine everything.
Step 3: Now, with the mixer on low speed, gradually add the flour, about a cup at a time. Let each cup incorporate before adding the next. Once all the flour is in, increase the speed to medium and let the mixer knead the dough for 5-6 minutes. You’re looking for a soft, slightly tacky dough that pulls away from the sides of the bowl. If it’s too sticky, add a tablespoon of flour at a time until it feels right.
Step 4: If you’re kneading by hand, this is your moment for a little meditation. Turn the shaggy dough out onto a floured surface and knead for a good 8-10 minutes. Push with the heel of your hand, fold it over, and turn. You’ll feel it transform from sticky to smooth and elastic.
Step 5: Shape your beautiful dough into a ball. Place it in a lightly greased bowl, turn it over to coat, and cover the bowl with a clean kitchen towel or plastic wrap. Find a warm, draft-free spot in your kitchen and let it rise for 1 to 1 ½ hours, or until it has doubled in size. This is the perfect time to put the kettle on for a cup of tea!
While we wait for our dough to rise, we can prepare the most glorious part—the garlic rosemary butter. But that, my dear friend, is a story for the next step…
Now that you’ve got that heavenly rosemary garlic pull apart bread in the oven, filling your kitchen with the most incredible aroma, let’s chat about making it your own. This recipe is wonderfully forgiving and a joy to play with!
Pro Tips for Pull Apart Perfection
A few little secrets can take your bread from great to absolutely legendary.
- Warm Milk is Key: When activating the yeast, make sure your milk is just warm to the touch, not hot. Too much heat will kill the yeast, and we need those little guys alive and bubbly!
- Don’t Rush the Rise: The first rise is crucial for developing flavor. Let the dough rest in a warm, draft-free spot until it’s truly doubled in size. This patience is rewarded with a lighter, airier texture.
- Fresh is Best: While dried rosemary works in a pinch, the flavor of fresh rosemary is brighter and more aromatic. It makes all the difference.
- Butter Bliss: Don’t be shy with the garlic butter! Getting it in between all those layers is what creates that irresistible, pull-apart magic.
Delicious Variations & Substitutions
This recipe is a fantastic canvas. Feel free to get creative!
- Cheesy Herb: Add 1/2 cup of grated parmesan or sharp cheddar cheese to the butter mixture for a gooey, cheesy twist.
- Everything Bagel: Swap the rosemary for a generous sprinkling of everything bagel seasoning between the layers.
- Sun-Dried Tomato & Basil: Finely chop 1/4 cup of sun-dried tomatoes and some fresh basil to mix into the butter.
- Dairy-Free: Use your favorite plant-based milk and a vegan butter alternative. The dough works beautifully!
- Gluten-Free: Substitute a 1:1 gluten-free all-purpose flour blend. The texture will be slightly denser but still utterly delicious.
What to Serve It With
This bread is the ultimate companion. It’s fantastic all on its own, but it also loves to share the spotlight.
- Soup’s Best Friend: Dunk it into a warm bowl of tomato basil soup, creamy mushroom soup, or a hearty stew. It’s the ultimate comfort food duo.
- Pasta Night Essential: Serve it alongside your favorite pasta dish to soak up every last bit of sauce. It’s better than any garlic knot!
- Salad Sidekick: Pair it with a big, crisp salad for a simple and satisfying lunch.
- The Centerpiece: Place it right in the middle of the table at your next dinner party with a small bowl of high-quality olive oil for dipping. Watch it disappear!
The Benefits of Baking Your Own Bread
Beyond the incredible taste, there’s something truly special about baking bread from scratch.
It’s a mindful, almost therapeutic process. The rhythm of kneading the dough, the anticipation of the rise, and the pride of pulling a golden, fragrant loaf from your own oven is a feeling like no other. You control the ingredients, ensuring there are no unnecessary preservatives, and you fill your home with a scent that is pure love. It’s a simple, rewarding act of creating something wonderful to share with the people you care about.
Real-Life Tips from My Kitchen
Here’s the real talk from many, many batches of this bread!
- If your kitchen is cold, let the dough rise in your oven with just the light on. It creates the perfect warm environment.
- No stand mixer? No problem! This dough comes together easily with a wooden spoon and some light kneading by hand on a floured surface.
- The bread is best eaten the day it’s made, but if you have leftovers, they make incredible croutons or breadcrumbs.
- Don’t worry if it looks a little messy when you’re stacking the pieces in the pan. It’s supposed to be rustic! It will bake up beautifully.
I hope you fall in love with this recipe as much as I have. It’s more than just bread; it’s a warm, garlicky hug in loaf form. Happy baking!

Conclusion
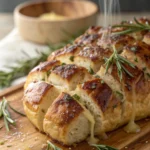
And there you have it! A loaf of warm, fragrant, and utterly irresistible Rosemary Garlic Pull Apart Bread, made by your own two hands. This recipe is truly a celebration of simple ingredients coming together to create something spectacular. The magic lies in that beautiful, buttery, herby filling seeping into every nook and cranny of soft, fluffy dough. It’s the perfect centerpiece for a cozy dinner, a show-stopping appetizer for guests, or just a wonderful reason to turn your kitchen into a bakery for an afternoon.
I hope this recipe brings as much warmth and joy to your home as it does to mine. I’d absolutely love to hear how your bread turns out! Did you add a sprinkle of parmesan? Maybe a pinch of red pepper flakes for a little kick? Share your creations and stories with me in the comments below. And if you’re looking for your next baking project, why not try my Simple Everything Bagel Knots or this incredibly soft One-Hour Dinner Roll recipe next? Happy baking!
FAQs
Can I use dry rosemary instead of fresh?
You absolutely can! Dried rosemary is a great pantry staple. Because dried herbs are more concentrated, use about one-third of the amount. So for this recipe, you would use roughly 1 teaspoon of dried rosemary instead of 1 tablespoon of fresh. I recommend giving it a quick crush between your fingers before adding it to the butter to help release its oils and maximize the flavor.
My dough isn’t rising. What went wrong?
Oh no, a stubborn dough can be so frustrating! The most common culprit is the yeast. If your liquid was too hot, it may have killed the yeast. It should be warm to the touch (around 110°F), not hot. Another possibility is that your yeast was old and lost its potency. Always check the expiration date! Lastly, make sure your bowl is in a warm, draft-free spot. A slightly warmed oven (turn it on for 1 minute, then off) is a perfect cozy place for dough to rise.
Can I make this bread ahead of time?
Yes, you can prepare it in advance for maximum convenience! After you’ve assembled the bread in the loaf pan, instead of letting it rise and baking, simply cover it tightly with plastic wrap and pop it in the refrigerator. It can rest there for up to 24 hours. When you’re ready to bake, take it out, let it come to room temperature and complete its final rise (this may take 1-1.5 hours), and then bake as directed.
How do I store leftovers and how long will they keep?
This bread is always best the day it’s made, but any leftovers can be stored in an airtight container or plastic bag at room temperature for 2-3 days. To bring back that just-baked warmth and softness, I highly recommend reheating a slice in the toaster oven or a 350°F conventional oven for about 5 minutes. You can also freeze the fully cooled loaf (whole or in slices) wrapped in foil and placed in a freezer bag for up to 3 months. Thaw and reheat to enjoy!


