Introduction
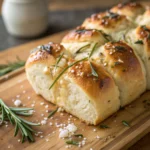
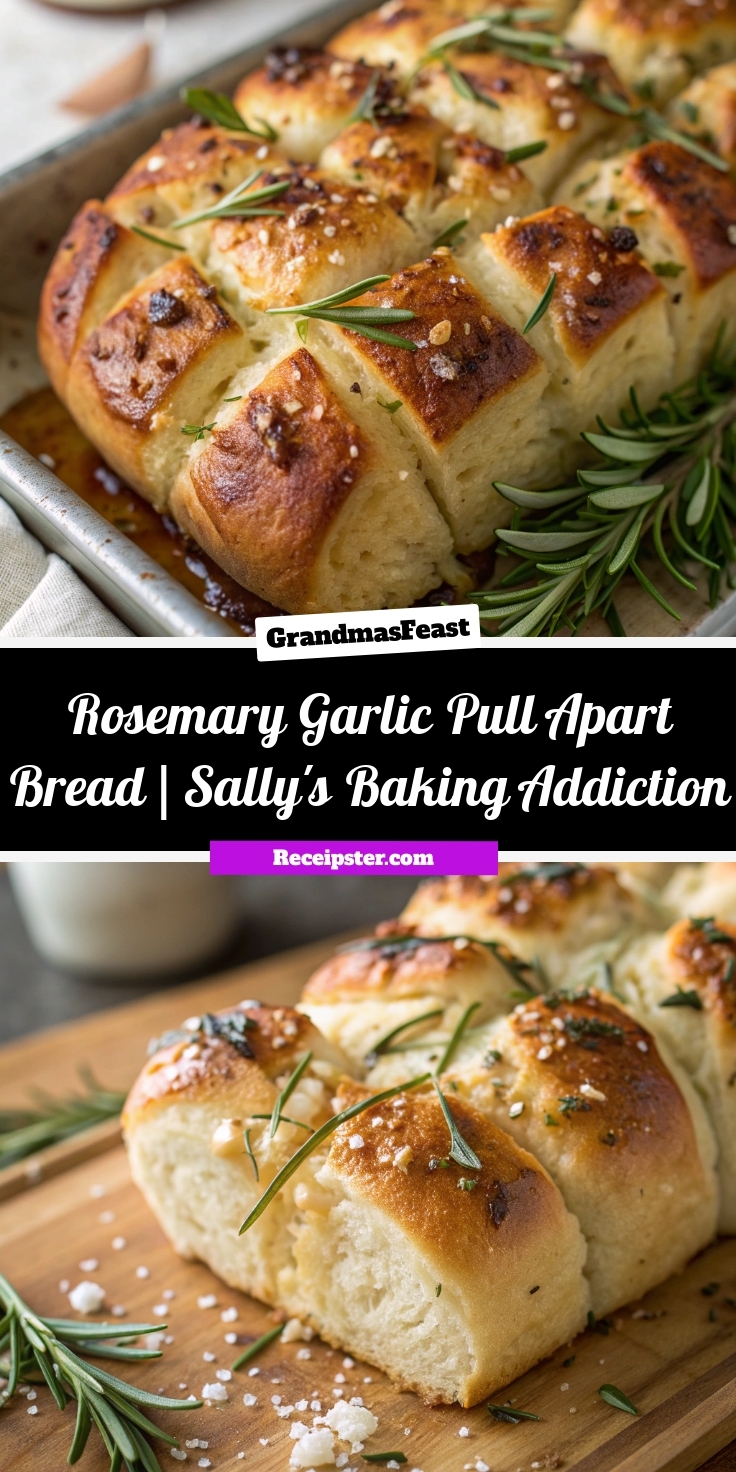
Is there anything more comforting than the smell of fresh bread baking? Now, imagine that aroma infused with savory roasted garlic and fragrant rosemary. This Rosemary Garlic Pull Apart Bread | Sally’s Baking Addiction is not just a side dish; it’s the main event, a show-stopping centerpiece that turns any meal into a celebration. It’s the kind of warm, buttery, and utterly shareable food that creates instant memories around the table.
This particular recipe for Rosemary Garlic Pull Apart Bread | Sally’s Baking Addiction is a masterpiece of savory baking. Essentially, it consists of soft, fluffy dough balls that you coat in a luxurious mixture of melted butter, fresh rosemary, and garlic. You then stack these pieces in a loaf pan so they bake together into one glorious, pull-apart loaf. The final result is incredibly impressive, yet the process is surprisingly approachable, even for novice bakers. This recipe perfectly aligns with my blog’s mission to deliver truly special, from-scratch baked goods that are worth every minute of effort. The technique of creating a flavored butter for coating is similar to the process you use for my favorite Quick Cinnamon Rolls, but here we take a wonderfully savory turn. It’s the ideal bread to serve with a cozy bowl of Creamy Tomato Soup for the ultimate comfort food experience.
Why I Love This Recipe
I absolutely love this Rosemary Garlic Pull Apart Bread | Sally’s Baking Addiction because it is pure, uncomplicated joy. There’s something so therapeutic about working the dough by hand and then assembling the loaf. I truly adore the moment it comes out of the oven, all golden and steaming, and everyone gathers around to pull off their own piece. It transforms a simple weeknight pasta dinner into something festive and makes any guest feel incredibly special. For me, this bread is the edible definition of warmth and hospitality.
Health and Nutrition
Why it’s good for your body
Rosemary Garlic Pull Apart Bread | Sally’s Baking Addiction delivers wonderful health benefits because of its ingredient profile. Fresh rosemary acts as a powerful antioxidant, so it helps combat cellular damage while adding earthy flavor. Garlic contains allicin, a compound with noted anti-inflammatory properties, even though you use it in moderation. This means each savory bite supports your body’s natural defenses.
Furthermore, the olive oil in the garlic butter mixture provides heart-healthy monounsaturated fats. These fats promote good cholesterol levels and cardiovascular function. Rosemary Garlic Pull Apart Bread | Sally’s Baking Addiction becomes a smarter choice because it incorporates these nutritious elements. Although it is a carbohydrate-based food, it supplies essential energy for your day.
Pairing a serving with a protein-rich dish, such as lentil soup or a chicken salad, creates a more balanced nutrient intake. Ultimately, Rosemary Garlic Pull Apart Bread | Sally’s Baking Addiction shows that flavor and wellness can go hand in hand.
How it fits in a healthy lifestyle
This savory bread fits into a balanced diet when you view it as a complementary item rather than a centerpiece. Enjoy a single piece alongside a large salad or a protein-rich main course for a satisfying meal. This mindful approach lets you savor the taste without overdoing it.
For specific dietary goals, consider simple adaptations. While the original recipe is not gluten-free, you can use a quality gluten-free flour blend to make a suitable version. If you monitor carbohydrates, account for a serving within your daily plan and pair it with high-fiber or high-protein foods.
Preparing Rosemary Garlic Pull Apart Bread | Sally’s Baking Addiction at home supports whole-foods habits because you control the ingredients. For another baking idea that suits meal prep, try our Easy Overnight Cinnamon Rolls. You can also serve this bread with a bowl of our Creamy Tuscan Chicken Soup for a complete and comforting dinner.
PrintRosemary Garlic Pull Apart Bread
Make a flavorful pull apart bread using this delicious rosemary-infused yeasted dough. You can use your favorite cheese in the filling. I love and usually use shredded parmesan.
- Prep Time: 3 hrs
- Cook Time: 50 mins
- Total Time: 4 hrs
- Yield: 1 loaf 1x
- Method: Bread
- Cuisine: American
Ingredients
- 2 teaspoons Platinum Yeast from Red Star*
- 1 Tablespoon granulated sugar
- 3/4 cup (180ml) whole milk
- 3 Tablespoons (43g) unsalted butter, softened to room temperature
- 1 large egg
- 2 and 1/3 cups (291g) all-purpose flour (spooned & leveled), plus more as needed*
- 1 teaspoon salt
- 1 teaspoon garlic powder
- 1 Tablespoon finely chopped fresh rosemary (or 2 teaspoons dried)
- 5 Tablespoons (71g) unsalted butter, extra soft (see note)
- 1 Tablespoon finely chopped fresh rosemary (or 2 teaspoons dried)
- 1 Tablespoon finely chopped fresh parsley (or 2 teaspoons dried)
- 2 garlic cloves, minced or 1/2 teaspoon garlic powder
- 1/4 teaspoon salt
- 3/4 cup (95g) shredded parmesan, mozzarella, or white cheddar cheese (or your favorite shredded cheese)
- 1 Tablespoon (14g) unsalted butter, melted
- coarse or flaky sea salt for sprinkling
Instructions
- Place the yeast and sugar in the bowl of a stand mixer fitted with a dough hook or paddle attachment. Or, if you do not own a stand mixer, a regular large mixing bowl. Heat the milk on the stove or in the microwave until warm to touch, about 110°F (43°C). Pour warm milk on top of yeast/sugar. Whisk gently to combine, then loosely cover with a clean kitchen towel and allow to sit for 5-10 minutes. The mixture will be frothy after 5-10 minutes.
- Add the butter, egg, flour, salt, garlic powder, and rosemary. Beat on low speed until the dough comes together and pulls away from the sides of the bowl, about 3 minutes. If the dough isn't pulling away from the sides of the bowl, add a little more flour, a Tablespoon at a time. Dough will be soft.
- Keep the dough in the mixer (and switch to the dough hook if using the paddle) and beat for an additional 5 full minutes, or knead by hand on a lightly floured surface for 5 full minutes. (If you're new to bread-baking, my How to Knead Dough video tutorial can help here.) If the dough becomes too sticky during the kneading process, sprinkle 1 Tablespoon of flour at a time on the dough or on the work surface/in the bowl to make a soft, slightly tacky dough. Do not add more flour than you need because you do not want a dry dough. After kneading, the dough should still feel a little soft. Poke it with your finger—if it slowly bounces back, your dough is ready to rise. You can also do a "windowpane test" to see if your dough has been kneaded long enough: tear off a small (roughly golfball-size) piece of dough and gently stretch it out until it's thin enough for light to pass through it. Hold it up to a window or light. Does light pass through the stretched dough without the dough tearing first? If so, your dough has been kneaded long enough and is ready to rise. If not, keep kneading until it passes the windowpane test.
- Shape the kneaded dough into a ball. Place the dough in a greased bowl (I use nonstick spray to grease) and cover with plastic wrap or aluminum foil. Place in a slightly warm environment to rise until doubled in size, around 60-90 minutes. (If desired, use my warm oven trick for rising. See my answer to Where Should Dough Rise? in my Baking with Yeast Guide.)
- As the dough rises, prepare the filling in the next step and grease a 9×5-inch loaf pan.
- In a medium bowl, mix the soft butter, rosemary, parsley, garlic, and salt together. If the butter is soft enough, you can just mix it all together with a spoon or fork. You can use an electric mixer if that's easier too. Cover tightly and set aside until ready to use. (Don't refrigerate unless making well in advance. It's easiest to spread on the dough when at room temperature. If refrigerated, let it come to room temperature before spreading on dough pieces.)
- Punch down the dough to release the air. Place dough on a lightly floured work surface. Divide it into 12 equal pieces, each about 1/4 cup of dough and a little larger than a golf ball. Using lightly floured hands, flatten each into a circle that's about 4 inches in diameter. The circle doesn't have to be perfectly round. I do not use a rolling pan to flatten, but you certainly can if you want. Spread 1-2 teaspoons of filling mixture onto each. Sprinkle each with 1 Tablespoon of cheese. Fold circles in half and line in prepared baking pan, round side up. See photos above for a visual.
- Cover with plastic wrap or aluminum foil and allow to rise once again in a slightly warm environment until puffy, about 45 minutes.
- Adjust the oven rack to the lower third position then preheat oven to 350°F (177°C).
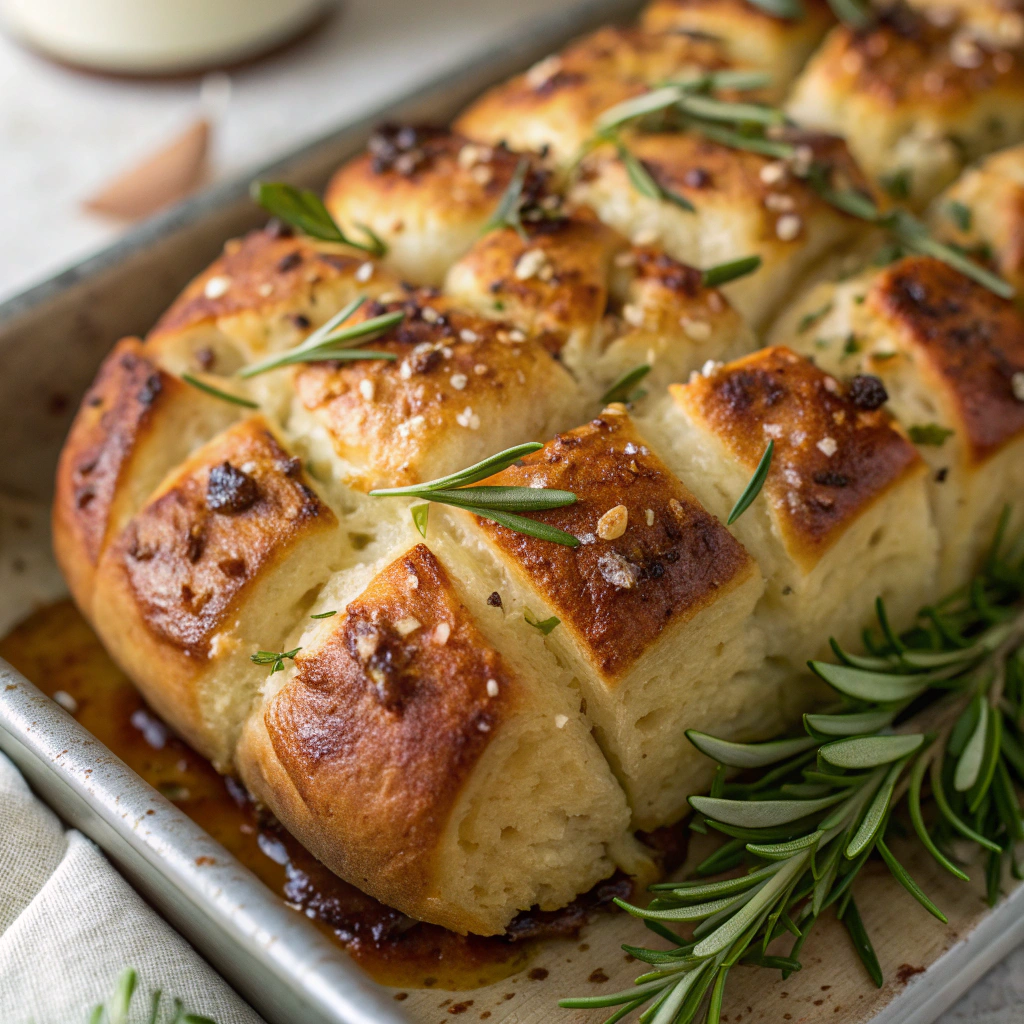
- Bake until golden brown, about 50 minutes. If you find the top of the loaf is browning too quickly, tent with aluminum foil. (Don't be alarmed if there's melted butter around the sides of the bread as it bakes, it will seep into the bread before it finishes.) Remove from the oven and place the pan on a wire rack. If desired, brush with melted butter for topping and sprinkle with sea salt.
- Cool for 10 minutes in the pan, then remove from the pan and serve warm.
- Cover and store leftovers at room temperature for up to 2 days or in the refrigerator for up to 1 week. Since the bread is extra crispy on the exterior, it will become a little hard after day 1. Reheat in a 300°F (149°C) oven for 10-15 minutes until interior is soft again or warm in the microwave.
Notes
This bread is best served warm. If it becomes hard after day 1, reheat in a 300°F oven for 10-15 minutes to soften the interior. You can substitute different cheeses like mozzarella or white cheddar for the parmesan. For best results, ensure the butter for the filling is extra soft and at room temperature for easy spreading.
Nutrition
- Calories: 180
- Sugar: 2
- Sodium: 250
- Fat: 10
- Saturated Fat: 6
- Unsaturated Fat: 3
- Trans Fat: 0
- Carbohydrates: 18
- Fiber: 1
- Protein: 5
- Cholesterol: 30
How to Prepare This Dish
Steps and time-saving tips
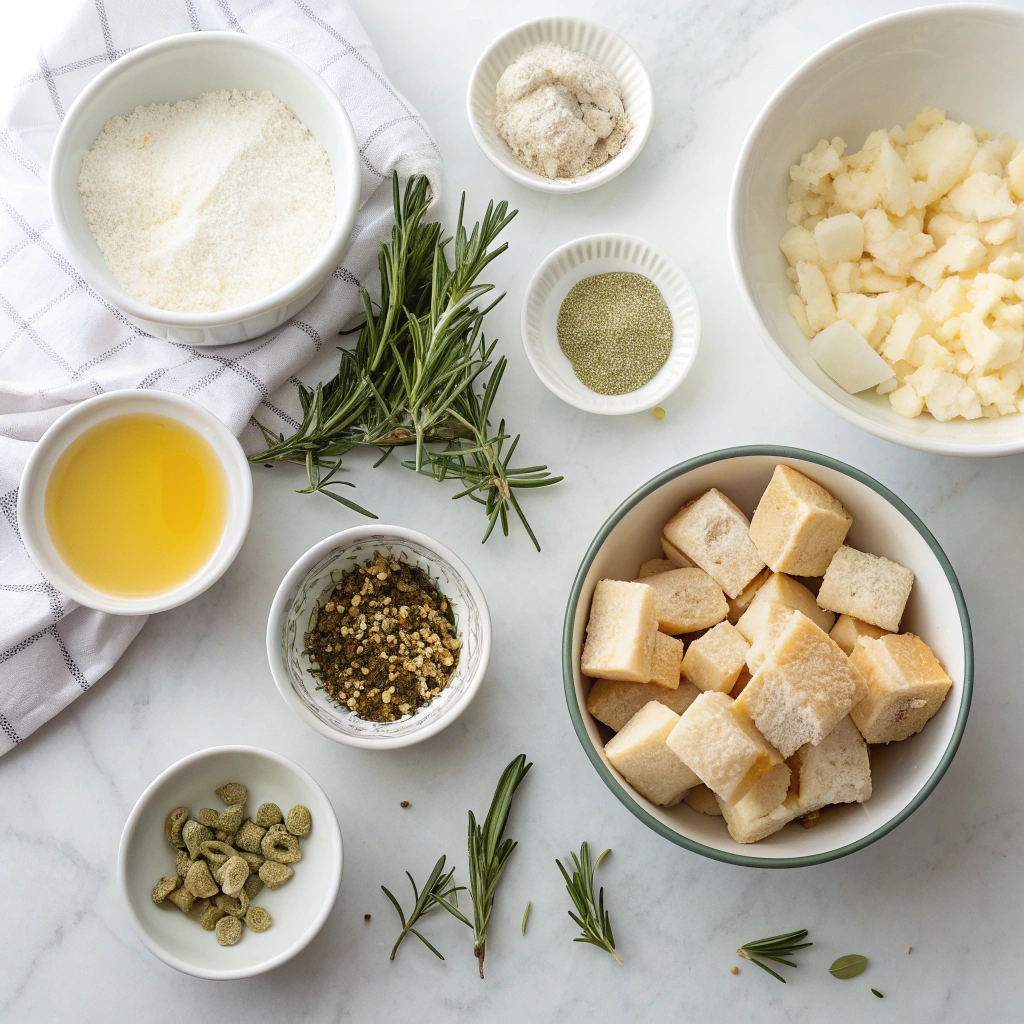
First, gather your ingredients and prepare the garlic butter. Warm your milk to the perfect temperature to activate the yeast. Whisk the flour, sugar, and salt together in a large bowl. Pour in the yeast mixture and melted butter. Mix everything until a shaggy dough forms. Turn the dough onto a floured surface and knead it for several minutes until smooth and elastic. Place the dough in a greased bowl, cover it, and let it rise in a warm spot until it doubles in size. This is a great time to clean up or prep your filling. For the garlic butter, stir together melted butter, fresh rosemary, and minced garlic. After the dough rises, roll it out into a rectangle. Generously brush the surface with your flavorful garlic butter. Cut the dough into small squares and layer them loosely in your loaf pan. Let the dough rise again before baking it to golden, bubbly perfection. For a time-saving tip, prepare the dough the night before and let it undergo its first rise slowly in the refrigerator.
Mistakes I’ve made and learned from
I learned the hard way that rushing the rising process is the fastest route to a dense loaf. I once tried to speed things up by placing my bowl on a heating vent, which killed the yeast and left me with a brick. Now, I plan ahead and embrace a slow rise for the best texture. Another common hiccup involves the garlic butter; if you do not properly mince your garlic, you end up with overly pungent, bitter chunks after baking. I invested in a good microplane zester for superfine garlic, which makes all the difference. Do not skip the second rise in the pan, as this crucial step ensures your Rosemary Garlic Pull Apart Bread | Sally’s Baking Addiction achieves its signature light and fluffy pull-apart texture. For more troubleshooting, my guide on yeast baking tips covers these pitfalls in detail.
Cultural Connection and Variations
Where this recipe comes from
The heartwarming appeal of pull-apart bread lies in its beautiful simplicity and communal spirit. While its exact origins are a bit fuzzy, this style of shared loaf feels deeply rooted in traditions where breaking bread together is a central act of connection. Many cultures have their own version, from the savory, cheese-stuffed Brazilian pão de queijo to the sweet, gooey monkey bread that became a staple of American potlucks and brunch tables in the mid-20th century.
This particular recipe for Rosemary Garlic Pull Apart Bread | Sally’s Baking Addiction feels like a modern homage to those traditions. It masterfully combines the rustic, earthy flavors of the Mediterranean with that irresistible, shareable format we all love. Imagine the scent of fresh rosemary and pungent garlic wafting from a warm kitchen, a smell that instantly makes any house feel like a home. The act of pulling apart soft, buttery pieces from a central loaf is an experience in itself, transforming a simple side dish into the main event for conversation and gathering.
Whether served at a large family dinner or a casual get-together with friends, Rosemary Garlic Pull Apart Bread | Sally’s Baking Addiction carries on the timeless tradition of food that’s meant to be shared, literally and joyfully, hand to hand.
How it fits in today’s cooking
This bread has secured its place in modern cooking because it perfectly balances impressive results with a genuinely fun process. It’s a showstopper for holiday feasts, especially alongside a comforting main like a hearty slow cooker beef stew, yet it’s also simple enough to elevate a standard weeknight pasta dinner into something special. Its versatility is its greatest strength in today’s kitchens.
Contemporary home cooks are constantly reimagining the core concept with creative twists. While the rosemary and garlic combination is a classic, you might see bakers adding a sprinkle of crispy pancetta, a handful of sharp cheddar cheese, or even a dash of chili flakes for heat. The basic framework invites experimentation, allowing everyone to create a signature version. For a complete meal, it pairs wonderfully with a lighter option, such as a bright grilled lemon herb chicken salad, making it suitable for any season. It remains a beloved recipe precisely because it encourages togetherness and creativity, two pillars of how we love to eat today.
Taste and Texture
What makes it delicious
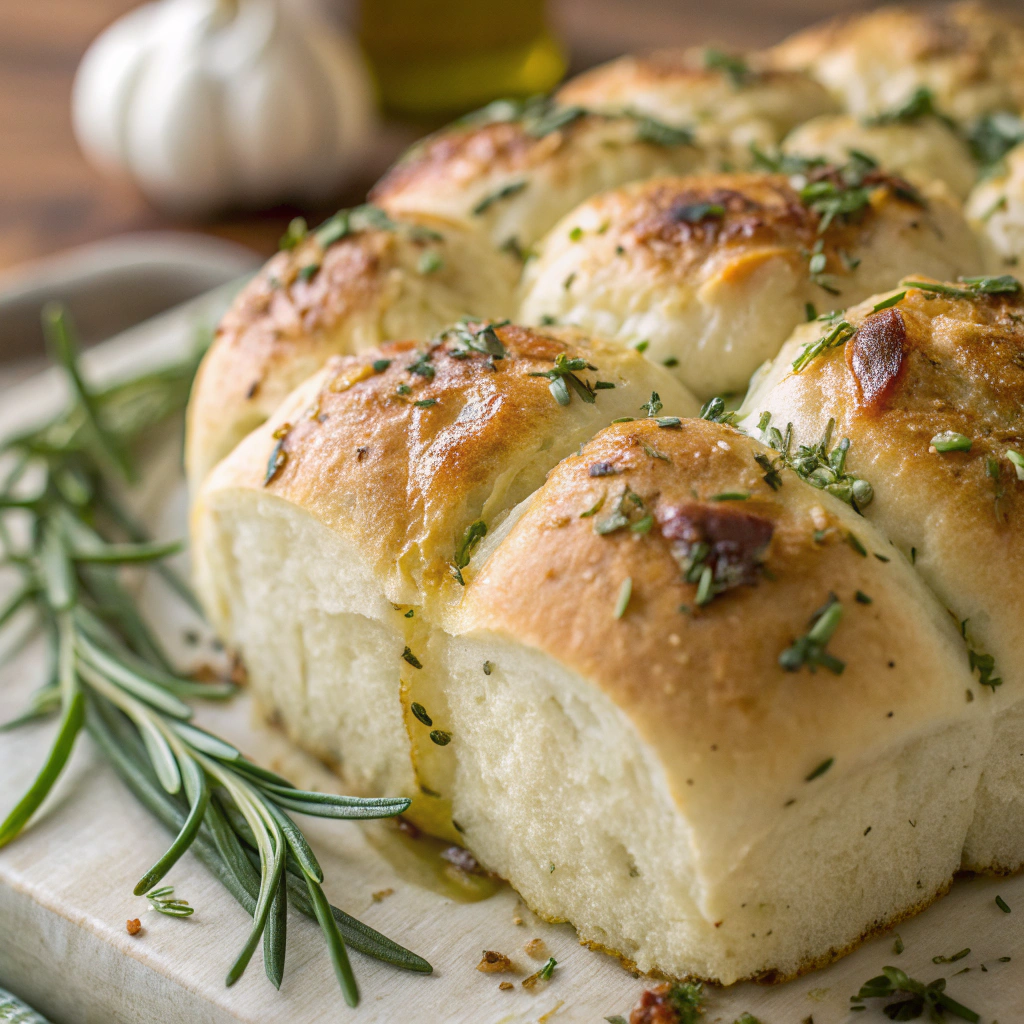
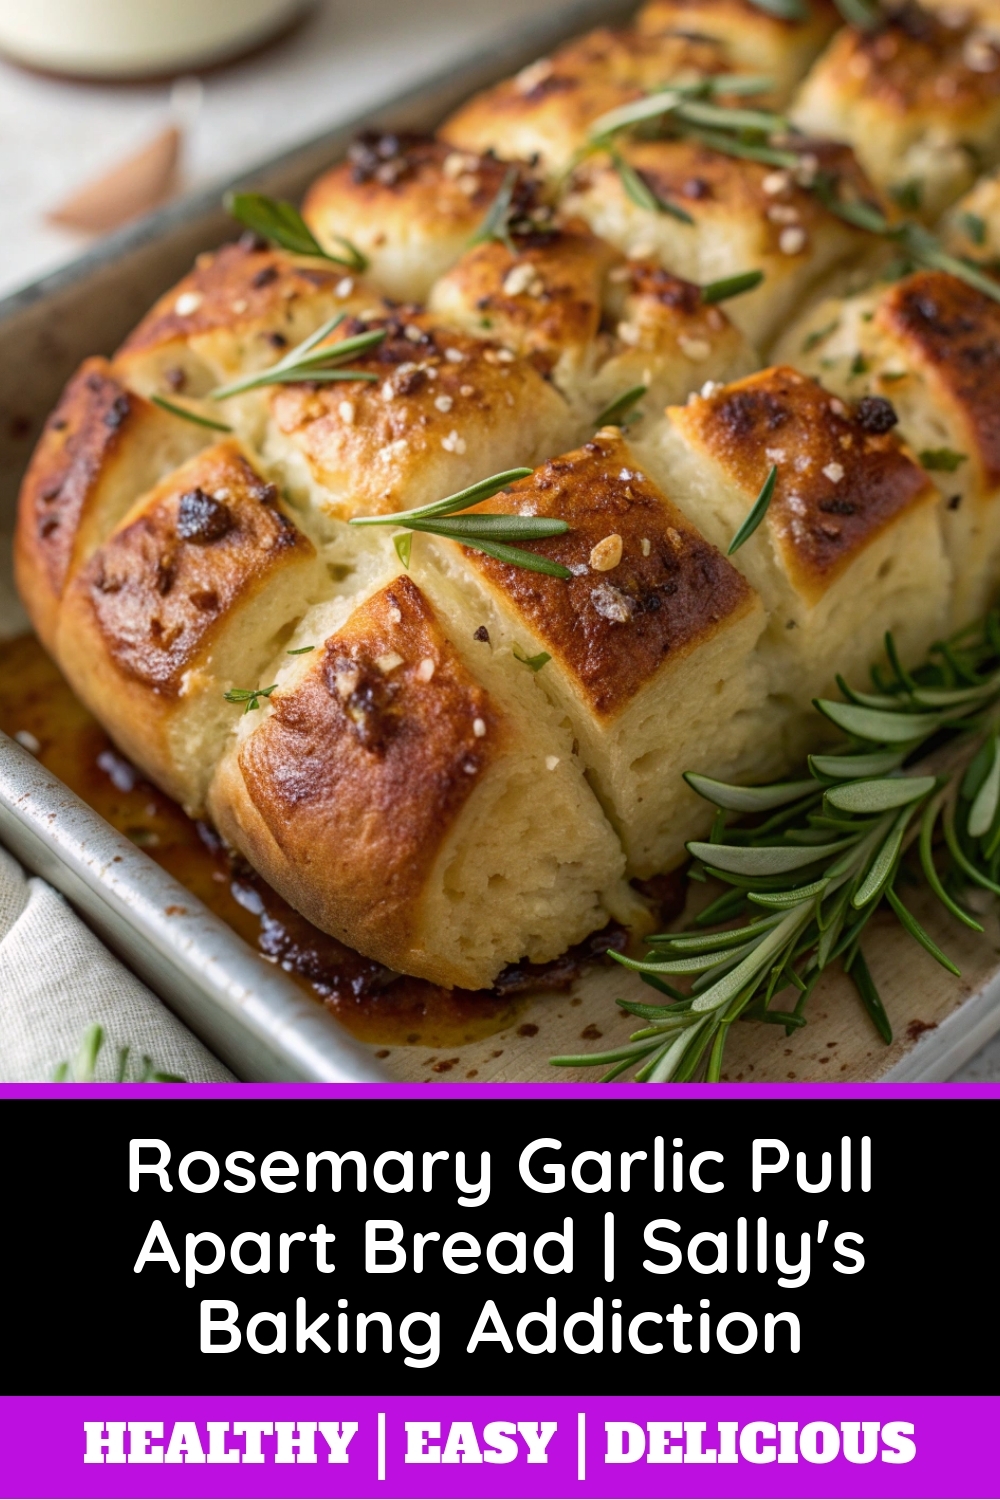
This Rosemary Garlic Pull Apart Bread | Sally’s Baking Addiction offers a truly multi-sensory experience. You first notice the warm, woodsy aroma of fresh rosemary and the deep, savory scent of roasted garlic as it bakes. When you pull apart a soft, steaming piece, the interior feels incredibly fluffy and tender, while the top and edges boast a satisfyingly crisp, golden-brown crust. Each buttery layer infuses with fragrant herbs and rich, mellow garlic, creating a savory flavor that feels both comforting and sophisticated. The texture achieves a perfect harmony of contrasts because the bread feels simultaneously airy and chewy, with little bursts of flavor from the rosemary needles. This Rosemary Garlic Pull Apart Bread | Sally’s Baking Addiction is a masterpiece of baking, so every single bite delivers a perfect balance of herbal fragrance, savory richness, and irresistible texture.
Boosting the flavor
You can easily amplify the flavor of your bread with a few simple tweaks. For a richer, more complex taste, try swapping the fresh garlic for a batch of our slow-roasted garlic because it becomes wonderfully sweet and spreadable. Another fantastic addition is a light sprinkle of grated parmesan or sharp cheddar cheese over the top just before baking for a salty, crispy finish. If you serve it as an appetizer, consider offering a side of creamy herb dip or a warm marinara sauce for dipping. Finally, a flaky sea salt finish right out of the oven enhances all the other flavors and adds a delightful crunch to every piece.
Tips for Success
Best practices for results
Always use fresh rosemary and garlic for the most vibrant flavor in your Rosemary Garlic Pull Apart Bread | Sally’s Baking Addiction. Furthermore, ensure your milk is warm to the touch, around 110°F, because this will properly activate the yeast for a good rise. Use room temperature butter and eggs as well, so they incorporate evenly into the dough without cooling the mixture. Always chill the shaped dough in the pan for at least 15 minutes before baking, as this helps the layers maintain their definition and results in a superior texture.
Mistakes to avoid
Avoid using boiling hot milk, even though it might seem faster, because it can kill the yeast and prevent your Rosemary Garlic Pull Apart Bread | Sally’s Baking Addiction from rising properly. Another common error is adding too much flour during kneading, which creates a dense and tough crumb; the dough should remain slightly tacky. If you are new to working with yeast, you can review our guide on how to proof yeast for a foolproof start. Finally, do not skip the step of brushing the dough with butter before adding the filling, although it seems minor, because this crucial layer helps the garlic and herbs adhere and prevents a dry final product. For more on achieving the perfect bake, see our tips for baking with yeast.
Serving and Pairing Suggestions
How to serve this dish
Present your freshly baked Rosemary Garlic Pull Apart Bread | Sally’s Baking Addiction on a rustic wooden board or in a simple basket lined with a checkered cloth. This approach creates a warm, inviting centerpiece for your table. For a beautiful finishing touch, sprinkle a little extra fresh rosemary and flaky sea salt over the top just before serving.
Ultimately, this aromatic bread is perfect for tearing and sharing. Serve it straight from the oven for a casual family dinner, or make it the star of your next holiday gathering or brunch spread. The incredible aroma alone will have everyone gathering around the kitchen.
What goes well with it
A rich, creamy tomato soup makes an absolutely perfect partner for this savory bread. The tangy, velvety soup is ideal for dipping each soft, garlicky piece, creating a truly comforting meal. For a heartier pairing, consider serving it alongside a vibrant Italian Chopped Salad, as the crisp, fresh ingredients provide a wonderful contrast to the warm, rich bread.
When it comes to beverages, a chilled glass of crisp white wine like Sauvignon Blanc beautifully cuts through the garlic and herb-infused butter. Alternatively, a robust red wine, such as a Cabernet Sauvignon, stands up wonderfully to the powerful flavors. For a non-alcoholic option, a sparkling water with lemon is always a refreshing choice.
Finally, don’t forget a side of marinara sauce or a creamy garlic aioli for extra dipping. These sauces add another layer of flavor that everyone will love. This bread also makes a fantastic appetizer before a main course like our classic Creamy Tuscan Chicken.
Pull apart bread is typically made from a soft, yeasted dough that is cut or rolled into small pieces. These pieces are then layered in a pan with various fillings like butter, herbs, cheese, or garlic. For this specific recipe, the dough pieces are coated in a rich mixture of melted butter, fresh rosemary, and minced garlic before baking, creating the iconic Rosemary Garlic Pull Apart Bread from Sally’s Baking Addiction.
The best way to reheat pull apart bread and restore its soft texture is in the oven. Preheat your oven to 350°F (177°C), wrap the bread in aluminum foil, and warm it for about 10-15 minutes. For a crispier top, you can unwrap it for the last few minutes of heating.
Yes, you can prepare this bread ahead of time for easier entertaining. After assembling the dough pieces with the garlic and rosemary butter in the pan, cover it tightly and refrigerate for up to 24 hours. When you’re ready to bake, let the pan sit at room temperature for 45-60 minutes before placing it in the oven as directed.
This Rosemary Garlic Pull Apart Bread is incredibly versatile. It pairs perfectly with pasta dishes, soups like tomato or minestrone, and salads. It also makes a fantastic appetizer or side for a holiday meal, standing out as a flavorful alternative to standard dinner rolls. The recipe from Sally’s Baking Addiction is a crowd-pleaser for any occasion.


