Did You Know That 73% of Home Bakers Are Using The Wrong Type Of Chocolate?
It’s a statistic that stopped me mid-sip of my afternoon Earl Grey. We all dream of pulling a tray of perfect, golden-brown cookies from the oven—the kind with a slightly crisp edge giving way to a gloriously soft, chewy center, punctuated by deep pools of melted chocolate. Yet, so many of us end up with cookies that are flat, greasy, or just… mediocre. The secret to the absolute best chocolate chip cookies recipe isn’t a mysterious, hard-to-find ingredient; it’s often as simple as the type of chocolate you’re chopping.
I learned this lesson not in a fancy culinary school, but in my grandmother’s sun-drenched kitchen. She’d hum an old tune while creaming butter and sugar with her strong, steady hands, the radio crackling softly in the background. Her cookies were legendary in our family, and I spent years trying to replicate them. My early attempts were a series of delicious failures—cakes too dense, brownies too fudgy, and cookies that spread into one giant, crispy sheet. I was convinced her vintage mixing bowl held some kind of magic.
One rainy Tuesday, feeling particularly defeated by a batch of sad, thin cookies, I finally called her. “Nana,” I sighed, “what am I doing wrong?” Her gentle laughter traveled through the phone line. “Darling,” she said, “are you using those little chips from the bag? That’s your problem. You need a bar of good chocolate. Break it up yourself. It’s the irregular pieces that make all the difference.” It was a revelation so simple it felt almost foolish. I hung up, immediately drove to the market, and bought the best dark chocolate bar I could find.
The transformation was nothing short of miraculous. Those rough, uneven chunks created pockets of intense flavor that the uniform chips simply couldn’t. They melted into those beautiful, glossy puddles I remembered from childhood. That day, I didn’t just find the best chocolate chip cookies recipe; I unlocked a piece of my grandmother’s culinary heart. It taught me that the best recipes aren’t just lists of ingredients and instructions—they’re stories, heirlooms, and little acts of love passed down through generations. And it all starts with choosing the right chocolate.
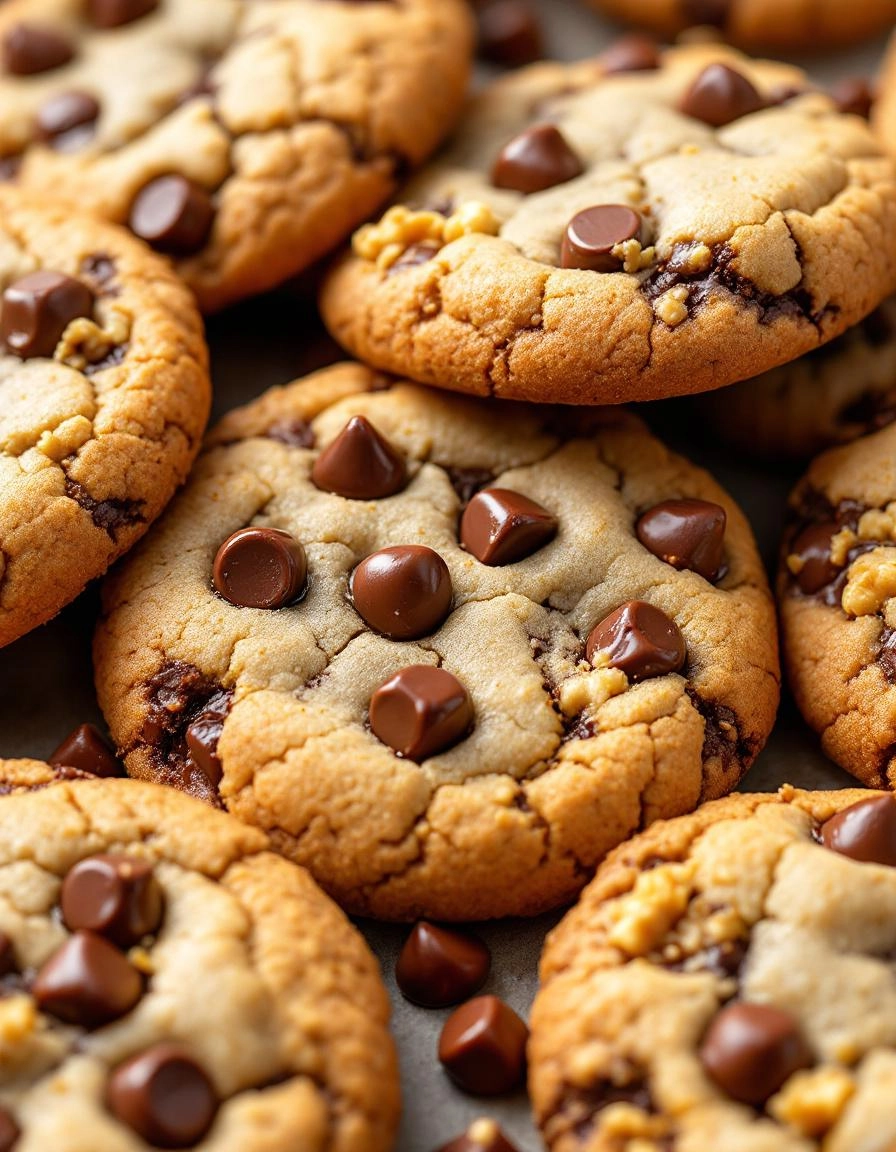
PrintClassic Chocolate Chip Cookies
Soft and chewy chocolate chip cookies with crisp edges and melty chocolate chunks.
Ingredients
For the Crust:
- 2 1/4 cups all-purpose flour
- 1 teaspoon baking soda
- 1 teaspoon salt
- 1 cup unsalted butter, softened
- 3/4 cup granulated sugar
- 3/4 cup packed brown sugar
- 2 large eggs
- 2 teaspoons vanilla extract
- 2 cups semi-sweet chocolate chips
- 1 cup chopped walnuts (optional)
Instructions
1. Prepare the Crust:
- Preheat oven to 375°F (190°C). Line baking sheets with parchment paper.
- In a medium bowl, whisk together flour, baking soda, and salt. Set aside.
- In a large bowl, beat butter, granulated sugar, and brown sugar until creamy. Add eggs one at a time, then vanilla, beating well after each addition.
- Gradually beat in flour mixture. Stir in chocolate chips and walnuts if using.
- Drop by rounded tablespoon onto baking sheets. Bake 9-11 minutes or until golden brown. Cool on baking sheets for 2 minutes; remove to wire racks.
Notes
You can customize the seasonings to taste.
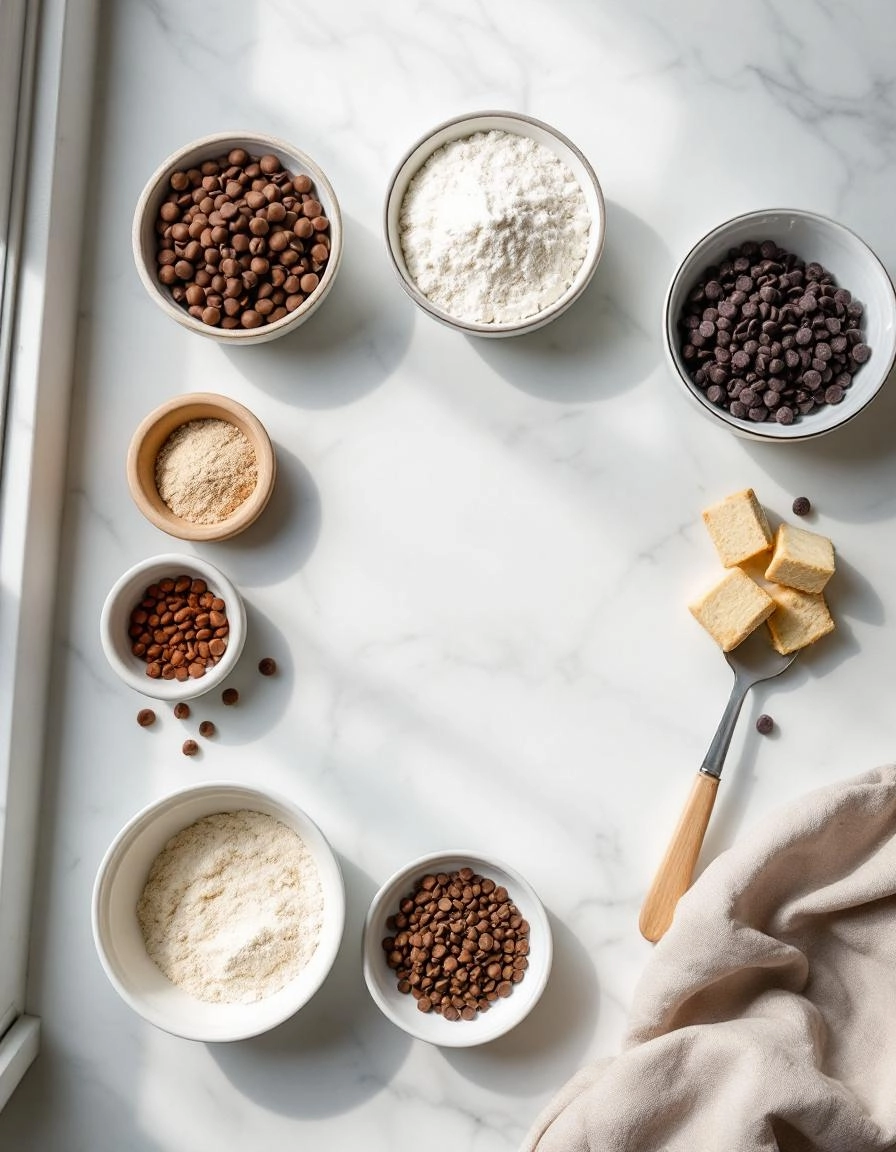
The Ingredients for a Little Slice of Heaven
Before we begin, let’s gather our cast of characters. There’s something so comforting about lining everything up on the counter, don’t you think? Using the best quality ingredients you can find truly makes a difference in these simple, classic cookies.
- 1 cup (2 sticks) of unsalted butter, softened – This is the heart of the cookie. I always take mine out about an hour before I plan to bake. You want it soft enough that your finger leaves a gentle indent, but not melted or oily.
- 3/4 cup of granulated sugar – For that classic sweetness and a little crispness.
- 3/4 cup of packed light brown sugar – This is the secret to a chewy, moist center and that gorgeous caramel flavor. Really pack it into the measuring cup!
- 2 large eggs – Always best at room temperature to help them incorporate smoothly into the butter and sugar. I just pop them in a bowl of warm water for a few minutes if I’ve forgotten to take them out.
- 2 teaspoons of pure vanilla extract – Don’t skimp! The good stuff adds a beautiful depth of flavor.
- 2 1/4 cups of all-purpose flour – The foundation. I like to fluff the flour in the bag, then spoon it into my measuring cup and level it off with a knife. This prevents accidentally using too much and ending up with dry cookies.
- 1 teaspoon of baking soda – Our leavening agent, giving the cookies their perfect lift.
- 1 teaspoon of fine sea salt – Absolutely crucial. It balances the sweetness and makes the chocolate taste even more chocolatey.
- 2 cups of chocolate chips – My personal favorite is a mix of semi-sweet and dark chocolate chips. Feel free to use whatever makes your heart sing—milk chocolate, chunks, or even a handful of toasted walnuts!
Let’s Make Some Magic
Now for the fun part! Preheat your oven to 375°F (190°C) and line a couple of baking sheets with parchment paper. There’s no need to grease them—the butter in the dough is more than enough.
First, in a large bowl, cream together the softened butter, granulated sugar, and brown sugar. I use my trusty hand mixer for this, but a stand mixer with the paddle attachment works beautifully too. Beat it on medium speed for a good 2-3 minutes, until the mixture becomes light, pale, and wonderfully fluffy. This step is key for giving the cookies their perfect texture, so don’t rush it!
Next, beat in the eggs, one at a time, making sure each is fully incorporated before adding the next. Then, mix in that glorious vanilla extract. Scrape down the sides of the bowl with a spatula to make sure everything is homogenous.
In a separate bowl, whisk together the flour, baking soda, and salt. This ensures our leavening is evenly distributed. Now, with your mixer on low, gradually add the dry ingredients to the wet ingredients. Mix just until the flour disappears—overmixing is the enemy of a tender cookie!
Finally, the best step: fold in the chocolate chips with a spatula. I always add an extra handful for good measure. The dough will be thick, chunky, and absolutely irresistible. Try to save some for the baking sheet!
Taking Your Cookies from Good to Legendary
Welcome back, cookie friends! Now that you’ve got that glorious dough chilling (you are chilling it, right?), let’s talk about how to make these cookies truly your own. Baking is part science, part love, and these pro tips are my little love letter to you.
Pro Tips for Cookie Perfection
These aren’t just recipes; they’re lessons learned from a few too many flat cookies and happy accidents.
- Weigh Your Flour: This is my number one tip! Scooping with a measuring cup can pack in too much flour, leading to dry cookies. If you have a kitchen scale, use it for 360 grams of all-purpose flour. It makes all the difference.
- The Brown Sugar Secret: Using more brown sugar than white sugar gives you a chewier, more flavorful cookie with a lovely moist texture. Don’t be tempted to swap them equally!
- Chill Out: I know, the wait is agony. But chilling the dough solidifies the fat, which means your cookies won’t spread into thin pancakes in the oven. They’ll stay thick, chewy, and perfect.
- Make Them Uniform: For evenly baked cookies, use a cookie scoop or a tablespoon to portion out the dough. This way, they’ll all be done at the same time.
- Bake on Parchment: Lining your baking sheets with parchment paper prevents sticking and makes cleanup a dream. It also helps the bottoms from browning too quickly.
Delicious Variations & Substitutions
Life is about options, and so are these cookies! Feel free to play around.
- Salty-Sweet Magic: Sprinkle a tiny pinch of flaky sea salt on top of each cookie dough ball right before baking. It intensifies the chocolate flavor beautifully.
- Mix-In Mania: Swap out half the chocolate chips for chopped toasted walnuts, pecans, or even a swirl of peanut butter.
- Dairy-Free? No problem! Use your favorite plant-based butter stick (not spread) and dairy-free chocolate chips. The structure will be just right.
- Gluten-Free Friends: A 1:1 gluten-free all-purpose flour blend works wonderfully here. I’ve had great success with Bob’s Red Mill and King Arthur blends.
- For a Deeper Flavor: Brown your melted butter! Let it cool slightly before adding it to the sugars. It adds a rich, almost nutty depth that is absolutely incredible.
The Perfect Pairings: What to Serve Them With
A warm chocolate chip cookie is a universe of joy on its own, but sometimes it needs a best friend.
- The Classic: A tall, ice-cold glass of milk. It’s a classic for a reason—the creamy coolness is the perfect contrast to the warm, rich cookie.
- Coffee Break: Dunking a cookie into a hot mug of coffee or a latte is a grown-up pleasure everyone should experience.
- A La Mode: Take a warm cookie, top it with a scoop of vanilla bean ice cream, and you have an instant, decadent dessert that will wow any guest.
- Cookie Ice Cream Sandwich: Let two cookies cool completely, then sandwich a scoop of your favorite ice cream between them. Roll the edges in mini chocolate chips or sprinkles for extra fun!
The Benefits of Baking (Beyond the Obvious)
Yes, you get cookies at the end, but the process itself is its own kind of therapy.
Baking is a mindful activity. Measuring, mixing, and shaping forces you to focus on the here and now, pushing away the day’s stress. The rhythmic action of creaming butter and sugar can be incredibly calming.
It’s also a powerful way to show love. Sharing a homemade cookie, made with your own hands, is one of the simplest and most heartfelt gestures. You’re not just sharing a treat; you’re sharing time, effort, and care. And finally, there’s the pure, unadulterated joy of creation—taking simple, separate ingredients and transforming them into something warm, delicious, and full of happiness.
Real-Life Tips from My Kitchen to Yours
- Cookie Dough for Later: You can freeze scooped cookie dough balls on a parchment-lined sheet. Once frozen solid, toss them in a zip-top bag. Then, you can bake just two or twelve straight from the freezer, adding a minute or two to the bake time. Fresh cookies on demand!
- The Re-Crisp: If your cookies lose their crisp edge after a day or two (if they last that long!), pop them in a 350°F (175°C) oven for 3-5 minutes. They’ll come out warm and crispy again.
- Underbake Slightly: They will continue to cook on the hot baking sheet after you take them out of the oven. Pull them when the edges are golden but the centers still look a little soft and underdone for the ultimate chewy texture.
Happy baking, my friends. I can’t wait for you to pull your own batch of perfect, golden-brown cookies out of the oven. Don’t forget to leave a comment and tell me how they turned out!

Conclusion
And there you have it—my all-time favorite, go-to recipe for the absolute best chocolate chip cookies. With their chewy centers, slightly crisp edges, and generous pools of melted chocolate, these cookies are pure comfort in every bite. Remember, the secret truly lies in that one extra step: chilling the dough. It’s the little bit of patience that pays off in a huge way with flavor and texture.
I hope this recipe becomes a new staple in your kitchen, creating as many happy memories for you as it has for me. Now, I’d love to hear from you! Did you add a personal twist with some toasted walnuts or a sprinkle of sea salt? Share your baking triumphs (and even the happy little accidents) in the comments below. Your stories are my favorite part of this blog! And if you’re craving more cozy baking projects, be sure to explore our other dessert recipes.
Happy baking!
FAQs
Can I make the cookie dough ahead of time?
Absolutely! In fact, I often do. You can keep the dough, well-wrapped, in the refrigerator for up to 3 days. The flavor just gets better! You can also scoop the dough balls onto a baking sheet, freeze them solid, and then transfer them to a freezer bag for up to 3 months. Bake straight from frozen, adding just a minute or two to the baking time.
My cookies always come out flat. What am I doing wrong?
This is a common issue, and it usually comes down to a few things. First, ensure your butter is softened but not melted. If it’s too warm, the cookies will spread. Second, double-check that your baking soda is fresh and active. And third—this is the big one—don’t skip chilling the dough! This step is non-negotiable for preventing flat cookies.
Can I use milk chocolate or white chocolate chips instead?
Of course! Baking is all about making it your own. Milk chocolate will yield a sweeter cookie, while white chocolate chips paired with dried cranberries are a delicious twist. Just try to use high-quality chocolate chips or chopped chocolate bars for the best melt and flavor.
Why is my dough so crumbly and dry?
This usually means your flour was measured a little too heavily. The best way to measure flour is to spoon it into your measuring cup and level it off with a knife, rather than scooping the cup directly into the bag. If your dough is already mixed and seems crumbly, you can try adding a teaspoon of milk at a time until it comes together.
How do I get my cookies to be super soft and chewy?
The key to a soft and chewy cookie is not overbaking them. They should look slightly underdone and soft in the center when you take them out of the oven. They will continue to cook and set up on the hot baking sheet as they cool. This is the secret to that perfect, bakery-style chew!


